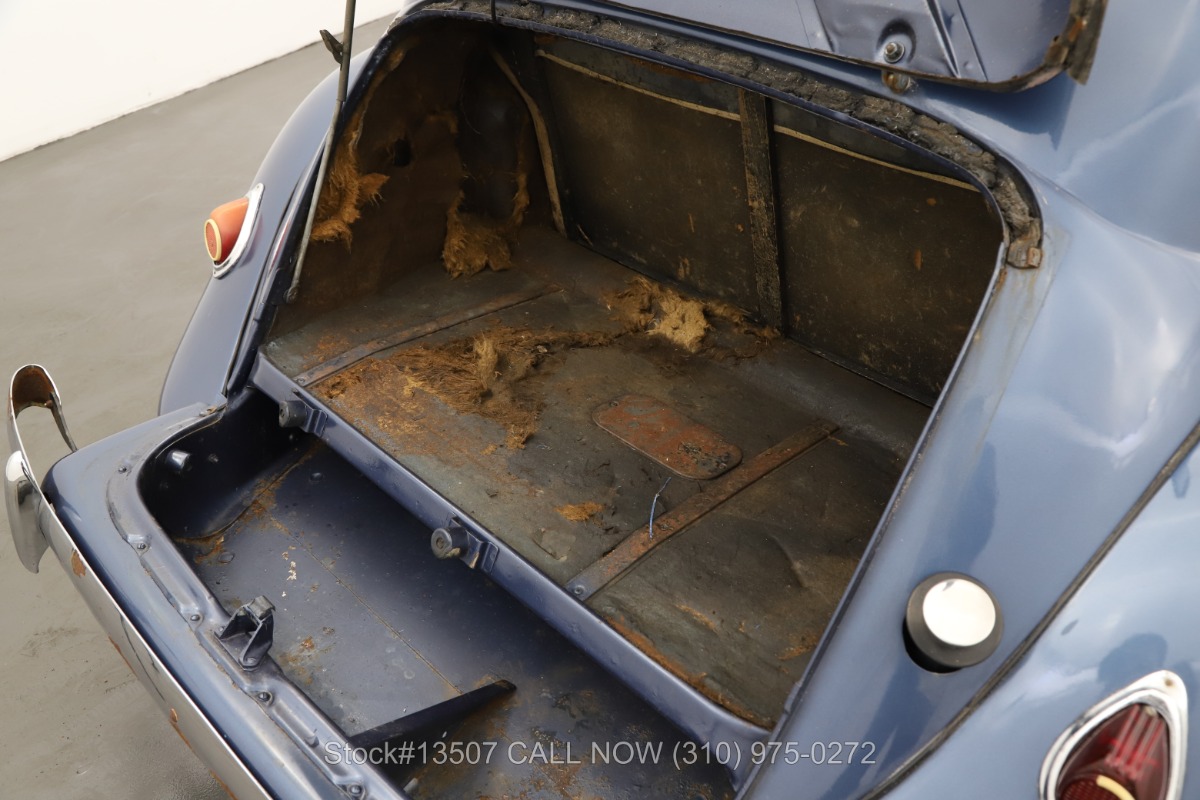
Recently (9-2021) I was able to buy me a tailgate and wheel cover from a wheeled TA version.
This was the start of my project to convert my 1955 Citroën Traction Avant into a wheeled version.
It’s a matter of taste of course, and I just think a wheeled version is much nicer than such an imposed trunk.
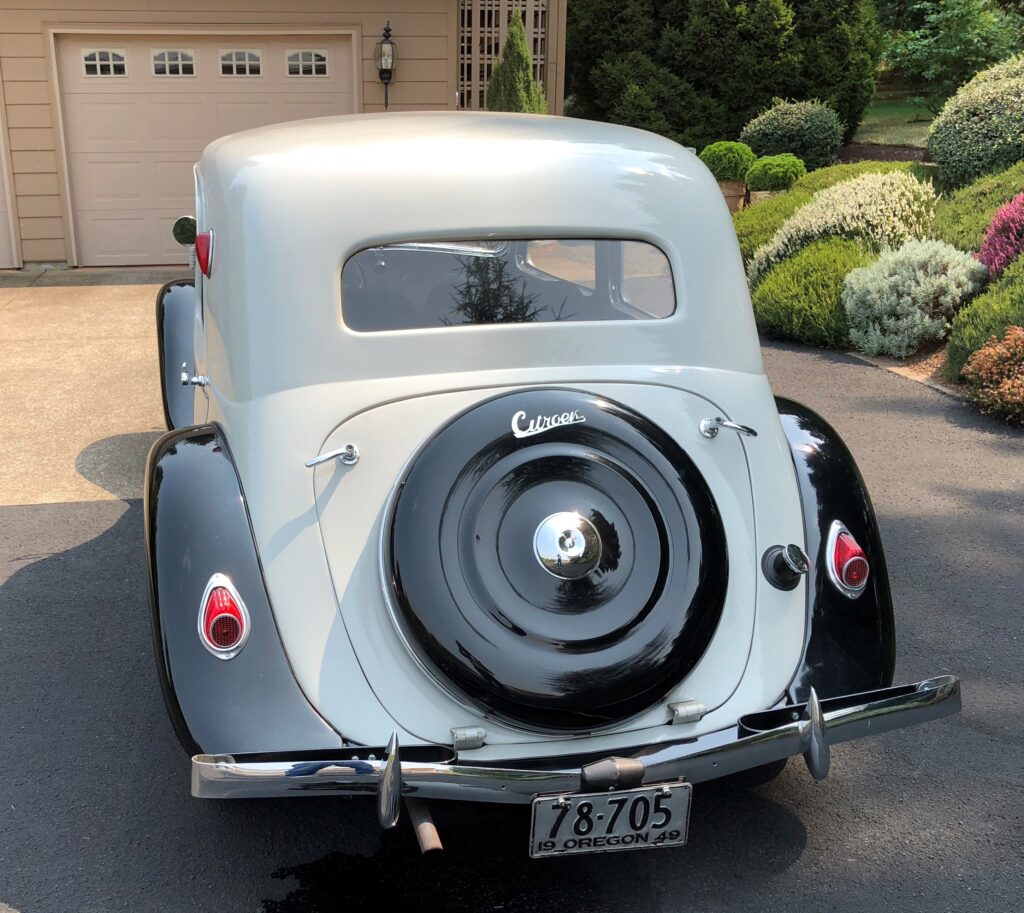
Below you can see what my car would look like with a wheel instead of a trunk:
So- we’ll need to go from the picture ABOVE to the picture BELOW!
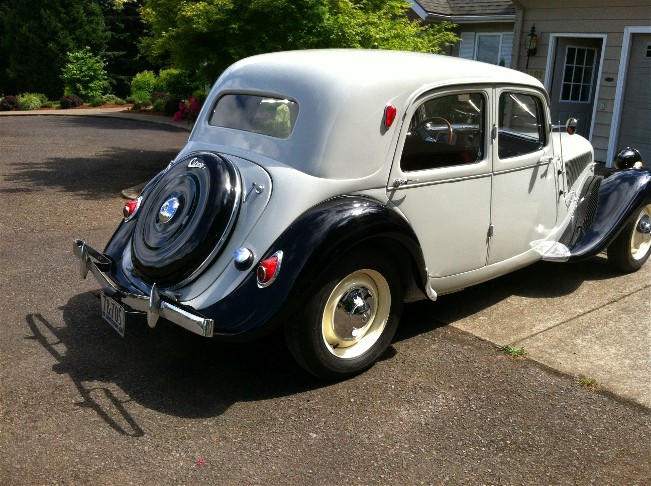
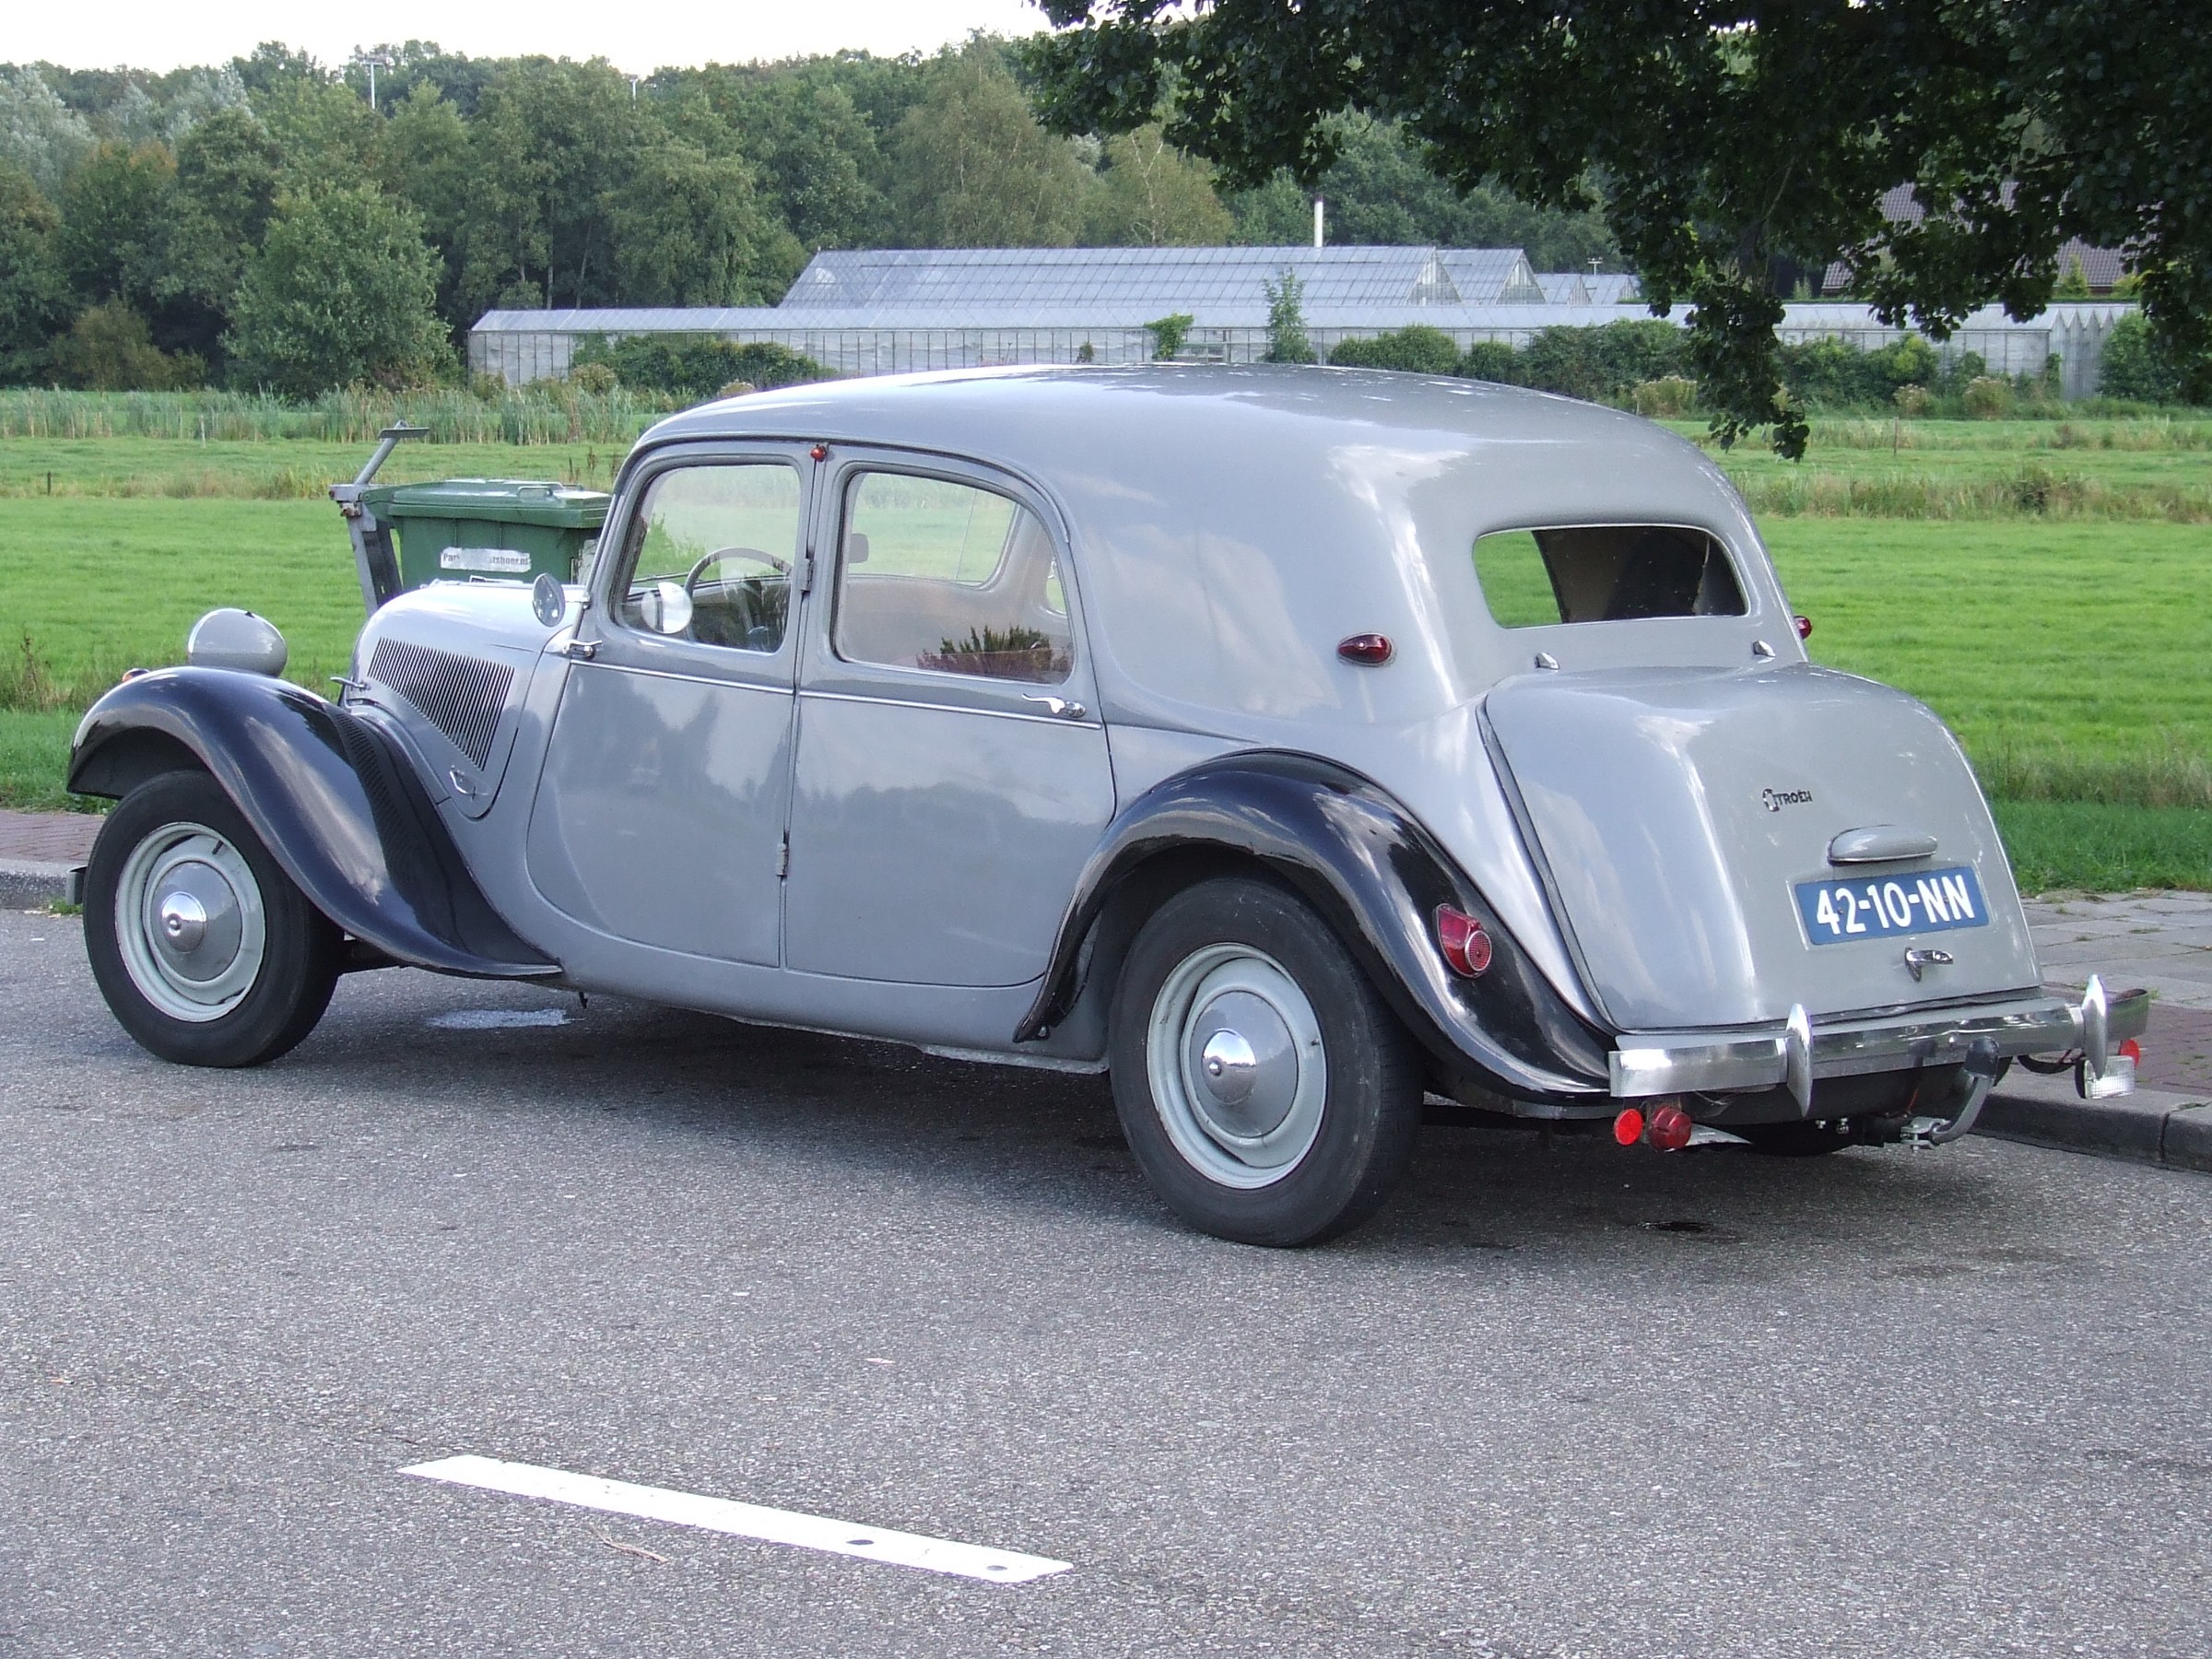
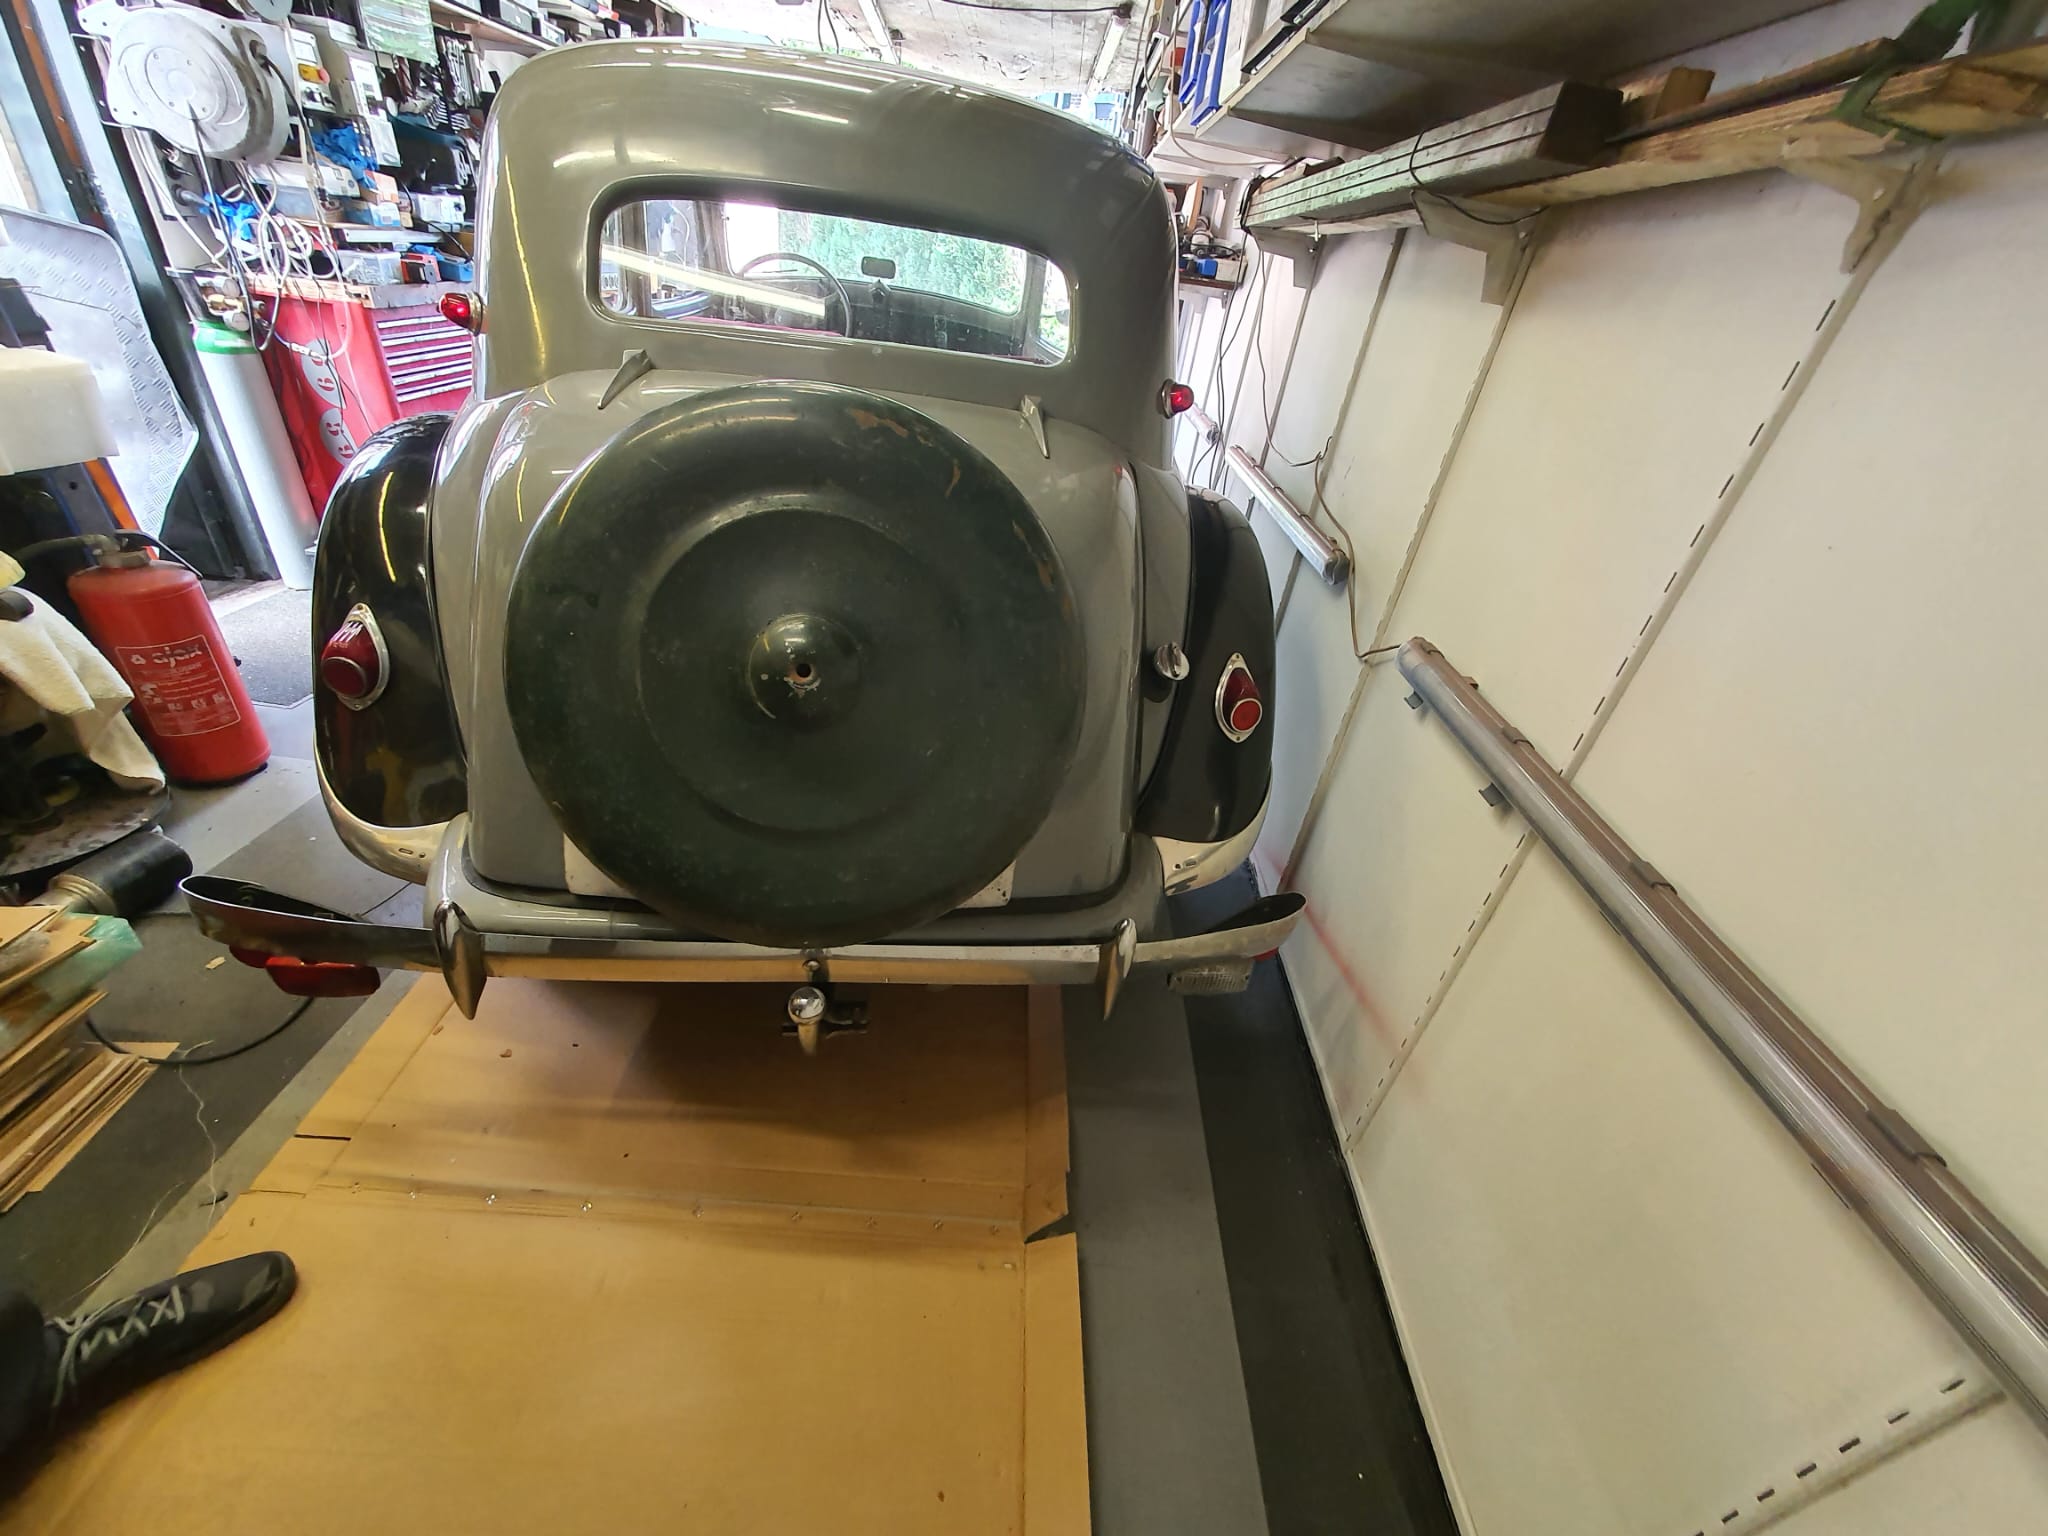
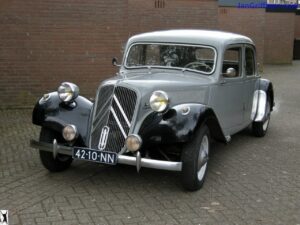
And, for comparison what my car looks like BEFORE the conversion to wheel:
Picture dates from 2007
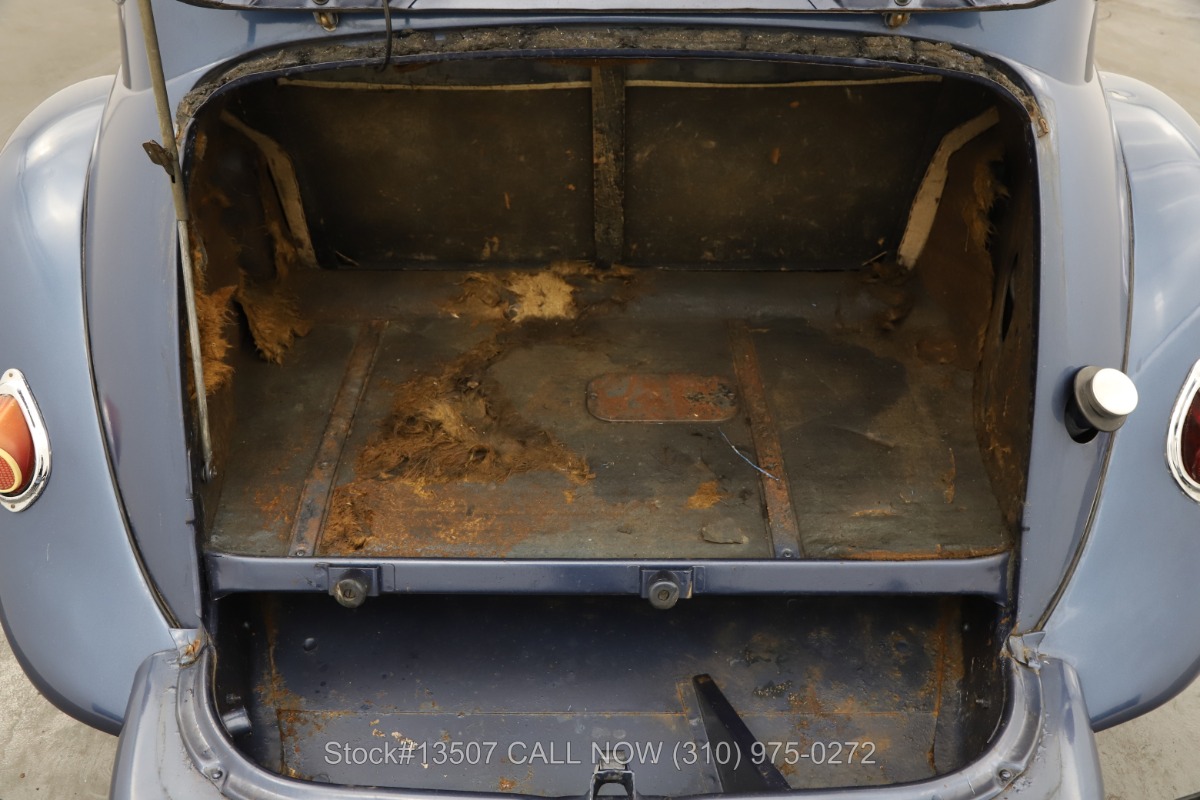
The trunk hangs from the part of the body directly under the rear window.
On a wheel version, there is still a section of sheet metal under the “kink” in the sheet metal that is under the window. That is completely missing from the trunk model.
And the underside in terms of sheet metal runs all the way through (gray) , including under the trunk lid (gray lid with black wheel cover). This should be constructed anyway, and connected to the existing trunk floor plate. Everything under and behind it has to be removed so also the spare wheel well and the existing extra extension of bumper brackets and the ‘standard’ extra bolted-on sheet metal.
The fender points L and R are connected with a piece of sheet metal, under the fixed body (grey). This sheet metal part is still readily available as an aftermarket part.
THE APPROACH – is planned for end of 2024, after finishing the ID20 –
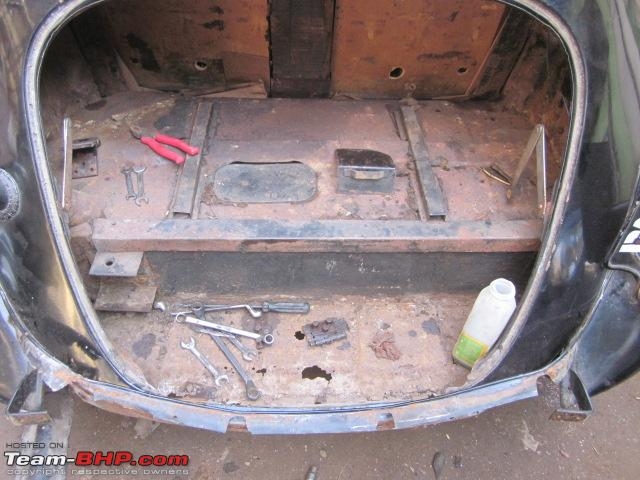
LPG tank out, gasoline tank out from under it.
First, a new piece is made that follows the exact shape of the trunk lid of the wheeled version. To that, a sheet metal edge is made to fit into the hole created by removing the existing trunk lid. After that, it becomes mostly a lot of fitting and measuring.
The goal is to make it so that everything can also be rebuilt back to the trunk version if necessary. That means that the space between the large hole for the trunk and the smaller wheel holder lid will be filled with a removable sheet metal part to be made, which will be fastened to the edge of the existing large hole with clips on the inside. For the inside edge I will use preformed fender edge, which is relatively easy to come by.
In any case, the rear bumper must also be replaced with a type for a BN with a wheel, so a dent to the bottom in the middle. The mounting brackets of the bumper also have to be adjusted because the bumper has to move a bit towards the body.
This does move the tow bar quite a bit further back (optically, the tow bar doesn’t change of course) and I’m thinking about taking the tow bar off completely for now and see if I can find a type for a wheeled version somewhere.
Again: Fron ABOVE to BELOW conversion!
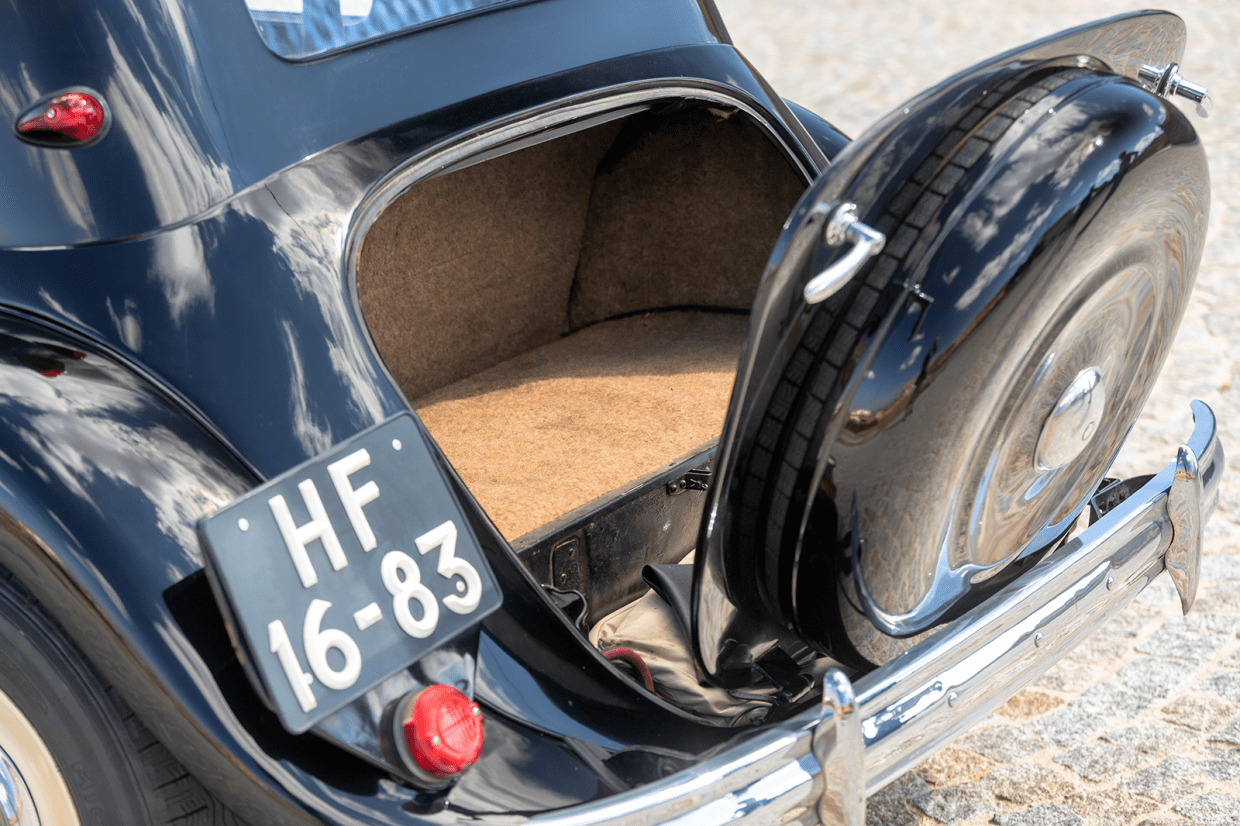
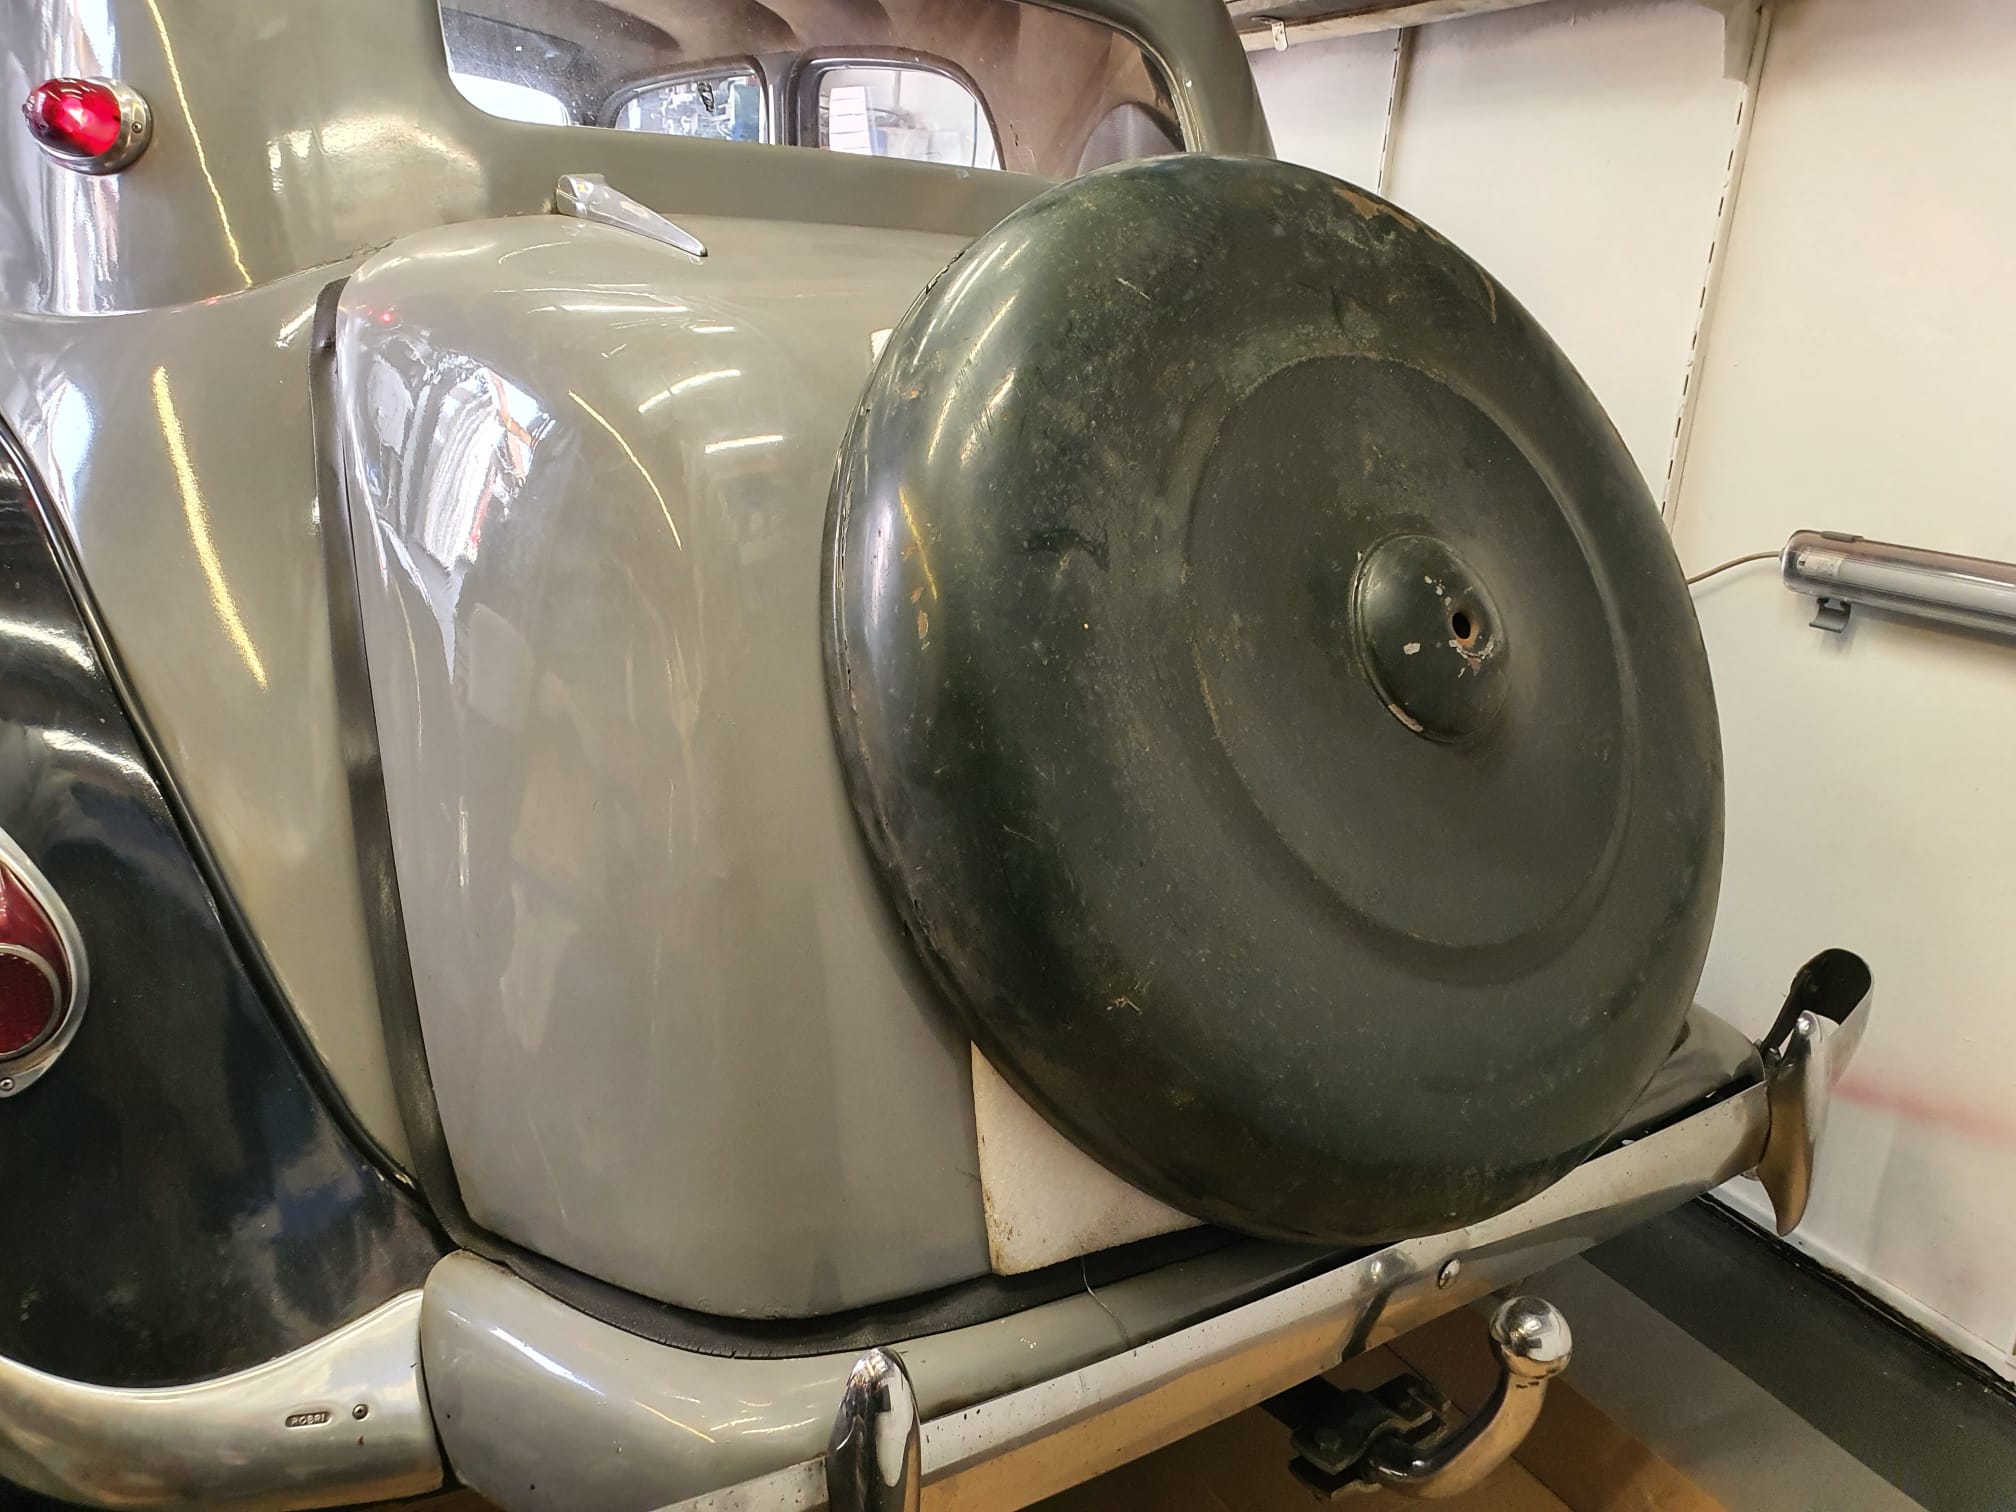
And this is how the license plate will be mounted after the conversion! (The above picture is obviously not a 11B(N) but a TA15, as the bumper clearly indicates.
Just a fit where you can clearly see that the trunk is too small for the wheel cover. You really have to go down, hence the “dented” bumper to make room for the wheel at the wheel version….
After over six months of driving my Atto3, I still have 2 “residual” issues that bother me. (2023-05-12)
1) The climate control.
It is still not as I would like it to be. The temperature in the car still varies, despite a fixed temperature setting. But it thankfully no longer varies as much as it did when the car was delivered. I always have the car set at 19 degrees Celsius, and the interior temperature varies between 16 and 22 degrees with that. Interestingly, when driving at longer constant speeds, the temperature does stabilize after about 5 minutes at the set temperature. But when I leave the highway or get in a traffic jam, the temperature rises immediately and then it takes about 3 minutes before the temperature returns to the set temperature. If I then drive faster again for a few minutes or more, it gets about 3 degrees colder than the set temperature and only then does the temperature stabilize back to the set value.
After I figured out this “behavior” of the heat pump system, I never adjust the temperature again and learn to live with the increases and decreases because the temperature will eventually be readjusted. But the way this works is very annoying. It has been filed as a complaint with BYD Amsterdam, also because of the constant fogging on the inside of the car’s windows after parking at outside temperatures below 10 degrees Celsius.
2. The lack of an automatic rain sensitive wiper controller.
Due to the lack of automatic wiper control, I am going to fix this myself. So far I have done that with my cars on which no sensor or control of the rain sensitive automatic wiper control was installed off-factory.
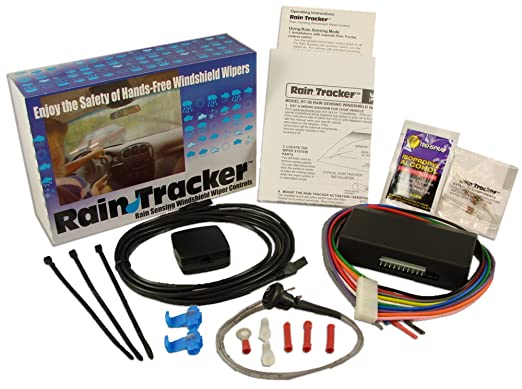
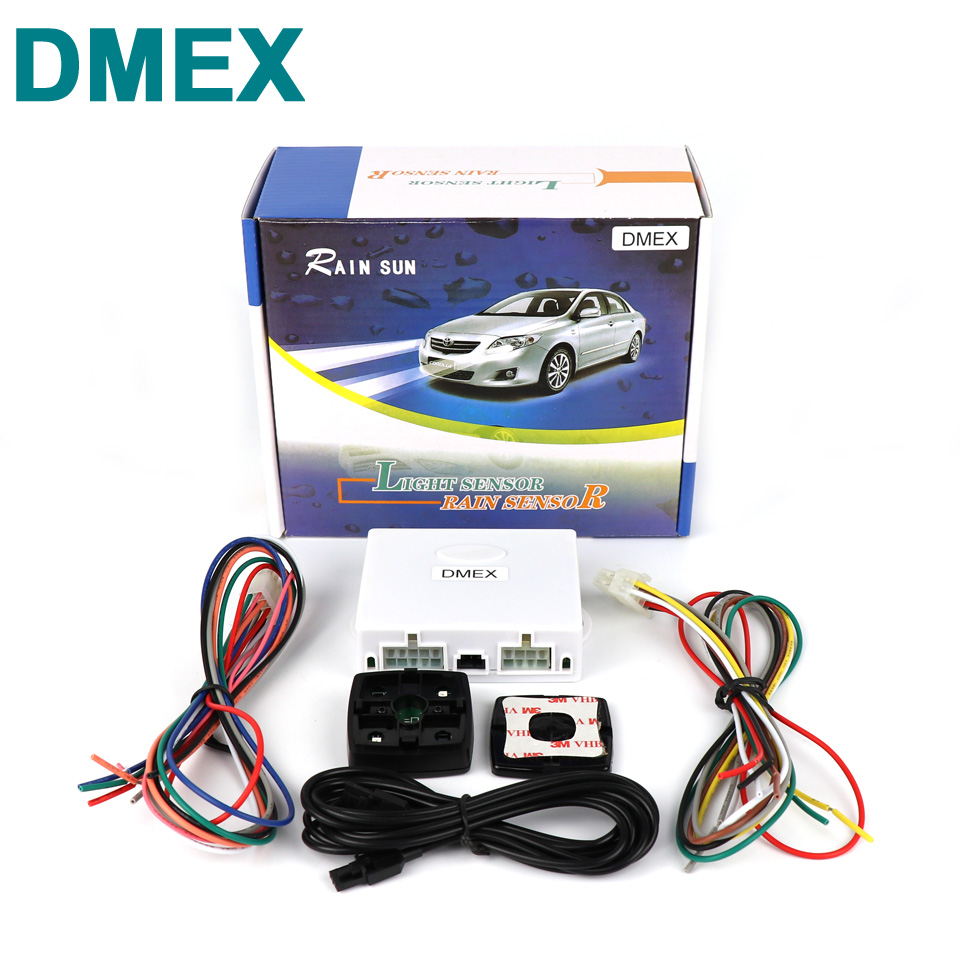
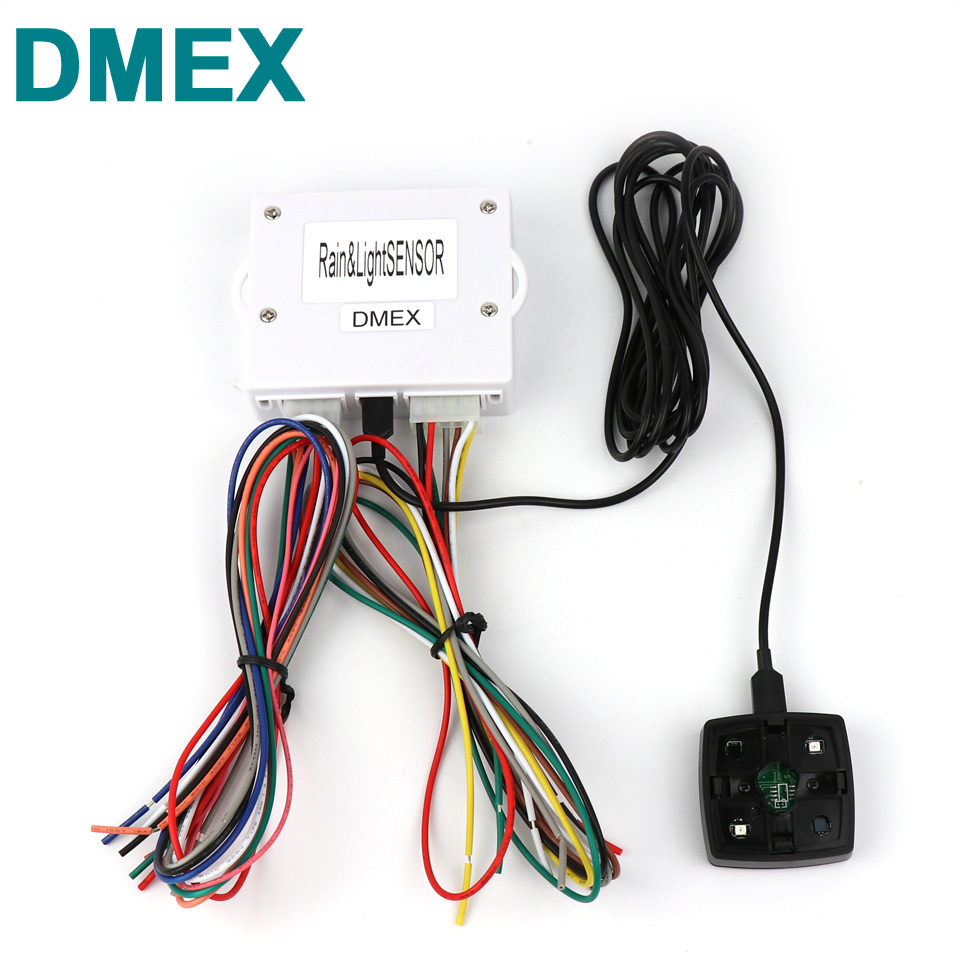
Previously I used the rain tracker RT-50A kit from Hydreon/Sonic for this purpose and since it is no longer available I use similar systems that are available in the market.
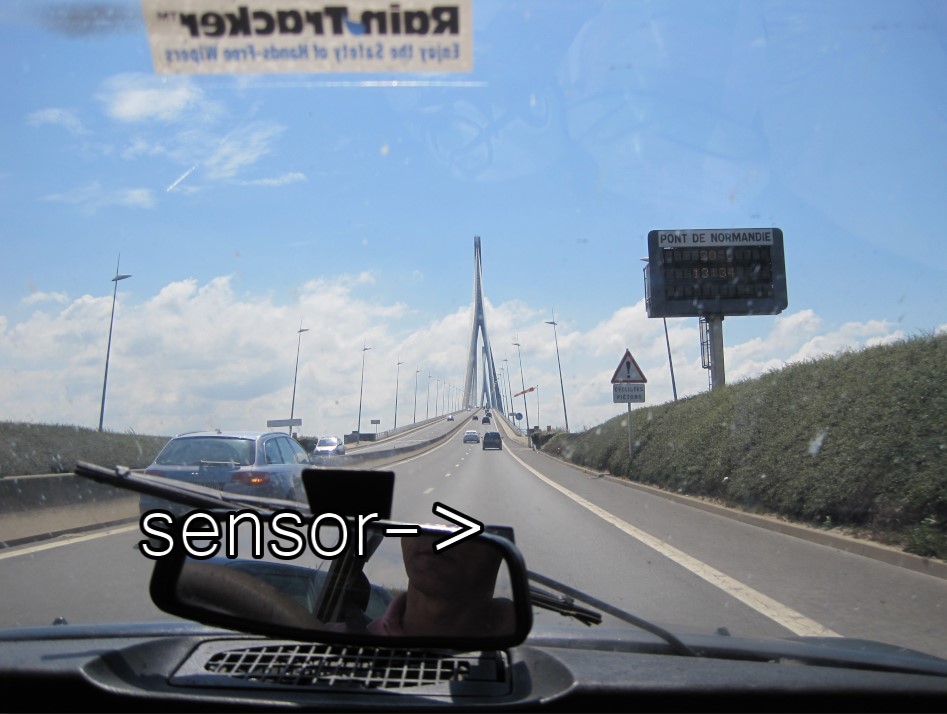
29-07-2010 Pont de Normandie, France with the Rain Sensor sticker. The installation is neatly concealed and the sensor sits against the inside of the windshield of the DS, just behind the mirror….
Actually, I would prefer to install an OBD2 system, but so far I have not been able to find an after market system for that. And building something like that all by myself will be too much work for me, also because I am not sure if the BYD Atto3’s wipers are indeed controlled with an addressable proprietary OBD2 control module.
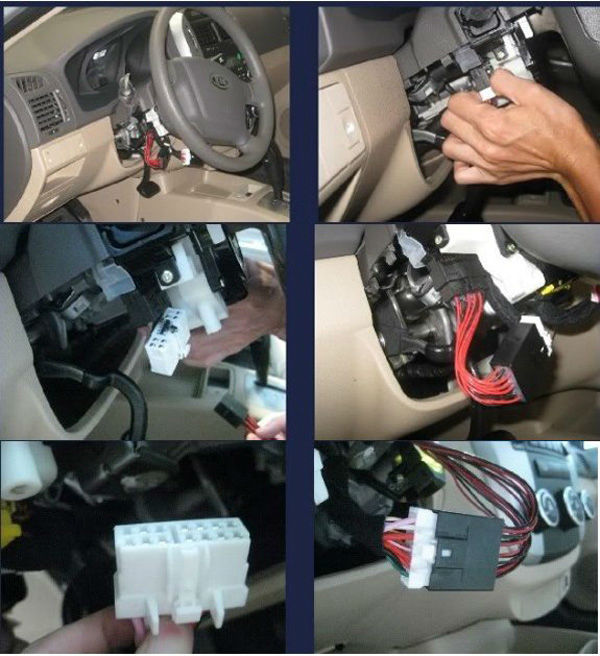
Therefore, I will go for the old school solution with standard wiring and an installation on the existing wiper switches. But then in the wiring harness under the dash. I know it’s not practical to “hack” such a drastic solution into the car in a relatively new auo but my irritation with the absence of this option is so high that at one point I seriously considered trading in the BYD Atto 3 for a Hyundai Kona or the like for this alone.
The standard wiring requires, in addition to the power supply from the switched 12V on-board voltage, an intervention in the connections between the wiper switches and the wiper motor. I am going for the simplest solution where I use the new module as an assistant for the existing installation. Then I can activate the new module with 1 extra switch that I neatly tuck away flat in the underside of the steering column. And then all the functions of the existing switches will remain intact. The new module then works in parallel with the original ‘single-wipe’ switch. So that means I will NOT have the ‘HIGH SPEED’ option automatically activated by the new module, and the new module will only use the default wipe speed for both single-wipe and continuous wipe.
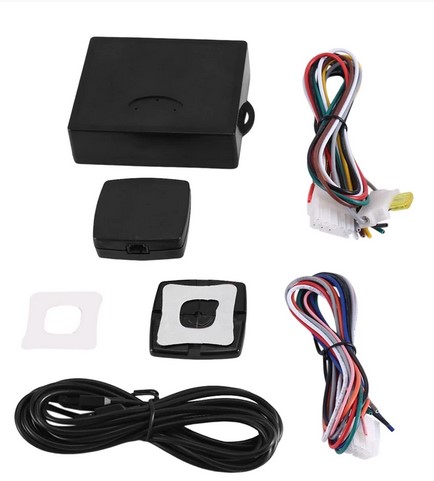
This is the new module I ordered from FRUUGO (China):
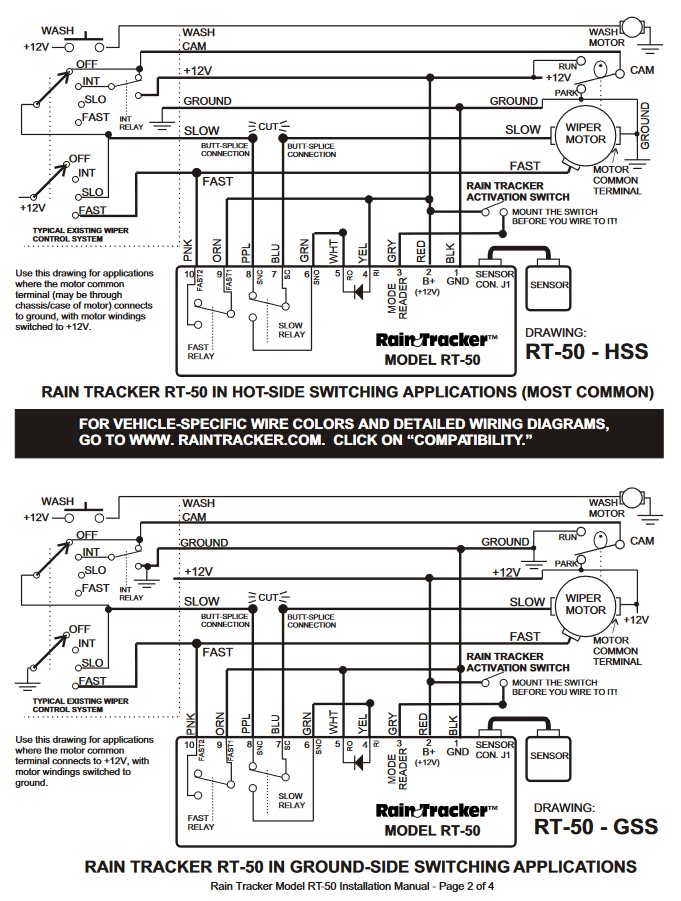
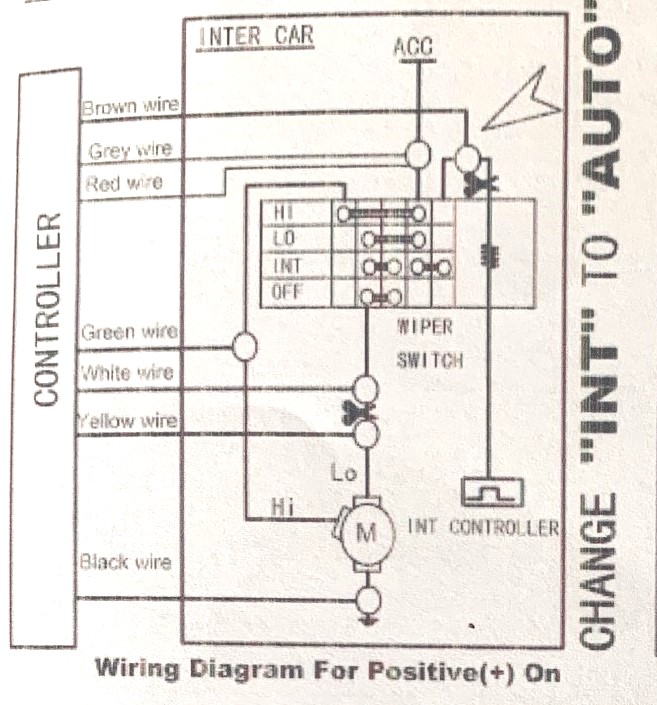
As shown in the above wiring scheme for a system where the wiper motor is used in the ‘positive’ power ON way (*and the motor’s common connection is towards GROUND), the connections of the following wires need to be made in the car:
CUT the existing connection from the interim controller to the wiper switch (that is on the steering column) AND connect the wire you just cut (that comes from the INT switch) to the new module’s BROWN wire. This is the main connection that sends a 12V pulse whenever rain is detected by the newly installed rain sensor.
Furthermore, connect the Grey and Red wires from the new control box to the switched 12Volts so the new module receives working power supply voltage.
Also, connect the Black wire to Ground, anywhere on the car.
Tham CUT the connection between the steering column’s wiper switch that is responsible for the SLKOW connection to the wiper’s motor an conne ct both cut ends to the White and Yellow wire from the new controlmodule. Be aware to connect the in the right way, i.e. YELLOW towards the wiper motor and WHITE towards the wiper switch!
Lastly, the GREEN wire from the new connection box needs to be connected to the HIGH speed wiper cable.
Since there is no on/off switch in the setup, the rain sensor will always be active as long as you set the existing wiper switch to the setting where the INT (or a chosen INT position, as for the Atto3 has multiple INT settings) position is connected to the module’s active pulse wire (BROWN).
Hopefully the wiper switch will not be based on OBD2, since this will make it a bit more difficult to get the rain sensor module installed because it will then need to be hacked into the wiring of the wiper motor directly, and will require a to be installed hardware switch to choose between the old and new situation.
For the Atto3, I will make a dedicated wiring scheme for the above whenever I will get to install the new system, that will probably be during my summer holidays 2023 July/ August.
All in all, this is not a difficult installation BUT if you don’t get it right, you could damage the car’s electronics and I will not hold any responsibility for any damage fiollowing my setup for this or any other install.
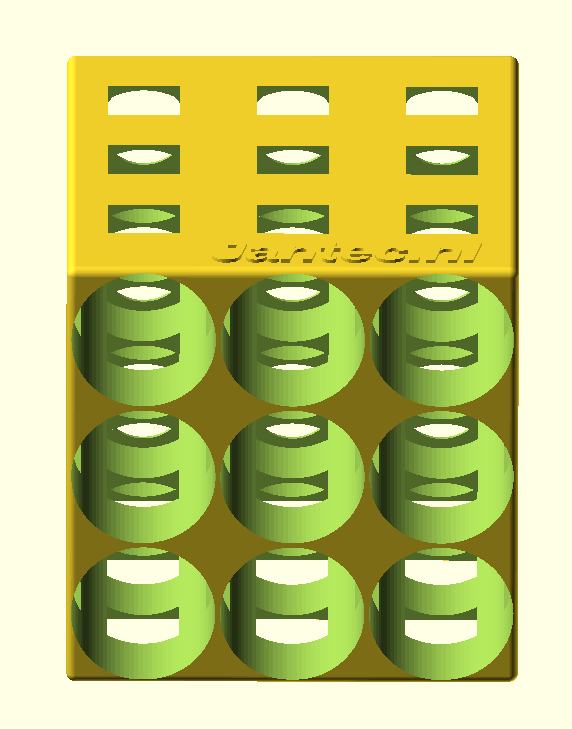
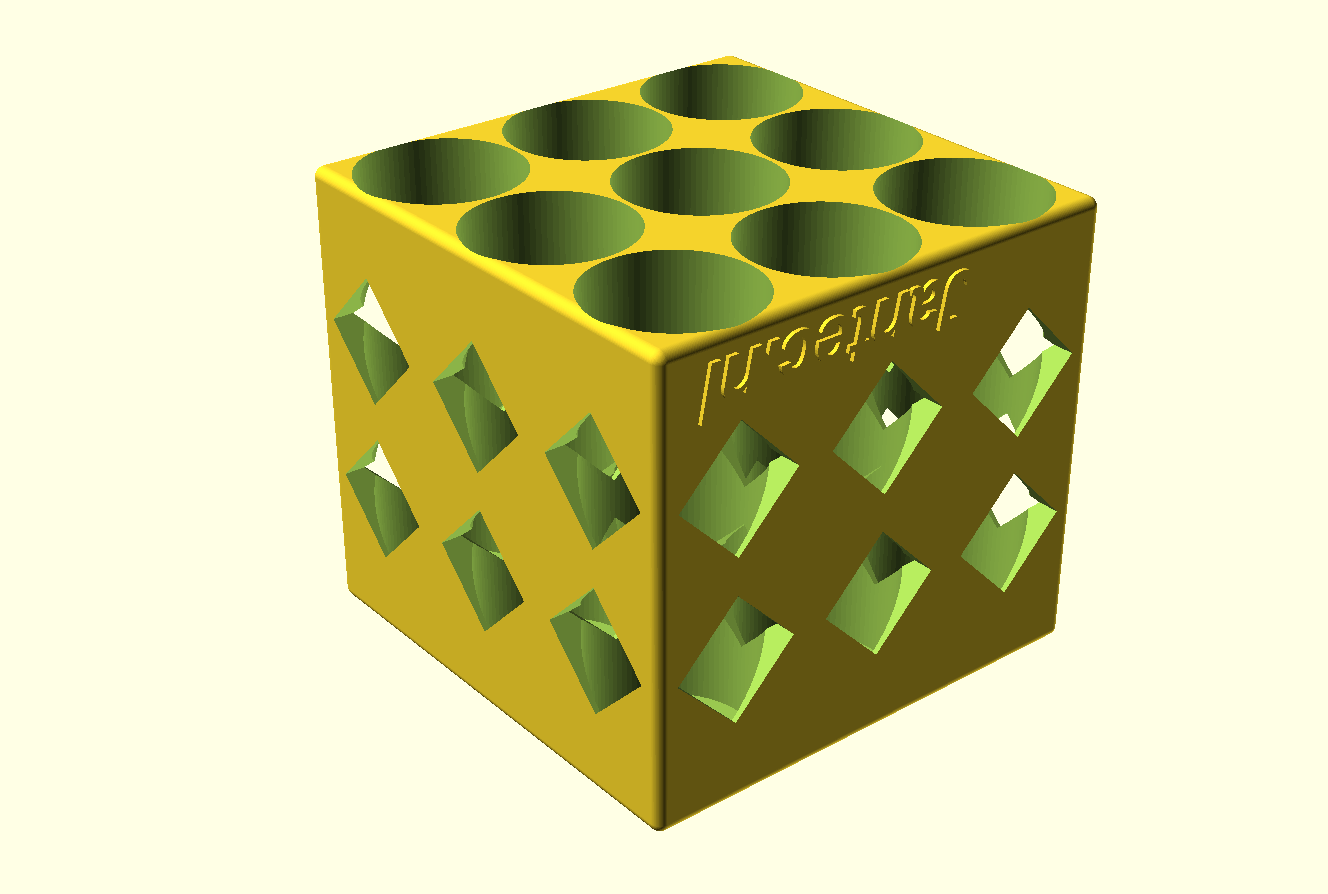
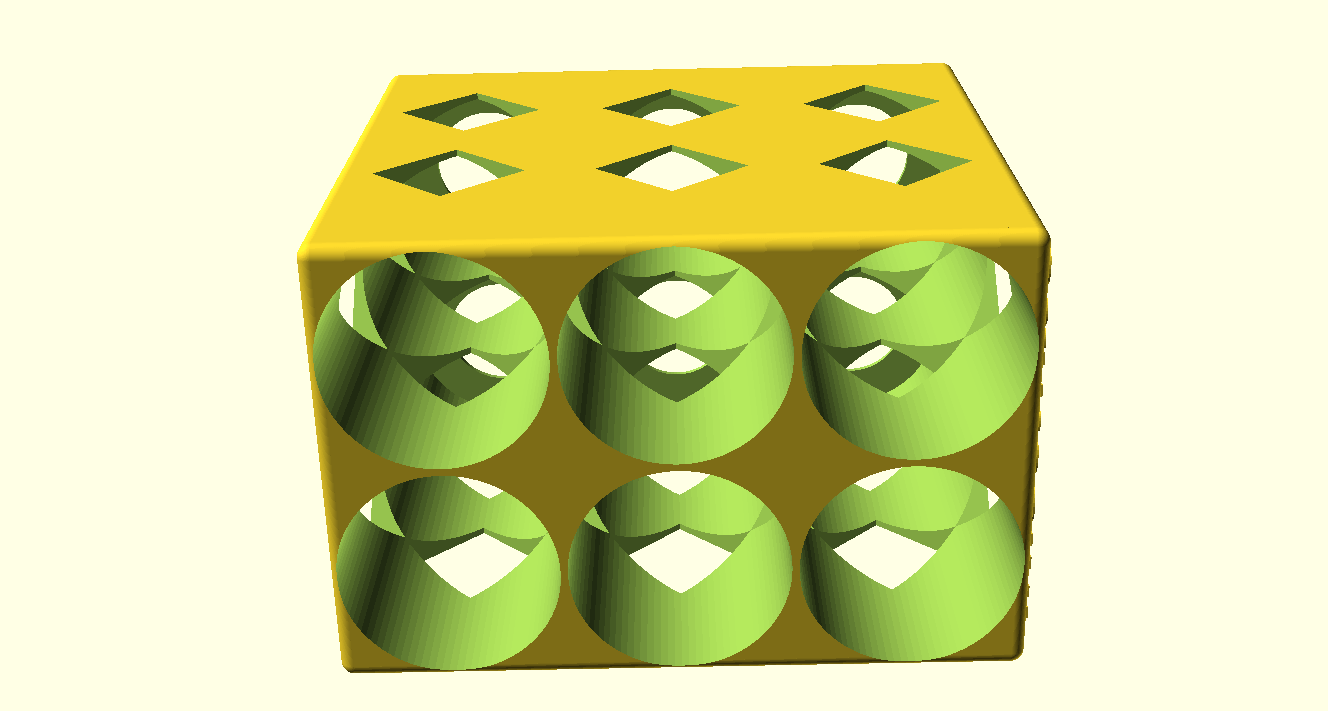
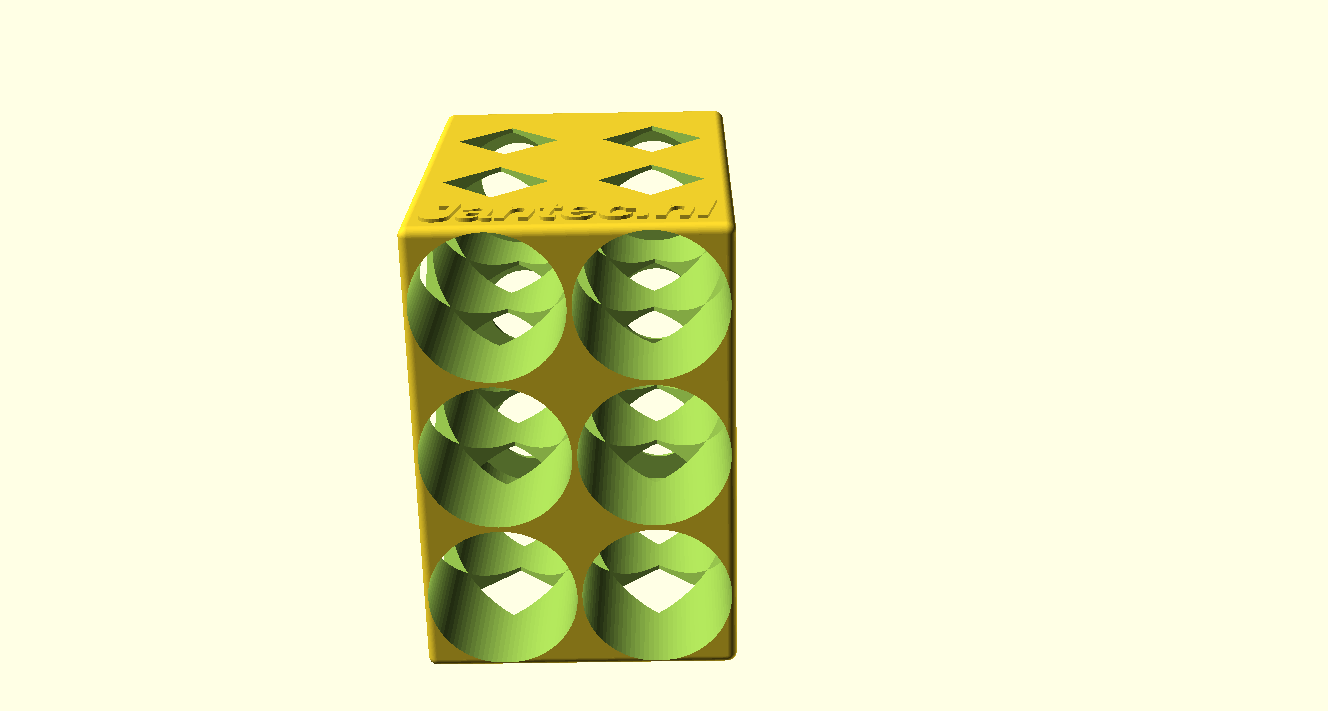
AchterkantEn zo staat ie in de koelkast!Voorkant en doorkijkje naar achter
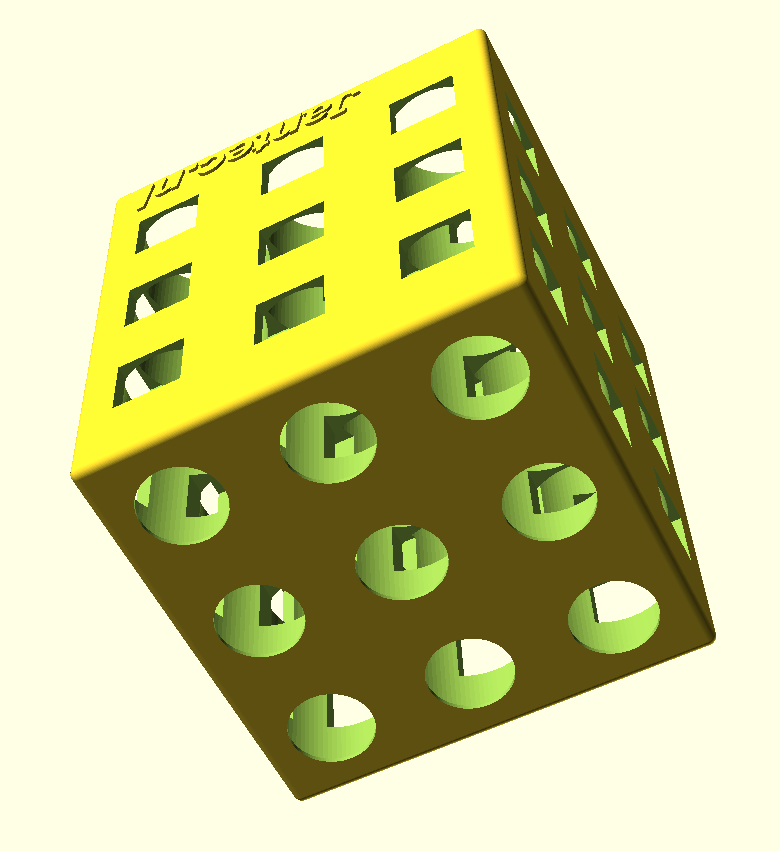
Voor gewone 330cl bierflesjes
De box in 3×3 flesjes uitvoering is 238 mm diep en 197mm hoog & breed.
Printen gaat het best met de achterkant van de flessenbox op het bed, dat is het deel waar de ronde gaten aan de achterkant van de flessen het kleinst zijn.
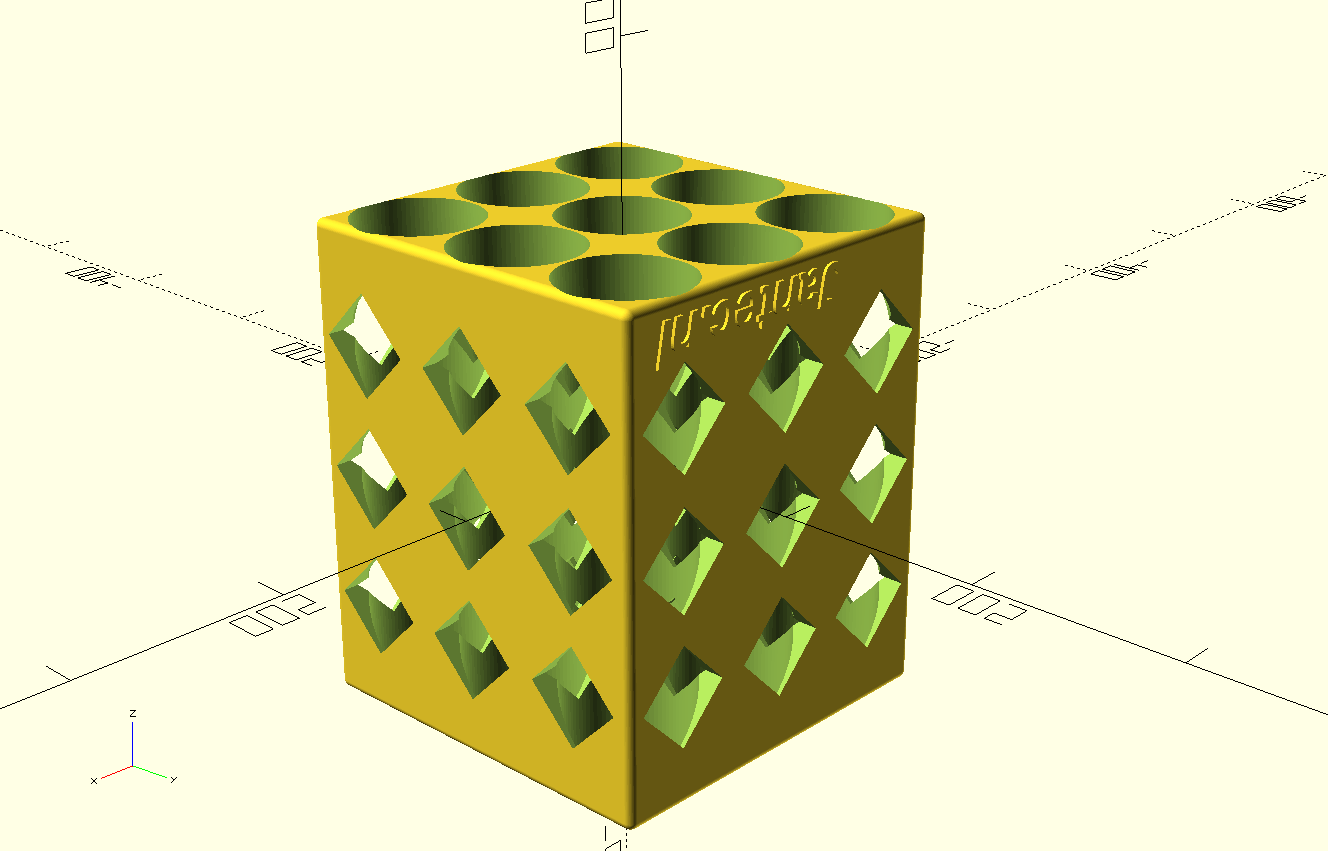
Als je printer max 200x200x200 mm aan kan, print dan de Z op 80%.
De flesjes steken er dan aan de voorkant 4 cm uit, dat kan ook prima!
Print meer boxen en zet ze naast elkaar, op elkaar etc.
Meaning, I now (May, 2023) have the old Citroën Traction Avant 11BN occupying space in my garage. The Traction Avant is ready to drive, and with the 4-gear gearbox, in combination with the ID19 engine, this car is quite roadworthy.
I should really drive this car more, it is almost always just sitting in the garage…
Mijn BYD Atto 3 heb ik vanaf de aanschaf in november 2022 gereden met daarin een Garmin mini dashcam gemonteerd, op de voorruit net boven rechts naast de binnenspiegel. Dat werkt prima, alleen heb je een kabel lopen die je moet wegwerken en je moet met je telefoon app de beelden bekijken.
Volgens de BYD-dealer is het niet mogelijk om de originele BYD dashcam achteraf te monteren.
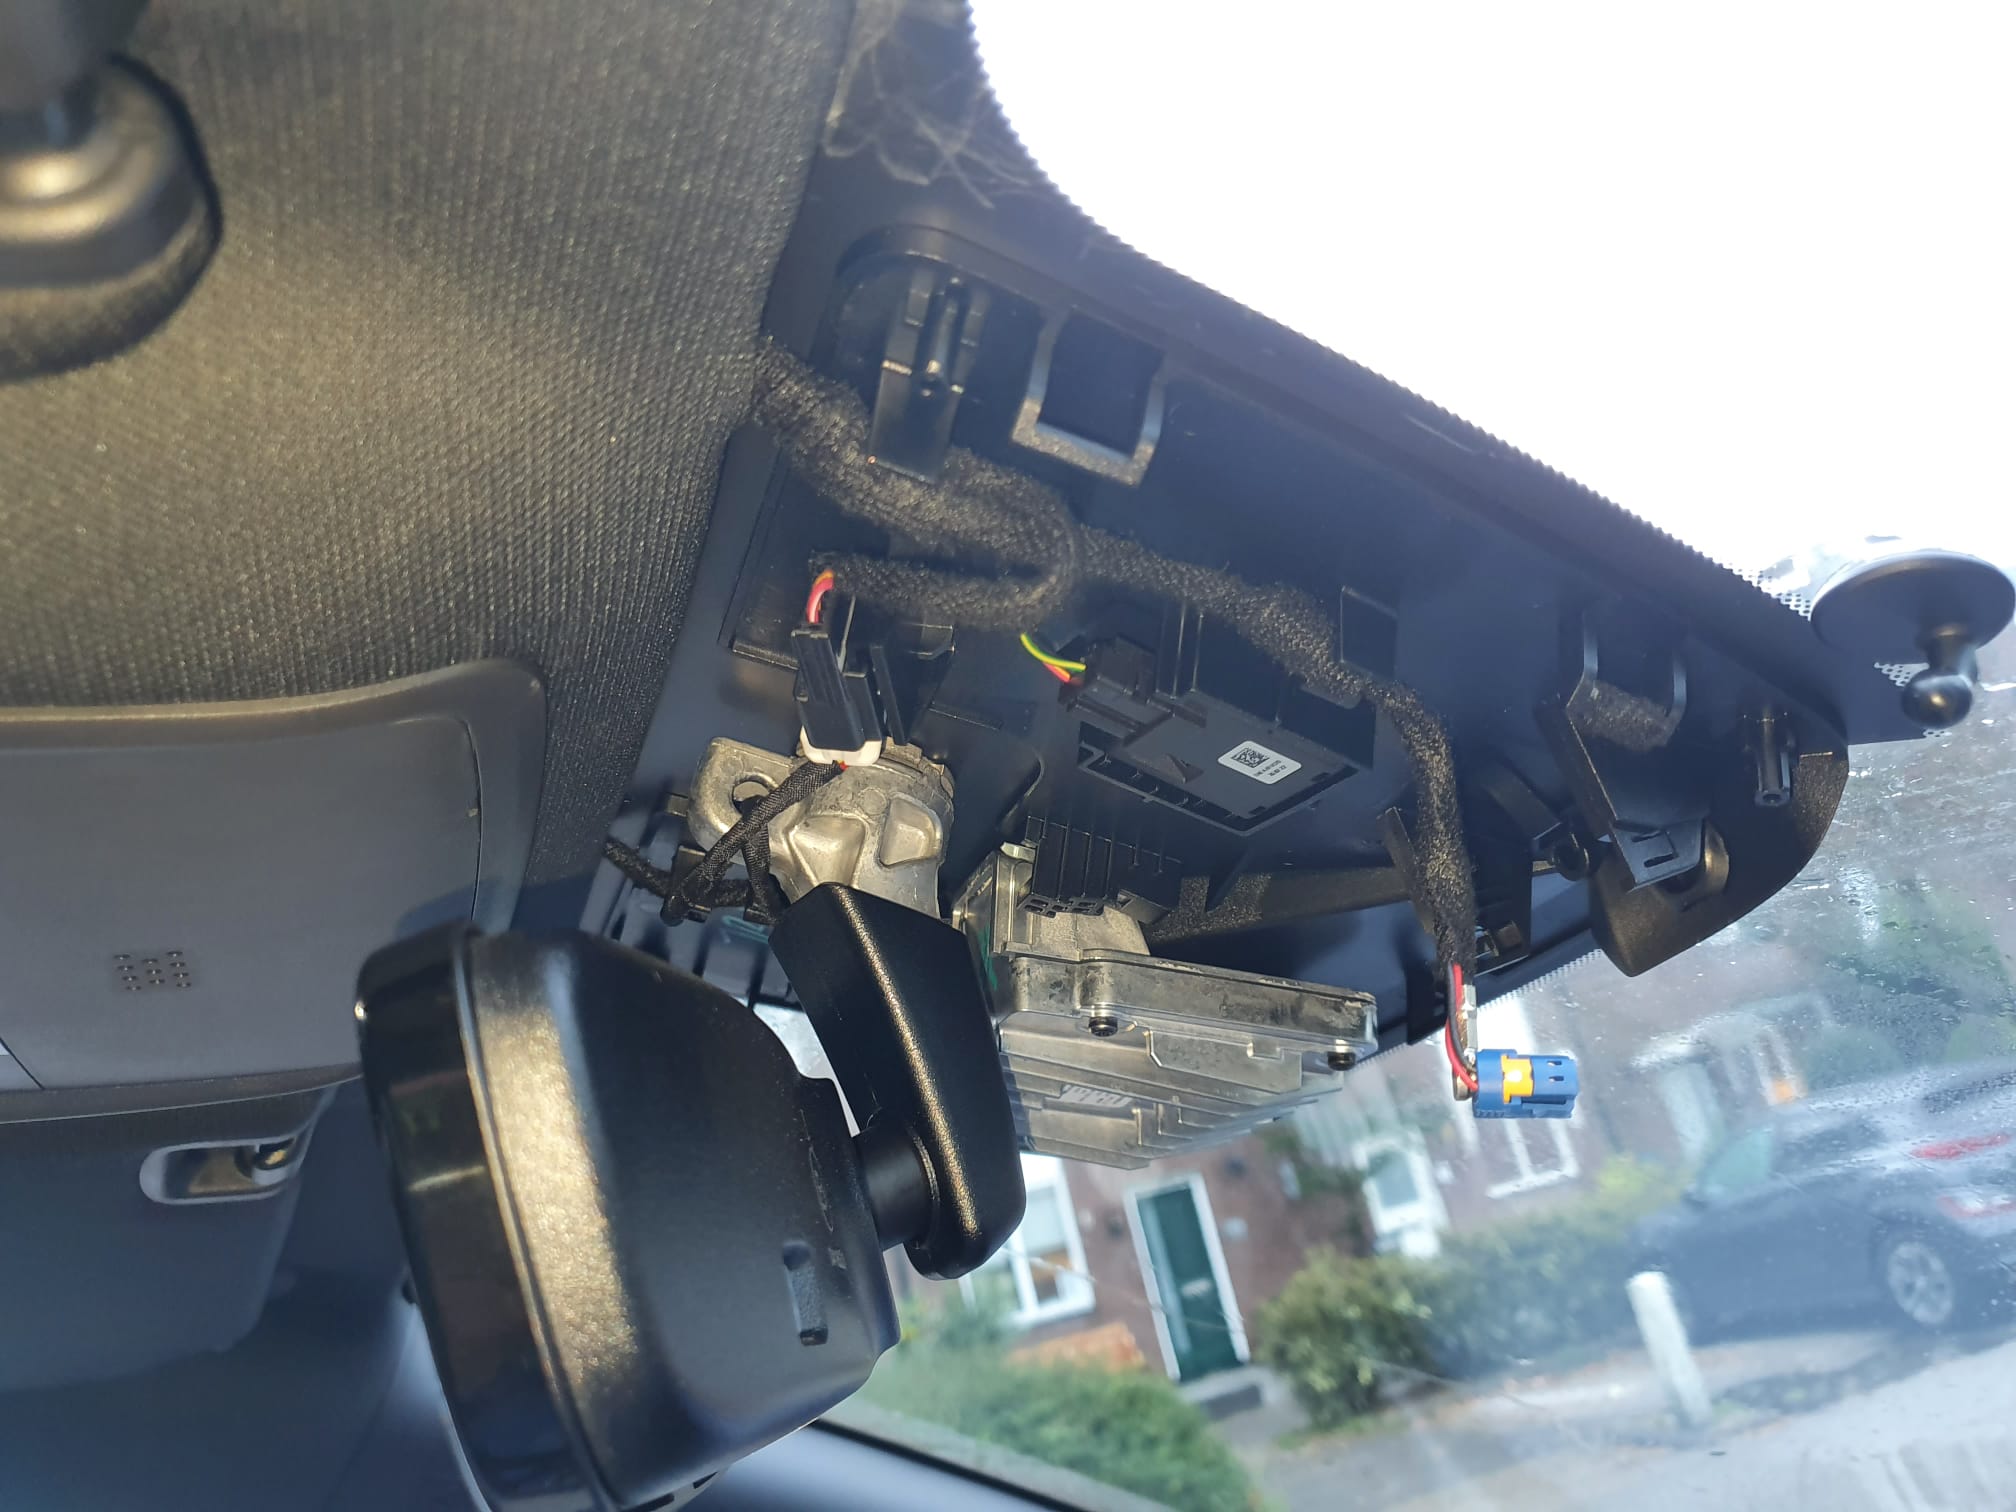
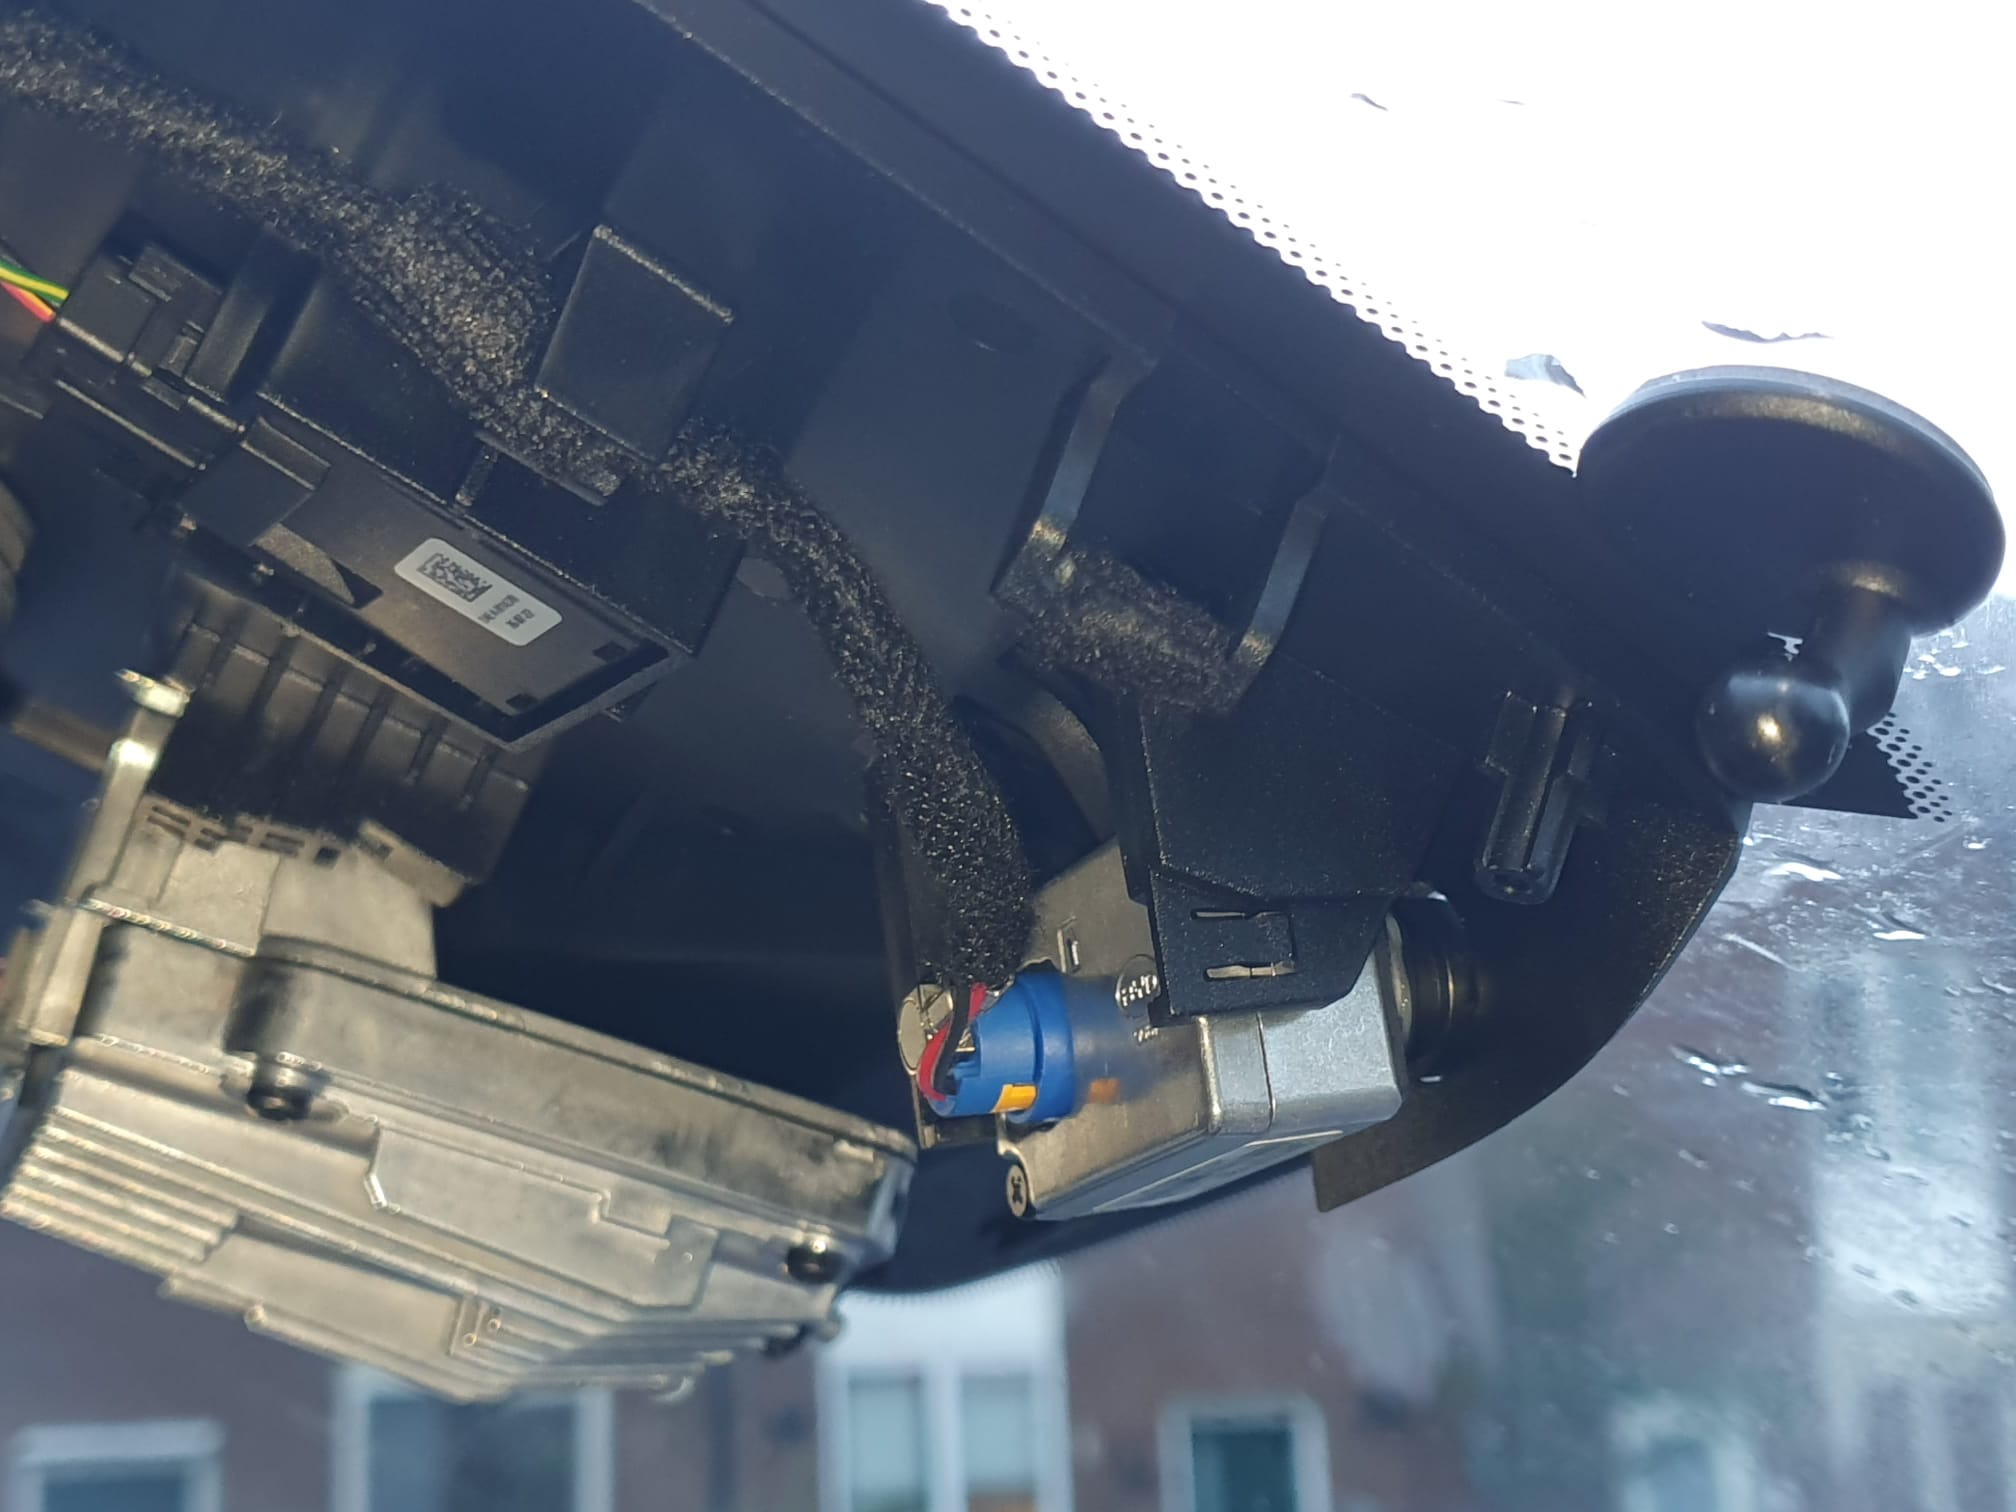
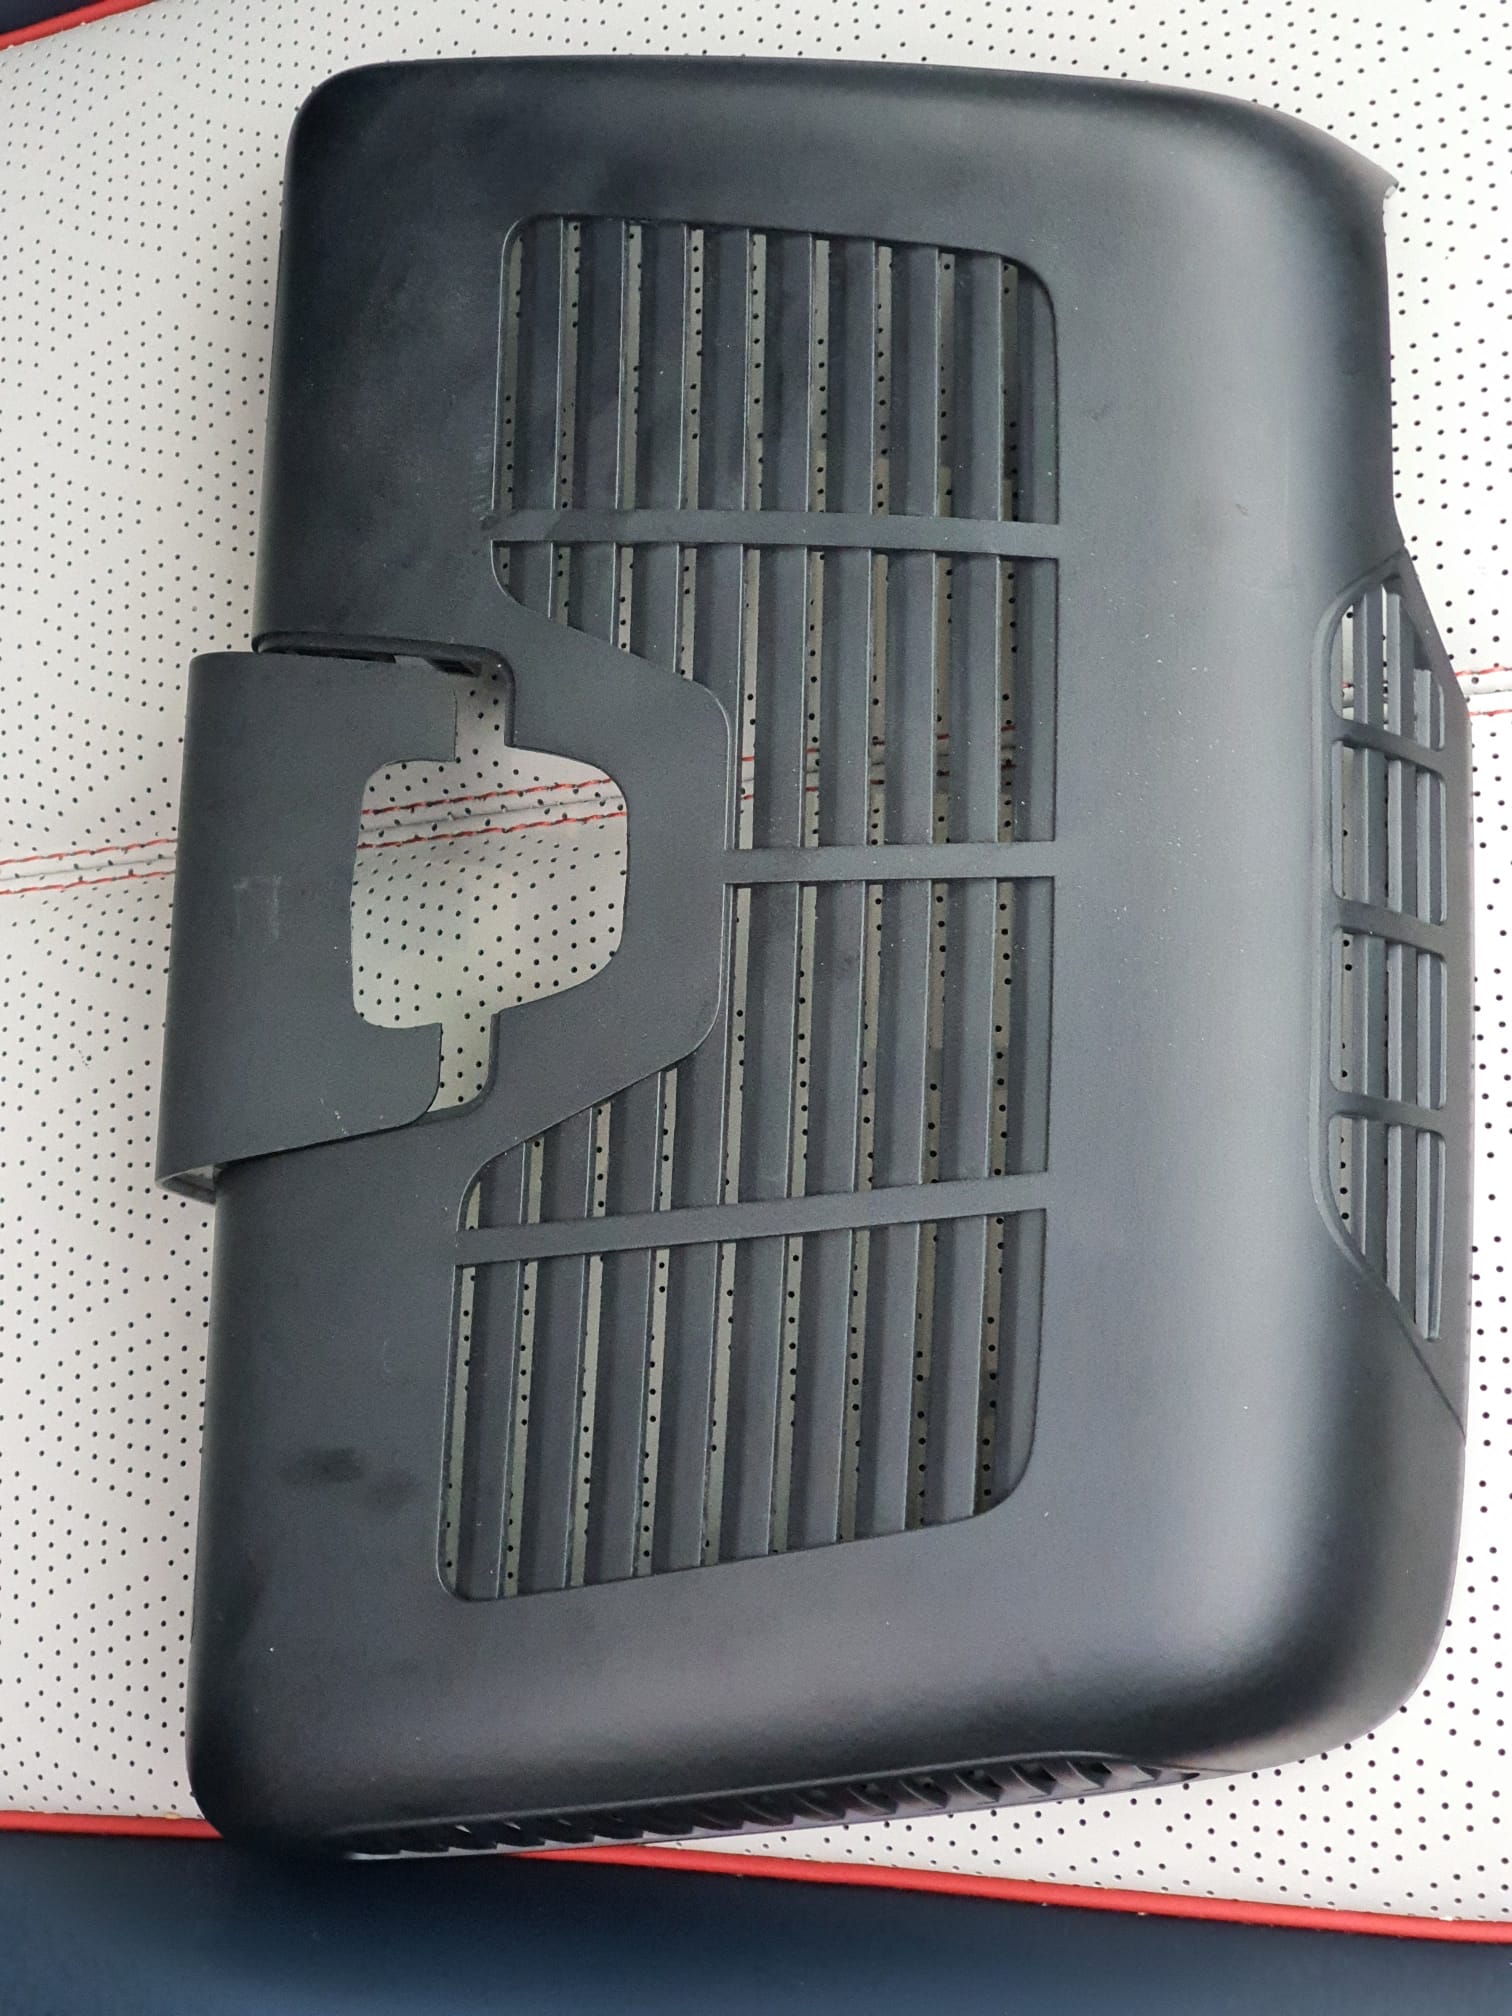
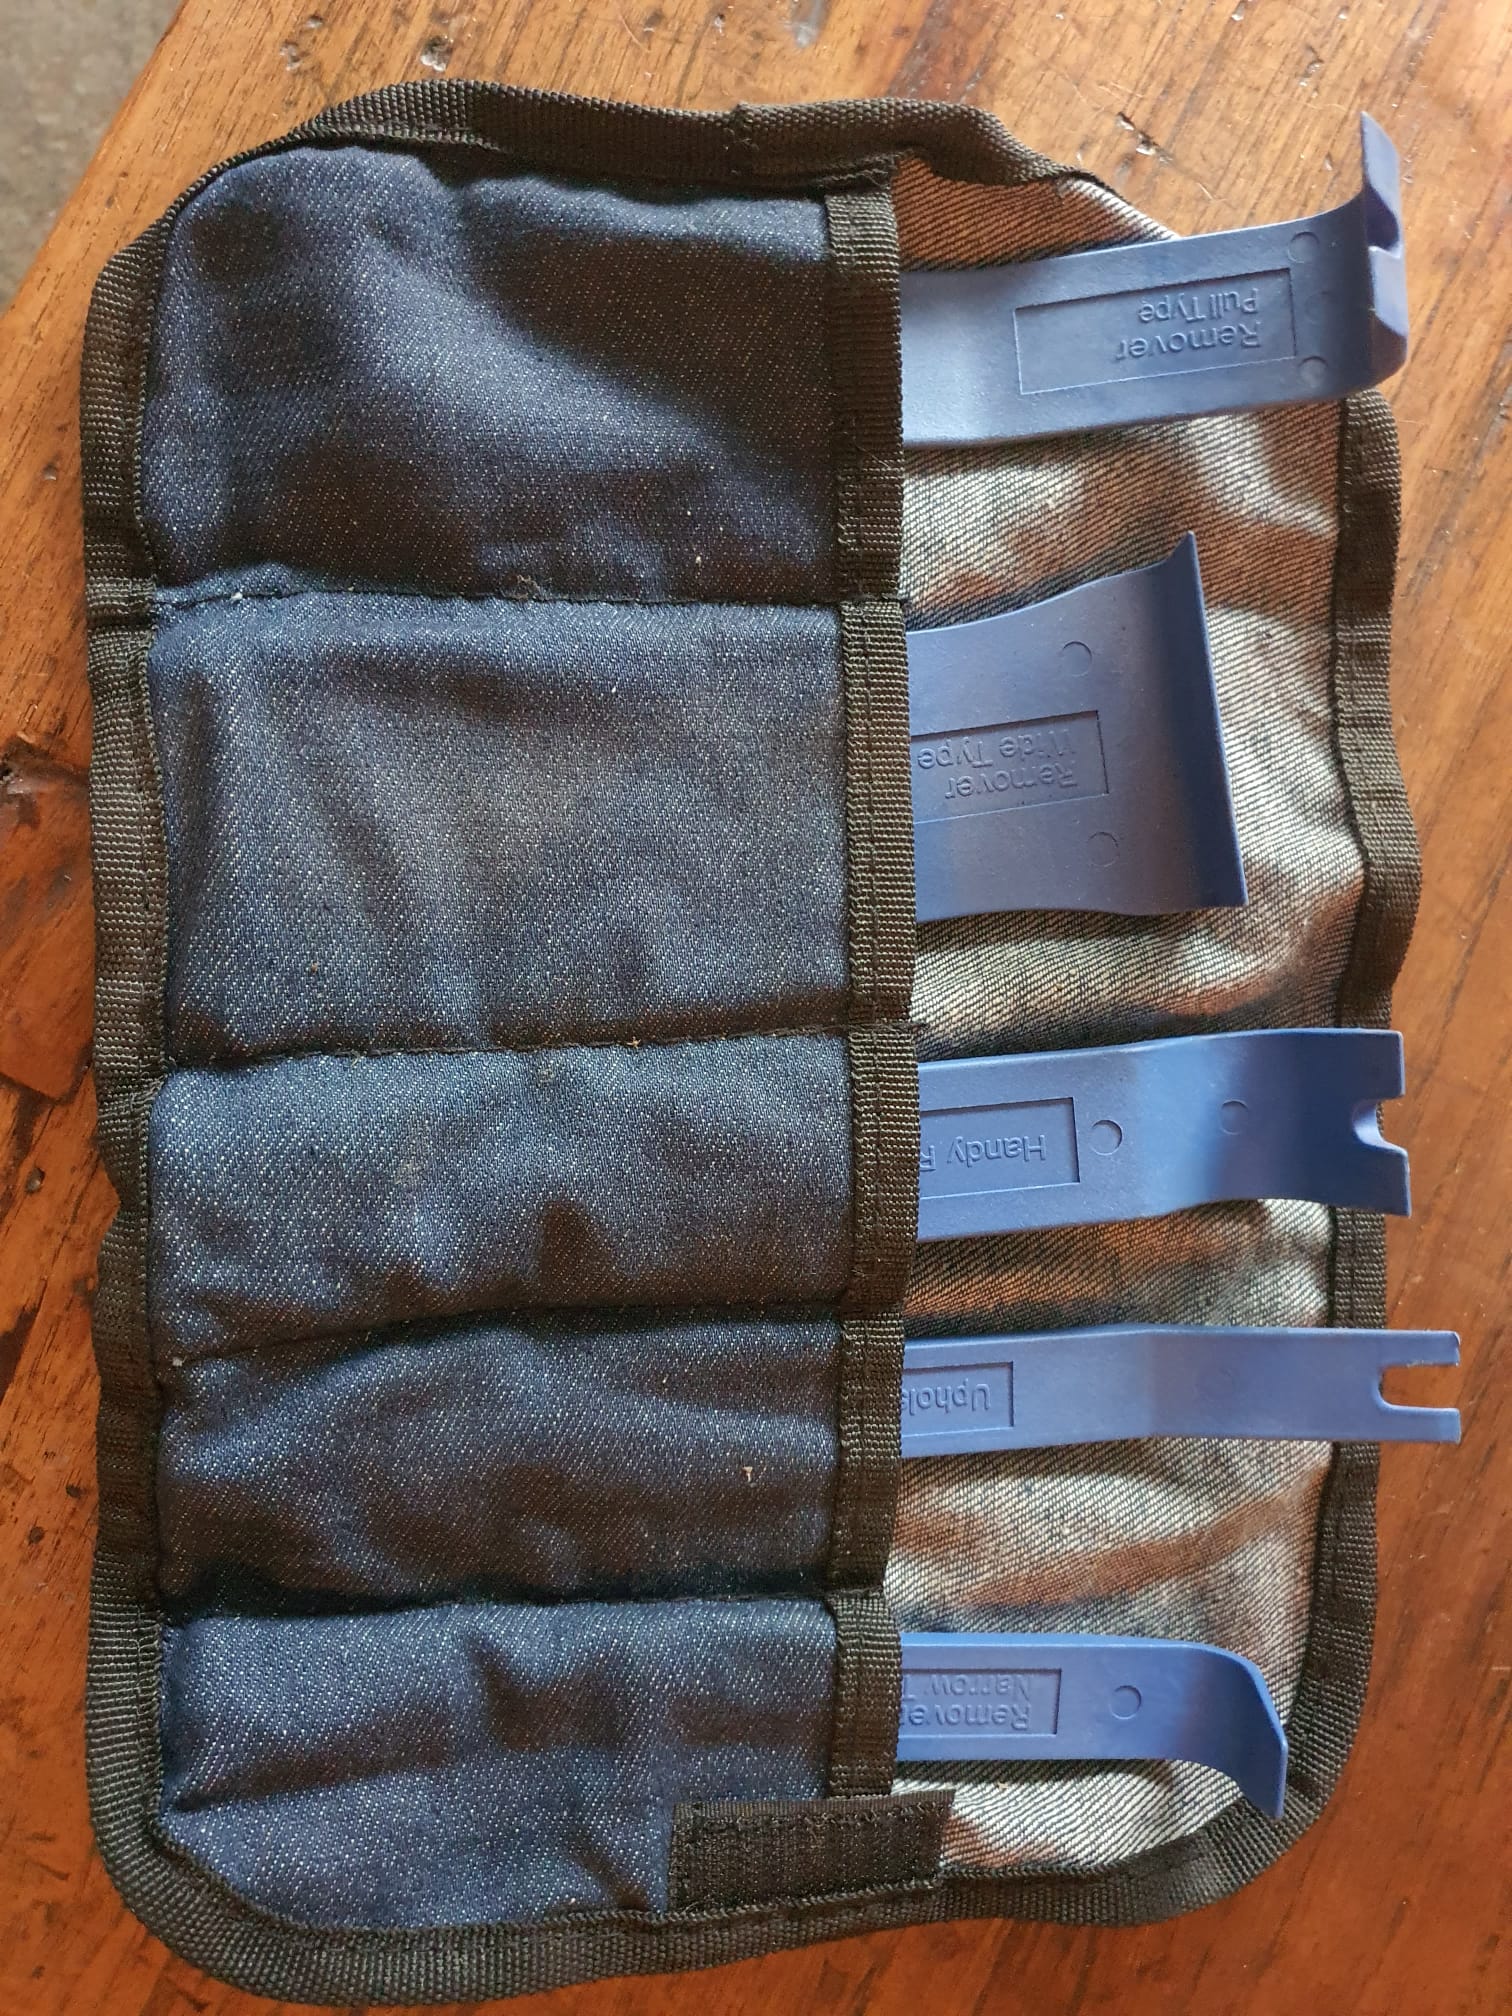
Ik heb de beschermkap waar de dashcam in moet komen verwijderd, met hiervoor geschikt gereedschap om de plastic klikbeugels niet te beschadigen.
Daarna bleek dat de kabel voor de dashcam gewoon netjes gemonteerd aanwezig is. Rechts op onderstaande foto kun je nog net het montagevoetje van de Garmin mini dashcam zien. Het blauwe losse stekkertje met gele vlakje is de stekker voor de originele BYD dashcam .
[Obviously, this is for a left-steered version but for a right-steered version the situation is just mirrored.]
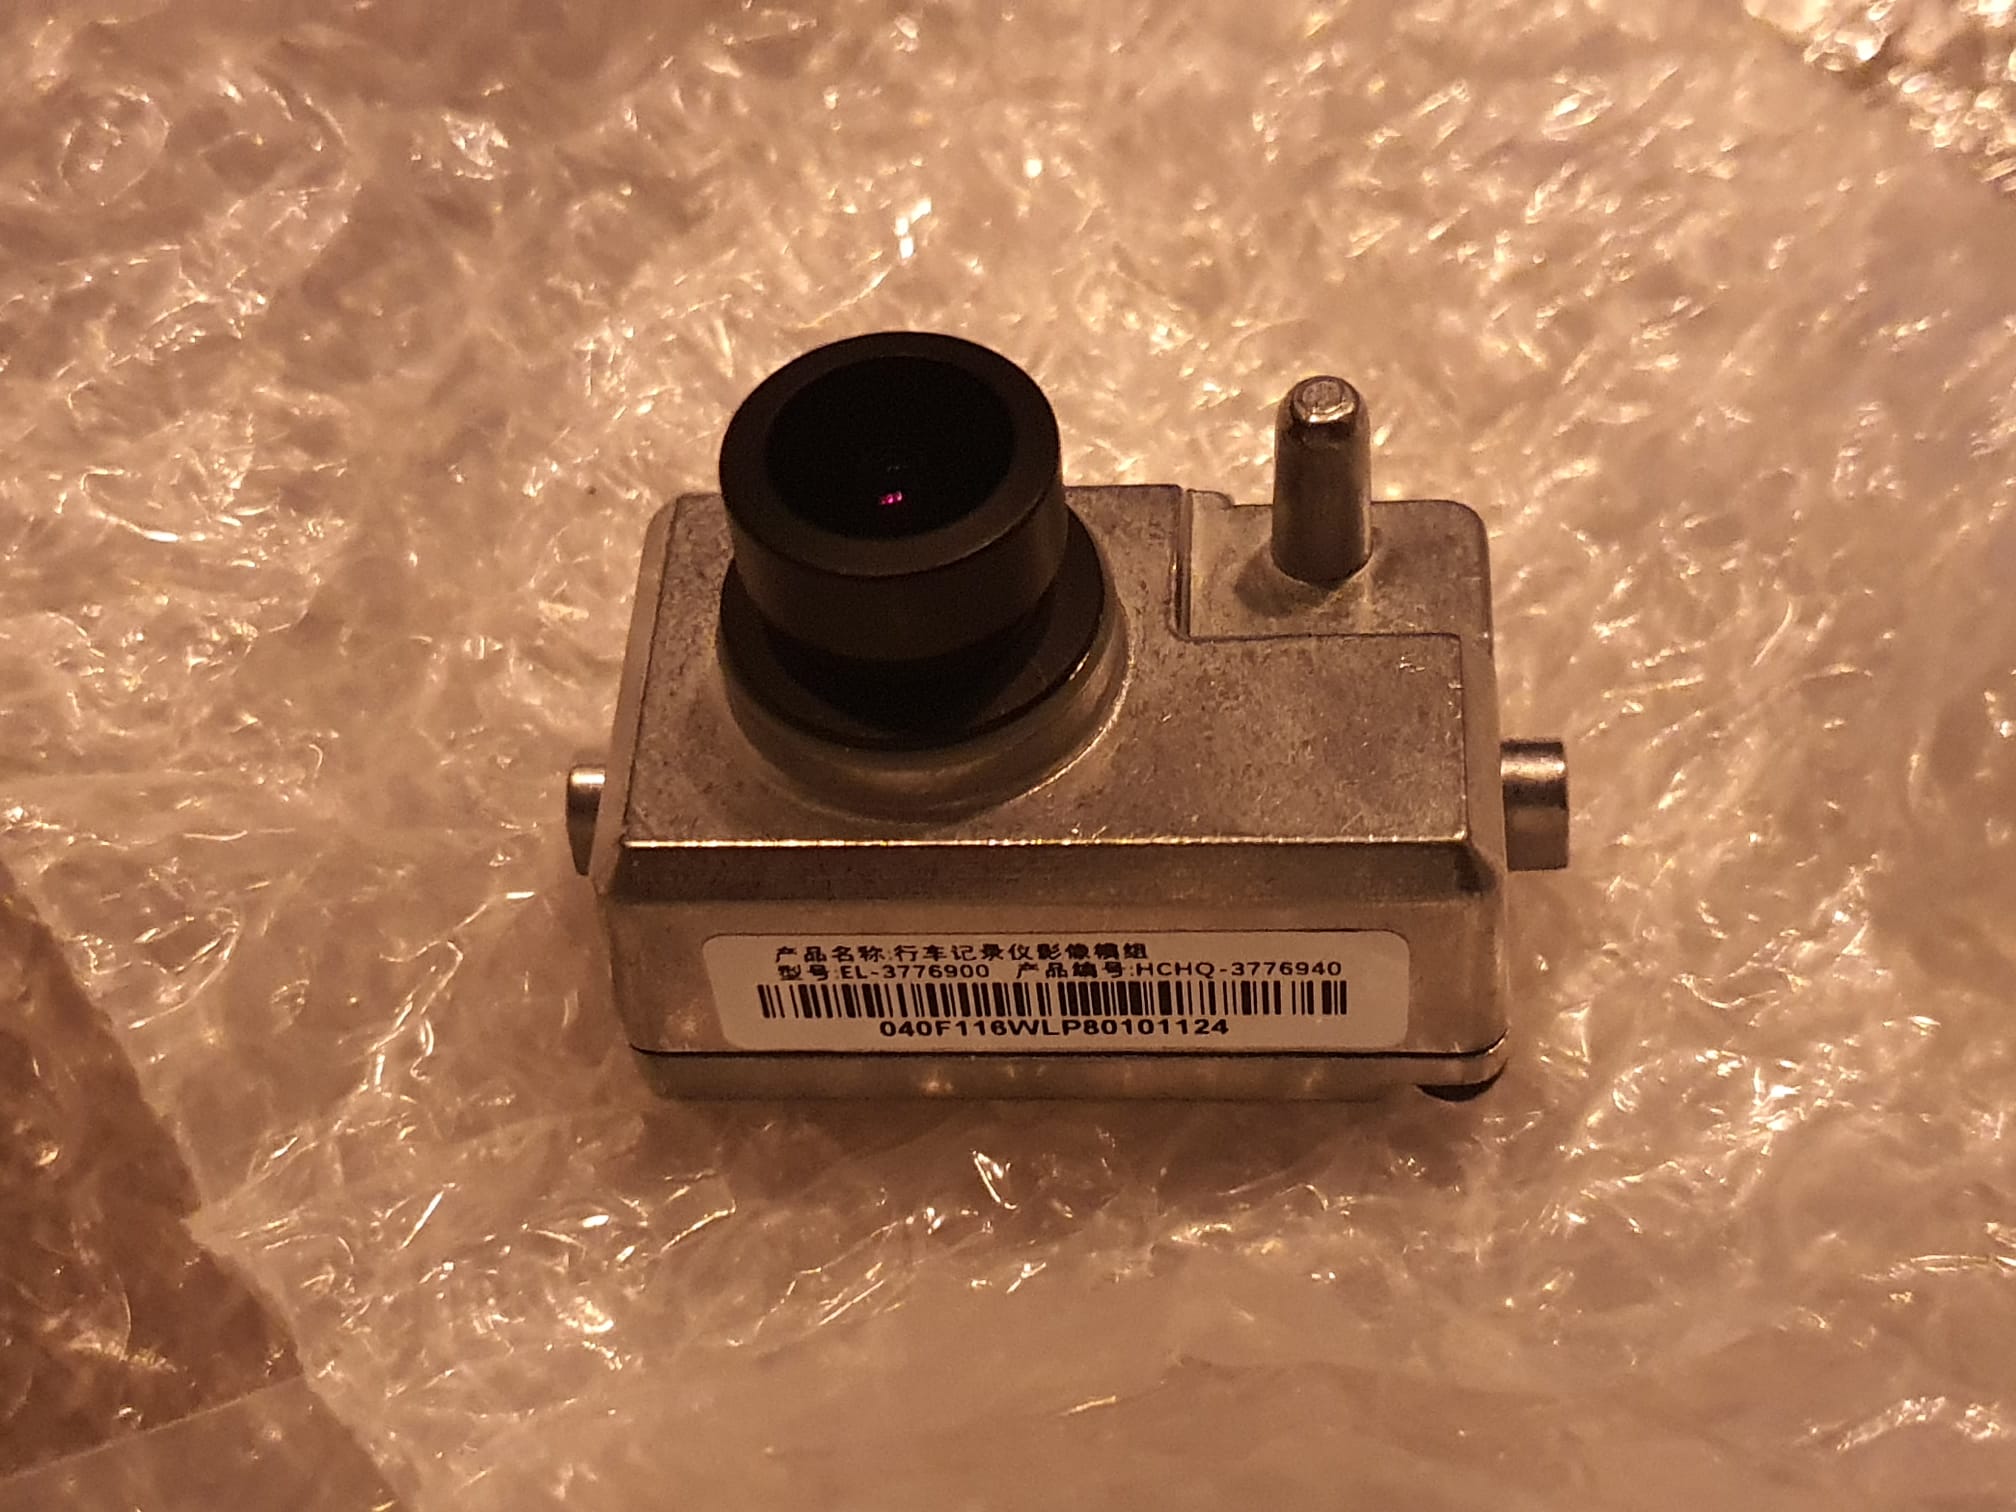
Op Aliexpress kwam ik de originele BYD dashcam als losse vervangingsunit gewoon tegen, voor ca. 83 Euro. Dus 2 weken terug besteld en vanmorgen gemonteerd.
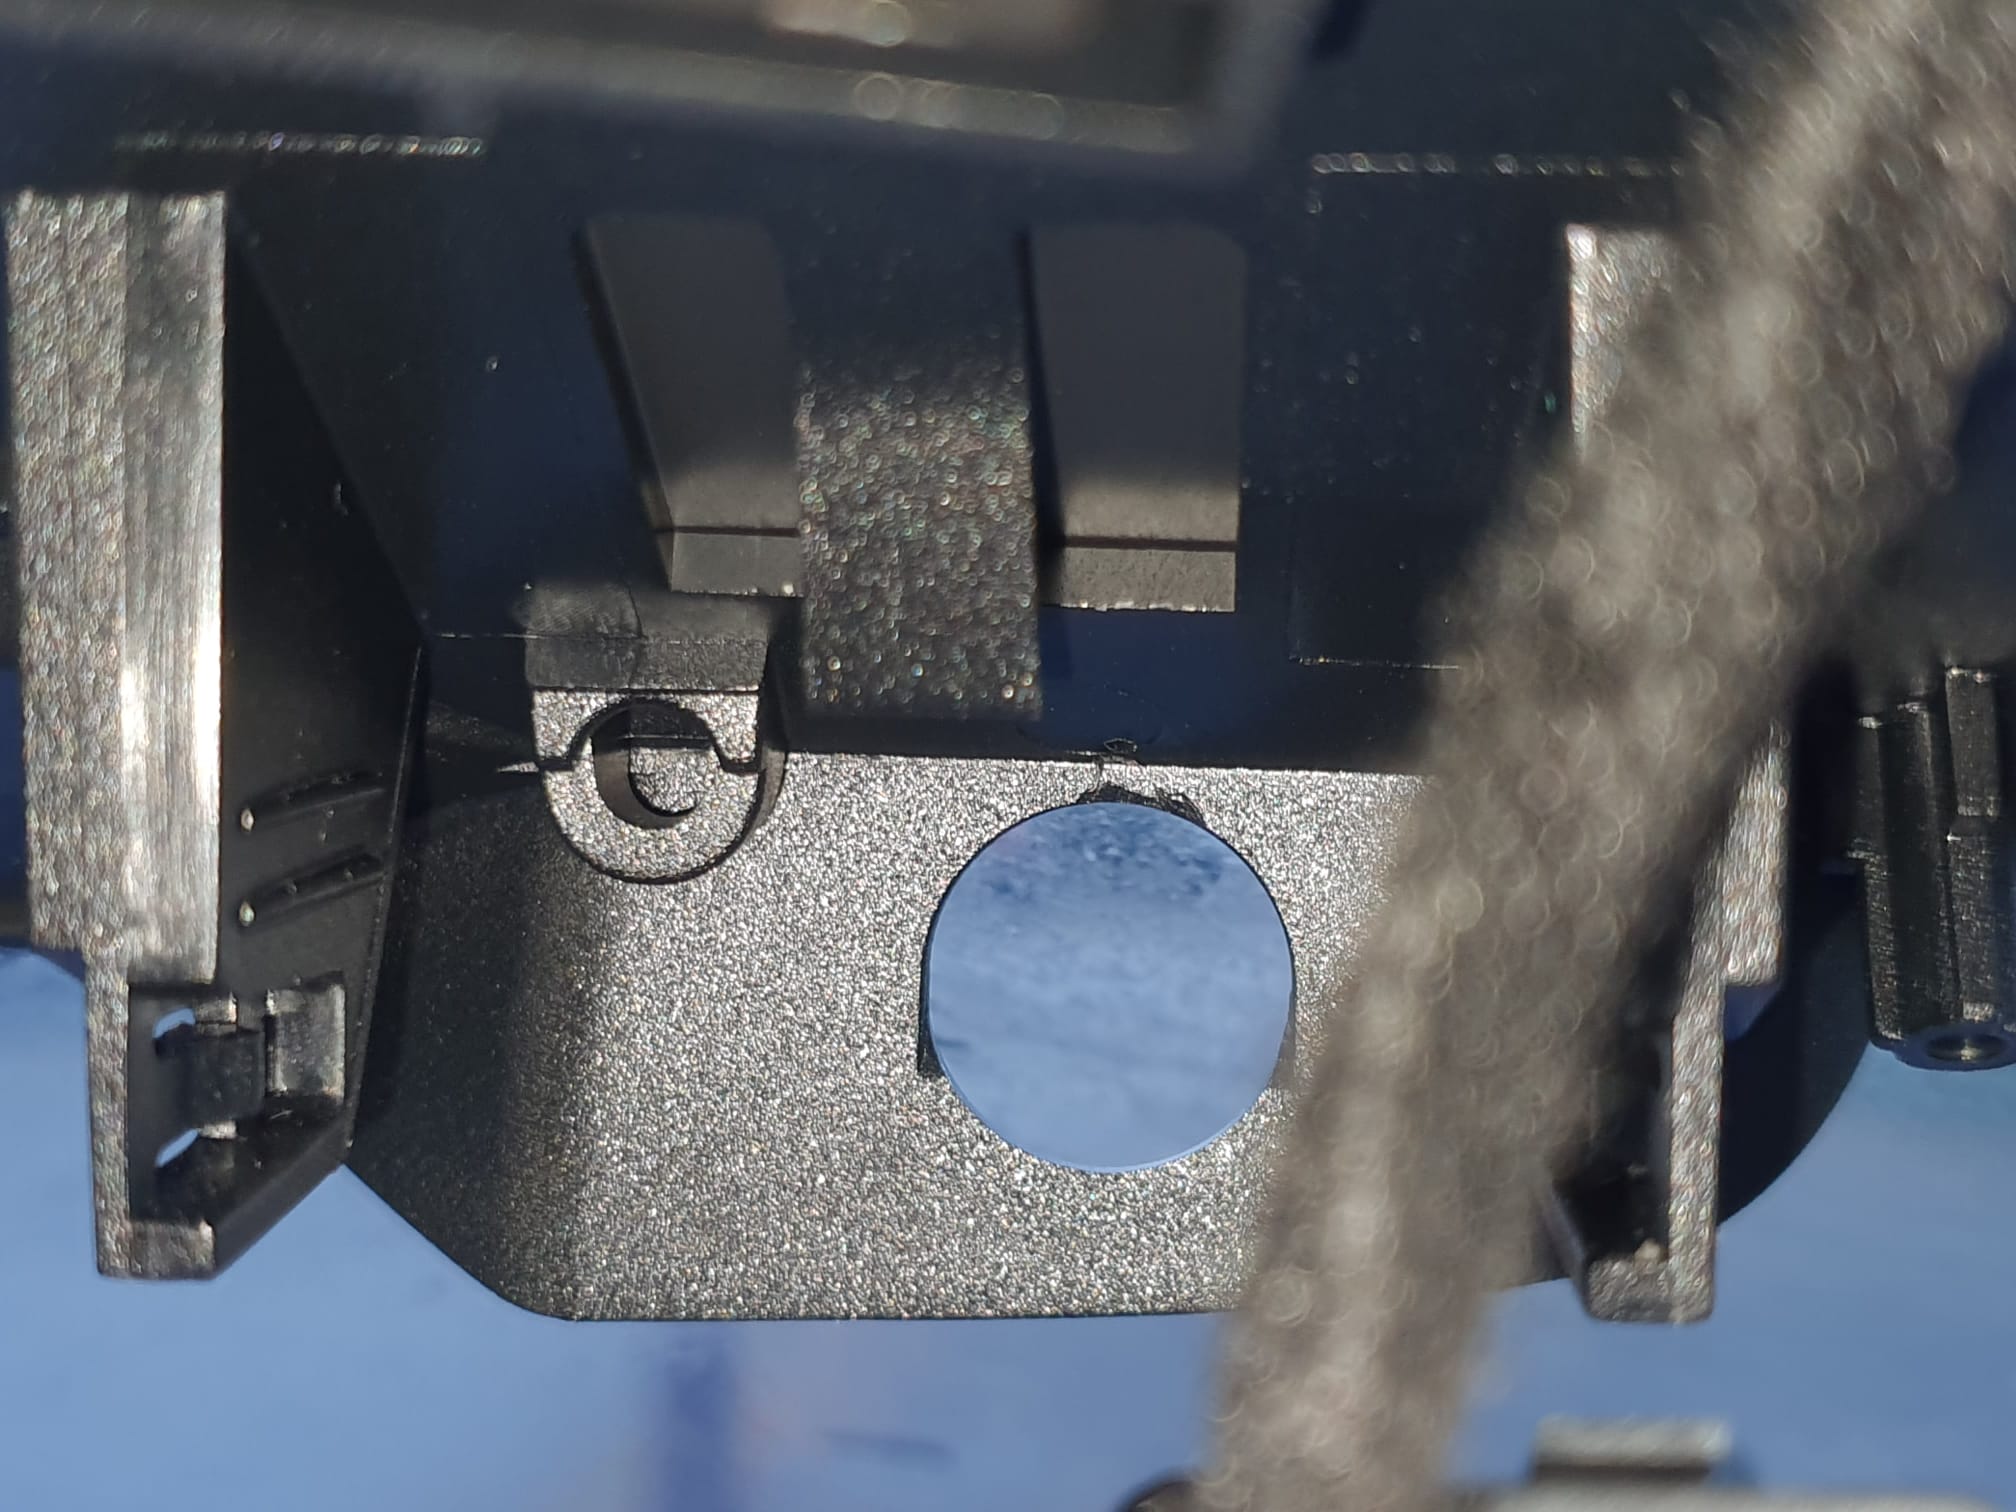
Het monteren is heel simpel: Eerst het rubbertje verwijderen waar de lens van de dashcam door moet komen .Obviously, this is for a left-steered version but for a right-steered version the situation is just mirrored.
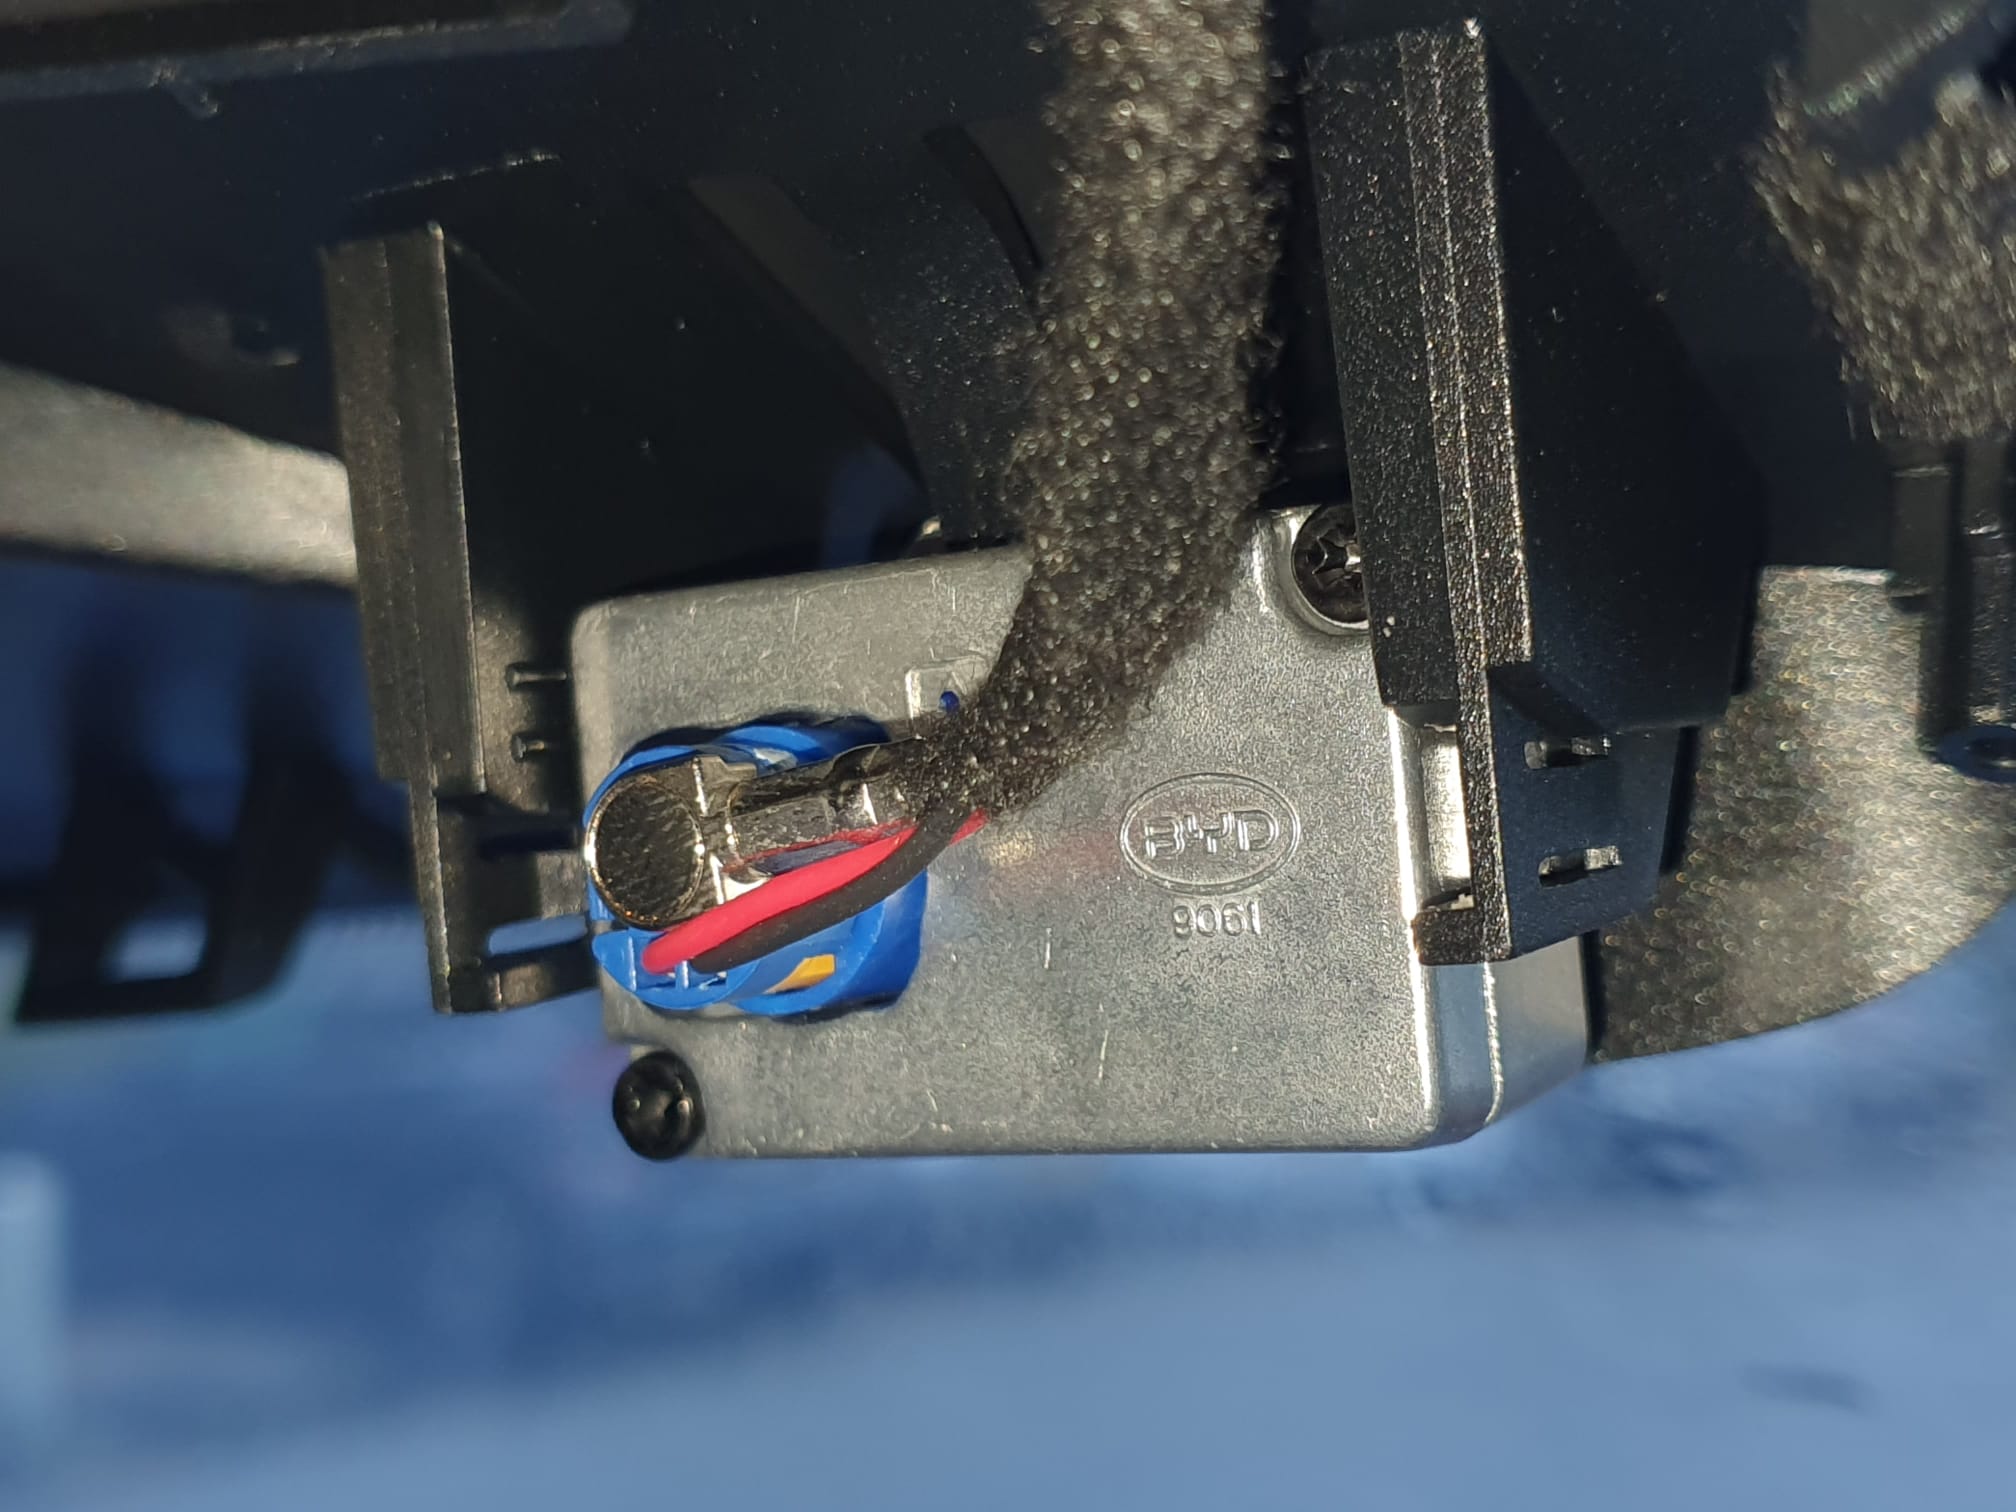
Daarna de kabel in de camera klikken, het zit vanzelf geborgd. Kijk heel goed hoe deze stekker erin moet worden geplaatst! Het is een gecombineerde stekker met 2 contacten voor de voedingsspanning en een coax videoconnector aan elkaar vast dus het past maar op 1 manier!
Obviously, this is for a left-steered version but for a right-steered version the situation is just mirrored.
En de camera op de juiste plek in de houder klikken.
En.. wat denk je? Het werkt gewoon. Ik had gelijktijdig ook de update van de auto naar V 1.4 onderhanden, en na het opstarten ontdekte de auto dat er een dashcam aanwezig was. En de app werd gelijk geactiveerd, zodat de camera nu geïntegreerd in de auto functioneert!
Vervolgens heb ik de beschermkap gemonteerd en de bevestigingssticker van de Garmin dashcam er netjes afgehaald en de ruit schoon gemaakt. Bij het weer monteren van de beschermkap heb ik eerst het grote deel geplaatst. Daarna de spiegel neer onder gedraaid en het kleine deel in het grote deel geplaatst. Dat was wel even heel voorzichtig werken…
De software wijst zichzelf: je moet wel een MicroSD card plaatsen onder het dashboard. Ik heb er een MicroSD card van 128Gb in zitten en die heb ik via de camera app van de auto-software op FAT32 geformatteerd.
Wat je vindt nadat je de camera gebruikt hebt is een aantal directories op de microSDcard. Je bestanden staan in de DCIM map, gerangschikt naar o.a. video en foto.
Met de app kun je een aantal instellingen wijzigen waaronder de opnameduur per opgenomen fragment. Ik zet dat altijd op de langst mogelijke tijd. Hier is dat 5 minuten. net als de Garmin.
Je kan live kijken en dan ook foto’s nemen. Ik heb een snelknop van het stuurwiel geprogrammeerd om de dashcam video-opnames te laten maken wanneer ik dat belangrijk vind. De app maakt sowieso natuurlijk altijd opnames die een bepekte tijd worden bewaard vanwege de omvang van de opslag op de MicroSDCard. is de kaart vol, dan gaan de oudste opnames eraf. Maar wanneer je zelf een opname initieert dan blijft deze opname altijd ‘beveiligd’ op de MicroSDCard bewaard.
Het programmeren van de knop voor aanzetten van de camera voor beveiligde (niet-wisbare) opnames) gaat zo: Je gebruikt hiervoor de schermrotatieknop op het stuurwiel. Druk deze knop 5 seconden totdat het grote LCD scherm je de keuze geeft wat je wilt verbinden aan deze knop. Ik heb daarvoor dus voor video opname gekozen.
Als je opnames vanaf de opslaglocatie wilt kopiëren kan dat het gemakkelijkst naar een USB drive doen via de bestandsbeheer app van de BYD software. gewoon kopiëren van MicroSDCard/DCIM/… en naar USB/… plakken zoals op je telefoon.
Dat was het! Veel plezier met je dashcam in de BYD Atto 3.
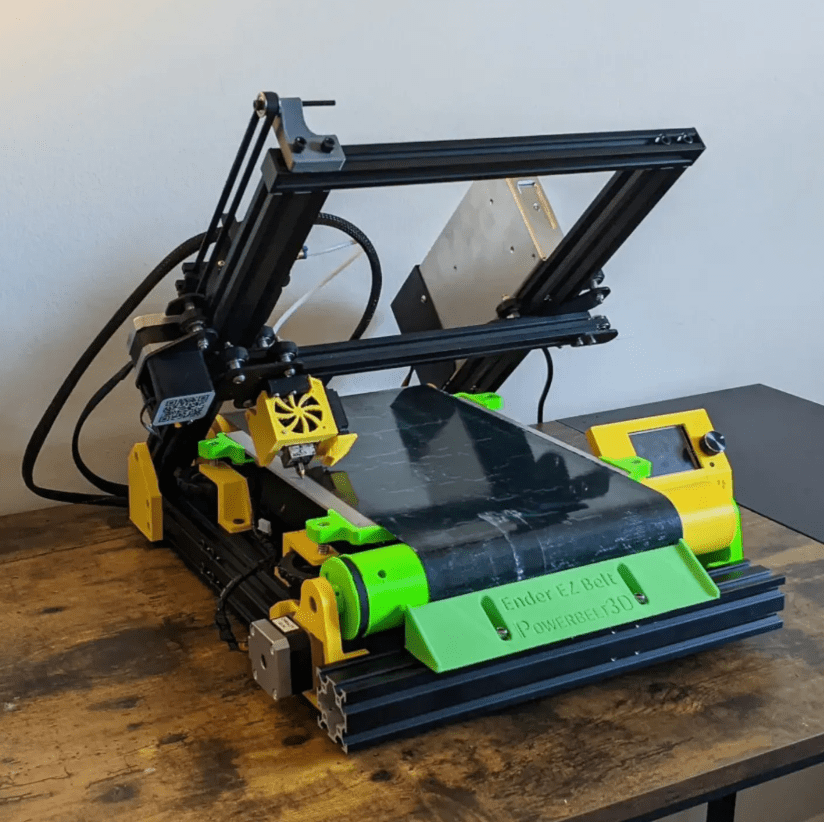
All of the hardware like frame parts, extruder, hotend, motherboard, steppers, teethed wheels and -belts, bearings, nuts and bolts are available.
I will go with a Duet2wifi board, since this is known to me and I like the Duet’s web interface a lot. An ESP32 camera will be added to the build and this will also be integrated into the Duet’s Web interface, as with all my other printers.
TO BE SOURCED:
I will need to source a good 24V PSU but I may go with an external one for this build, to start with.
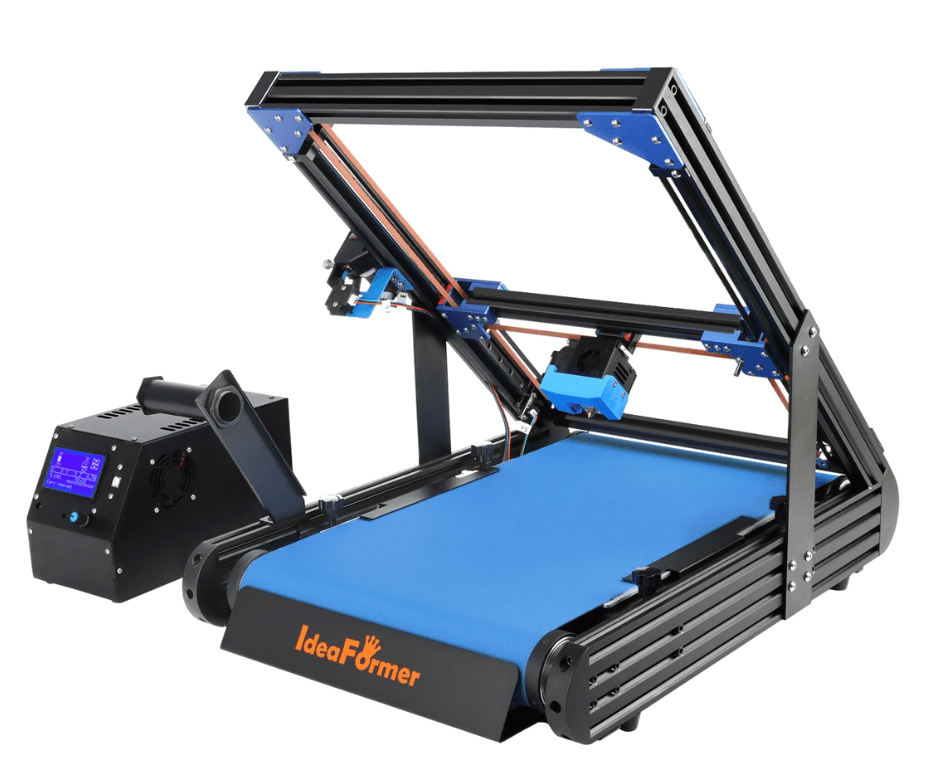
The belt and corresponding heated bed have veen ordered from Ali, I chose an Ideaformer belt , 320mm wide, 1.3 mm thick and a perimeter of 1180mm.


 Picture dates from 2007
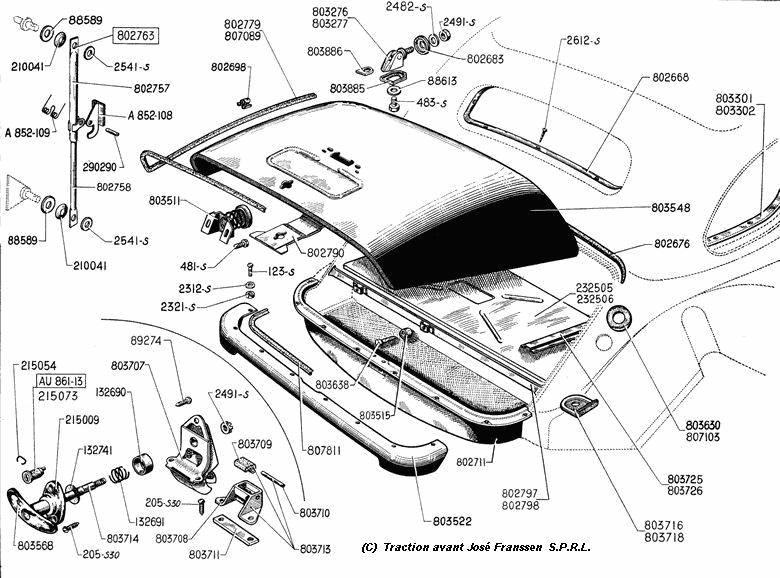


 Daarna bleek dat de kabel voor de dashcam gewoon netjes gemonteerd aanwezig is. Rechts op onderstaande foto kun je nog net het montagevoetje van de Garmin mini dashcam zien. Het blauwe losse stekkertje met gele vlakje is de stekker voor de originele BYD dashcam .