FASTLED_clock_ALL_feed_V6_2023_01_22_FINAL_ONLY_CLOCK DOWNLOAD ARDUINO PROGRAM FILE
FASTLED_clock_ALL_feed_V6_2023_01_22_FINAL_ONLY_CLOCK DOWNLOAD ARDUINO PROGRAM FILE
Uiteindelijk kan ik de gebruikerservaringen van mijn BYD Atto3 delen, na 8000 kilometers en 6 maanden gebruik.
Van mijn oorspronkelijke lijst met UPS en DOWNS is veel gewoon blijven staan. De zelfdenkende ruitenwisser zit er gewoon niet op en de dashcam ook niet. Maar- die heb ik inmiddles lekker wel, gewoon bij AliExpress een originele BYD dashcam besteld en gemonteerd, lees HIER! Wat de ruitenwisser betreft heb ik inmiddels besloten dat ik dat ook zelf ga oplossen..
Android auto werkt in de Atto 3 perfect!
Mijn wagen (eerste lichting) heeft geen trekhaak homologatie MAAR voor gebruik met een fietsdrager is de oplossing bij Burghof trekhaken gevonden.
Mogelijk krijgen toekomstige ATTO 3 typen wel gelijk de trekhaak met een trekgewicht op het geboortekaartje van de wagen bijgeschreven. Zoals het er nu (september 2023) voor staat lijkt het niet zomaar op de oorspronkelijke versie van de Atto 3 te komen omdat volgens de RDW de chassisbalken aan de achterkant van de auto niet voldoende sterk aan het middendeel van de carrosserie zijn bevestigd. En mogelijk ook gemaakt zijn van onvoldoende dik en/of geprofileerde kokerbalken.
De ervaringen:
De wagen rijdt, veert, stuurt en remt naar mijn mening prima.
Zoals bij alle EV’s is het batterijpakket sneller leeg bij koud weer dan bij gemiddeld 20 graden. Dat heb ik duidelijk gemerkt deze winter omdat ik maar zo’n 320 kilometer ver kon komen met de volle accu. Terwijl ik nooit harder rijd dan 105 km/h maar wel altijd snelweg rijd.
Nu het gemiddeld 11-14 graden is merk ik dat ik net iets zuiniger rijd dan de WLTP schatting van 420 km op een volle tank van ruim 60Kwh. De meter op het dashboard geeft een verbruik van ca 14kwH per 100 km aan en ik rijd voornamelijk snelweg met 95 kmH maximale snelheid. Vaak plak ik met de ACC aan achter een voorligger die ca 96km/h rijd en dat is heel relaxed rijden. De ACC houd ik daarbij op 3 streepjes afstand.
Snelladen doe ik meestal bij Fastned en bij ca 20- 50% lege tank.
Dan is de accu in 20-25 minuten weer op +40-45% capaciteit.
De Atto3 laadt dan met 88kW ca 25 -30 kW bij in die 20-25 minuten en daarmee kun je weer ca 150-200 km rijden (mits rustig aan).
En terwijl de auto bijlaad heb ik ook wel weer behoefte aan koffie, dus gaat de laad-/ koffietijd weer snel voorbij.
Deze formule werkt voor ons reis- en rijpatroon prima. Lijkt een beetje op vakantie met de motor, waar ik elke 200 km even de benen moet strekken en gelijk de tank volgooi.
Opmerkingen bij gebruik van de BYD Atto 3:
Over het gebruik van de wagen heb ik inmiddels wel wat opmerkingen:
Lane assist: Dit werkt op secundaire binnenwegen vaak niet echt bruikbaar. De wagen blijft ‘zoeken’ tussen de linker- en rechter kant van de langsstrepen en stuurt steeds met schokjes bij. Dat levert continue bijsturen op, niet te vergelijken met normaal handmatig sturen. Deze functie zet ik dus steeds uit wanneer ik de cruise control gebruik buiten de rechte wegen en de snelwegen.
Open dak: Onbruikbaar met geheel geopend dak, dit werkt alleen onder 80 km/h. Het geraas van de wind zorgt voor een dusdanige last dat het dak bij mijn dan altijd dicht blijft. Zelfs op de kierstand met het dakje iets omhoog in de eerste automatische stand is het boven 80 km/h ondoenlijk qua herrie, zeker met tegenwind of gedeeltelijke tegen/zijwind. De navigatie en radio zijn i.i.g. dan niet meer goed te gebruiken.
Automatische stuurcorrecties: Het was erg wennen, zeker dat het niet uit te schakelen is behalve elke rit opnieuw uitschakelen. De stuurcorrecties zijn zoals ik heb gemerkt gebaseerd op reguliere wegen, met reguliere wegbelijning. Op N-wegen in Nederland bestaan in onze omgeving (o.a. Kamerik, Kockengen enz.) wegen zonder middenstreep en onderbroken zijstrepen. Als het verkeer op beide rijstroken zich aan de zijstrepen houdt kom je in botsing met elkaar, vanwege de beperkte wegbreedte. Dus moet je net over de onderbroken strepen rijden, aan de rechterkant daarvan dus. Dan kun je normaal langs de tegenligger rijden. De wagen kan hier niet mee om gaan en corrigeert hardnekkig in linkse bochten de wagen terug naar de linkerkant. Doordat het structureel door de wagen wordt gedaan ben ik er inmiddels aan gewend geraakt en schrik niet meer van deze correcties die ik direct weer corrigeer. Tegenliggers schrikken er overigens zoals ik kan zien onderweg wel erg van.
Navigatie: de ME-MAPS navigatie heeft geen geïntegreerde functie met laadpunten voor de wagen. Dat betekent dat ik op mijn telefoon moet zoeken naar (Fastned en/of Shell recharger) laadpunten, en dan deze op moet zoeken en als reisdoel moet instellen in de autonavigatie. Gemiste kans wat mij betreft. Als car android eindelijk beschikbaar is voor de BYD Atto3, gelijk maar alles overzetten vanaf de telefoon! NB: Apple carplay is wel beschikbaar voor de Atto3 maar ik heb nou eenmaal altijd Android phones. UPDATE 2023-04-16: De navigatie van de Atto heeft (inmiddels?) wel degelijk een mogelijkheid om te navigeren naar het dichtsbijzijnde laadpunt, instelbaar op capaciteit, zowel langs de route als op snelste bereikbaar. De laadpunten staan alleen niet in de route op het scherm. Je moet echt separaat zoeken. Met uitzondering wanneer je onder 50km laadbereik komt: Dan wil de navigatie je graag als voorstel naar het dichtstbijzijnde laadpunt navigeren.
Airco/verwarmingsfunctie: De warmtepomp verzorgt de airco/verwarming voor zowel het interieur als de accu. Los van de wat ongelukkig opgezette bediening met touch screen na touch screen voordat je gevonden hebt wat nodig is, blijken de instellingen niet te werken. Het instellen van een temperatuur leid niet tot het bereiken en vasthouden van die temperatuur en de instelling automatic werkt al helemaal niet automatisch. De knop ‘defrost’ werkt wel maar geen van de functieknoppen onthoud de eerdere gebruiks-instelling. Dat lijkt me erg vreemd. Ik ben onderweg continue aan het bijsturen tussen erg heet en erg koud. Pas na een half uur rijden kun je een min of meer stabiele temperatuur bereiken. Waarom niet gewoon een temperatuurknop die het doet? en een A/C knop die aan/uit aan kan zou ook beter zijn. Wat overigens in ons klimaat erg belangrijk is en echt in de Atto 3 niet mogelijk is : DE instelling van de voorruit fan en daarbij ook de ontvochtigingsknop aan/uit. Deze zijn er gewoon niet als knop of als setting. Wat je dan moet doen om dit wel te bedienen:: De defrost knop indrukken en daarna elke keer alles handmatig instellen. temperatuur, voeten en/of body beluchting: alles kan alleen maar aan of uit en de ventilator kan alleen maar voor alle 3 de uitstroomopties TEGELIJK worden ingesteld. Ik ervaar het als onwerkbaar.
Bij mijn eerdere auto’s was dit altijd beschikbaar, daarom begrijp ik niet wat hier aan de hand is: Heeft BYD ons vochtige en soms koude klimaat niet meegenomen in het ontwerp van de airco/warmtepomp bediening?
Het moet m.i met een software update op te lossen zijn, dus ik zal ook de importeur hierover informeren.
Nog een kleine extra opmerking over de warmte/koelinstallatie van de Atto3: : De temperatuur is niet instelbaar onder 16 graden, dan komt een LO in beeld. Terwijl ik graag in de winter in een auto rijd die binnenin de wagen 10-14 graden is. Dan houd ik lekker mijn jas aan en de wagen voelt bij vorst als het binnen 10 graden is ook lekker warm aan. No problem. Maar lager dan 16 graden is gewoon niet in te stellen.
UPDATE met software upgrade V1.4 van 18 september 2023: Er is verbetering: Fijne oplossing zit er nu in want je kan nu zelf de combinatie van lucht schakelen met elke combinatie van uitstroom op 1) de voorruit, 2) in de cabine en /of 3) naar je voeten!! Temperatuur vasthouden is nu ook beter geworden. Of onderstaand probleem inmiddels ook is opgelost weet ik nog niet, dat volgt nog.
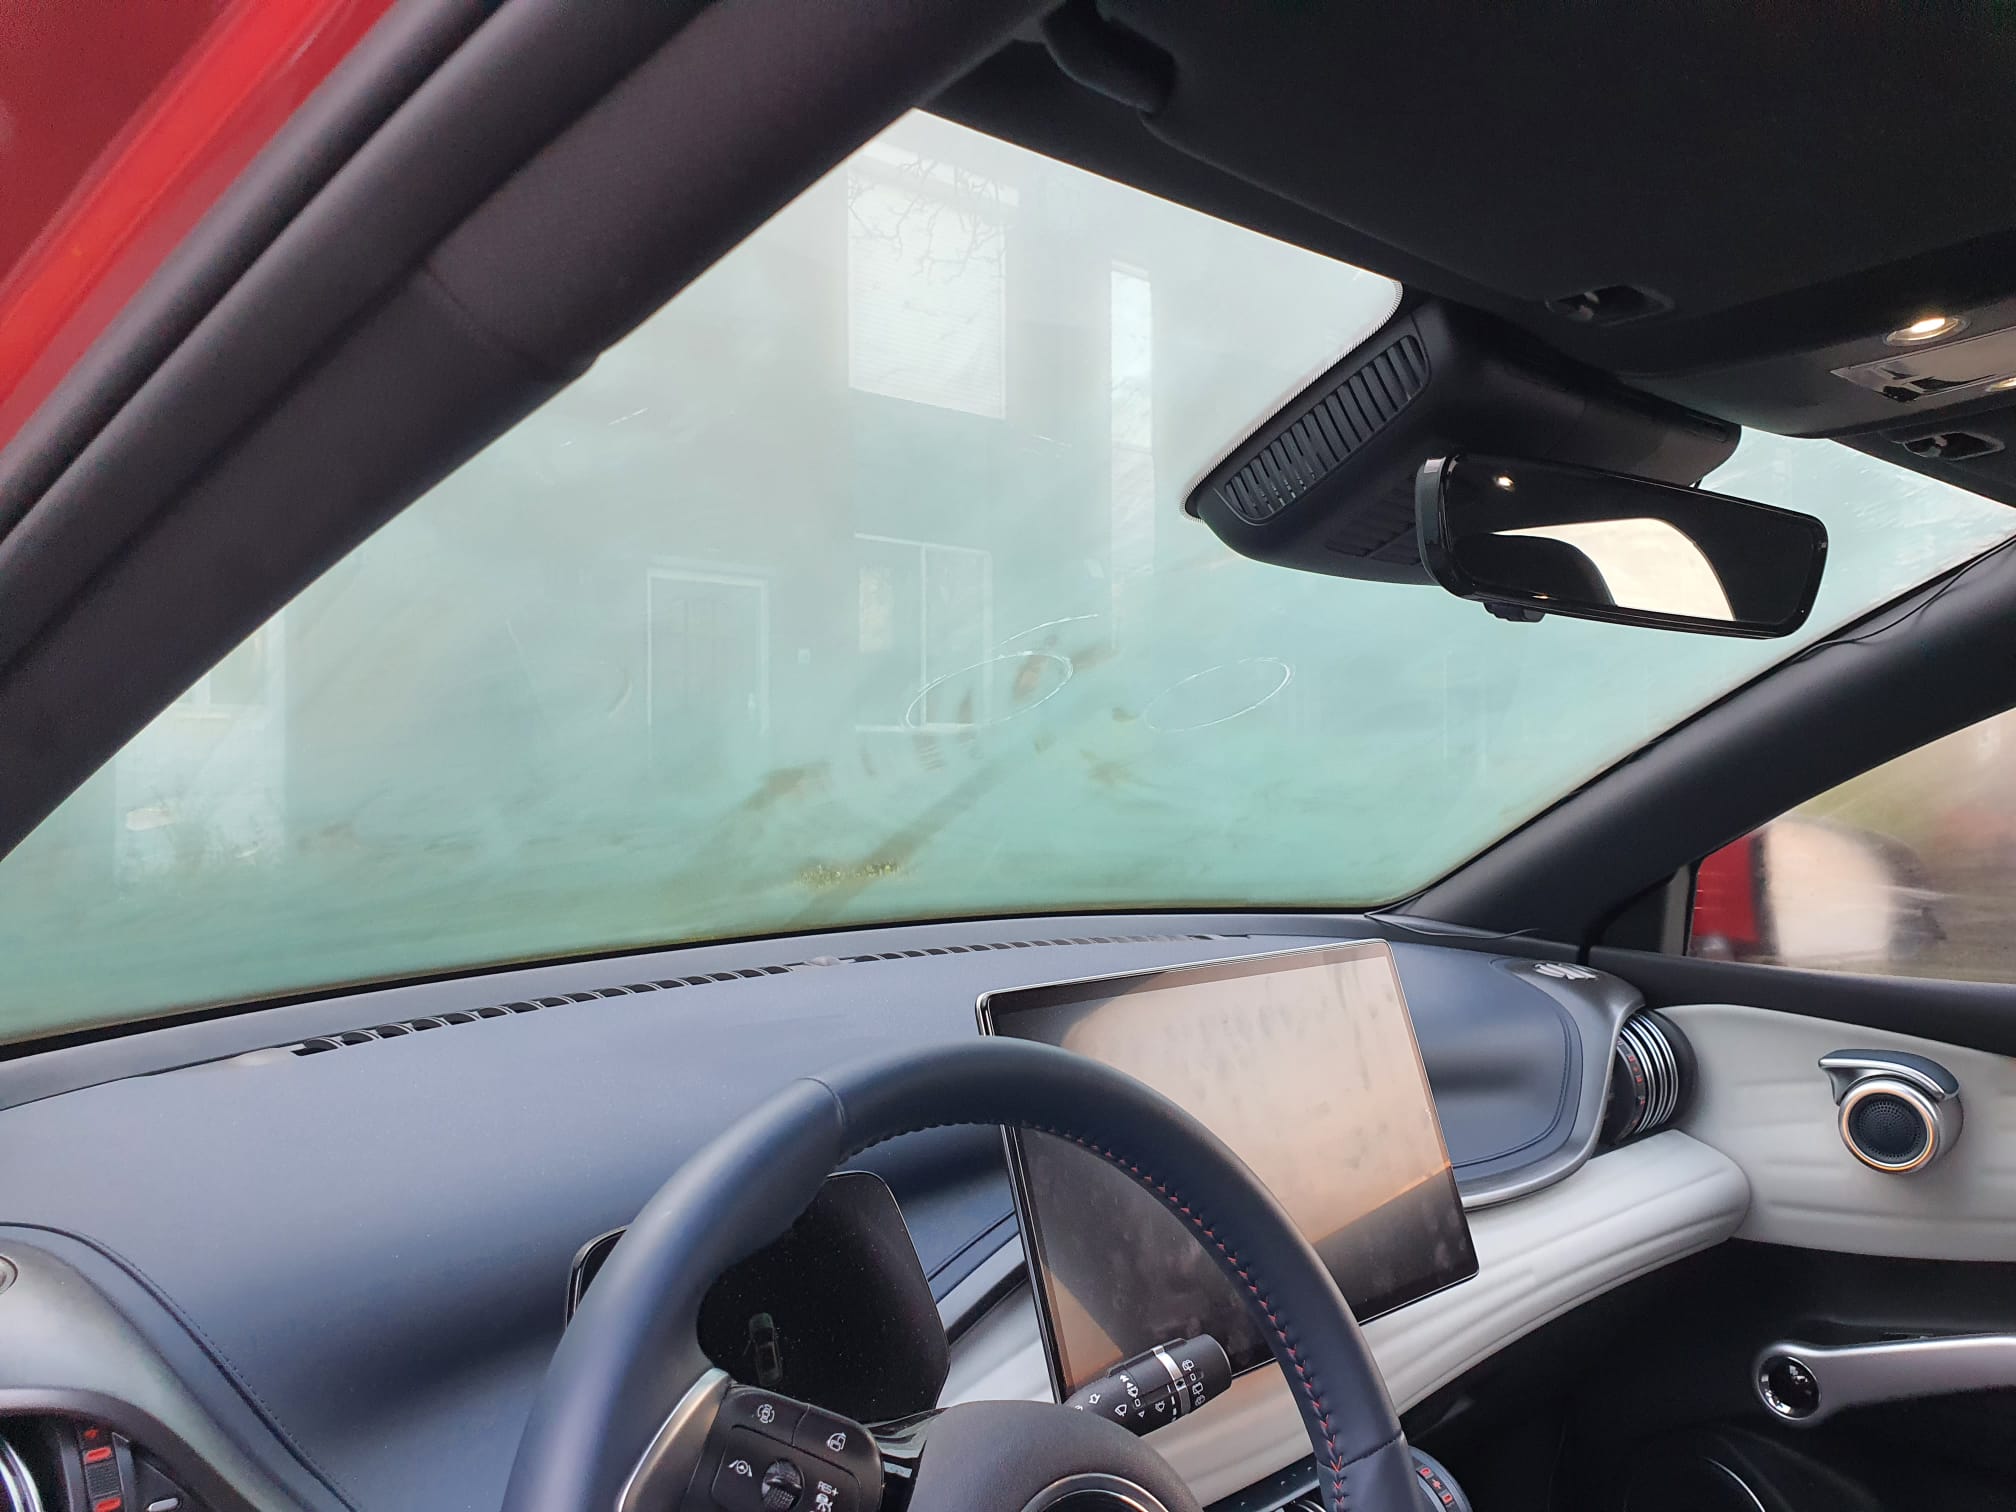
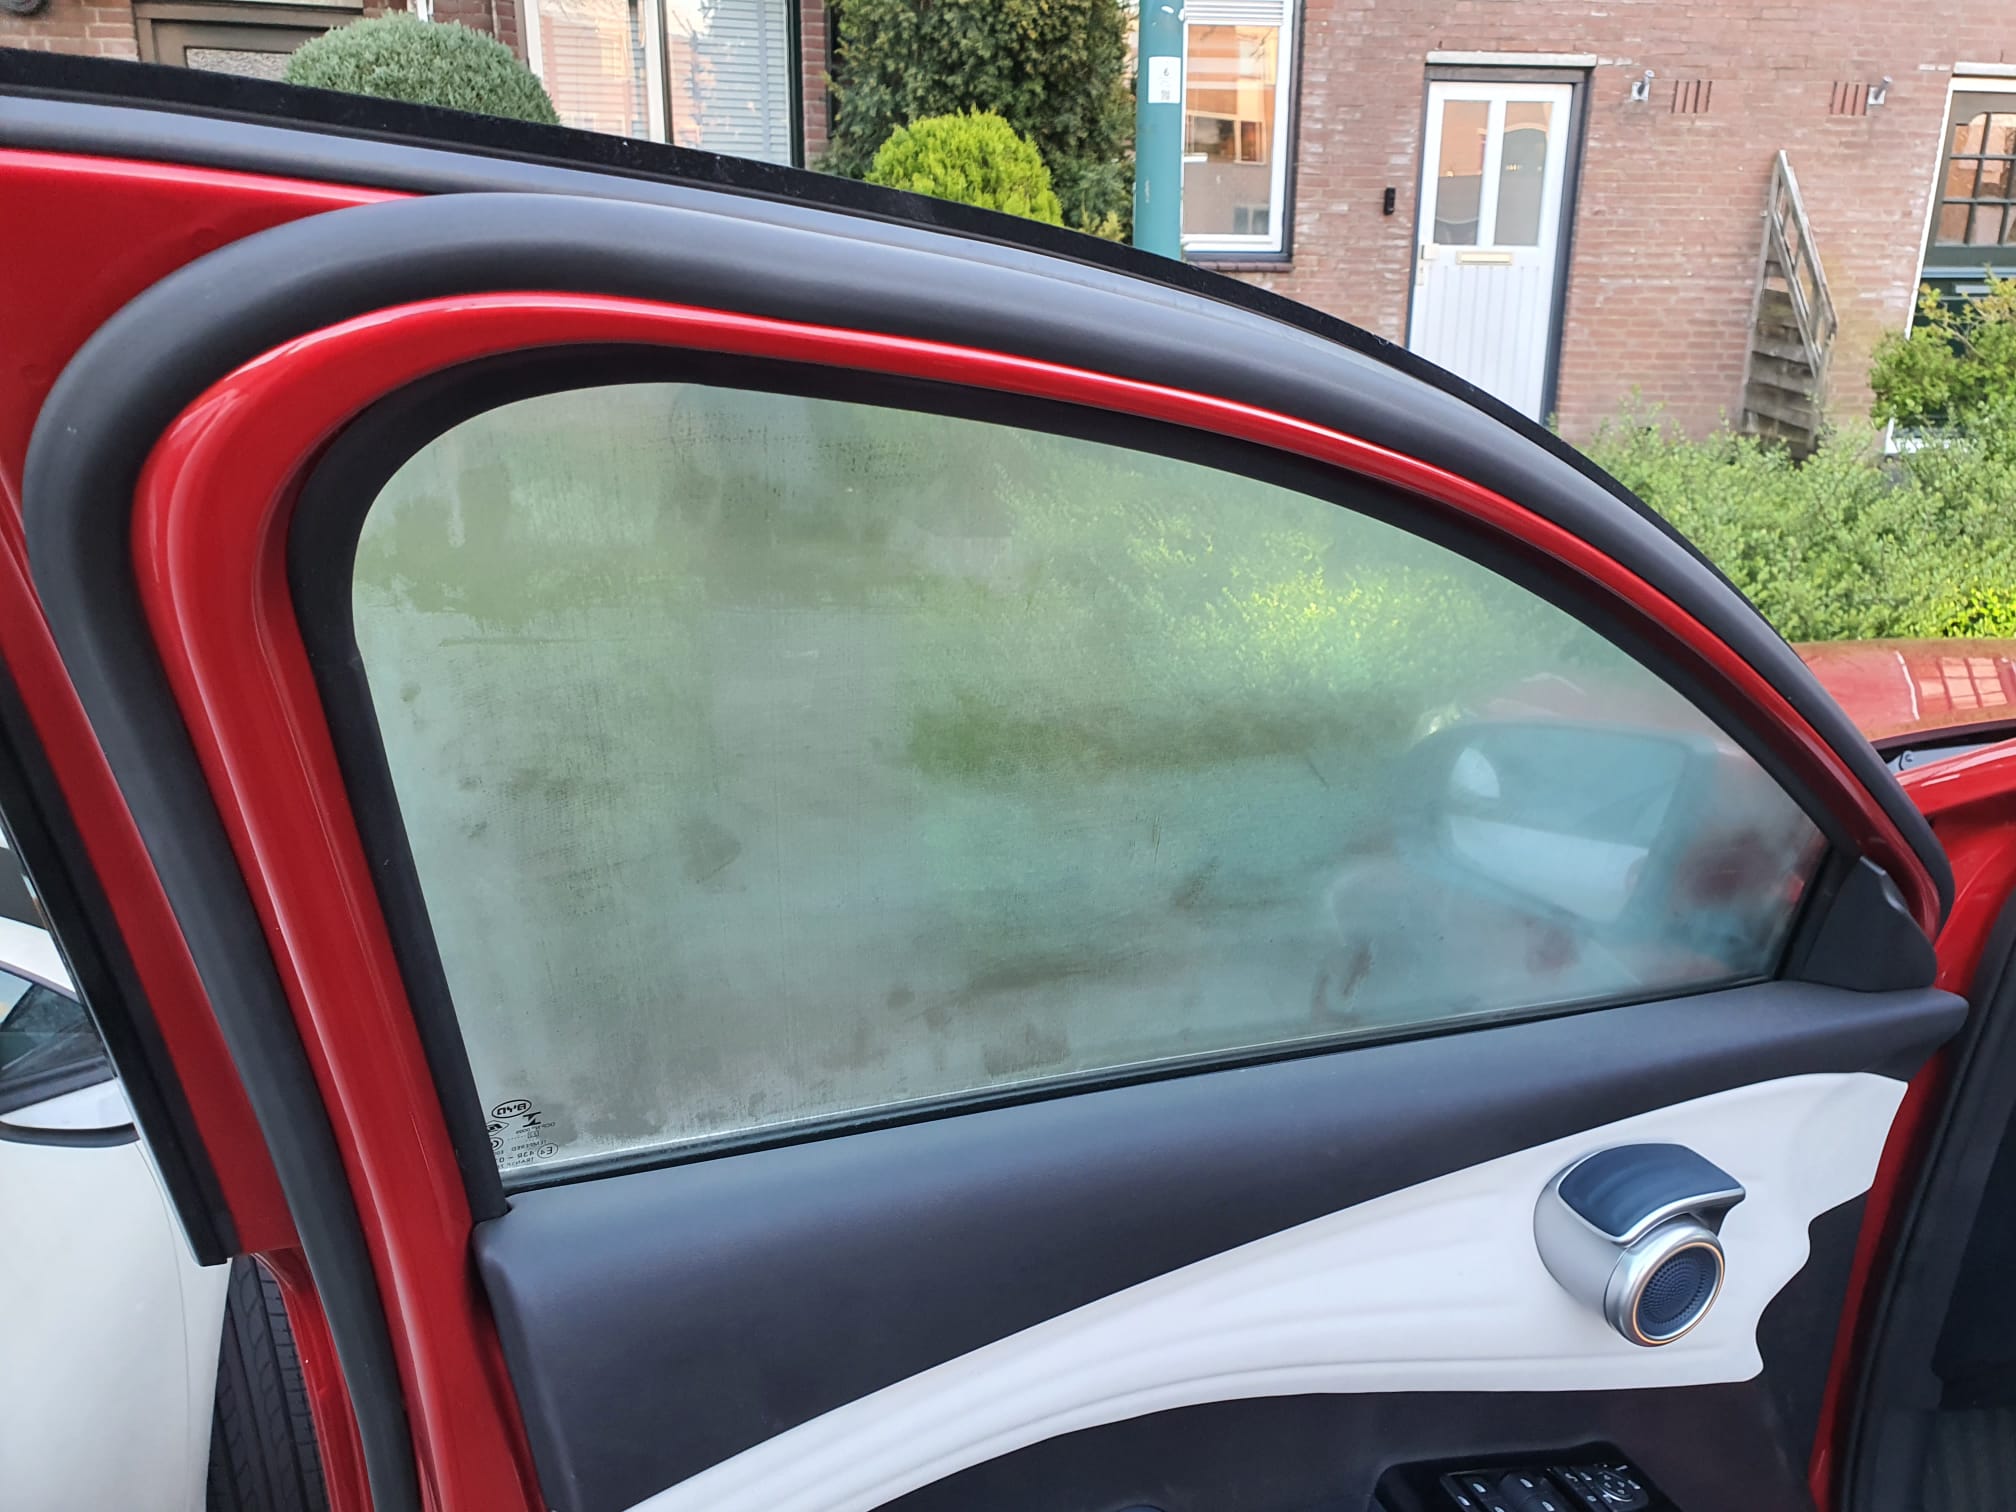
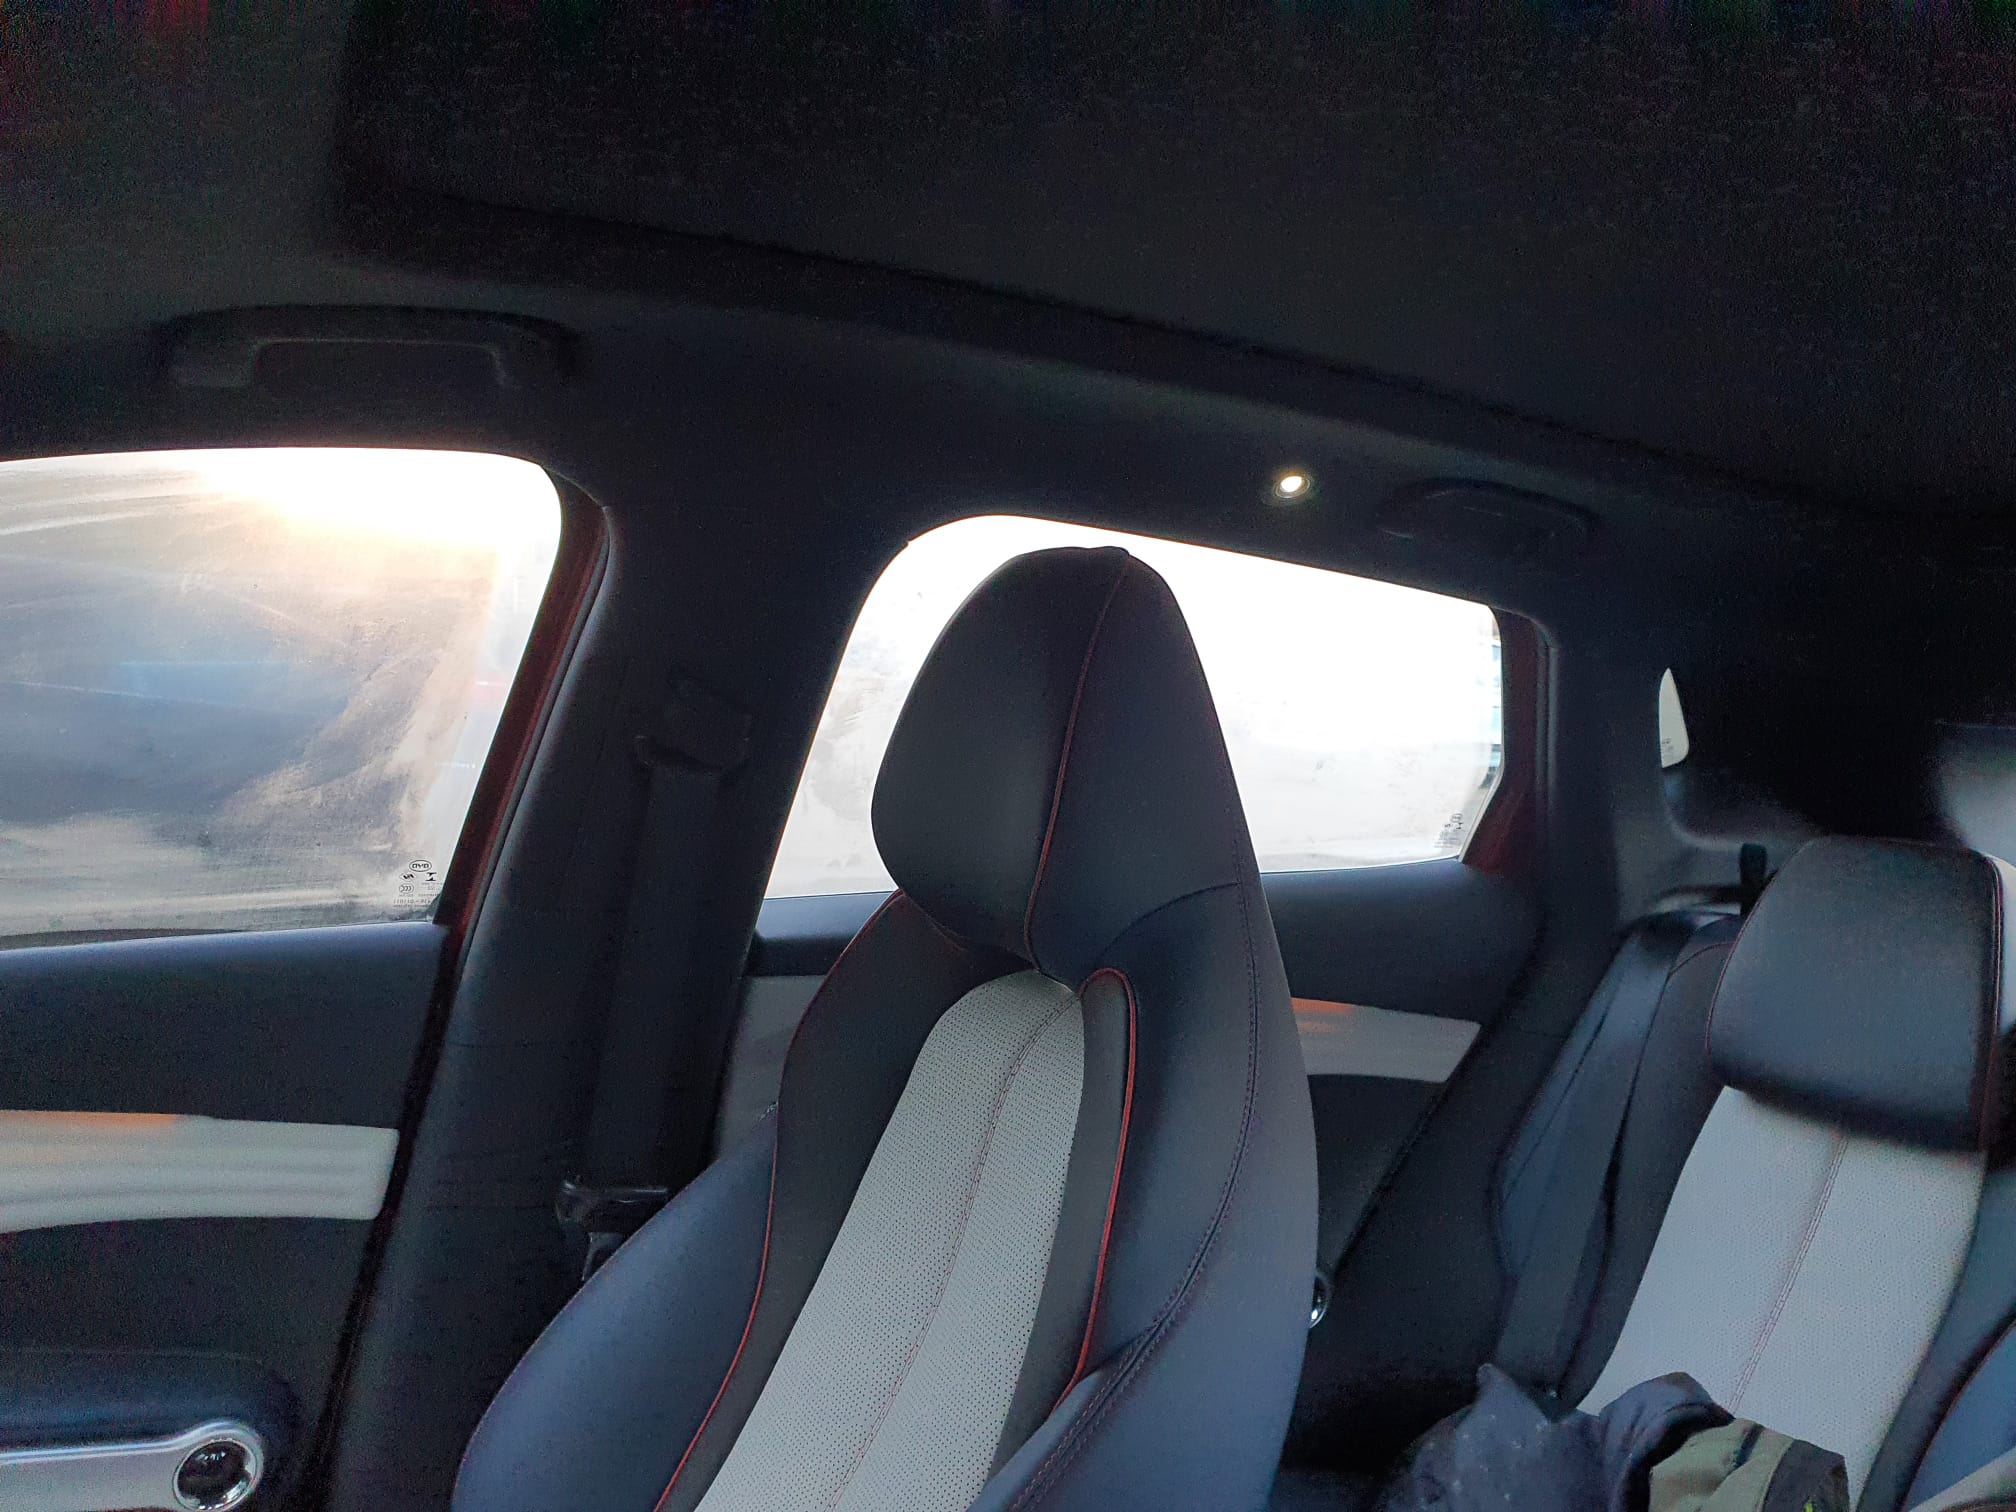
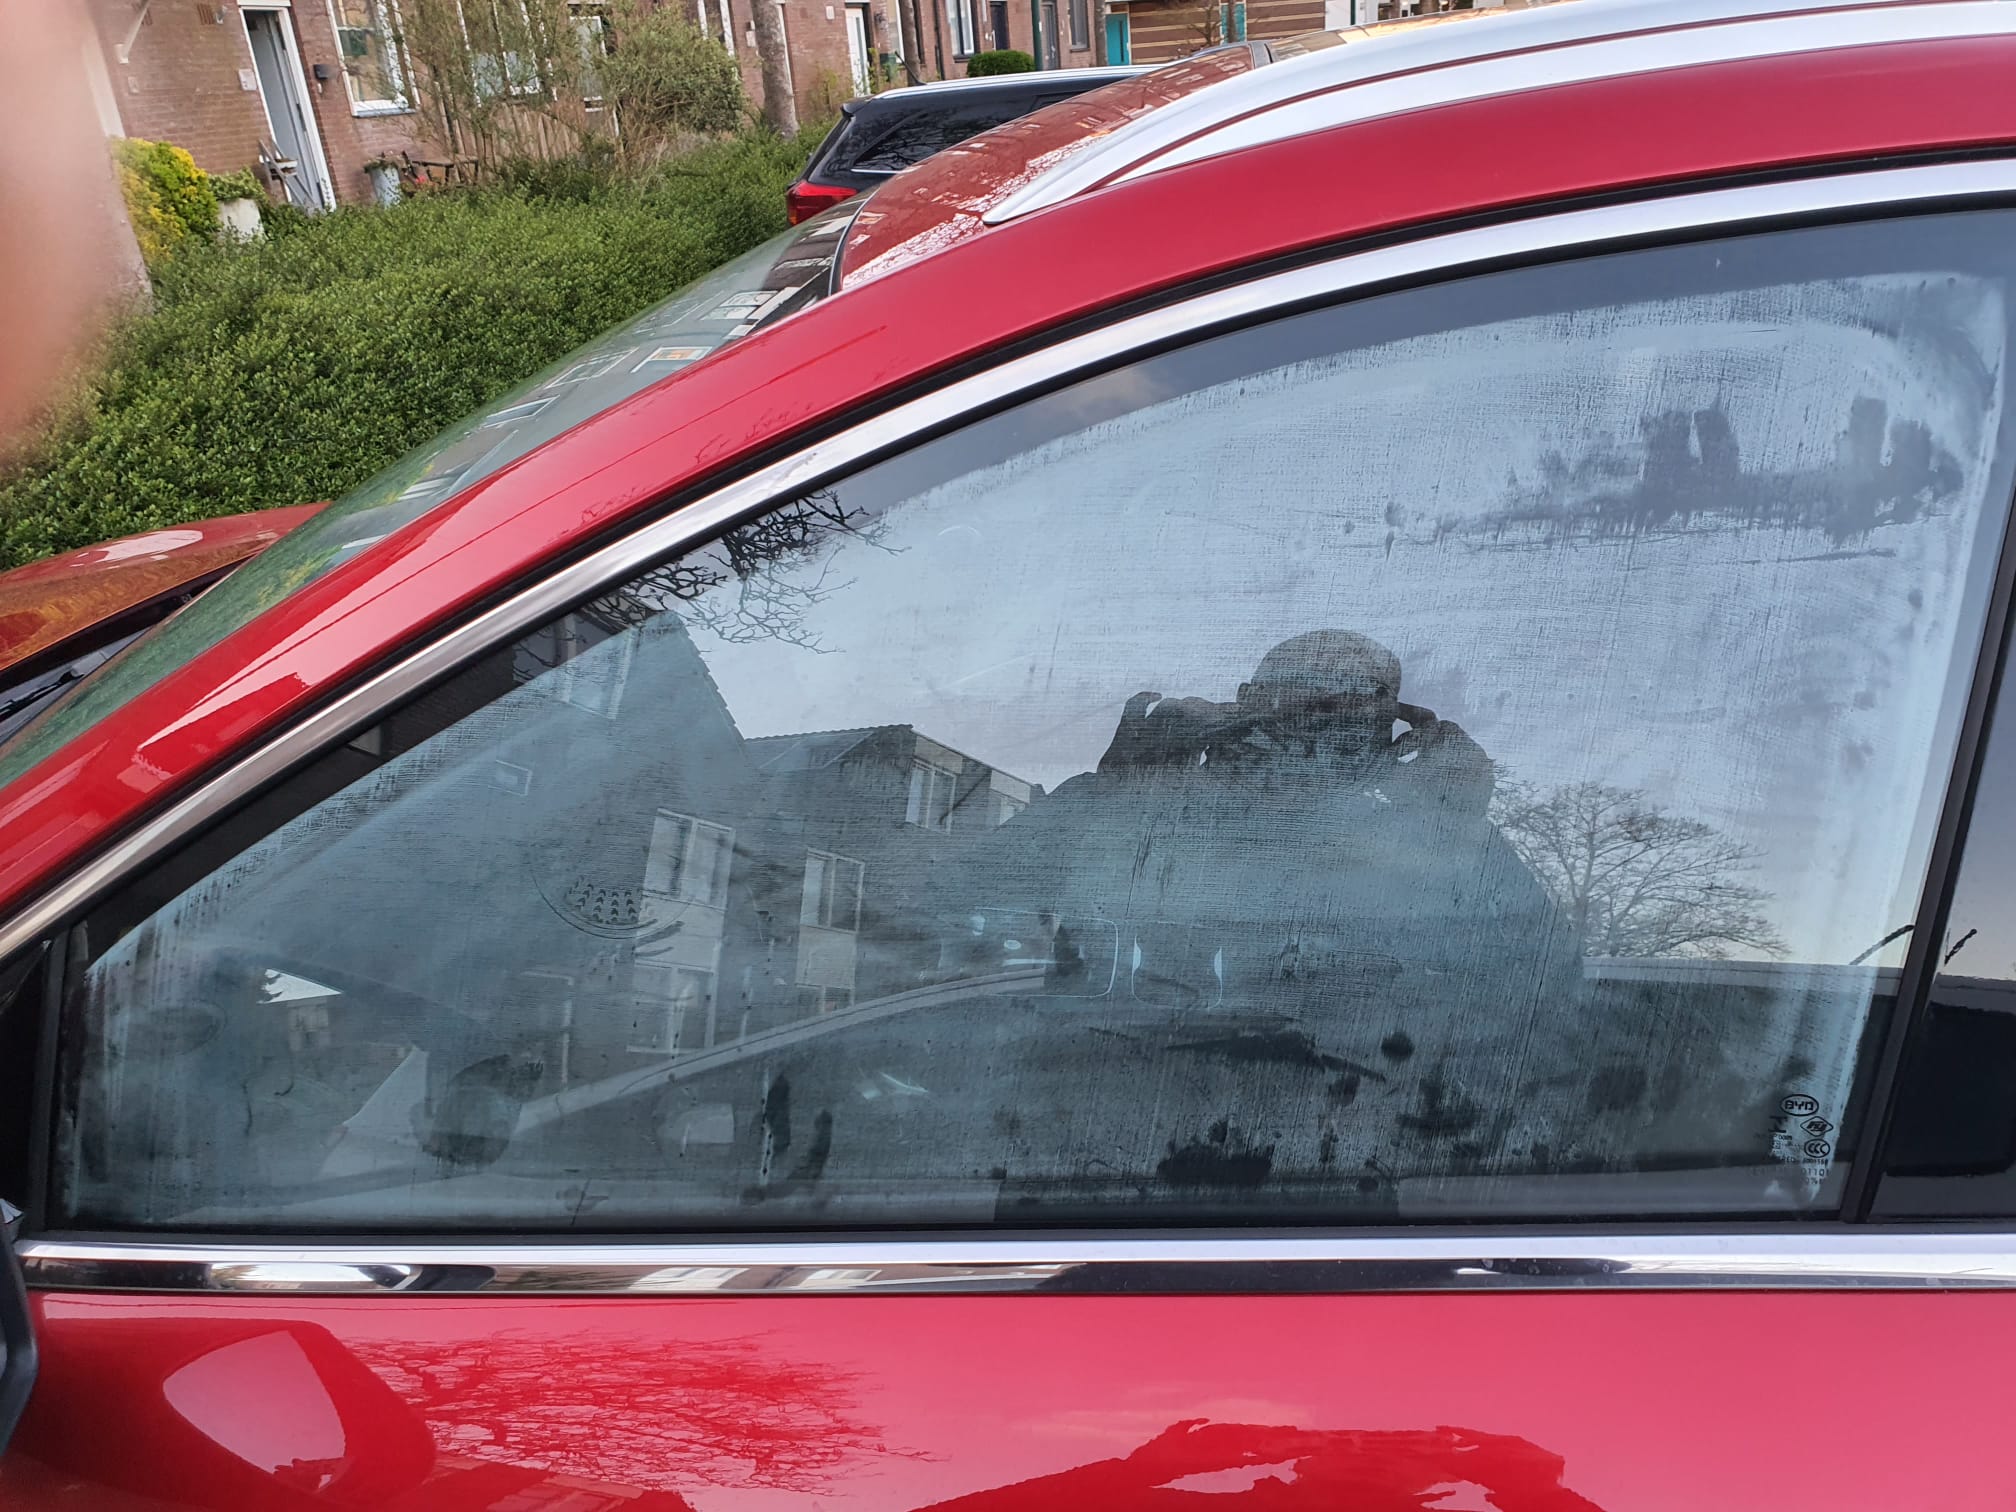
Nawoord over de airco: Na een rit van een uur parkeer ik de auto en als ik dan ’s morgens na 5-10 minurten bij ca 10 graden buiten kom is de gehele autio beslagen, en het duurt best lang voordat je dan weer rijlklaar bent. Dit is volgens BYD een bekend probleem dat oplosbaar is door bij het parkeren even 2x de auto op en van slot te doen. Heb ik geprobeerd maar lost het niet op bij mij. Zie de foto’s:
I added the timezone.lib plus arduino-additional code to the open-source code as GRA-AFCH made this for their IN-18 nixie clock with Arduino Mega : NixieClockShield_NCS318_V1_94_TZ.
This is a first version that works, but it might require some coding to be done, depending on where you live.
And THIS is HOW it works: The startup sequence is shown in the below video:
If you’re not in Western Europe, changing the timezone will be needed.
If I want to spend some more time on it, I can make it fully automated to work anywhere in the world and make the timezone setting done via the menu buttons, requires only a one time setting upon installation. Maybe later.
This 1ST version makes the NIXIE clock sync to UTC with the help of a to be connected standard GPS module . This was already in the code. Then, the clock changes to the correct time zone, including automatic shifting for summer- and wintertime!
In the code, I used the Western Europe timezone- and winter/summertime settings. Also, an example is given for a US timezone. Others can be derived from the examples that come with the newly added timezone.lib from https://github.com/JChristensen/Timezone
These are the available timezones:
// Australia Eastern Time Zone (Sydney, Melbourne)
TimeChangeRule aEDT = {“AEDT”, First, Sun, Oct, 2, 660}; // UTC + 11 hours
TimeChangeRule aEST = {“AEST”, First, Sun, Apr, 3, 600}; // UTC + 10 hours
Timezone ausET(aEDT, aEST);
// Moscow Standard Time (MSK, does not observe DST)
TimeChangeRule msk = {“MSK”, Last, Sun, Mar, 1, 180};
Timezone tzMSK(msk);
// Central European Time (Frankfurt, Paris)
TimeChangeRule CEST = {“CEST”, Last, Sun, Mar, 2, 120}; // Central European Summer Time
TimeChangeRule CET = {“CET “, Last, Sun, Oct, 3, 60}; // Central European Standard Time
Timezone CE(CEST, CET);
// United Kingdom (London, Belfast)
TimeChangeRule BST = {“BST”, Last, Sun, Mar, 1, 60}; // British Summer Time
TimeChangeRule GMT = {“GMT”, Last, Sun, Oct, 2, 0}; // Standard Time
Timezone UK(BST, GMT);
// UTC
TimeChangeRule utcRule = {“UTC”, Last, Sun, Mar, 1, 0}; // UTC
Timezone UTC(utcRule);
// US Eastern Time Zone (New York, Detroit)
TimeChangeRule usEDT = {“EDT”, Second, Sun, Mar, 2, -240}; // Eastern Daylight Time = UTC – 4 hours
TimeChangeRule usEST = {“EST”, First, Sun, Nov, 2, -300}; // Eastern Standard Time = UTC – 5 hours
Timezone usET(usEDT, usEST);
// US Central Time Zone (Chicago, Houston)
TimeChangeRule usCDT = {“CDT”, Second, Sun, Mar, 2, -300};
TimeChangeRule usCST = {“CST”, First, Sun, Nov, 2, -360};
Timezone usCT(usCDT, usCST);
// US Mountain Time Zone (Denver, Salt Lake City)
TimeChangeRule usMDT = {“MDT”, Second, Sun, Mar, 2, -360};
TimeChangeRule usMST = {“MST”, First, Sun, Nov, 2, -420};
Timezone usMT(usMDT, usMST);
// Arizona is US Mountain Time Zone but does not use DST
Timezone usAZ(usMST);
// US Pacific Time Zone (Las Vegas, Los Angeles)
TimeChangeRule usPDT = {“PDT”, Second, Sun, Mar, 2, -420};
TimeChangeRule usPST = {“PST”, First, Sun, Nov, 2, -480};
Timezone usPT(usPDT, usPST);
Be aware,the way I did this is a Q&D method since i have just hacked this into an existing piece of code, and only do a rewrite of the RTC’s original time after every sync to GPS with the new timezone and winter/summer time rules, so RTC will then become the new local time, either summer- or wintertime.
Since the time and applying the rules of timezone+ winter/summertime is continuously refreshed, not just the time is very stable, but also the changes between winter- and summertime and vice versa are automated.
The required arduino libraries are on the GRA-AFCH Github pagine:
https://github.com/afch/NixieClock
OR-just download the zipped Libraries from our website.
It works really well, please see the zipped file here or copy/paste the arduino code below (you will need some additional files than can only be retreived from the zip-file below, though).
NixieClockShield_NCS318_V1_94_TZ.ino
const String FirmwareVersion = “0196TZ”;
const char HardwareVersion[] PROGMEM = {“NCS318/568 FW 1.94TZ 2021_04_04 Jantec.nl add-on for Timezones for HW 1.x HV5122 or HV5222”};
//// This ‘TZ’ firmware addition delivers automated Summer/Winter time changes based on your local time zone settings ////
//// Jantec.nl 2023-04-04 The Netherlands, Amsterdam. Please share and re-use! ////
//// This can and may be used in any CLOCK program, with possibly specific minor alteration, due to different libraries and do on ////
//// All of my add-ons are specified in the code! Cheers, Jantec.nl, NL ////
//// The approach here is to automatically change the EEPROM hours setting according to the SUMMER/WINTER timecheme ////
//// meaning: Put in the register: a) the time zone (=normal winter time) versus UTC and b) at the switching times the summer ‘+1’ change versus ‘normal’wintertime ///
//// If the user changes the hours setting, this will be overruled at every programmed time change related to summer/ winter time
//Format _X.XXX_
//NIXIE CLOCK SHIELD NCS318/568 for HW 1.x by GRA & AFCH (fominalec@gmail.com)
//1.94 26.02.2021
//Added: Сhecking the presence of a gps receiver when turned on.
//Return to the previous gps parser
//1.92 21.01.2021
//Added: defines for GPS receiver types
//1.91 29.07.2020
//The driver has been changed to support BOTH HV5122 and HV5222 registers (switching using resistor R5222 Arduino pin No. 8)
//1.90 08.06.2020
//Fixed: GPS timezone issue: added breakTime(now(), tm) to adjustTime function at Time.cpp
//1.89 03.04.2020
//Dots sync with seconds
//1.88 26.03.2020
//GPS synchronization algorithm has been changed (again)
//1.86 23.02.2020
//GPS synchronization algorithm changed
//1.85.3 23.02.2020
//Added: DS3231 internal temperature sensor self test: 5 beeps if fail.
//1.85.2 21.02.2020
//Fixed: Bug with time zones more than +-9
// GPS parser has been replaced by NEOGPS
//1.85.1 05.01.2020
//Value of “HardwareVersion” was changed to NCS318/568
//1.85 14.06.2019
//indication is working inside interrupt (only for Arduino Mega), driver v1.3 is required
//Added: support programmable leds ws2812b
//Some performance optimizations
//1.84 08.04.2018
//LEDs functions moved to external file
//LEDs freezing while music (or sound) played.
//SPI Setup moved driver’s file
//1.83 02.08.2018 (Driver v 1.1 is required)
//Fixed: Temp. reading speed fixed
//Fixed: Dots mixed up (driver was updated to v. 1.1)
//Fixed: RGB LEDs reading from EEPROM
//Fixed: Check for entering data from GPS in range
//1.82 18.07.2018 Dual Date Format
//1.81 18.02.2018 Temp. sensor present analyze
//1.80 06.08.2017
//Added: Date and Time GPS synchronization
//1.70 30.07.2017
//Added IR remote control support (Sony RM-X151) (“MODE”, “UP”, “DOWN”)
//1.60 24_07_2017
//Added: Temperature reading mode in menu and slot machine transaction
//1.0.31 27_04_2017
//Added: antipoisoning effect – slot machine
//1.021 31.01.2017
//Added: time synchronizing each 10 seconds
//Fixed: not correct time reading from RTC while start up
//1.02 17.10.2016
//Fixed: RGB color controls
//Update to Arduino IDE 1.6.12 (Time.h replaced to TimeLib.h)
//1.01
//Added RGB LEDs lock(by UP and Down Buttons)
//Added Down and Up buttons pause and resume self testing
//25.09.2016 update to HW ver 1.1
//25.05.2016
//#define tubes8
#define tubes6
//#define tubes4
#include <SPI.h>
#include <Wire.h>
#include <ClickButton.h>
#include <TimeLib.h>
#ifndef GRA_AND_AFCH_TIME_LIB_MOD
#error The “Time (TimeLib)” library modified by GRA and AFCH must be used!
#endif
//// THIS IS NEW, related to TIMEZONE add-on:
#include <Timezone.h>//https://github.com/JChristensen/Timezone
//Central European Time (Frankfurt, Paris)
TimeChangeRule myDST = {“CEST”, Last, Sun, Mar, 26, 120}; //Central European Summer Time//Daylight time = UTC +2 hours
TimeChangeRule mySTD = {“CET “, Last, Sun, Oct, 3, 60}; //Central European Standard Time (Winter)//Daylight time = UTC +1 hour
Timezone myTZ(myDST, mySTD);
//ADD AND REPLACE THE ABOVE FOR ANY OTHER REQUIRED TIMEZONE FROM THE EXAMPLES IN JChistensen’s exaples folders
// US Eastern Time Zone (New York, Detroit)
//TimeChangeRule myDST = {“EDT”, Second, Sun, Mar, 2, -240}; //Daylight time = UTC – 4 hours
//TimeChangeRule mySTD = {“EST”, First, Sun, Nov, 2, -300}; //Daylight time = UTC – 4 hours
//Timezone myTZ(myDST, mySTD);
TimeChangeRule *tcr; //pointer to the time change rule, use to get the TZ abbrev
time_t utc;
//// end of this add-on for TIMEZONE
#include <Tone.h>
#include <EEPROM.h>
#include “doIndication318_HW1.x.h”
#include <OneWire.h>
//IR remote control /////////// START /////////////////////////////
#if defined(__AVR_ATmega1280__) || defined(__AVR_ATmega2560__)
#define GPS_SYNC_INTERVAL 1800000 // in milliseconds
//#define GPS_SYNC_INTERVAL 180000 //3 minutes
unsigned long Last_Time_GPS_Sync = 0;
//bool GPS_Sync_Flag = false;
//uint32_t GPS_Sync_Interval=120000; // 2 minutes
uint32_t GPS_Sync_Interval = 60000; // first try = 1 minute
uint32_t MillsNow=0;
#define TIME_TO_TRY 60000 //1 minute
bool AttMsgWasShowed=false;
#define GPS_BUFFER_LENGTH 83
char GPS_Package[GPS_BUFFER_LENGTH];
byte GPS_position = 0;
struct GPS_DATE_TIME
{
byte GPS_hours;
byte GPS_minutes;
byte GPS_seconds;
byte GPS_day;
byte GPS_mounth;
int GPS_year;
bool GPS_Valid_Data = false;
unsigned long GPS_Data_Parsed_time;
};
GPS_DATE_TIME GPS_Date_Time;
#define PreZero(digit) ((abs(digit)<10)?”0″+String(abs(digit)):String(abs(digit)))
#include <IRremote.h>
int RECV_PIN = 4;
IRrecv irrecv(RECV_PIN);
decode_results IRresults;
// buttons codes for remote controller Sony RM-X151
#define IR_BUTTON_UP_CODE 0x6621
#define IR_BUTTON_DOWN_CODE 0x2621
#define IR_BUTTON_MODE_CODE 0x7121
class IRButtonState
{
public:
int PAUSE_BETWEEN_PACKETS = 50;
int PACKETS_QTY_IN_LONG_PRESS = 18;
private:
bool Flag = 0;
byte CNT_packets = 0;
unsigned long lastPacketTime = 0;
bool START_TIMER = false;
int _buttonCode;
public: IRButtonState::IRButtonState(int buttonCode)
{
_buttonCode = buttonCode;
}
public: int IRButtonState::checkButtonState(int receivedCode)
{
if (((millis() – lastPacketTime) > PAUSE_BETWEEN_PACKETS) && (START_TIMER == true))
{
START_TIMER = false;
if (CNT_packets >= 2) {
Flag = 0;
CNT_packets = 0;
START_TIMER = false;
return 1;
}
else {
Flag = 0;
CNT_packets = 0;
return 0;
}
}
else
{
if (receivedCode == _buttonCode) { Flag = 1;}
else
{
if (!(Flag == 1)) {return 0;}
else
{
if (!(receivedCode == 0xFFFFFFFF)) {return 0;}
}
}
CNT_packets++;
lastPacketTime = millis();
START_TIMER = true;
if (CNT_packets >= PACKETS_QTY_IN_LONG_PRESS) {
Flag = 0;
CNT_packets = 0;
START_TIMER = false;
return -1;
}
else {return 0;}
}
}
};
IRButtonState IRModeButton(IR_BUTTON_MODE_CODE);
IRButtonState IRUpButton(IR_BUTTON_UP_CODE);
IRButtonState IRDownButton(IR_BUTTON_DOWN_CODE);
#endif
int ModeButtonState = 0;
int UpButtonState = 0;
int DownButtonState = 0;
//IR remote control /////////// START /////////////////////////////
/*#define GPS_BUFFER_LENGTH 83
char GPS_Package[GPS_BUFFER_LENGTH];
byte GPS_position=0;
struct GPS_DATE_TIME
{
byte GPS_hours;
byte GPS_minutes;
byte GPS_seconds;
byte GPS_day;
byte GPS_mounth;
int GPS_year;
bool GPS_Valid_Data=false;
unsigned long GPS_Data_Parsed_time;
};
*/
//GPS_DATE_TIME GPS_Date_Time;
unsigned long GPS_Data_Parsed_time;
boolean UD, LD; // DOTS control;
byte data[12];
byte addr[8];
int celsius, fahrenheit;
#define RedLedPin 9 //MCU WDM output for red LEDs 9-g
#define GreenLedPin 6 //MCU WDM output for green LEDs 6-b
#define BlueLedPin 3 //MCU WDM output for blue LEDs 3-r
#define pinSet A0
#define pinUp A2
#define pinDown A1
//#define pinBuzzer 2
const byte pinBuzzer = 2; // pomenyal
#define pinUpperDots 12 //HIGH value light a dots
#define pinLowerDots 8 //HIGH value light a dots
#define pinTemp 7
bool RTC_present;
#define US_DateFormat 1
#define EU_DateFormat 0
//bool DateFormat=EU_DateFormat;
OneWire ds(pinTemp);
bool TempPresent = false;
#define CELSIUS 0
#define FAHRENHEIT 1
String stringToDisplay = “000000”; // Content of this string will be displayed on tubes (must be 6 chars length)
int menuPosition = 0;
// 0 – time
// 1 – date
// 2 – alarm
// 3 – 12/24 hours mode
// 4 – Temperature
// 5 – TimeZone* (Only for Ardiono Mega)
byte blinkMask = B00000000; //bit mask for blinkin digits (1 – blink, 0 – constant light)
int blankMask = B00000000; //bit mask for digits (1 – off, 0 – on)
byte dotPattern = B00000000; //bit mask for separeting dots (1 – on, 0 – off)
//B10000000 – upper dots
//B01000000 – lower dots
#define DS1307_ADDRESS 0x68
byte zero = 0x00; //workaround for issue #527
int RTC_hours, RTC_minutes, RTC_seconds, RTC_day, RTC_month, RTC_year, RTC_day_of_week;
#define TimeIndex 0
#define DateIndex 1
#define AlarmIndex 2
#define hModeIndex 3
#define TemperatureIndex 4
#define TimeZoneIndex 5
#define TimeHoursIndex 6
#define TimeMintuesIndex 7
#define TimeSecondsIndex 8
#define DateFormatIndex 9
#define DateDayIndex 10
#define DateMonthIndex 11
#define DateYearIndex 12
#define AlarmHourIndex 13
#define AlarmMinuteIndex 14
#define AlarmSecondIndex 15
#define Alarm01 16
#define hModeValueIndex 17
#define DegreesFormatIndex 18
#define HoursOffsetIndex 19
#define FirstParent TimeIndex
#define LastParent TimeZoneIndex
#define SettingsCount (HoursOffsetIndex+1)
#define NoParent 0
#define NoChild 0
//——————————-0——–1——–2——-3——–4——–5——–6——–7——–8——–9———-10——-11———12———13——-14——-15———16———17——–18———-19
// names: Time, Date, Alarm, 12/24, Temperature,TimeZone,hours, mintues, seconds, DateFormat, day, month, year, hour, minute, second alarm01 hour_format Deg.FormIndex HoursOffset
// 1 1 1 1 1 1 1 1 1 1 1 1 1 1 1 1 1 1 1 1
int parent[SettingsCount] = {NoParent, NoParent, NoParent, NoParent,NoParent,NoParent,1, 1, 1, 2, 2, 2, 2, 3, 3, 3, 3, 4, 5, 6};
int firstChild[SettingsCount] = {6, 9, 13, 17, 18, 19, 0, 0, 0, NoChild, 0, 0, 0, 0, 0, 0, 0, 0, 0, 0};
int lastChild[SettingsCount] = { 8, 12, 16, 17, 18, 19, 0, 0, 0, NoChild, 0, 0, 0, 0, 0, 0, 0, 0, 0, 0};
int value[SettingsCount] = { 0, 0, 0, 0, 0, 0, 0, 0, 0, EU_DateFormat, 0, 0, 0, 0, 0, 0, 0, 24, 0, 2};
int maxValue[SettingsCount] = { 0, 0, 0, 0, 0, 0, 23, 59, 59, US_DateFormat, 31, 12, 99, 23, 59, 59, 1, 24, FAHRENHEIT, 14};
int minValue[SettingsCount] = { 0, 0, 0, 12, 0, 0, 00, 00, 00, EU_DateFormat, 1, 1, 00, 00, 00, 00, 0, 12, CELSIUS, -12};
int blinkPattern[SettingsCount] = {
B00000000, //0
B00000000, //1
B00000000, //2
B00000000, //3
B00000000, //4
B00000000, //5
B00000011, //6
B00001100, //7
B00110000, //8
B00111111, //9
B00000011, //10
B00001100, //11
B00110000, //12
B00000011, //13
B00001100, //14
B00110000, //15
B11000000, //16
B00001100, //17
B00111111, //18
B00000011, //19
};
bool editMode = false;
long downTime = 0;
long upTime = 0;
const long settingDelay = 150;
bool BlinkUp = false;
bool BlinkDown = false;
unsigned long enteringEditModeTime = 0;
bool RGBLedsOn = true;
#define RGBLEDsEEPROMAddress 0
#define HourFormatEEPROMAddress 1
#define AlarmTimeEEPROMAddress 2 //3,4,5
#define AlarmArmedEEPROMAddress 6
#define LEDsLockEEPROMAddress 7
#define LEDsRedValueEEPROMAddress 8
#define LEDsGreenValueEEPROMAddress 9
#define LEDsBlueValueEEPROMAddress 10
#define DegreesFormatEEPROMAddress 11
#define HoursOffsetEEPROMAddress 12
#define DateFormatEEPROMAddress 13
//buttons pins declarations
ClickButton setButton(pinSet, LOW, CLICKBTN_PULLUP);
ClickButton upButton(pinUp, LOW, CLICKBTN_PULLUP);
ClickButton downButton(pinDown, LOW, CLICKBTN_PULLUP);
///////////////////
Tone tone1;
#define isdigit(n) (n >= ‘0’ && n <= ‘9’)
//char *song = “MissionImp:d=16,o=6,b=95:32d,32d#,32d,32d#,32d,32d#,32d,32d#,32d,32d,32d#,32e,32f,32f#,32g,g,8p,g,8p,a#,p,c7,p,g,8p,g,8p,f,p,f#,p,g,8p,g,8p,a#,p,c7,p,g,8p,g,8p,f,p,f#,p,a#,g,2d,32p,a#,g,2c#,32p,a#,g,2c,a#5,8c,2p,32p,a#5,g5,2f#,32p,a#5,g5,2f,32p,a#5,g5,2e,d#,8d”;
char *song = “PinkPanther:d=4,o=5,b=160:8d#,8e,2p,8f#,8g,2p,8d#,8e,16p,8f#,8g,16p,8c6,8b,16p,8d#,8e,16p,8b,2a#,2p,16a,16g,16e,16d,2e”;
//char *song=”VanessaMae:d=4,o=6,b=70:32c7,32b,16c7,32g,32p,32g,32p,32d#,32p,32d#,32p,32c,32p,32c,32p,32c7,32b,16c7,32g#,32p,32g#,32p,32f,32p,16f,32c,32p,32c,32p,32c7,32b,16c7,32g,32p,32g,32p,32d#,32p,32d#,32p,32c,32p,32c,32p,32g,32f,32d#,32d,32c,32d,32d#,32c,32d#,32f,16g,8p,16d7,32c7,32d7,32a#,32d7,32a,32d7,32g,32d7,32d7,32p,32d7,32p,32d7,32p,16d7,32c7,32d7,32a#,32d7,32a,32d7,32g,32d7,32d7,32p,32d7,32p,32d7,32p,32g,32f,32d#,32d,32c,32d,32d#,32c,32d#,32f,16c”;
//char *song=”DasBoot:d=4,o=5,b=100:d#.4,8d4,8c4,8d4,8d#4,8g4,a#.4,8a4,8g4,8a4,8a#4,8d,2f.,p,f.4,8e4,8d4,8e4,8f4,8a4,c.,8b4,8a4,8b4,8c,8e,2g.,2p”;
//char *song=”Scatman:d=4,o=5,b=200:8b,16b,32p,8b,16b,32p,8b,2d6,16p,16c#.6,16p.,8d6,16p,16c#6,8b,16p,8f#,2p.,16c#6,8p,16d.6,16p.,16c#6,16b,8p,8f#,2p,32p,2d6,16p,16c#6,8p,16d.6,16p.,16c#6,16a.,16p.,8e,2p.,16c#6,8p,16d.6,16p.,16c#6,16b,8p,8b,16b,32p,8b,16b,32p,8b,2d6,16p,16c#.6,16p.,8d6,16p,16c#6,8b,16p,8f#,2p.,16c#6,8p,16d.6,16p.,16c#6,16b,8p,8f#,2p,32p,2d6,16p,16c#6,8p,16d.6,16p.,16c#6,16a.,16p.,8e,2p.,16c#6,8p,16d.6,16p.,16c#6,16a,8p,8e,2p,32p,16f#.6,16p.,16b.,16p.”;
//char *song=”Popcorn:d=4,o=5,b=160:8c6,8a#,8c6,8g,8d#,8g,c,8c6,8a#,8c6,8g,8d#,8g,c,8c6,8d6,8d#6,16c6,8d#6,16c6,8d#6,8d6,16a#,8d6,16a#,8d6,8c6,8a#,8g,8a#,c6″;
//char *song=”WeWishYou:d=4,o=5,b=200:d,g,8g,8a,8g,8f#,e,e,e,a,8a,8b,8a,8g,f#,d,d,b,8b,8c6,8b,8a,g,e,d,e,a,f#,2g,d,g,8g,8a,8g,8f#,e,e,e,a,8a,8b,8a,8g,f#,d,d,b,8b,8c6,8b,8a,g,e,d,e,a,f#,1g,d,g,g,g,2f#,f#,g,f#,e,2d,a,b,8a,8a,8g,8g,d6,d,d,e,a,f#,2g”;
#define OCTAVE_OFFSET 0
char *p;
int notes[] = { 0,
NOTE_C4, NOTE_CS4, NOTE_D4, NOTE_DS4, NOTE_E4, NOTE_F4, NOTE_FS4, NOTE_G4, NOTE_GS4, NOTE_A4, NOTE_AS4, NOTE_B4,
NOTE_C5, NOTE_CS5, NOTE_D5, NOTE_DS5, NOTE_E5, NOTE_F5, NOTE_FS5, NOTE_G5, NOTE_GS5, NOTE_A5, NOTE_AS5, NOTE_B5,
NOTE_C6, NOTE_CS6, NOTE_D6, NOTE_DS6, NOTE_E6, NOTE_F6, NOTE_FS6, NOTE_G6, NOTE_GS6, NOTE_A6, NOTE_AS6, NOTE_B6,
NOTE_C7, NOTE_CS7, NOTE_D7, NOTE_DS7, NOTE_E7, NOTE_F7, NOTE_FS7, NOTE_G7, NOTE_GS7, NOTE_A7, NOTE_AS7, NOTE_B7
};
int fireforks[] = {0, 0, 1, //1
-1, 0, 0, //2
0, 1, 0, //3
0, 0, -1, //4
1, 0, 0, //5
0, -1, 0
}; //array with RGB rules (0 – do nothing, -1 – decrese, +1 – increse
void setRTCDateTime(byte h, byte m, byte s, byte d, byte mon, byte y, byte w = 1);
int functionDownButton = 0;
int functionUpButton = 0;
bool LEDsLock = false;
//antipoisoning transaction
bool modeChangedByUser = false;
bool transactionInProgress = false; //antipoisoning transaction
#define timeModePeriod 60000
#define dateModePeriod 5000
long modesChangePeriod = timeModePeriod;
//end of antipoisoning transaction
bool GPS_sync_flag=false;
extern const int LEDsDelay;
/*******************************************************************************************************
Init Programm
*******************************************************************************************************/
void setup()
{
Wire.begin();
//setRTCDateTime(23,40,00,25,7,15,1);
Serial.begin(115200);
#if defined(__AVR_ATmega1280__) || defined(__AVR_ATmega2560__)
Serial1.begin(9600);
digitalWrite(19, HIGH);
#endif
if (EEPROM.read(HourFormatEEPROMAddress) != 12) value[hModeValueIndex] = 24; else value[hModeValueIndex] = 12;
if (EEPROM.read(RGBLEDsEEPROMAddress) != 0) RGBLedsOn = true; else RGBLedsOn = false;
if (EEPROM.read(AlarmTimeEEPROMAddress) == 255) value[AlarmHourIndex] = 0; else value[AlarmHourIndex] = EEPROM.read(AlarmTimeEEPROMAddress);
if (EEPROM.read(AlarmTimeEEPROMAddress + 1) == 255) value[AlarmMinuteIndex] = 0; else value[AlarmMinuteIndex] = EEPROM.read(AlarmTimeEEPROMAddress + 1);
if (EEPROM.read(AlarmTimeEEPROMAddress + 2) == 255) value[AlarmSecondIndex] = 0; else value[AlarmSecondIndex] = EEPROM.read(AlarmTimeEEPROMAddress + 2);
if (EEPROM.read(AlarmArmedEEPROMAddress) == 255) value[Alarm01] = 0; else value[Alarm01] = EEPROM.read(AlarmArmedEEPROMAddress);
if (EEPROM.read(LEDsLockEEPROMAddress) == 255) LEDsLock = false; else LEDsLock = EEPROM.read(LEDsLockEEPROMAddress);
if (EEPROM.read(DegreesFormatEEPROMAddress) == 255) value[DegreesFormatIndex] = CELSIUS; else value[DegreesFormatIndex] = EEPROM.read(DegreesFormatEEPROMAddress);
if (EEPROM.read(HoursOffsetEEPROMAddress) == 255) value[HoursOffsetIndex] = value[HoursOffsetIndex]; else value[HoursOffsetIndex] = EEPROM.read(HoursOffsetEEPROMAddress) + minValue[HoursOffsetIndex];
//// needed to set this HoursOffsetIndex variable to 0 since we will use the timezone lib (local timezone and summer/winter time add-ons by Jantec.nl)
value[HoursOffsetIndex] = 0;
EEPROM.write(HoursOffsetEEPROMAddress, 0);
if (EEPROM.read(DateFormatEEPROMAddress) == 255) value[DateFormatIndex] = value[DateFormatIndex]; else value[DateFormatIndex] = EEPROM.read(DateFormatEEPROMAddress);
//Serial.print(F(“led lock=”));
//Serial.println(LEDsLock);
pinMode(RedLedPin, OUTPUT);
pinMode(GreenLedPin, OUTPUT);
pinMode(BlueLedPin, OUTPUT);
tone1.begin(pinBuzzer);
song = parseSong(song);
pinMode(LEpin, OUTPUT);
// SPI setup
SPISetup();
LEDsSetup();
//buttons pins inits
pinMode(pinSet, INPUT_PULLUP);
pinMode(pinUp, INPUT_PULLUP);
pinMode(pinDown, INPUT_PULLUP);
////////////////////////////
pinMode(pinBuzzer, OUTPUT);
//buttons objects inits
setButton.debounceTime = 20; // Debounce timer in ms
setButton.multiclickTime = 30; // Time limit for multi clicks
setButton.longClickTime = 2000; // time until “held-down clicks” register
upButton.debounceTime = 20; // Debounce timer in ms
upButton.multiclickTime = 30; // Time limit for multi clicks
upButton.longClickTime = 2000; // time until “held-down clicks” register
downButton.debounceTime = 20; // Debounce timer in ms
downButton.multiclickTime = 30; // Time limit for multi clicks
downButton.longClickTime = 2000; // time until “held-down clicks” register
#if defined(__AVR_ATmega1280__) || defined(__AVR_ATmega2560__)
timerSetup();
#endif
//!!!!!!!!!!!!!!!!!!!!!!!!!!!!!!!!!!!!!!!!!!!!!!!!
doTest();
//!!!!!!!!!!!!!!!!!!!!!!!!!!!!!!!!!!!!!!!!!!!!!!!
if (LEDsLock == 1)
{
setLEDsFromEEPROM();
}
getRTCTime();
byte prevSeconds = RTC_seconds;
unsigned long RTC_ReadingStartTime = millis();
RTC_present = true;
while (prevSeconds == RTC_seconds)
{
getRTCTime();
//Serial.println(RTC_seconds);
if ((millis() – RTC_ReadingStartTime) > 3000)
{
#ifdef DEBUG
Serial.println(F(“Warning! RTC DON’T RESPOND!”));
#endif
RTC_present = false;
break;
}
}
setTime(RTC_hours, RTC_minutes, RTC_seconds, RTC_day, RTC_month, RTC_year);
#if defined(__AVR_ATmega1280__) || defined(__AVR_ATmega2560__)
irrecv.blink13(false);
irrecv.enableIRIn(); // Start the receiver
#endif
//// add-ons for TIMEZONE
time_t utc = now();
time_t local = myTZ.toLocal(utc, &tcr);
Serial.println();
printDateTime(utc, “UTC”);
printDateTime(local, tcr -> abbrev);
delay(1000);//was 10000
//// end of add-ons for TIMEZONE
}
int rotator = 0; //index in array with RGB “rules” (increse by one on each 255 cycles)
int cycle = 0; //cycles counter
int RedLight = 255;
int GreenLight = 0;
int BlueLight = 0;
unsigned long prevTime = 0; // time of lase tube was lit
unsigned long prevTime4FireWorks = 0; //time of last RGB changed
//int minuteL=0; //младшая цифра минут
/***************************************************************************************************************
MAIN Programm
***************************************************************************************************************/
void loop() {
if (((millis() % 10000) == 0) && (RTC_present)) //synchronize with RTC every 10 seconds
{
getRTCTime();
setTime(RTC_hours, RTC_minutes, RTC_seconds, RTC_day, RTC_month, RTC_year);
// 4 lines of time zone & winter/summer time additions by Jantec.nl 2023 0404
time_t utc = now();
time_t local = myTZ.toLocal(utc, &tcr);
setTime(myTZ.toLocal(utc, &tcr));
EEPROM.write(DateFormatEEPROMAddress, value[myTZ.toLocal(utc, &tcr)]);
//Serial.println(F(“Sync”));
}
#if defined(__AVR_ATmega1280__) || defined(__AVR_ATmega2560__)
MillsNow=millis();
if ((MillsNow – Last_Time_GPS_Sync) > GPS_Sync_Interval)
{
//GPS_Sync_Interval = GPS_SYNC_INTERVAL; // <—-!
//GPS_Sync_Flag = 0;
if (AttMsgWasShowed==false)
{
Serial.println(F(“Attempt to sync with GPS.”));
AttMsgWasShowed=true;
}
GetDataFromSerial1();
//SyncWithGPS();
}
if ((MillsNow – Last_Time_GPS_Sync) > GPS_Sync_Interval + TIME_TO_TRY)
{
Last_Time_GPS_Sync=MillsNow; //if it is not possible to synchronize within the allotted time TIME_TO_TRY, then we postpone attempts to the next time interval.
//GPS_Sync_Flag = 1;
//GPS_Sync_Interval = GPS_SYNC_INTERVAL;
Serial.println(F(“All attempts were unsuccessful.”));
AttMsgWasShowed=false;
}
IRresults.value = 0;
if (irrecv.decode(&IRresults)) {
Serial.println(IRresults.value, HEX);
irrecv.resume(); // Receive the next value
}
ModeButtonState = IRModeButton.checkButtonState(IRresults.value);
if (ModeButtonState == 1) Serial.println(F(“Mode short”));
if (ModeButtonState == -1) Serial.println(F(“Mode long….”));
UpButtonState = IRUpButton.checkButtonState(IRresults.value);
if (UpButtonState == 1) Serial.println(F(“Up short”));
if (UpButtonState == -1) Serial.println(F(“Up long….”));
DownButtonState = IRDownButton.checkButtonState(IRresults.value);
if (DownButtonState == 1) Serial.println(F(“Down short”));
if (DownButtonState == -1) Serial.println(F(“Down long….”));
#else
ModeButtonState=0;
UpButtonState=0;
DownButtonState=0;
#endif
p = playmusic(p);
if ((millis() – prevTime4FireWorks) > LEDsDelay)
{
rotateFireWorks(); //change color (by 1 step)
prevTime4FireWorks = millis();
}
if ((menuPosition == TimeIndex) || (modeChangedByUser == false) ) modesChanger();
#if defined (__AVR_ATmega328P__)
doIndication();
#endif
setButton.Update();
upButton.Update();
downButton.Update();
if (editMode == false)
{
blinkMask = B00000000;
} else if ((millis() – enteringEditModeTime) > 60000)
{
editMode = false;
menuPosition = firstChild[menuPosition];
blinkMask = blinkPattern[menuPosition];
}
if ((setButton.clicks > 0) || (ModeButtonState == 1)) //short click
{
modeChangedByUser = true;
p = 0; //shut off music )))
tone1.play(1000, 100);
enteringEditModeTime = millis();
/*if (value[DateFormatIndex] == US_DateFormat)
{
//if (menuPosition == )
} else */
menuPosition = menuPosition + 1;
#if defined (__AVR_ATmega328P__)
if (menuPosition == TimeZoneIndex) menuPosition++;// skip TimeZone for Arduino Uno
#endif
if (menuPosition == LastParent + 1) menuPosition = TimeIndex;
/*Serial.print(F(“menuPosition=”));
Serial.println(menuPosition);
Serial.print(F(“value=”));
Serial.println(value[menuPosition]);*/
blinkMask = blinkPattern[menuPosition];
if ((parent[menuPosition – 1] != 0) and (lastChild[parent[menuPosition – 1] – 1] == (menuPosition – 1))) //exit from edit mode
{
if ((parent[menuPosition – 1] – 1 == 1) && (!isValidDate()))
{
menuPosition = DateDayIndex;
return;
}
editMode = false;
menuPosition = parent[menuPosition – 1] – 1;
if (menuPosition == TimeIndex) setTime(value[TimeHoursIndex], value[TimeMintuesIndex], value[TimeSecondsIndex], day(), month(), year());
if (menuPosition == DateIndex)
{
#ifdef DEBUG
Serial.print(F(“Day:”));
Serial.println(value[DateDayIndex]);
Serial.print(F(“Month:”));
Serial.println(value[DateMonthIndex]);
#endif
setTime(hour(), minute(), second(), value[DateDayIndex], value[DateMonthIndex], 2000 + value[DateYearIndex]);
EEPROM.write(DateFormatEEPROMAddress, value[DateFormatIndex]);
}
if (menuPosition == AlarmIndex) {
EEPROM.write(AlarmTimeEEPROMAddress, value[AlarmHourIndex]);
EEPROM.write(AlarmTimeEEPROMAddress + 1, value[AlarmMinuteIndex]);
EEPROM.write(AlarmTimeEEPROMAddress + 2, value[AlarmSecondIndex]);
EEPROM.write(AlarmArmedEEPROMAddress, value[Alarm01]);
};
if (menuPosition == hModeIndex) EEPROM.write(HourFormatEEPROMAddress, value[hModeValueIndex]);
if (menuPosition == TemperatureIndex)
{
EEPROM.write(DegreesFormatEEPROMAddress, value[DegreesFormatIndex]);
}
if (menuPosition == TimeZoneIndex) EEPROM.write(HoursOffsetEEPROMAddress, value[HoursOffsetIndex] – minValue[HoursOffsetIndex]);
//if (menuPosition == hModeIndex) EEPROM.write(HourFormatEEPROMAddress, value[hModeValueIndex]);
setRTCDateTime(hour(), minute(), second(), day(), month(), year() % 1000, 1);
return;
} //end exit from edit mode
/*Serial.print(“menu pos=”);
Serial.println(menuPosition);
Serial.print(“DateFormat”);
Serial.println(value[DateFormatIndex]);*/
if ((menuPosition != HoursOffsetIndex) &&
(menuPosition != DateFormatIndex) &&
(menuPosition != DateDayIndex)) value[menuPosition] = extractDigits(blinkMask);
}
if ((setButton.clicks < 0) || (ModeButtonState == -1)) //long click
{
tone1.play(1000, 100);
if (!editMode)
{
enteringEditModeTime = millis();
if (menuPosition == TimeIndex) stringToDisplay = PreZero(hour()) + PreZero(minute()) + PreZero(second()); //temporary enabled 24 hour format while settings
}
if (menuPosition == DateIndex)
{
// Serial.println(“DateEdit”);
value[DateDayIndex] = day();
value[DateMonthIndex] = month();
value[DateYearIndex] = year() % 1000;
if (value[DateFormatIndex] == EU_DateFormat) stringToDisplay=PreZero(value[DateDayIndex])+PreZero(value[DateMonthIndex])+PreZero(value[DateYearIndex]);
else stringToDisplay=PreZero(value[DateMonthIndex])+PreZero(value[DateDayIndex])+PreZero(value[DateYearIndex]);
//Serial.print(“str=”);
// Serial.println(stringToDisplay);
}
menuPosition = firstChild[menuPosition];
if (menuPosition == AlarmHourIndex) {
value[Alarm01] = 1; /*digitalWrite(pinUpperDots, HIGH);*/dotPattern = B10000000;
}
editMode = !editMode;
blinkMask = blinkPattern[menuPosition];
if ((menuPosition != DegreesFormatIndex) &&
(menuPosition != HoursOffsetIndex) &&
(menuPosition != DateFormatIndex))
value[menuPosition] = extractDigits(blinkMask);
/*Serial.print(F(“menuPosition=”));
Serial.println(menuPosition);
Serial.print(F(“value=”));
Serial.println(value[menuPosition]); */
}
if (upButton.clicks != 0) functionUpButton = upButton.clicks;
if ((upButton.clicks > 0) || (UpButtonState == 1))
{
modeChangedByUser = true;
p = 0; //shut off music )))
tone1.play(1000, 100);
incrementValue();
if (!editMode)
{
LEDsLock = false;
EEPROM.write(LEDsLockEEPROMAddress, 0);
}
}
if (functionUpButton == -1 && upButton.depressed == true)
{
BlinkUp = false;
if (editMode == true)
{
if ( (millis() – upTime) > settingDelay)
{
upTime = millis();// + settingDelay;
incrementValue();
}
}
} else BlinkUp = true;
if (downButton.clicks != 0) functionDownButton = downButton.clicks;
if ((downButton.clicks > 0) || (DownButtonState == 1))
{
modeChangedByUser = true;
p = 0; //shut off music )))
tone1.play(1000, 100);
dicrementValue();
if (!editMode)
{
LEDsLock = true;
EEPROM.write(LEDsLockEEPROMAddress, 1);
EEPROM.write(LEDsRedValueEEPROMAddress, RedLight);
EEPROM.write(LEDsGreenValueEEPROMAddress, GreenLight);
EEPROM.write(LEDsBlueValueEEPROMAddress, BlueLight);
/*Serial.println(F(“Store to EEPROM:”));
Serial.print(F(“RED=”));
Serial.println(RedLight);
Serial.print(F(“GREEN=”));
Serial.println(GreenLight);
Serial.print(F(“Blue=”));
Serial.println(BlueLight);*/
}
}
if (functionDownButton == -1 && downButton.depressed == true)
{
BlinkDown = false;
if (editMode == true)
{
if ( (millis() – downTime) > settingDelay)
{
downTime = millis();// + settingDelay;
dicrementValue();
}
}
} else BlinkDown = true;
if (!editMode)
{
if ((upButton.clicks < 0) || (UpButtonState == -1))
{
tone1.play(1000, 100);
RGBLedsOn = true;
EEPROM.write(RGBLEDsEEPROMAddress, 1);
#ifdef DEBUG
Serial.println(F(“RGB=on”));
#endif
setLEDsFromEEPROM();
}
if ((downButton.clicks < 0) || (DownButtonState == -1))
{
tone1.play(1000, 100);
RGBLedsOn = false;
EEPROM.write(RGBLEDsEEPROMAddress, 0);
#ifdef DEBUG
Serial.println(F(“RGB=off”));
#endif
}
}
static bool updateDateTime = false;
float curTemp=0;
switch (menuPosition)
{
case TimeIndex: //time mode
if (!transactionInProgress) stringToDisplay = updateDisplayString();
doDotBlink();
checkAlarmTime();
blankMask = B00000000;
break;
case DateIndex: //date mode
if (!transactionInProgress) stringToDisplay = updateDateString();
dotPattern = B01000000; //turn on lower dots
checkAlarmTime();
blankMask = B00000000;
break;
case AlarmIndex: //alarm mode
//stringToDisplay=”000000″;
//unsigned long execTime;
//execTime=micros();
stringToDisplay = PreZero(value[AlarmHourIndex]) + PreZero(value[AlarmMinuteIndex]) + PreZero(value[AlarmSecondIndex]);
blankMask = B00000000;
if (value[Alarm01] == 1) dotPattern = B10000000; //turn on upper dots
else
{
dotPattern = B00000000; //turn off upper dots
}
//execTime=micros()-execTime;
//Serial.println(execTime);
checkAlarmTime();
break;
case hModeIndex: //12/24 hours mode
stringToDisplay = “00” + String(value[hModeValueIndex]) + “00”;
blankMask = B00110011;
dotPattern = B00000000; //turn off all dots
checkAlarmTime();
break;
case TemperatureIndex: //missed break
case DegreesFormatIndex:
if (!transactionInProgress)
{
curTemp=getTemperature(value[DegreesFormatIndex]);
stringToDisplay = updateTemperatureString(curTemp);
if (value[DegreesFormatIndex] == CELSIUS)
{
blankMask = B00110001;
dotPattern = B01000000;
}
else
{
blankMask = B00100011;
dotPattern = B00000000;
}
}
if (curTemp < 0) dotPattern |= B10000000;
else dotPattern &= B01111111;
break;
case TimeZoneIndex:
case HoursOffsetIndex:
stringToDisplay = String(PreZero(value[HoursOffsetIndex])) + “0000”;
blankMask = B00001111;
if (value[HoursOffsetIndex]>=0) dotPattern = B00000000; //turn off all dots
else dotPattern = B10000000; //turn on upper dots
break;
case DateFormatIndex:
if (value[DateFormatIndex] == EU_DateFormat)
{
stringToDisplay=”311299″;
blinkPattern[DateDayIndex]=B00000011;
blinkPattern[DateMonthIndex]=B00001100;
}
else
{
stringToDisplay=”123199″;
blinkPattern[DateDayIndex]=B00001100;
blinkPattern[DateMonthIndex]=B00000011;
}
break;
case DateDayIndex:
case DateMonthIndex:
case DateYearIndex:
if (value[DateFormatIndex] == EU_DateFormat) stringToDisplay=PreZero(value[DateDayIndex])+PreZero(value[DateMonthIndex])+PreZero(value[DateYearIndex]);
else stringToDisplay=PreZero(value[DateMonthIndex])+PreZero(value[DateDayIndex])+PreZero(value[DateYearIndex]);
break;
}
// IRresults.value=0;
}
#if defined (__AVR_ATmega328P__)
String PreZero(int digit)
{
digit=abs(digit);
if (digit < 10) return String(“0”) + String(digit);
//if (digit < 10) return “0” + String(digit);
else return String(digit);
}
#endif
String updateDisplayString()
{
static int prevS=-1;
if (second()!=prevS)
{
prevS=second();
return getTimeNow();
} else return stringToDisplay;
}
String getTimeNow()
{
if (value[hModeValueIndex] == 24) return PreZero(hour()) + PreZero(minute()) + PreZero(second());
else return PreZero(hourFormat12()) + PreZero(minute()) + PreZero(second());
}
//// add-on void for TIMEZONE ////////////////////////////////////////////////////////////
// format and print a time_t value, with a time zone appended.
void printDateTime(time_t t, const char *tz)
{
char buf[32];
char m[4]; // temporary storage for month string (DateStrings.cpp uses shared buffer)
strcpy(m, monthShortStr(month(t)));
sprintf(buf, “%.2d:%.2d:%.2d %s %.2d %s %d %s”,
hour(t), minute(t), second(t), dayShortStr(weekday(t)), day(t), m, year(t), tz);
Serial.println(buf);
}
/////// Jantec.nl 2023-04-04 The Netherlands, Amsterdam. Please share and re-use! ////////
void doTest()
{
Serial.print(F(“Firmware version: “));
Serial.println(FirmwareVersion.substring(1,2)+”.”+FirmwareVersion.substring(2,5));
for (byte k = 0; k < strlen_P(HardwareVersion); k++) {
Serial.print((char)pgm_read_byte_near(HardwareVersion + k));
}
Serial.println();
#ifdef DEBUG
Serial.println(F(“Start Test”));
#endif
p=song;
parseSong(p);
//p=0; //need to be deleted
LEDsTest();
#if defined(__AVR_ATmega1280__) || defined(__AVR_ATmega2560__)
if (Serial1.available() > 20) Serial.println(F(“GPS detected”));
else Serial.println(F(“GPS NOT detected!”));
#endif
#ifdef tubes8
String testStringArray[11]={“00000000″,”11111111″,”22222222″,”33333333″,”44444444″,”55555555″,”66666666″,”77777777″,”88888888″,”99999999″,””};
testStringArray[10]=FirmwareVersion+”00″;
#endif
#ifdef tubes6
String testStringArray[11]={“000000″,”111111″,”222222″,”333333″,”444444″,”555555″,”666666″,”777777″,”888888″,”999999″,””};
testStringArray[10]=FirmwareVersion;
#endif
int dlay=500;
bool test=1;
byte strIndex=-1;
unsigned long startOfTest=millis()+1000; //disable delaying in first iteration
bool digitsLock=false;
while (test)
{
if (digitalRead(pinDown)==0) digitsLock=true;
if (digitalRead(pinUp)==0) digitsLock=false;
if ((millis()-startOfTest)>dlay)
{
startOfTest=millis();
if (!digitsLock) strIndex=strIndex+1;
if (strIndex==10) dlay=2000;
if (strIndex>10) { test=false; strIndex=10;}
stringToDisplay=testStringArray[strIndex];
#ifdef DEBUG
Serial.println(stringToDisplay);
#endif
}
#if defined (__AVR_ATmega328P__)
doIndication();
#endif
}
if ( !ds.search(addr))
{
#ifdef DEBUG
Serial.println(F(“Temp. sensor not found.”));
#endif
} else TempPresent=true;
testDS3231TempSensor();
#ifdef DEBUG
Serial.println(F(“Stop Test”));
#endif
// while(1);
}
void doDotBlink()
{
if (second()%2 == 0) dotPattern = B11000000;
else dotPattern = B00000000;
}
void setRTCDateTime(byte h, byte m, byte s, byte d, byte mon, byte y, byte w)
{
Wire.beginTransmission(DS1307_ADDRESS);
Wire.write(zero); //stop Oscillator
Wire.write(decToBcd(s));
Wire.write(decToBcd(m));
Wire.write(decToBcd(h));
Wire.write(decToBcd(w));
Wire.write(decToBcd(d));
Wire.write(decToBcd(mon));
Wire.write(decToBcd(y));
Wire.write(zero); //start
Wire.endTransmission();
}
byte decToBcd(byte val) {
// Convert normal decimal numbers to binary coded decimal
return ( (val / 10 * 16) + (val % 10) );
}
byte bcdToDec(byte val) {
// Convert binary coded decimal to normal decimal numbers
return ( (val / 16 * 10) + (val % 16) );
}
void getRTCTime()
{
Wire.beginTransmission(DS1307_ADDRESS);
Wire.write(zero);
Wire.endTransmission();
Wire.requestFrom(DS1307_ADDRESS, 7);
RTC_seconds = bcdToDec(Wire.read());
RTC_minutes = bcdToDec(Wire.read());
RTC_hours = bcdToDec(Wire.read() & 0b111111); //24 hour time
RTC_day_of_week = bcdToDec(Wire.read()); //0-6 -> sunday – Saturday
RTC_day = bcdToDec(Wire.read());
RTC_month = bcdToDec(Wire.read());
RTC_year = bcdToDec(Wire.read());
}
int extractDigits(byte b)
{
String tmp = “1”;
if (b == B00000011)
{
tmp = stringToDisplay.substring(0, 2);
}
if (b == B00001100)
{
tmp = stringToDisplay.substring(2, 4);
}
if (b == B00110000)
{
tmp = stringToDisplay.substring(4);
}
return tmp.toInt();
}
void injectDigits(byte b, int value)
{
if (b == B00000011) stringToDisplay = PreZero(value) + stringToDisplay.substring(2);
if (b == B00001100) stringToDisplay = stringToDisplay.substring(0, 2) + PreZero(value) + stringToDisplay.substring(4);
if (b == B00110000) stringToDisplay = stringToDisplay.substring(0, 4) + PreZero(value);
}
bool isValidDate()
{
int days[12] = {31, 28, 31, 30, 31, 30, 31, 31, 30, 31, 30, 31};
if (value[DateYearIndex] % 4 == 0) days[1] = 29;
if (value[DateDayIndex] > days[value[DateMonthIndex] – 1]) return false;
else return true;
}
byte default_dur = 4;
byte default_oct = 6;
int bpm = 63;
int num;
long wholenote;
long duration;
byte note;
byte scale;
char* parseSong(char *p)
{
// Absolutely no error checking in here
// format: d=N,o=N,b=NNN:
// find the start (skip name, etc)
while (*p != ‘:’) p++; // ignore name
p++; // skip ‘:’
// get default duration
if (*p == ‘d’)
{
p++; p++; // skip “d=”
num = 0;
while (isdigit(*p))
{
num = (num * 10) + (*p++ – ‘0’);
}
if (num > 0) default_dur = num;
p++; // skip comma
}
// get default octave
if (*p == ‘o’)
{
p++; p++; // skip “o=”
num = *p++ – ‘0’;
if (num >= 3 && num <= 7) default_oct = num;
p++; // skip comma
}
// get BPM
if (*p == ‘b’)
{
p++; p++; // skip “b=”
num = 0;
while (isdigit(*p))
{
num = (num * 10) + (*p++ – ‘0’);
}
bpm = num;
p++; // skip colon
}
// BPM usually expresses the number of quarter notes per minute
wholenote = (60 * 1000L / bpm) * 4; // this is the time for whole note (in milliseconds)
return p;
}
// now begin note loop
static unsigned long lastTimeNotePlaying = 0;
char* playmusic(char *p)
{
if (*p == 0)
{
return p;
}
if (millis() – lastTimeNotePlaying > duration)
lastTimeNotePlaying = millis();
else return p;
// first, get note duration, if available
num = 0;
while (isdigit(*p))
{
num = (num * 10) + (*p++ – ‘0’);
}
if (num) duration = wholenote / num;
else duration = wholenote / default_dur; // we will need to check if we are a dotted note after
// now get the note
note = 0;
switch (*p)
{
case ‘c’:
note = 1;
break;
case ‘d’:
note = 3;
break;
case ‘e’:
note = 5;
break;
case ‘f’:
note = 6;
break;
case ‘g’:
note = 8;
break;
case ‘a’:
note = 10;
break;
case ‘b’:
note = 12;
break;
case ‘p’:
default:
note = 0;
}
p++;
// now, get optional ‘#’ sharp
if (*p == ‘#’)
{
note++;
p++;
}
// now, get optional ‘.’ dotted note
if (*p == ‘.’)
{
duration += duration / 2;
p++;
}
// now, get scale
if (isdigit(*p))
{
scale = *p – ‘0’;
p++;
}
else
{
scale = default_oct;
}
scale += OCTAVE_OFFSET;
if (*p == ‘,’)
p++; // skip comma for next note (or we may be at the end)
// now play the note
if (note)
{
tone1.play(notes[(scale – 4) * 12 + note], duration);
if (millis() – lastTimeNotePlaying > duration)
lastTimeNotePlaying = millis();
else return p;
tone1.stop();
}
else
{
return p;
}
#ifdef DEBUG
Serial.println(F(“Incorrect Song Format!”));
#endif
return 0; //error
}
void incrementValue()
{
enteringEditModeTime = millis();
if (editMode == true)
{
if (menuPosition != hModeValueIndex) // 12/24 hour mode menu position
value[menuPosition] = value[menuPosition] + 1; else value[menuPosition] = value[menuPosition] + 12;
if (value[menuPosition] > maxValue[menuPosition]) value[menuPosition] = minValue[menuPosition];
if (menuPosition == Alarm01)
{
if (value[menuPosition] == 1) /*digitalWrite(pinUpperDots, HIGH);*/dotPattern = B10000000; //turn on upper dots
/*else digitalWrite(pinUpperDots, LOW); */ dotPattern = B00000000; //turn off all dots
}
if (menuPosition!=DateFormatIndex) injectDigits(blinkMask, value[menuPosition]);
/*Serial.print(“value=”);
Serial.println(value[menuPosition]);*/
}
}
void dicrementValue()
{
enteringEditModeTime = millis();
if (editMode == true)
{
if (menuPosition != hModeValueIndex) value[menuPosition] = value[menuPosition] – 1; else value[menuPosition] = value[menuPosition] – 12;
if (value[menuPosition] < minValue[menuPosition]) value[menuPosition] = maxValue[menuPosition];
if (menuPosition == Alarm01)
{
if (value[menuPosition] == 1) /*digitalWrite(pinUpperDots, HIGH);*/ dotPattern = B10000000; //turn on upper dots
else /*digitalWrite(pinUpperDots, LOW);*/ dotPattern = B00000000; //turn off all dots
}
if (menuPosition!=DateFormatIndex) injectDigits(blinkMask, value[menuPosition]);
/*Serial.print(“value=”);
Serial.println(value[menuPosition]);*/
}
}
bool Alarm1SecondBlock = false;
unsigned long lastTimeAlarmTriggired = 0;
void checkAlarmTime()
{
if (value[Alarm01] == 0) return;
if ((Alarm1SecondBlock == true) && ((millis() – lastTimeAlarmTriggired) > 1000)) Alarm1SecondBlock = false;
if (Alarm1SecondBlock == true) return;
if ((hour() == value[AlarmHourIndex]) && (minute() == value[AlarmMinuteIndex]) && (second() == value[AlarmSecondIndex]))
{
lastTimeAlarmTriggired = millis();
Alarm1SecondBlock = true;
#ifdef DEBUG
Serial.println(F(“Wake up, Neo!”));
#endif
p = song;
}
}
void modesChanger()
{
if (editMode == true) return;
static unsigned long lastTimeModeChanged = millis();
static unsigned long lastTimeAntiPoisoningIterate = millis();
static int transnumber = 0;
if ((millis() – lastTimeModeChanged) > modesChangePeriod)
{
lastTimeModeChanged = millis();
if (transnumber == 0) {
menuPosition = DateIndex;
modesChangePeriod = dateModePeriod;
}
if (transnumber == 1) {
menuPosition = TemperatureIndex;
modesChangePeriod = dateModePeriod;
if (!TempPresent) transnumber = 2;
}
if (transnumber == 2) {
menuPosition = TimeIndex;
modesChangePeriod = timeModePeriod;
}
transnumber++;
if (transnumber > 2) transnumber = 0;
if (modeChangedByUser == true)
{
menuPosition = TimeIndex;
}
modeChangedByUser = false;
}
if ((millis() – lastTimeModeChanged) < 2000)
{
if ((millis() – lastTimeAntiPoisoningIterate) > 100)
{
lastTimeAntiPoisoningIterate = millis();
if (TempPresent)
{
if (menuPosition == TimeIndex) stringToDisplay = antiPoisoning2(updateTemperatureString(getTemperature(value[DegreesFormatIndex])), getTimeNow());
if (menuPosition == DateIndex) stringToDisplay = antiPoisoning2(getTimeNow(), PreZero(day()) + PreZero(month()) + PreZero(year() % 1000) );
if (menuPosition == TemperatureIndex) stringToDisplay = antiPoisoning2(PreZero(day()) + PreZero(month()) + PreZero(year() % 1000), updateTemperatureString(getTemperature(value[DegreesFormatIndex])));
} else
{
if (menuPosition == TimeIndex) stringToDisplay = antiPoisoning2(PreZero(day()) + PreZero(month()) + PreZero(year() % 1000), getTimeNow());
if (menuPosition == DateIndex) stringToDisplay = antiPoisoning2(getTimeNow(), PreZero(day()) + PreZero(month()) + PreZero(year() % 1000) );
}
// Serial.println(“StrTDInToModeChng=”+stringToDisplay);
}
} else
{
transactionInProgress = false;
}
}
String antiPoisoning2(String fromStr, String toStr)
{
//static bool transactionInProgress=false;
//byte fromDigits[6];
static byte toDigits[6];
static byte currentDigits[6];
static byte iterationCounter = 0;
if (!transactionInProgress)
{
transactionInProgress = true;
blankMask = B00000000;
for (int i = 0; i < 6; i++)
{
currentDigits[i] = fromStr.substring(i, i + 1).toInt();
toDigits[i] = toStr.substring(i, i + 1).toInt();
}
}
for (int i = 0; i < 6; i++)
{
if (iterationCounter < 10) currentDigits[i]++;
else if (currentDigits[i] != toDigits[i]) currentDigits[i]++;
if (currentDigits[i] == 10) currentDigits[i] = 0;
}
iterationCounter++;
if (iterationCounter == 20)
{
iterationCounter = 0;
transactionInProgress = false;
}
String tmpStr;
for (int i = 0; i < 6; i++)
tmpStr += currentDigits[i];
return tmpStr;
}
String updateDateString()
{
static unsigned long lastTimeDateUpdate = millis()+1001;
static String DateString = PreZero(day()) + PreZero(month()) + PreZero(year() % 1000);
static byte prevoiusDateFormatWas=value[DateFormatIndex];
if (((millis() – lastTimeDateUpdate) > 1000) || (prevoiusDateFormatWas != value[DateFormatIndex]))
{
lastTimeDateUpdate = millis();
if (value[DateFormatIndex]==EU_DateFormat) DateString = PreZero(day()) + PreZero(month()) + PreZero(year() % 1000);
else DateString = PreZero(month()) + PreZero(day()) + PreZero(year() % 1000);
}
return DateString;
}
#if defined(__AVR_ATmega1280__) || defined(__AVR_ATmega2560__)
void SyncWithGPS()
{
if ((millis() – GPS_Date_Time.GPS_Data_Parsed_time) > 3000) {
Serial.println(F(“Parsed data to old”));
return;
}
Serial.println(F(“Updating time from GPS…”));
Serial.println(GPS_Date_Time.GPS_hours);
Serial.println(GPS_Date_Time.GPS_minutes);
Serial.println(GPS_Date_Time.GPS_seconds);
setTime(GPS_Date_Time.GPS_hours, GPS_Date_Time.GPS_minutes, GPS_Date_Time.GPS_seconds, GPS_Date_Time.GPS_day, GPS_Date_Time.GPS_mounth, GPS_Date_Time.GPS_year % 1000);
adjustTime((long)value[HoursOffsetIndex] * 3600);
setRTCDateTime(hour(), minute(), second(), day(), month(), year() % 1000, 1);
Last_Time_GPS_Sync = MillsNow;
GPS_Sync_Interval = GPS_SYNC_INTERVAL;
AttMsgWasShowed=false;
//// TIMEZONE add-ons
while (!Serial) ; // wait until Arduino Serial Monitor opens
//setSyncProvider(RTC.get); // the function to get the time from the RTC
//if(timeStatus()!= timeSet)
// Serial.println(“Unable to sync with the RTC”);
//else
// Serial.println(“RTC has set the system time”);
time_t utc = now();
time_t local = myTZ.toLocal(utc, &tcr);
Serial.println();
printDateTime(utc, “UTC”);
printDateTime(local, tcr -> abbrev);
setTime(myTZ.toLocal(utc, &tcr));
EEPROM.write(DateFormatEEPROMAddress, value[myTZ.toLocal(utc, &tcr)]);
//Serial.println(EEPROM.read(HourFormatEEPROMAddress));// check whether the new timezon’s winter /summer time is put in memory
//setTime(hour(), minute(), second(), value[DateDayIndex], value[DateMonthIndex], 2000 + value[DateYearIndex]);
//EEPROM.write(DateFormatEEPROMAddress, value[DateFormatIndex]);
//// End of TIMEZONE add-ons
}
void GetDataFromSerial1()
{
if (Serial1.available()) { // If anything comes in Serial1 (pin 19)
byte GPS_incoming_byte;
GPS_incoming_byte = Serial1.read();
//Serial.write(GPS_incoming_byte);
GPS_Package[GPS_position] = GPS_incoming_byte;
GPS_position++;
if (GPS_position == GPS_BUFFER_LENGTH – 1)
{
GPS_position = 0;
// Serial.println(“more then BUFFER_LENGTH!!!!”);
}
if (GPS_incoming_byte == 0x0A)
{
GPS_Package[GPS_position] = 0;
GPS_position = 0;
if (ControlCheckSum()) {
if (GPS_Parse_DateTime()) SyncWithGPS();
}
}
}
}
bool GPS_Parse_DateTime()
{
bool GPSsignal = false;
if (!((GPS_Package[0] == ‘$’)
&& (GPS_Package[3] == ‘R’)
&& (GPS_Package[4] == ‘M’)
&& (GPS_Package[5] == ‘C’))) {
return false;
}
else
{
// Serial.println(“RMC!!!”);
}
//Serial.print(“hh: “);
int hh = (GPS_Package[7] – 48) * 10 + GPS_Package[8] – 48;
//Serial.println(hh);
int mm = (GPS_Package[9] – 48) * 10 + GPS_Package[10] – 48;
//Serial.print(“mm: “);
//Serial.println(mm);
int ss = (GPS_Package[11] – 48) * 10 + GPS_Package[12] – 48;
//Serial.print(“ss: “);
//Serial.println(ss);
byte GPSDatePos = 0;
int CommasCounter = 0;
for (int i = 12; i < GPS_BUFFER_LENGTH ; i++)
{
if (GPS_Package[i] == ‘,’)
{
CommasCounter++;
if (CommasCounter == 8)
{
GPSDatePos = i + 1;
break;
}
}
}
//Serial.print(“dd: “);
int dd = (GPS_Package[GPSDatePos] – 48) * 10 + GPS_Package[GPSDatePos + 1] – 48;
//Serial.println(dd);
int MM = (GPS_Package[GPSDatePos + 2] – 48) * 10 + GPS_Package[GPSDatePos + 3] – 48;
//Serial.print(“MM: “);
//Serial.println(MM);
int yyyy = 2000 + (GPS_Package[GPSDatePos + 4] – 48) * 10 + GPS_Package[GPSDatePos + 5] – 48;
//Serial.print(“yyyy: “);
//Serial.println(yyyy);
//if ((hh<0) || (mm<0) || (ss<0) || (dd<0) || (MM<0) || (yyyy<0)) return false;
if ( !inRange( yyyy, 2018, 2038 ) ||
!inRange( MM, 1, 12 ) ||
!inRange( dd, 1, 31 ) ||
!inRange( hh, 0, 23 ) ||
!inRange( mm, 0, 59 ) ||
!inRange( ss, 0, 59 ) ) return false;
else
{
GPS_Date_Time.GPS_hours = hh;
GPS_Date_Time.GPS_minutes = mm;
GPS_Date_Time.GPS_seconds = ss;
GPS_Date_Time.GPS_day = dd;
GPS_Date_Time.GPS_mounth = MM;
GPS_Date_Time.GPS_year = yyyy;
GPS_Date_Time.GPS_Data_Parsed_time = millis();
//Serial.println(“Precision TIME HAS BEEN ACCURED!!!!!!!!!”);
//GPS_Package[0]=0x0A;
return 1;
}
}
uint8_t ControlCheckSum()
{
uint8_t CheckSum = 0, MessageCheckSum = 0; // check sum
uint16_t i = 1; // 1 sybol left from ‘$’
while (GPS_Package[i] != ‘*’)
{
CheckSum ^= GPS_Package[i];
if (++i == GPS_BUFFER_LENGTH) {
//Serial.println(F(“End of the line not found”)); // end of line not found
return 0;
}
}
if (GPS_Package[++i] > 0x40) MessageCheckSum = (GPS_Package[i] – 0x37) << 4; // ASCII codes to DEC convertation
else MessageCheckSum = (GPS_Package[i] – 0x30) << 4;
if (GPS_Package[++i] > 0x40) MessageCheckSum += (GPS_Package[i] – 0x37);
else MessageCheckSum += (GPS_Package[i] – 0x30);
if (MessageCheckSum != CheckSum) {
//Serial.println(F(“wrong checksum”)); // wrong checksum
return 0;
}
//Serial.println(“Checksum is ok”);
return 1; // all ok!
}
boolean inRange( int no, int low, int high )
{
if ( no < low || no > high )
{
Serial.println(F(“Date or Time not in range”));
//Serial.println(String(no) + “:” + String (low) + “-” + String(high));
return false;
}
return true;
}
#endif
String updateTemperatureString(float fDegrees)
{
static unsigned long lastTimeTemperatureString=millis()+1100;
static String strTemp =”000000″;
if ((millis() – lastTimeTemperatureString) > 1000)
{
//Serial.println(F(“Updating temp. str.”));
lastTimeTemperatureString = millis();
int iDegrees = round(fDegrees);
if (value[DegreesFormatIndex] == CELSIUS)
{
strTemp = “0” + String(abs(iDegrees)) + “0”;
if (abs(iDegrees) < 1000) strTemp = “00” + String(abs(iDegrees)) + “0”;
if (abs(iDegrees) < 100) strTemp = “000” + String(abs(iDegrees)) + “0”;
if (abs(iDegrees) < 10) strTemp = “0000” + String(abs(iDegrees)) + “0”;
}else
{
strTemp = “0” + String(abs(iDegrees)) + “0”;
if (abs(iDegrees) < 1000) strTemp = “00” + String(abs(iDegrees)/10) + “00”;
if (abs(iDegrees) < 100) strTemp = “000” + String(abs(iDegrees)/10) + “00”;
if (abs(iDegrees) < 10) strTemp = “0000” + String(abs(iDegrees)/10) + “00”;
}
#ifdef tubes8
strTemp= “”+strTemp+”00”;
#endif
return strTemp;
}
return strTemp;
}
float getTemperature (boolean bTempFormat)
{
static float fDegrees;
static int iterator=0;
static byte TempRawData[2];
/*unsigned long execTime=0;
execTime=micros();*/
switch (iterator)
{
case 0: ds.reset(); break;
case 1: ds.write(0xCC, 0); break; //skip ROM command
case 2: ds.write(0x44, 0); break; //send make convert to all devices
case 3: ds.reset(); break;
case 4: ds.write(0xCC, 0); break; //skip ROM command
case 5: ds.write(0xBE, 0); break; //send request to all devices
case 6: TempRawData[0] = ds.read(); break;
case 7: TempRawData[1] = ds.read(); break;
default: break;
}
if (iterator == 7)
{
int16_t raw = (TempRawData[1] << 8) | TempRawData[0];
if (raw == -1) raw = 0;
float celsius = (float)raw / 16.0;
//celsius = celsius + (float)value[TempAdjustIndex]/10;//users adjustment
if (!bTempFormat) fDegrees = celsius * 10;
else fDegrees = (celsius * 1.8 + 32.0) * 10;
}
/*execTime=micros()-execTime;
Serial.print(iterator);
Serial.println(execTime);*/
iterator++;
if (iterator==8) iterator=0;
return fDegrees;
}
#if defined(__AVR_ATmega1280__) || defined(__AVR_ATmega2560__)
ISR(TIMER4_COMPA_vect)
{
sei();
doIndication();
}
void timerSetup()
{
//timer3 setup for calling doIndication function
TCCR4A = 0; //control registers reset (WGM21, WGM20)
TCCR4B = 0; //control registers reset
TCCR4B = (1 << CS12)|(1 << CS10)|(1 << WGM12); //prescaler 1024 and CTC mode
//OCR5A = 31; //2 mS
TCNT4=0; //reset counter to 0
OCR4A = 46; //3mS
//OCR4A = 92; //6mS
TIMSK4 = (1 << OCIE1A);//TIMER3_COMPA_vect interrupt enable
sei();
}
#endif
void testDS3231TempSensor()
{
int8_t DS3231InternalTemperature=0;
Wire.beginTransmission(DS1307_ADDRESS);
Wire.write(0x11);
Wire.endTransmission();
Wire.requestFrom(DS1307_ADDRESS, 2);
DS3231InternalTemperature=Wire.read();
Serial.print(F(“DS3231_T=”));
Serial.println(DS3231InternalTemperature);
if ((DS3231InternalTemperature<5) || (DS3231InternalTemperature>60))
{
Serial.println(F(“Faulty DS3231!”));
for (int i=0; i<5; i++)
{
tone1.play(1000, 1000);
delay(2000);
}
}
}
Ik heb de timzone.lib plus arduino-additionele code toegevoegd aan de open-source code zoals GRA-AFCH die heeft gemaakt voor hun IN-18 nixie klok met Arduino Mega : NixieClockShield_NCS318_V1_94_TZ.
Hiermee synchroniseert de NIXIE klok via een aan te sluiten standaard GPS module met UTC (stond al in de code) en vervolgens met de juiste tijdzone, inclusief automatische verschuiving voor zomer- en wintertijd! (wat geheel nieuw is!)
Zie de werkende versie onder:
Het is nu gecodeerd voor West-Europa en een voorbeeld staat in de code voor een US tijdzone, andere kunnen worden afgeleid uit de voorbeelden die bij de nieuw toegevoegde timezone.lib zitten! #include <Timezone.h>//https://github.com/JChristensen/Timezone
Beschikbare tijdzones:
// Australia Eastern Time Zone (Sydney, Melbourne)
TimeChangeRule aEDT = {“AEDT”, First, Sun, Oct, 2, 660}; // UTC + 11 hours
TimeChangeRule aEST = {“AEST”, First, Sun, Apr, 3, 600}; // UTC + 10 hours
Timezone ausET(aEDT, aEST);
// Moscow Standard Time (MSK, does not observe DST)
TimeChangeRule msk = {“MSK”, Last, Sun, Mar, 1, 180};
Timezone tzMSK(msk);
// Central European Time (Frankfurt, Paris)
TimeChangeRule CEST = {“CEST”, Last, Sun, Mar, 2, 120}; // Central European Summer Time
TimeChangeRule CET = {“CET “, Last, Sun, Oct, 3, 60}; // Central European Standard Time
Timezone CE(CEST, CET);
// United Kingdom (London, Belfast)
TimeChangeRule BST = {“BST”, Last, Sun, Mar, 1, 60}; // British Summer Time
TimeChangeRule GMT = {“GMT”, Last, Sun, Oct, 2, 0}; // Standard Time
Timezone UK(BST, GMT);
// UTC
TimeChangeRule utcRule = {“UTC”, Last, Sun, Mar, 1, 0}; // UTC
Timezone UTC(utcRule);
// US Eastern Time Zone (New York, Detroit)
TimeChangeRule usEDT = {“EDT”, Second, Sun, Mar, 2, -240}; // Eastern Daylight Time = UTC – 4 hours
TimeChangeRule usEST = {“EST”, First, Sun, Nov, 2, -300}; // Eastern Standard Time = UTC – 5 hours
Timezone usET(usEDT, usEST);
// US Central Time Zone (Chicago, Houston)
TimeChangeRule usCDT = {“CDT”, Second, Sun, Mar, 2, -300};
TimeChangeRule usCST = {“CST”, First, Sun, Nov, 2, -360};
Timezone usCT(usCDT, usCST);
// US Mountain Time Zone (Denver, Salt Lake City)
TimeChangeRule usMDT = {“MDT”, Second, Sun, Mar, 2, -360};
TimeChangeRule usMST = {“MST”, First, Sun, Nov, 2, -420};
Timezone usMT(usMDT, usMST);
// Arizona is US Mountain Time Zone but does not use DST
Timezone usAZ(usMST);
// US Pacific Time Zone (Las Vegas, Los Angeles)
TimeChangeRule usPDT = {“PDT”, Second, Sun, Mar, 2, -420};
TimeChangeRule usPST = {“PST”, First, Sun, Nov, 2, -480};
Timezone usPT(usPDT, usPST);
De benodigde arduino libraries staan op de GRA-AFCH Github pagina’s hier:
https://github.com/afch/NixieClock
of download alleen de Libraries
Het werkt echt goed, zie het gezipte bestand hieronder of de arduino code verderop:
NixieClockShield_NCS318_V1_94_TZ.ino
const String FirmwareVersion = “0196TZ”;
const char HardwareVersion[] PROGMEM = {“NCS318/568 FW 1.94TZ 2021_04_04 Jantec.nl add-on for Timezones for HW 1.x HV5122 or HV5222”};
//// This ‘TZ’ firmware addition delivers automated Summer/Winter time changes based on your local time zone settings ////
//// Jantec.nl 2023-04-04 The Netherlands, Amsterdam. Please share and re-use! ////
//// This can and may be used in any CLOCK program, with possibly specific minor alteration, due to different libraries and do on ////
//// All of my add-ons are specified in the code! Cheers, Jantec.nl, NL ////
//// The approach here is to automatically change the EEPROM hours setting according to the SUMMER/WINTER timescheme ////
//// meaning: Put in the register: a) the time zone (=normal winter time) versus UTC and b) at the switching times the summer ‘+1’ change versus ‘normal’wintertime ///
//// If the user changes the hours setting, this will be overruled at every programmed time change related to summer/ winter time
//Format _X.XXX_
//NIXIE CLOCK SHIELD NCS318/568 for HW 1.x by GRA & AFCH (fominalec@gmail.com)
//1.94 26.02.2021
//Added: Сhecking the presence of a gps receiver when turned on.
//Return to the previous gps parser
//1.92 21.01.2021
//Added: defines for GPS receiver types
//1.91 29.07.2020
//The driver has been changed to support BOTH HV5122 and HV5222 registers (switching using resistor R5222 Arduino pin No. 8)
//1.90 08.06.2020
//Fixed: GPS timezone issue: added breakTime(now(), tm) to adjustTime function at Time.cpp
//1.89 03.04.2020
//Dots sync with seconds
//1.88 26.03.2020
//GPS synchronization algorithm has been changed (again)
//1.86 23.02.2020
//GPS synchronization algorithm changed
//1.85.3 23.02.2020
//Added: DS3231 internal temperature sensor self test: 5 beeps if fail.
//1.85.2 21.02.2020
//Fixed: Bug with time zones more than +-9
// GPS parser has been replaced by NEOGPS
//1.85.1 05.01.2020
//Value of “HardwareVersion” was changed to NCS318/568
//1.85 14.06.2019
//indication is working inside interrupt (only for Arduino Mega), driver v1.3 is required
//Added: support programmable leds ws2812b
//Some performance optimizations
//1.84 08.04.2018
//LEDs functions moved to external file
//LEDs freezing while music (or sound) played.
//SPI Setup moved driver’s file
//1.83 02.08.2018 (Driver v 1.1 is required)
//Fixed: Temp. reading speed fixed
//Fixed: Dots mixed up (driver was updated to v. 1.1)
//Fixed: RGB LEDs reading from EEPROM
//Fixed: Check for entering data from GPS in range
//1.82 18.07.2018 Dual Date Format
//1.81 18.02.2018 Temp. sensor present analyze
//1.80 06.08.2017
//Added: Date and Time GPS synchronization
//1.70 30.07.2017
//Added IR remote control support (Sony RM-X151) (“MODE”, “UP”, “DOWN”)
//1.60 24_07_2017
//Added: Temperature reading mode in menu and slot machine transaction
//1.0.31 27_04_2017
//Added: antipoisoning effect – slot machine
//1.021 31.01.2017
//Added: time synchronizing each 10 seconds
//Fixed: not correct time reading from RTC while start up
//1.02 17.10.2016
//Fixed: RGB color controls
//Update to Arduino IDE 1.6.12 (Time.h replaced to TimeLib.h)
//1.01
//Added RGB LEDs lock(by UP and Down Buttons)
//Added Down and Up buttons pause and resume self testing
//25.09.2016 update to HW ver 1.1
//25.05.2016
//#define tubes8
#define tubes6
//#define tubes4
#include <SPI.h>
#include <Wire.h>
#include <ClickButton.h>
#include <TimeLib.h>
#ifndef GRA_AND_AFCH_TIME_LIB_MOD
#error The “Time (TimeLib)” library modified by GRA and AFCH must be used!
#endif
//// THIS IS NEW, related to TIMEZONE add-on:
#include <Timezone.h>//https://github.com/JChristensen/Timezone
//Central European Time (Frankfurt, Paris)
TimeChangeRule myDST = {“CEST”, Last, Sun, Mar, 26, 120}; //Central European Summer Time//Daylight time = UTC +2 hours
TimeChangeRule mySTD = {“CET “, Last, Sun, Oct, 3, 60}; //Central European Standard Time (Winter)//Daylight time = UTC +1 hour
Timezone myTZ(myDST, mySTD);
//ADD AND REPLACE THE ABOVE FOR ANY OTHER REQUIRED TIMEZONE FROM THE EXAMPLES IN JChistensen’s exaples folders
// US Eastern Time Zone (New York, Detroit)
//TimeChangeRule myDST = {“EDT”, Second, Sun, Mar, 2, -240}; //Daylight time = UTC – 4 hours
//TimeChangeRule mySTD = {“EST”, First, Sun, Nov, 2, -300}; //Daylight time = UTC – 4 hours
//Timezone myTZ(myDST, mySTD);
TimeChangeRule *tcr; //pointer to the time change rule, use to get the TZ abbrev
time_t utc;
//// end of this add-on for TIMEZONE
#include <Tone.h>
#include <EEPROM.h>
#include “doIndication318_HW1.x.h”
#include <OneWire.h>
//IR remote control /////////// START /////////////////////////////
#if defined(__AVR_ATmega1280__) || defined(__AVR_ATmega2560__)
#define GPS_SYNC_INTERVAL 1800000 // in milliseconds
//#define GPS_SYNC_INTERVAL 180000 //3 minutes
unsigned long Last_Time_GPS_Sync = 0;
//bool GPS_Sync_Flag = false;
//uint32_t GPS_Sync_Interval=120000; // 2 minutes
uint32_t GPS_Sync_Interval = 60000; // first try = 1 minute
uint32_t MillsNow=0;
#define TIME_TO_TRY 60000 //1 minute
bool AttMsgWasShowed=false;
#define GPS_BUFFER_LENGTH 83
char GPS_Package[GPS_BUFFER_LENGTH];
byte GPS_position = 0;
struct GPS_DATE_TIME
{
byte GPS_hours;
byte GPS_minutes;
byte GPS_seconds;
byte GPS_day;
byte GPS_mounth;
int GPS_year;
bool GPS_Valid_Data = false;
unsigned long GPS_Data_Parsed_time;
};
GPS_DATE_TIME GPS_Date_Time;
#define PreZero(digit) ((abs(digit)<10)?”0″+String(abs(digit)):String(abs(digit)))
#include <IRremote.h>
int RECV_PIN = 4;
IRrecv irrecv(RECV_PIN);
decode_results IRresults;
// buttons codes for remote controller Sony RM-X151
#define IR_BUTTON_UP_CODE 0x6621
#define IR_BUTTON_DOWN_CODE 0x2621
#define IR_BUTTON_MODE_CODE 0x7121
class IRButtonState
{
public:
int PAUSE_BETWEEN_PACKETS = 50;
int PACKETS_QTY_IN_LONG_PRESS = 18;
private:
bool Flag = 0;
byte CNT_packets = 0;
unsigned long lastPacketTime = 0;
bool START_TIMER = false;
int _buttonCode;
public: IRButtonState::IRButtonState(int buttonCode)
{
_buttonCode = buttonCode;
}
public: int IRButtonState::checkButtonState(int receivedCode)
{
if (((millis() – lastPacketTime) > PAUSE_BETWEEN_PACKETS) && (START_TIMER == true))
{
START_TIMER = false;
if (CNT_packets >= 2) {
Flag = 0;
CNT_packets = 0;
START_TIMER = false;
return 1;
}
else {
Flag = 0;
CNT_packets = 0;
return 0;
}
}
else
{
if (receivedCode == _buttonCode) { Flag = 1;}
else
{
if (!(Flag == 1)) {return 0;}
else
{
if (!(receivedCode == 0xFFFFFFFF)) {return 0;}
}
}
CNT_packets++;
lastPacketTime = millis();
START_TIMER = true;
if (CNT_packets >= PACKETS_QTY_IN_LONG_PRESS) {
Flag = 0;
CNT_packets = 0;
START_TIMER = false;
return -1;
}
else {return 0;}
}
}
};
IRButtonState IRModeButton(IR_BUTTON_MODE_CODE);
IRButtonState IRUpButton(IR_BUTTON_UP_CODE);
IRButtonState IRDownButton(IR_BUTTON_DOWN_CODE);
#endif
int ModeButtonState = 0;
int UpButtonState = 0;
int DownButtonState = 0;
//IR remote control /////////// START /////////////////////////////
/*#define GPS_BUFFER_LENGTH 83
char GPS_Package[GPS_BUFFER_LENGTH];
byte GPS_position=0;
struct GPS_DATE_TIME
{
byte GPS_hours;
byte GPS_minutes;
byte GPS_seconds;
byte GPS_day;
byte GPS_mounth;
int GPS_year;
bool GPS_Valid_Data=false;
unsigned long GPS_Data_Parsed_time;
};
*/
//GPS_DATE_TIME GPS_Date_Time;
unsigned long GPS_Data_Parsed_time;
boolean UD, LD; // DOTS control;
byte data[12];
byte addr[8];
int celsius, fahrenheit;
#define RedLedPin 9 //MCU WDM output for red LEDs 9-g
#define GreenLedPin 6 //MCU WDM output for green LEDs 6-b
#define BlueLedPin 3 //MCU WDM output for blue LEDs 3-r
#define pinSet A0
#define pinUp A2
#define pinDown A1
//#define pinBuzzer 2
const byte pinBuzzer = 2; // pomenyal
#define pinUpperDots 12 //HIGH value light a dots
#define pinLowerDots 8 //HIGH value light a dots
#define pinTemp 7
bool RTC_present;
#define US_DateFormat 1
#define EU_DateFormat 0
//bool DateFormat=EU_DateFormat;
OneWire ds(pinTemp);
bool TempPresent = false;
#define CELSIUS 0
#define FAHRENHEIT 1
String stringToDisplay = “000000”; // Content of this string will be displayed on tubes (must be 6 chars length)
int menuPosition = 0;
// 0 – time
// 1 – date
// 2 – alarm
// 3 – 12/24 hours mode
// 4 – Temperature
// 5 – TimeZone* (Only for Ardiono Mega)
byte blinkMask = B00000000; //bit mask for blinkin digits (1 – blink, 0 – constant light)
int blankMask = B00000000; //bit mask for digits (1 – off, 0 – on)
byte dotPattern = B00000000; //bit mask for separeting dots (1 – on, 0 – off)
//B10000000 – upper dots
//B01000000 – lower dots
#define DS1307_ADDRESS 0x68
byte zero = 0x00; //workaround for issue #527
int RTC_hours, RTC_minutes, RTC_seconds, RTC_day, RTC_month, RTC_year, RTC_day_of_week;
#define TimeIndex 0
#define DateIndex 1
#define AlarmIndex 2
#define hModeIndex 3
#define TemperatureIndex 4
#define TimeZoneIndex 5
#define TimeHoursIndex 6
#define TimeMintuesIndex 7
#define TimeSecondsIndex 8
#define DateFormatIndex 9
#define DateDayIndex 10
#define DateMonthIndex 11
#define DateYearIndex 12
#define AlarmHourIndex 13
#define AlarmMinuteIndex 14
#define AlarmSecondIndex 15
#define Alarm01 16
#define hModeValueIndex 17
#define DegreesFormatIndex 18
#define HoursOffsetIndex 19
#define FirstParent TimeIndex
#define LastParent TimeZoneIndex
#define SettingsCount (HoursOffsetIndex+1)
#define NoParent 0
#define NoChild 0
//——————————-0——–1——–2——-3——–4——–5——–6——–7——–8——–9———-10——-11———12———13——-14——-15———16———17——–18———-19
// names: Time, Date, Alarm, 12/24, Temperature,TimeZone,hours, mintues, seconds, DateFormat, day, month, year, hour, minute, second alarm01 hour_format Deg.FormIndex HoursOffset
// 1 1 1 1 1 1 1 1 1 1 1 1 1 1 1 1 1 1 1 1
int parent[SettingsCount] = {NoParent, NoParent, NoParent, NoParent,NoParent,NoParent,1, 1, 1, 2, 2, 2, 2, 3, 3, 3, 3, 4, 5, 6};
int firstChild[SettingsCount] = {6, 9, 13, 17, 18, 19, 0, 0, 0, NoChild, 0, 0, 0, 0, 0, 0, 0, 0, 0, 0};
int lastChild[SettingsCount] = { 8, 12, 16, 17, 18, 19, 0, 0, 0, NoChild, 0, 0, 0, 0, 0, 0, 0, 0, 0, 0};
int value[SettingsCount] = { 0, 0, 0, 0, 0, 0, 0, 0, 0, EU_DateFormat, 0, 0, 0, 0, 0, 0, 0, 24, 0, 2};
int maxValue[SettingsCount] = { 0, 0, 0, 0, 0, 0, 23, 59, 59, US_DateFormat, 31, 12, 99, 23, 59, 59, 1, 24, FAHRENHEIT, 14};
int minValue[SettingsCount] = { 0, 0, 0, 12, 0, 0, 00, 00, 00, EU_DateFormat, 1, 1, 00, 00, 00, 00, 0, 12, CELSIUS, -12};
int blinkPattern[SettingsCount] = {
B00000000, //0
B00000000, //1
B00000000, //2
B00000000, //3
B00000000, //4
B00000000, //5
B00000011, //6
B00001100, //7
B00110000, //8
B00111111, //9
B00000011, //10
B00001100, //11
B00110000, //12
B00000011, //13
B00001100, //14
B00110000, //15
B11000000, //16
B00001100, //17
B00111111, //18
B00000011, //19
};
bool editMode = false;
long downTime = 0;
long upTime = 0;
const long settingDelay = 150;
bool BlinkUp = false;
bool BlinkDown = false;
unsigned long enteringEditModeTime = 0;
bool RGBLedsOn = true;
#define RGBLEDsEEPROMAddress 0
#define HourFormatEEPROMAddress 1
#define AlarmTimeEEPROMAddress 2 //3,4,5
#define AlarmArmedEEPROMAddress 6
#define LEDsLockEEPROMAddress 7
#define LEDsRedValueEEPROMAddress 8
#define LEDsGreenValueEEPROMAddress 9
#define LEDsBlueValueEEPROMAddress 10
#define DegreesFormatEEPROMAddress 11
#define HoursOffsetEEPROMAddress 12
#define DateFormatEEPROMAddress 13
//buttons pins declarations
ClickButton setButton(pinSet, LOW, CLICKBTN_PULLUP);
ClickButton upButton(pinUp, LOW, CLICKBTN_PULLUP);
ClickButton downButton(pinDown, LOW, CLICKBTN_PULLUP);
///////////////////
Tone tone1;
#define isdigit(n) (n >= ‘0’ && n <= ‘9’)
//char *song = “MissionImp:d=16,o=6,b=95:32d,32d#,32d,32d#,32d,32d#,32d,32d#,32d,32d,32d#,32e,32f,32f#,32g,g,8p,g,8p,a#,p,c7,p,g,8p,g,8p,f,p,f#,p,g,8p,g,8p,a#,p,c7,p,g,8p,g,8p,f,p,f#,p,a#,g,2d,32p,a#,g,2c#,32p,a#,g,2c,a#5,8c,2p,32p,a#5,g5,2f#,32p,a#5,g5,2f,32p,a#5,g5,2e,d#,8d”;
char *song = “PinkPanther:d=4,o=5,b=160:8d#,8e,2p,8f#,8g,2p,8d#,8e,16p,8f#,8g,16p,8c6,8b,16p,8d#,8e,16p,8b,2a#,2p,16a,16g,16e,16d,2e”;
//char *song=”VanessaMae:d=4,o=6,b=70:32c7,32b,16c7,32g,32p,32g,32p,32d#,32p,32d#,32p,32c,32p,32c,32p,32c7,32b,16c7,32g#,32p,32g#,32p,32f,32p,16f,32c,32p,32c,32p,32c7,32b,16c7,32g,32p,32g,32p,32d#,32p,32d#,32p,32c,32p,32c,32p,32g,32f,32d#,32d,32c,32d,32d#,32c,32d#,32f,16g,8p,16d7,32c7,32d7,32a#,32d7,32a,32d7,32g,32d7,32d7,32p,32d7,32p,32d7,32p,16d7,32c7,32d7,32a#,32d7,32a,32d7,32g,32d7,32d7,32p,32d7,32p,32d7,32p,32g,32f,32d#,32d,32c,32d,32d#,32c,32d#,32f,16c”;
//char *song=”DasBoot:d=4,o=5,b=100:d#.4,8d4,8c4,8d4,8d#4,8g4,a#.4,8a4,8g4,8a4,8a#4,8d,2f.,p,f.4,8e4,8d4,8e4,8f4,8a4,c.,8b4,8a4,8b4,8c,8e,2g.,2p”;
//char *song=”Scatman:d=4,o=5,b=200:8b,16b,32p,8b,16b,32p,8b,2d6,16p,16c#.6,16p.,8d6,16p,16c#6,8b,16p,8f#,2p.,16c#6,8p,16d.6,16p.,16c#6,16b,8p,8f#,2p,32p,2d6,16p,16c#6,8p,16d.6,16p.,16c#6,16a.,16p.,8e,2p.,16c#6,8p,16d.6,16p.,16c#6,16b,8p,8b,16b,32p,8b,16b,32p,8b,2d6,16p,16c#.6,16p.,8d6,16p,16c#6,8b,16p,8f#,2p.,16c#6,8p,16d.6,16p.,16c#6,16b,8p,8f#,2p,32p,2d6,16p,16c#6,8p,16d.6,16p.,16c#6,16a.,16p.,8e,2p.,16c#6,8p,16d.6,16p.,16c#6,16a,8p,8e,2p,32p,16f#.6,16p.,16b.,16p.”;
//char *song=”Popcorn:d=4,o=5,b=160:8c6,8a#,8c6,8g,8d#,8g,c,8c6,8a#,8c6,8g,8d#,8g,c,8c6,8d6,8d#6,16c6,8d#6,16c6,8d#6,8d6,16a#,8d6,16a#,8d6,8c6,8a#,8g,8a#,c6″;
//char *song=”WeWishYou:d=4,o=5,b=200:d,g,8g,8a,8g,8f#,e,e,e,a,8a,8b,8a,8g,f#,d,d,b,8b,8c6,8b,8a,g,e,d,e,a,f#,2g,d,g,8g,8a,8g,8f#,e,e,e,a,8a,8b,8a,8g,f#,d,d,b,8b,8c6,8b,8a,g,e,d,e,a,f#,1g,d,g,g,g,2f#,f#,g,f#,e,2d,a,b,8a,8a,8g,8g,d6,d,d,e,a,f#,2g”;
#define OCTAVE_OFFSET 0
char *p;
int notes[] = { 0,
NOTE_C4, NOTE_CS4, NOTE_D4, NOTE_DS4, NOTE_E4, NOTE_F4, NOTE_FS4, NOTE_G4, NOTE_GS4, NOTE_A4, NOTE_AS4, NOTE_B4,
NOTE_C5, NOTE_CS5, NOTE_D5, NOTE_DS5, NOTE_E5, NOTE_F5, NOTE_FS5, NOTE_G5, NOTE_GS5, NOTE_A5, NOTE_AS5, NOTE_B5,
NOTE_C6, NOTE_CS6, NOTE_D6, NOTE_DS6, NOTE_E6, NOTE_F6, NOTE_FS6, NOTE_G6, NOTE_GS6, NOTE_A6, NOTE_AS6, NOTE_B6,
NOTE_C7, NOTE_CS7, NOTE_D7, NOTE_DS7, NOTE_E7, NOTE_F7, NOTE_FS7, NOTE_G7, NOTE_GS7, NOTE_A7, NOTE_AS7, NOTE_B7
};
int fireforks[] = {0, 0, 1, //1
-1, 0, 0, //2
0, 1, 0, //3
0, 0, -1, //4
1, 0, 0, //5
0, -1, 0
}; //array with RGB rules (0 – do nothing, -1 – decrese, +1 – increse
void setRTCDateTime(byte h, byte m, byte s, byte d, byte mon, byte y, byte w = 1);
int functionDownButton = 0;
int functionUpButton = 0;
bool LEDsLock = false;
//antipoisoning transaction
bool modeChangedByUser = false;
bool transactionInProgress = false; //antipoisoning transaction
#define timeModePeriod 60000
#define dateModePeriod 5000
long modesChangePeriod = timeModePeriod;
//end of antipoisoning transaction
bool GPS_sync_flag=false;
extern const int LEDsDelay;
/*******************************************************************************************************
Init Programm
*******************************************************************************************************/
void setup()
{
Wire.begin();
//setRTCDateTime(23,40,00,25,7,15,1);
Serial.begin(115200);
#if defined(__AVR_ATmega1280__) || defined(__AVR_ATmega2560__)
Serial1.begin(9600);
digitalWrite(19, HIGH);
#endif
if (EEPROM.read(HourFormatEEPROMAddress) != 12) value[hModeValueIndex] = 24; else value[hModeValueIndex] = 12;
if (EEPROM.read(RGBLEDsEEPROMAddress) != 0) RGBLedsOn = true; else RGBLedsOn = false;
if (EEPROM.read(AlarmTimeEEPROMAddress) == 255) value[AlarmHourIndex] = 0; else value[AlarmHourIndex] = EEPROM.read(AlarmTimeEEPROMAddress);
if (EEPROM.read(AlarmTimeEEPROMAddress + 1) == 255) value[AlarmMinuteIndex] = 0; else value[AlarmMinuteIndex] = EEPROM.read(AlarmTimeEEPROMAddress + 1);
if (EEPROM.read(AlarmTimeEEPROMAddress + 2) == 255) value[AlarmSecondIndex] = 0; else value[AlarmSecondIndex] = EEPROM.read(AlarmTimeEEPROMAddress + 2);
if (EEPROM.read(AlarmArmedEEPROMAddress) == 255) value[Alarm01] = 0; else value[Alarm01] = EEPROM.read(AlarmArmedEEPROMAddress);
if (EEPROM.read(LEDsLockEEPROMAddress) == 255) LEDsLock = false; else LEDsLock = EEPROM.read(LEDsLockEEPROMAddress);
if (EEPROM.read(DegreesFormatEEPROMAddress) == 255) value[DegreesFormatIndex] = CELSIUS; else value[DegreesFormatIndex] = EEPROM.read(DegreesFormatEEPROMAddress);
if (EEPROM.read(HoursOffsetEEPROMAddress) == 255) value[HoursOffsetIndex] = value[HoursOffsetIndex]; else value[HoursOffsetIndex] = EEPROM.read(HoursOffsetEEPROMAddress) + minValue[HoursOffsetIndex];
//// needed to set this HoursOffsetIndex variable to 0 since we will use the timezone lib (local timezone and summer/winter time add-ons by Jantec.nl)
value[HoursOffsetIndex] = 0;
EEPROM.write(HoursOffsetEEPROMAddress, 0);
if (EEPROM.read(DateFormatEEPROMAddress) == 255) value[DateFormatIndex] = value[DateFormatIndex]; else value[DateFormatIndex] = EEPROM.read(DateFormatEEPROMAddress);
//Serial.print(F(“led lock=”));
//Serial.println(LEDsLock);
pinMode(RedLedPin, OUTPUT);
pinMode(GreenLedPin, OUTPUT);
pinMode(BlueLedPin, OUTPUT);
tone1.begin(pinBuzzer);
song = parseSong(song);
pinMode(LEpin, OUTPUT);
// SPI setup
SPISetup();
LEDsSetup();
//buttons pins inits
pinMode(pinSet, INPUT_PULLUP);
pinMode(pinUp, INPUT_PULLUP);
pinMode(pinDown, INPUT_PULLUP);
////////////////////////////
pinMode(pinBuzzer, OUTPUT);
//buttons objects inits
setButton.debounceTime = 20; // Debounce timer in ms
setButton.multiclickTime = 30; // Time limit for multi clicks
setButton.longClickTime = 2000; // time until “held-down clicks” register
upButton.debounceTime = 20; // Debounce timer in ms
upButton.multiclickTime = 30; // Time limit for multi clicks
upButton.longClickTime = 2000; // time until “held-down clicks” register
downButton.debounceTime = 20; // Debounce timer in ms
downButton.multiclickTime = 30; // Time limit for multi clicks
downButton.longClickTime = 2000; // time until “held-down clicks” register
#if defined(__AVR_ATmega1280__) || defined(__AVR_ATmega2560__)
timerSetup();
#endif
//!!!!!!!!!!!!!!!!!!!!!!!!!!!!!!!!!!!!!!!!!!!!!!!!
doTest();
//!!!!!!!!!!!!!!!!!!!!!!!!!!!!!!!!!!!!!!!!!!!!!!!
if (LEDsLock == 1)
{
setLEDsFromEEPROM();
}
getRTCTime();
byte prevSeconds = RTC_seconds;
unsigned long RTC_ReadingStartTime = millis();
RTC_present = true;
while (prevSeconds == RTC_seconds)
{
getRTCTime();
//Serial.println(RTC_seconds);
if ((millis() – RTC_ReadingStartTime) > 3000)
{
#ifdef DEBUG
Serial.println(F(“Warning! RTC DON’T RESPOND!”));
#endif
RTC_present = false;
break;
}
}
setTime(RTC_hours, RTC_minutes, RTC_seconds, RTC_day, RTC_month, RTC_year);
#if defined(__AVR_ATmega1280__) || defined(__AVR_ATmega2560__)
irrecv.blink13(false);
irrecv.enableIRIn(); // Start the receiver
#endif
//// add-ons for TIMEZONE
time_t utc = now();
time_t local = myTZ.toLocal(utc, &tcr);
Serial.println();
printDateTime(utc, “UTC”);
printDateTime(local, tcr -> abbrev);
delay(1000);//was 10000
//// end of add-ons for TIMEZONE
}
int rotator = 0; //index in array with RGB “rules” (increse by one on each 255 cycles)
int cycle = 0; //cycles counter
int RedLight = 255;
int GreenLight = 0;
int BlueLight = 0;
unsigned long prevTime = 0; // time of lase tube was lit
unsigned long prevTime4FireWorks = 0; //time of last RGB changed
//int minuteL=0; //младшая цифра минут
/***************************************************************************************************************
MAIN Programm
***************************************************************************************************************/
void loop() {
if (((millis() % 10000) == 0) && (RTC_present)) //synchronize with RTC every 10 seconds
{
getRTCTime();
setTime(RTC_hours, RTC_minutes, RTC_seconds, RTC_day, RTC_month, RTC_year);
// 4 lines of time zone & winter/summer time additions by Jantec.nl 2023 0404
time_t utc = now();
time_t local = myTZ.toLocal(utc, &tcr);
setTime(myTZ.toLocal(utc, &tcr));
EEPROM.write(DateFormatEEPROMAddress, value[myTZ.toLocal(utc, &tcr)]);
//Serial.println(F(“Sync”));
}
#if defined(__AVR_ATmega1280__) || defined(__AVR_ATmega2560__)
MillsNow=millis();
if ((MillsNow – Last_Time_GPS_Sync) > GPS_Sync_Interval)
{
//GPS_Sync_Interval = GPS_SYNC_INTERVAL; // <—-!
//GPS_Sync_Flag = 0;
if (AttMsgWasShowed==false)
{
Serial.println(F(“Attempt to sync with GPS.”));
AttMsgWasShowed=true;
}
GetDataFromSerial1();
//SyncWithGPS();
}
if ((MillsNow – Last_Time_GPS_Sync) > GPS_Sync_Interval + TIME_TO_TRY)
{
Last_Time_GPS_Sync=MillsNow; //if it is not possible to synchronize within the allotted time TIME_TO_TRY, then we postpone attempts to the next time interval.
//GPS_Sync_Flag = 1;
//GPS_Sync_Interval = GPS_SYNC_INTERVAL;
Serial.println(F(“All attempts were unsuccessful.”));
AttMsgWasShowed=false;
}
IRresults.value = 0;
if (irrecv.decode(&IRresults)) {
Serial.println(IRresults.value, HEX);
irrecv.resume(); // Receive the next value
}
ModeButtonState = IRModeButton.checkButtonState(IRresults.value);
if (ModeButtonState == 1) Serial.println(F(“Mode short”));
if (ModeButtonState == -1) Serial.println(F(“Mode long….”));
UpButtonState = IRUpButton.checkButtonState(IRresults.value);
if (UpButtonState == 1) Serial.println(F(“Up short”));
if (UpButtonState == -1) Serial.println(F(“Up long….”));
DownButtonState = IRDownButton.checkButtonState(IRresults.value);
if (DownButtonState == 1) Serial.println(F(“Down short”));
if (DownButtonState == -1) Serial.println(F(“Down long….”));
#else
ModeButtonState=0;
UpButtonState=0;
DownButtonState=0;
#endif
p = playmusic(p);
if ((millis() – prevTime4FireWorks) > LEDsDelay)
{
rotateFireWorks(); //change color (by 1 step)
prevTime4FireWorks = millis();
}
if ((menuPosition == TimeIndex) || (modeChangedByUser == false) ) modesChanger();
#if defined (__AVR_ATmega328P__)
doIndication();
#endif
setButton.Update();
upButton.Update();
downButton.Update();
if (editMode == false)
{
blinkMask = B00000000;
} else if ((millis() – enteringEditModeTime) > 60000)
{
editMode = false;
menuPosition = firstChild[menuPosition];
blinkMask = blinkPattern[menuPosition];
}
if ((setButton.clicks > 0) || (ModeButtonState == 1)) //short click
{
modeChangedByUser = true;
p = 0; //shut off music )))
tone1.play(1000, 100);
enteringEditModeTime = millis();
/*if (value[DateFormatIndex] == US_DateFormat)
{
//if (menuPosition == )
} else */
menuPosition = menuPosition + 1;
#if defined (__AVR_ATmega328P__)
if (menuPosition == TimeZoneIndex) menuPosition++;// skip TimeZone for Arduino Uno
#endif
if (menuPosition == LastParent + 1) menuPosition = TimeIndex;
/*Serial.print(F(“menuPosition=”));
Serial.println(menuPosition);
Serial.print(F(“value=”));
Serial.println(value[menuPosition]);*/
blinkMask = blinkPattern[menuPosition];
if ((parent[menuPosition – 1] != 0) and (lastChild[parent[menuPosition – 1] – 1] == (menuPosition – 1))) //exit from edit mode
{
if ((parent[menuPosition – 1] – 1 == 1) && (!isValidDate()))
{
menuPosition = DateDayIndex;
return;
}
editMode = false;
menuPosition = parent[menuPosition – 1] – 1;
if (menuPosition == TimeIndex) setTime(value[TimeHoursIndex], value[TimeMintuesIndex], value[TimeSecondsIndex], day(), month(), year());
if (menuPosition == DateIndex)
{
#ifdef DEBUG
Serial.print(F(“Day:”));
Serial.println(value[DateDayIndex]);
Serial.print(F(“Month:”));
Serial.println(value[DateMonthIndex]);
#endif
setTime(hour(), minute(), second(), value[DateDayIndex], value[DateMonthIndex], 2000 + value[DateYearIndex]);
EEPROM.write(DateFormatEEPROMAddress, value[DateFormatIndex]);
}
if (menuPosition == AlarmIndex) {
EEPROM.write(AlarmTimeEEPROMAddress, value[AlarmHourIndex]);
EEPROM.write(AlarmTimeEEPROMAddress + 1, value[AlarmMinuteIndex]);
EEPROM.write(AlarmTimeEEPROMAddress + 2, value[AlarmSecondIndex]);
EEPROM.write(AlarmArmedEEPROMAddress, value[Alarm01]);
};
if (menuPosition == hModeIndex) EEPROM.write(HourFormatEEPROMAddress, value[hModeValueIndex]);
if (menuPosition == TemperatureIndex)
{
EEPROM.write(DegreesFormatEEPROMAddress, value[DegreesFormatIndex]);
}
if (menuPosition == TimeZoneIndex) EEPROM.write(HoursOffsetEEPROMAddress, value[HoursOffsetIndex] – minValue[HoursOffsetIndex]);
//if (menuPosition == hModeIndex) EEPROM.write(HourFormatEEPROMAddress, value[hModeValueIndex]);
setRTCDateTime(hour(), minute(), second(), day(), month(), year() % 1000, 1);
return;
} //end exit from edit mode
/*Serial.print(“menu pos=”);
Serial.println(menuPosition);
Serial.print(“DateFormat”);
Serial.println(value[DateFormatIndex]);*/
if ((menuPosition != HoursOffsetIndex) &&
(menuPosition != DateFormatIndex) &&
(menuPosition != DateDayIndex)) value[menuPosition] = extractDigits(blinkMask);
}
if ((setButton.clicks < 0) || (ModeButtonState == -1)) //long click
{
tone1.play(1000, 100);
if (!editMode)
{
enteringEditModeTime = millis();
if (menuPosition == TimeIndex) stringToDisplay = PreZero(hour()) + PreZero(minute()) + PreZero(second()); //temporary enabled 24 hour format while settings
}
if (menuPosition == DateIndex)
{
// Serial.println(“DateEdit”);
value[DateDayIndex] = day();
value[DateMonthIndex] = month();
value[DateYearIndex] = year() % 1000;
if (value[DateFormatIndex] == EU_DateFormat) stringToDisplay=PreZero(value[DateDayIndex])+PreZero(value[DateMonthIndex])+PreZero(value[DateYearIndex]);
else stringToDisplay=PreZero(value[DateMonthIndex])+PreZero(value[DateDayIndex])+PreZero(value[DateYearIndex]);
//Serial.print(“str=”);
// Serial.println(stringToDisplay);
}
menuPosition = firstChild[menuPosition];
if (menuPosition == AlarmHourIndex) {
value[Alarm01] = 1; /*digitalWrite(pinUpperDots, HIGH);*/dotPattern = B10000000;
}
editMode = !editMode;
blinkMask = blinkPattern[menuPosition];
if ((menuPosition != DegreesFormatIndex) &&
(menuPosition != HoursOffsetIndex) &&
(menuPosition != DateFormatIndex))
value[menuPosition] = extractDigits(blinkMask);
/*Serial.print(F(“menuPosition=”));
Serial.println(menuPosition);
Serial.print(F(“value=”));
Serial.println(value[menuPosition]); */
}
if (upButton.clicks != 0) functionUpButton = upButton.clicks;
if ((upButton.clicks > 0) || (UpButtonState == 1))
{
modeChangedByUser = true;
p = 0; //shut off music )))
tone1.play(1000, 100);
incrementValue();
if (!editMode)
{
LEDsLock = false;
EEPROM.write(LEDsLockEEPROMAddress, 0);
}
}
if (functionUpButton == -1 && upButton.depressed == true)
{
BlinkUp = false;
if (editMode == true)
{
if ( (millis() – upTime) > settingDelay)
{
upTime = millis();// + settingDelay;
incrementValue();
}
}
} else BlinkUp = true;
if (downButton.clicks != 0) functionDownButton = downButton.clicks;
if ((downButton.clicks > 0) || (DownButtonState == 1))
{
modeChangedByUser = true;
p = 0; //shut off music )))
tone1.play(1000, 100);
dicrementValue();
if (!editMode)
{
LEDsLock = true;
EEPROM.write(LEDsLockEEPROMAddress, 1);
EEPROM.write(LEDsRedValueEEPROMAddress, RedLight);
EEPROM.write(LEDsGreenValueEEPROMAddress, GreenLight);
EEPROM.write(LEDsBlueValueEEPROMAddress, BlueLight);
/*Serial.println(F(“Store to EEPROM:”));
Serial.print(F(“RED=”));
Serial.println(RedLight);
Serial.print(F(“GREEN=”));
Serial.println(GreenLight);
Serial.print(F(“Blue=”));
Serial.println(BlueLight);*/
}
}
if (functionDownButton == -1 && downButton.depressed == true)
{
BlinkDown = false;
if (editMode == true)
{
if ( (millis() – downTime) > settingDelay)
{
downTime = millis();// + settingDelay;
dicrementValue();
}
}
} else BlinkDown = true;
if (!editMode)
{
if ((upButton.clicks < 0) || (UpButtonState == -1))
{
tone1.play(1000, 100);
RGBLedsOn = true;
EEPROM.write(RGBLEDsEEPROMAddress, 1);
#ifdef DEBUG
Serial.println(F(“RGB=on”));
#endif
setLEDsFromEEPROM();
}
if ((downButton.clicks < 0) || (DownButtonState == -1))
{
tone1.play(1000, 100);
RGBLedsOn = false;
EEPROM.write(RGBLEDsEEPROMAddress, 0);
#ifdef DEBUG
Serial.println(F(“RGB=off”));
#endif
}
}
static bool updateDateTime = false;
float curTemp=0;
switch (menuPosition)
{
case TimeIndex: //time mode
if (!transactionInProgress) stringToDisplay = updateDisplayString();
doDotBlink();
checkAlarmTime();
blankMask = B00000000;
break;
case DateIndex: //date mode
if (!transactionInProgress) stringToDisplay = updateDateString();
dotPattern = B01000000; //turn on lower dots
checkAlarmTime();
blankMask = B00000000;
break;
case AlarmIndex: //alarm mode
//stringToDisplay=”000000″;
//unsigned long execTime;
//execTime=micros();
stringToDisplay = PreZero(value[AlarmHourIndex]) + PreZero(value[AlarmMinuteIndex]) + PreZero(value[AlarmSecondIndex]);
blankMask = B00000000;
if (value[Alarm01] == 1) dotPattern = B10000000; //turn on upper dots
else
{
dotPattern = B00000000; //turn off upper dots
}
//execTime=micros()-execTime;
//Serial.println(execTime);
checkAlarmTime();
break;
case hModeIndex: //12/24 hours mode
stringToDisplay = “00” + String(value[hModeValueIndex]) + “00”;
blankMask = B00110011;
dotPattern = B00000000; //turn off all dots
checkAlarmTime();
break;
case TemperatureIndex: //missed break
case DegreesFormatIndex:
if (!transactionInProgress)
{
curTemp=getTemperature(value[DegreesFormatIndex]);
stringToDisplay = updateTemperatureString(curTemp);
if (value[DegreesFormatIndex] == CELSIUS)
{
blankMask = B00110001;
dotPattern = B01000000;
}
else
{
blankMask = B00100011;
dotPattern = B00000000;
}
}
if (curTemp < 0) dotPattern |= B10000000;
else dotPattern &= B01111111;
break;
case TimeZoneIndex:
case HoursOffsetIndex:
stringToDisplay = String(PreZero(value[HoursOffsetIndex])) + “0000”;
blankMask = B00001111;
if (value[HoursOffsetIndex]>=0) dotPattern = B00000000; //turn off all dots
else dotPattern = B10000000; //turn on upper dots
break;
case DateFormatIndex:
if (value[DateFormatIndex] == EU_DateFormat)
{
stringToDisplay=”311299″;
blinkPattern[DateDayIndex]=B00000011;
blinkPattern[DateMonthIndex]=B00001100;
}
else
{
stringToDisplay=”123199″;
blinkPattern[DateDayIndex]=B00001100;
blinkPattern[DateMonthIndex]=B00000011;
}
break;
case DateDayIndex:
case DateMonthIndex:
case DateYearIndex:
if (value[DateFormatIndex] == EU_DateFormat) stringToDisplay=PreZero(value[DateDayIndex])+PreZero(value[DateMonthIndex])+PreZero(value[DateYearIndex]);
else stringToDisplay=PreZero(value[DateMonthIndex])+PreZero(value[DateDayIndex])+PreZero(value[DateYearIndex]);
break;
}
// IRresults.value=0;
}
#if defined (__AVR_ATmega328P__)
String PreZero(int digit)
{
digit=abs(digit);
if (digit < 10) return String(“0”) + String(digit);
//if (digit < 10) return “0” + String(digit);
else return String(digit);
}
#endif
String updateDisplayString()
{
static int prevS=-1;
if (second()!=prevS)
{
prevS=second();
return getTimeNow();
} else return stringToDisplay;
}
String getTimeNow()
{
if (value[hModeValueIndex] == 24) return PreZero(hour()) + PreZero(minute()) + PreZero(second());
else return PreZero(hourFormat12()) + PreZero(minute()) + PreZero(second());
}
//// add-on void for TIMEZONE ////////////////////////////////////////////////////////////
// format and print a time_t value, with a time zone appended.
void printDateTime(time_t t, const char *tz)
{
char buf[32];
char m[4]; // temporary storage for month string (DateStrings.cpp uses shared buffer)
strcpy(m, monthShortStr(month(t)));
sprintf(buf, “%.2d:%.2d:%.2d %s %.2d %s %d %s”,
hour(t), minute(t), second(t), dayShortStr(weekday(t)), day(t), m, year(t), tz);
Serial.println(buf);
}
/////// Jantec.nl 2023-04-04 The Netherlands, Amsterdam. Please share and re-use! ////////
void doTest()
{
Serial.print(F(“Firmware version: “));
Serial.println(FirmwareVersion.substring(1,2)+”.”+FirmwareVersion.substring(2,5));
for (byte k = 0; k < strlen_P(HardwareVersion); k++) {
Serial.print((char)pgm_read_byte_near(HardwareVersion + k));
}
Serial.println();
#ifdef DEBUG
Serial.println(F(“Start Test”));
#endif
p=song;
parseSong(p);
//p=0; //need to be deleted
LEDsTest();
#if defined(__AVR_ATmega1280__) || defined(__AVR_ATmega2560__)
if (Serial1.available() > 20) Serial.println(F(“GPS detected”));
else Serial.println(F(“GPS NOT detected!”));
#endif
#ifdef tubes8
String testStringArray[11]={“00000000″,”11111111″,”22222222″,”33333333″,”44444444″,”55555555″,”66666666″,”77777777″,”88888888″,”99999999″,””};
testStringArray[10]=FirmwareVersion+”00″;
#endif
#ifdef tubes6
String testStringArray[11]={“000000″,”111111″,”222222″,”333333″,”444444″,”555555″,”666666″,”777777″,”888888″,”999999″,””};
testStringArray[10]=FirmwareVersion;
#endif
int dlay=500;
bool test=1;
byte strIndex=-1;
unsigned long startOfTest=millis()+1000; //disable delaying in first iteration
bool digitsLock=false;
while (test)
{
if (digitalRead(pinDown)==0) digitsLock=true;
if (digitalRead(pinUp)==0) digitsLock=false;
if ((millis()-startOfTest)>dlay)
{
startOfTest=millis();
if (!digitsLock) strIndex=strIndex+1;
if (strIndex==10) dlay=2000;
if (strIndex>10) { test=false; strIndex=10;}
stringToDisplay=testStringArray[strIndex];
#ifdef DEBUG
Serial.println(stringToDisplay);
#endif
}
#if defined (__AVR_ATmega328P__)
doIndication();
#endif
}
if ( !ds.search(addr))
{
#ifdef DEBUG
Serial.println(F(“Temp. sensor not found.”));
#endif
} else TempPresent=true;
testDS3231TempSensor();
#ifdef DEBUG
Serial.println(F(“Stop Test”));
#endif
// while(1);
}
void doDotBlink()
{
if (second()%2 == 0) dotPattern = B11000000;
else dotPattern = B00000000;
}
void setRTCDateTime(byte h, byte m, byte s, byte d, byte mon, byte y, byte w)
{
Wire.beginTransmission(DS1307_ADDRESS);
Wire.write(zero); //stop Oscillator
Wire.write(decToBcd(s));
Wire.write(decToBcd(m));
Wire.write(decToBcd(h));
Wire.write(decToBcd(w));
Wire.write(decToBcd(d));
Wire.write(decToBcd(mon));
Wire.write(decToBcd(y));
Wire.write(zero); //start
Wire.endTransmission();
}
byte decToBcd(byte val) {
// Convert normal decimal numbers to binary coded decimal
return ( (val / 10 * 16) + (val % 10) );
}
byte bcdToDec(byte val) {
// Convert binary coded decimal to normal decimal numbers
return ( (val / 16 * 10) + (val % 16) );
}
void getRTCTime()
{
Wire.beginTransmission(DS1307_ADDRESS);
Wire.write(zero);
Wire.endTransmission();
Wire.requestFrom(DS1307_ADDRESS, 7);
RTC_seconds = bcdToDec(Wire.read());
RTC_minutes = bcdToDec(Wire.read());
RTC_hours = bcdToDec(Wire.read() & 0b111111); //24 hour time
RTC_day_of_week = bcdToDec(Wire.read()); //0-6 -> sunday – Saturday
RTC_day = bcdToDec(Wire.read());
RTC_month = bcdToDec(Wire.read());
RTC_year = bcdToDec(Wire.read());
}
int extractDigits(byte b)
{
String tmp = “1”;
if (b == B00000011)
{
tmp = stringToDisplay.substring(0, 2);
}
if (b == B00001100)
{
tmp = stringToDisplay.substring(2, 4);
}
if (b == B00110000)
{
tmp = stringToDisplay.substring(4);
}
return tmp.toInt();
}
void injectDigits(byte b, int value)
{
if (b == B00000011) stringToDisplay = PreZero(value) + stringToDisplay.substring(2);
if (b == B00001100) stringToDisplay = stringToDisplay.substring(0, 2) + PreZero(value) + stringToDisplay.substring(4);
if (b == B00110000) stringToDisplay = stringToDisplay.substring(0, 4) + PreZero(value);
}
bool isValidDate()
{
int days[12] = {31, 28, 31, 30, 31, 30, 31, 31, 30, 31, 30, 31};
if (value[DateYearIndex] % 4 == 0) days[1] = 29;
if (value[DateDayIndex] > days[value[DateMonthIndex] – 1]) return false;
else return true;
}
byte default_dur = 4;
byte default_oct = 6;
int bpm = 63;
int num;
long wholenote;
long duration;
byte note;
byte scale;
char* parseSong(char *p)
{
// Absolutely no error checking in here
// format: d=N,o=N,b=NNN:
// find the start (skip name, etc)
while (*p != ‘:’) p++; // ignore name
p++; // skip ‘:’
// get default duration
if (*p == ‘d’)
{
p++; p++; // skip “d=”
num = 0;
while (isdigit(*p))
{
num = (num * 10) + (*p++ – ‘0’);
}
if (num > 0) default_dur = num;
p++; // skip comma
}
// get default octave
if (*p == ‘o’)
{
p++; p++; // skip “o=”
num = *p++ – ‘0’;
if (num >= 3 && num <= 7) default_oct = num;
p++; // skip comma
}
// get BPM
if (*p == ‘b’)
{
p++; p++; // skip “b=”
num = 0;
while (isdigit(*p))
{
num = (num * 10) + (*p++ – ‘0’);
}
bpm = num;
p++; // skip colon
}
// BPM usually expresses the number of quarter notes per minute
wholenote = (60 * 1000L / bpm) * 4; // this is the time for whole note (in milliseconds)
return p;
}
// now begin note loop
static unsigned long lastTimeNotePlaying = 0;
char* playmusic(char *p)
{
if (*p == 0)
{
return p;
}
if (millis() – lastTimeNotePlaying > duration)
lastTimeNotePlaying = millis();
else return p;
// first, get note duration, if available
num = 0;
while (isdigit(*p))
{
num = (num * 10) + (*p++ – ‘0’);
}
if (num) duration = wholenote / num;
else duration = wholenote / default_dur; // we will need to check if we are a dotted note after
// now get the note
note = 0;
switch (*p)
{
case ‘c’:
note = 1;
break;
case ‘d’:
note = 3;
break;
case ‘e’:
note = 5;
break;
case ‘f’:
note = 6;
break;
case ‘g’:
note = 8;
break;
case ‘a’:
note = 10;
break;
case ‘b’:
note = 12;
break;
case ‘p’:
default:
note = 0;
}
p++;
// now, get optional ‘#’ sharp
if (*p == ‘#’)
{
note++;
p++;
}
// now, get optional ‘.’ dotted note
if (*p == ‘.’)
{
duration += duration / 2;
p++;
}
// now, get scale
if (isdigit(*p))
{
scale = *p – ‘0’;
p++;
}
else
{
scale = default_oct;
}
scale += OCTAVE_OFFSET;
if (*p == ‘,’)
p++; // skip comma for next note (or we may be at the end)
// now play the note
if (note)
{
tone1.play(notes[(scale – 4) * 12 + note], duration);
if (millis() – lastTimeNotePlaying > duration)
lastTimeNotePlaying = millis();
else return p;
tone1.stop();
}
else
{
return p;
}
#ifdef DEBUG
Serial.println(F(“Incorrect Song Format!”));
#endif
return 0; //error
}
void incrementValue()
{
enteringEditModeTime = millis();
if (editMode == true)
{
if (menuPosition != hModeValueIndex) // 12/24 hour mode menu position
value[menuPosition] = value[menuPosition] + 1; else value[menuPosition] = value[menuPosition] + 12;
if (value[menuPosition] > maxValue[menuPosition]) value[menuPosition] = minValue[menuPosition];
if (menuPosition == Alarm01)
{
if (value[menuPosition] == 1) /*digitalWrite(pinUpperDots, HIGH);*/dotPattern = B10000000; //turn on upper dots
/*else digitalWrite(pinUpperDots, LOW); */ dotPattern = B00000000; //turn off all dots
}
if (menuPosition!=DateFormatIndex) injectDigits(blinkMask, value[menuPosition]);
/*Serial.print(“value=”);
Serial.println(value[menuPosition]);*/
}
}
void dicrementValue()
{
enteringEditModeTime = millis();
if (editMode == true)
{
if (menuPosition != hModeValueIndex) value[menuPosition] = value[menuPosition] – 1; else value[menuPosition] = value[menuPosition] – 12;
if (value[menuPosition] < minValue[menuPosition]) value[menuPosition] = maxValue[menuPosition];
if (menuPosition == Alarm01)
{
if (value[menuPosition] == 1) /*digitalWrite(pinUpperDots, HIGH);*/ dotPattern = B10000000; //turn on upper dots
else /*digitalWrite(pinUpperDots, LOW);*/ dotPattern = B00000000; //turn off all dots
}
if (menuPosition!=DateFormatIndex) injectDigits(blinkMask, value[menuPosition]);
/*Serial.print(“value=”);
Serial.println(value[menuPosition]);*/
}
}
bool Alarm1SecondBlock = false;
unsigned long lastTimeAlarmTriggired = 0;
void checkAlarmTime()
{
if (value[Alarm01] == 0) return;
if ((Alarm1SecondBlock == true) && ((millis() – lastTimeAlarmTriggired) > 1000)) Alarm1SecondBlock = false;
if (Alarm1SecondBlock == true) return;
if ((hour() == value[AlarmHourIndex]) && (minute() == value[AlarmMinuteIndex]) && (second() == value[AlarmSecondIndex]))
{
lastTimeAlarmTriggired = millis();
Alarm1SecondBlock = true;
#ifdef DEBUG
Serial.println(F(“Wake up, Neo!”));
#endif
p = song;
}
}
void modesChanger()
{
if (editMode == true) return;
static unsigned long lastTimeModeChanged = millis();
static unsigned long lastTimeAntiPoisoningIterate = millis();
static int transnumber = 0;
if ((millis() – lastTimeModeChanged) > modesChangePeriod)
{
lastTimeModeChanged = millis();
if (transnumber == 0) {
menuPosition = DateIndex;
modesChangePeriod = dateModePeriod;
}
if (transnumber == 1) {
menuPosition = TemperatureIndex;
modesChangePeriod = dateModePeriod;
if (!TempPresent) transnumber = 2;
}
if (transnumber == 2) {
menuPosition = TimeIndex;
modesChangePeriod = timeModePeriod;
}
transnumber++;
if (transnumber > 2) transnumber = 0;
if (modeChangedByUser == true)
{
menuPosition = TimeIndex;
}
modeChangedByUser = false;
}
if ((millis() – lastTimeModeChanged) < 2000)
{
if ((millis() – lastTimeAntiPoisoningIterate) > 100)
{
lastTimeAntiPoisoningIterate = millis();
if (TempPresent)
{
if (menuPosition == TimeIndex) stringToDisplay = antiPoisoning2(updateTemperatureString(getTemperature(value[DegreesFormatIndex])), getTimeNow());
if (menuPosition == DateIndex) stringToDisplay = antiPoisoning2(getTimeNow(), PreZero(day()) + PreZero(month()) + PreZero(year() % 1000) );
if (menuPosition == TemperatureIndex) stringToDisplay = antiPoisoning2(PreZero(day()) + PreZero(month()) + PreZero(year() % 1000), updateTemperatureString(getTemperature(value[DegreesFormatIndex])));
} else
{
if (menuPosition == TimeIndex) stringToDisplay = antiPoisoning2(PreZero(day()) + PreZero(month()) + PreZero(year() % 1000), getTimeNow());
if (menuPosition == DateIndex) stringToDisplay = antiPoisoning2(getTimeNow(), PreZero(day()) + PreZero(month()) + PreZero(year() % 1000) );
}
// Serial.println(“StrTDInToModeChng=”+stringToDisplay);
}
} else
{
transactionInProgress = false;
}
}
String antiPoisoning2(String fromStr, String toStr)
{
//static bool transactionInProgress=false;
//byte fromDigits[6];
static byte toDigits[6];
static byte currentDigits[6];
static byte iterationCounter = 0;
if (!transactionInProgress)
{
transactionInProgress = true;
blankMask = B00000000;
for (int i = 0; i < 6; i++)
{
currentDigits[i] = fromStr.substring(i, i + 1).toInt();
toDigits[i] = toStr.substring(i, i + 1).toInt();
}
}
for (int i = 0; i < 6; i++)
{
if (iterationCounter < 10) currentDigits[i]++;
else if (currentDigits[i] != toDigits[i]) currentDigits[i]++;
if (currentDigits[i] == 10) currentDigits[i] = 0;
}
iterationCounter++;
if (iterationCounter == 20)
{
iterationCounter = 0;
transactionInProgress = false;
}
String tmpStr;
for (int i = 0; i < 6; i++)
tmpStr += currentDigits[i];
return tmpStr;
}
String updateDateString()
{
static unsigned long lastTimeDateUpdate = millis()+1001;
static String DateString = PreZero(day()) + PreZero(month()) + PreZero(year() % 1000);
static byte prevoiusDateFormatWas=value[DateFormatIndex];
if (((millis() – lastTimeDateUpdate) > 1000) || (prevoiusDateFormatWas != value[DateFormatIndex]))
{
lastTimeDateUpdate = millis();
if (value[DateFormatIndex]==EU_DateFormat) DateString = PreZero(day()) + PreZero(month()) + PreZero(year() % 1000);
else DateString = PreZero(month()) + PreZero(day()) + PreZero(year() % 1000);
}
return DateString;
}
#if defined(__AVR_ATmega1280__) || defined(__AVR_ATmega2560__)
void SyncWithGPS()
{
if ((millis() – GPS_Date_Time.GPS_Data_Parsed_time) > 3000) {
Serial.println(F(“Parsed data to old”));
return;
}
Serial.println(F(“Updating time from GPS…”));
Serial.println(GPS_Date_Time.GPS_hours);
Serial.println(GPS_Date_Time.GPS_minutes);
Serial.println(GPS_Date_Time.GPS_seconds);
setTime(GPS_Date_Time.GPS_hours, GPS_Date_Time.GPS_minutes, GPS_Date_Time.GPS_seconds, GPS_Date_Time.GPS_day, GPS_Date_Time.GPS_mounth, GPS_Date_Time.GPS_year % 1000);
adjustTime((long)value[HoursOffsetIndex] * 3600);
setRTCDateTime(hour(), minute(), second(), day(), month(), year() % 1000, 1);
Last_Time_GPS_Sync = MillsNow;
GPS_Sync_Interval = GPS_SYNC_INTERVAL;
AttMsgWasShowed=false;
//// TIMEZONE add-ons
while (!Serial) ; // wait until Arduino Serial Monitor opens
//setSyncProvider(RTC.get); // the function to get the time from the RTC
//if(timeStatus()!= timeSet)
// Serial.println(“Unable to sync with the RTC”);
//else
// Serial.println(“RTC has set the system time”);
time_t utc = now();
time_t local = myTZ.toLocal(utc, &tcr);
Serial.println();
printDateTime(utc, “UTC”);
printDateTime(local, tcr -> abbrev);
setTime(myTZ.toLocal(utc, &tcr));
EEPROM.write(DateFormatEEPROMAddress, value[myTZ.toLocal(utc, &tcr)]);
//Serial.println(EEPROM.read(HourFormatEEPROMAddress));// check whether the new timezon’s winter /summer time is put in memory
//setTime(hour(), minute(), second(), value[DateDayIndex], value[DateMonthIndex], 2000 + value[DateYearIndex]);
//EEPROM.write(DateFormatEEPROMAddress, value[DateFormatIndex]);
//// End of TIMEZONE add-ons
}
void GetDataFromSerial1()
{
if (Serial1.available()) { // If anything comes in Serial1 (pin 19)
byte GPS_incoming_byte;
GPS_incoming_byte = Serial1.read();
//Serial.write(GPS_incoming_byte);
GPS_Package[GPS_position] = GPS_incoming_byte;
GPS_position++;
if (GPS_position == GPS_BUFFER_LENGTH – 1)
{
GPS_position = 0;
// Serial.println(“more then BUFFER_LENGTH!!!!”);
}
if (GPS_incoming_byte == 0x0A)
{
GPS_Package[GPS_position] = 0;
GPS_position = 0;
if (ControlCheckSum()) {
if (GPS_Parse_DateTime()) SyncWithGPS();
}
}
}
}
bool GPS_Parse_DateTime()
{
bool GPSsignal = false;
if (!((GPS_Package[0] == ‘$’)
&& (GPS_Package[3] == ‘R’)
&& (GPS_Package[4] == ‘M’)
&& (GPS_Package[5] == ‘C’))) {
return false;
}
else
{
// Serial.println(“RMC!!!”);
}
//Serial.print(“hh: “);
int hh = (GPS_Package[7] – 48) * 10 + GPS_Package[8] – 48;
//Serial.println(hh);
int mm = (GPS_Package[9] – 48) * 10 + GPS_Package[10] – 48;
//Serial.print(“mm: “);
//Serial.println(mm);
int ss = (GPS_Package[11] – 48) * 10 + GPS_Package[12] – 48;
//Serial.print(“ss: “);
//Serial.println(ss);
byte GPSDatePos = 0;
int CommasCounter = 0;
for (int i = 12; i < GPS_BUFFER_LENGTH ; i++)
{
if (GPS_Package[i] == ‘,’)
{
CommasCounter++;
if (CommasCounter == 8)
{
GPSDatePos = i + 1;
break;
}
}
}
//Serial.print(“dd: “);
int dd = (GPS_Package[GPSDatePos] – 48) * 10 + GPS_Package[GPSDatePos + 1] – 48;
//Serial.println(dd);
int MM = (GPS_Package[GPSDatePos + 2] – 48) * 10 + GPS_Package[GPSDatePos + 3] – 48;
//Serial.print(“MM: “);
//Serial.println(MM);
int yyyy = 2000 + (GPS_Package[GPSDatePos + 4] – 48) * 10 + GPS_Package[GPSDatePos + 5] – 48;
//Serial.print(“yyyy: “);
//Serial.println(yyyy);
//if ((hh<0) || (mm<0) || (ss<0) || (dd<0) || (MM<0) || (yyyy<0)) return false;
if ( !inRange( yyyy, 2018, 2038 ) ||
!inRange( MM, 1, 12 ) ||
!inRange( dd, 1, 31 ) ||
!inRange( hh, 0, 23 ) ||
!inRange( mm, 0, 59 ) ||
!inRange( ss, 0, 59 ) ) return false;
else
{
GPS_Date_Time.GPS_hours = hh;
GPS_Date_Time.GPS_minutes = mm;
GPS_Date_Time.GPS_seconds = ss;
GPS_Date_Time.GPS_day = dd;
GPS_Date_Time.GPS_mounth = MM;
GPS_Date_Time.GPS_year = yyyy;
GPS_Date_Time.GPS_Data_Parsed_time = millis();
//Serial.println(“Precision TIME HAS BEEN ACCURED!!!!!!!!!”);
//GPS_Package[0]=0x0A;
return 1;
}
}
uint8_t ControlCheckSum()
{
uint8_t CheckSum = 0, MessageCheckSum = 0; // check sum
uint16_t i = 1; // 1 sybol left from ‘$’
while (GPS_Package[i] != ‘*’)
{
CheckSum ^= GPS_Package[i];
if (++i == GPS_BUFFER_LENGTH) {
//Serial.println(F(“End of the line not found”)); // end of line not found
return 0;
}
}
if (GPS_Package[++i] > 0x40) MessageCheckSum = (GPS_Package[i] – 0x37) << 4; // ASCII codes to DEC convertation
else MessageCheckSum = (GPS_Package[i] – 0x30) << 4;
if (GPS_Package[++i] > 0x40) MessageCheckSum += (GPS_Package[i] – 0x37);
else MessageCheckSum += (GPS_Package[i] – 0x30);
if (MessageCheckSum != CheckSum) {
//Serial.println(F(“wrong checksum”)); // wrong checksum
return 0;
}
//Serial.println(“Checksum is ok”);
return 1; // all ok!
}
boolean inRange( int no, int low, int high )
{
if ( no < low || no > high )
{
Serial.println(F(“Date or Time not in range”));
//Serial.println(String(no) + “:” + String (low) + “-” + String(high));
return false;
}
return true;
}
#endif
String updateTemperatureString(float fDegrees)
{
static unsigned long lastTimeTemperatureString=millis()+1100;
static String strTemp =”000000″;
if ((millis() – lastTimeTemperatureString) > 1000)
{
//Serial.println(F(“Updating temp. str.”));
lastTimeTemperatureString = millis();
int iDegrees = round(fDegrees);
if (value[DegreesFormatIndex] == CELSIUS)
{
strTemp = “0” + String(abs(iDegrees)) + “0”;
if (abs(iDegrees) < 1000) strTemp = “00” + String(abs(iDegrees)) + “0”;
if (abs(iDegrees) < 100) strTemp = “000” + String(abs(iDegrees)) + “0”;
if (abs(iDegrees) < 10) strTemp = “0000” + String(abs(iDegrees)) + “0”;
}else
{
strTemp = “0” + String(abs(iDegrees)) + “0”;
if (abs(iDegrees) < 1000) strTemp = “00” + String(abs(iDegrees)/10) + “00”;
if (abs(iDegrees) < 100) strTemp = “000” + String(abs(iDegrees)/10) + “00”;
if (abs(iDegrees) < 10) strTemp = “0000” + String(abs(iDegrees)/10) + “00”;
}
#ifdef tubes8
strTemp= “”+strTemp+”00”;
#endif
return strTemp;
}
return strTemp;
}
float getTemperature (boolean bTempFormat)
{
static float fDegrees;
static int iterator=0;
static byte TempRawData[2];
/*unsigned long execTime=0;
execTime=micros();*/
switch (iterator)
{
case 0: ds.reset(); break;
case 1: ds.write(0xCC, 0); break; //skip ROM command
case 2: ds.write(0x44, 0); break; //send make convert to all devices
case 3: ds.reset(); break;
case 4: ds.write(0xCC, 0); break; //skip ROM command
case 5: ds.write(0xBE, 0); break; //send request to all devices
case 6: TempRawData[0] = ds.read(); break;
case 7: TempRawData[1] = ds.read(); break;
default: break;
}
if (iterator == 7)
{
int16_t raw = (TempRawData[1] << 8) | TempRawData[0];
if (raw == -1) raw = 0;
float celsius = (float)raw / 16.0;
//celsius = celsius + (float)value[TempAdjustIndex]/10;//users adjustment
if (!bTempFormat) fDegrees = celsius * 10;
else fDegrees = (celsius * 1.8 + 32.0) * 10;
}
/*execTime=micros()-execTime;
Serial.print(iterator);
Serial.println(execTime);*/
iterator++;
if (iterator==8) iterator=0;
return fDegrees;
}
#if defined(__AVR_ATmega1280__) || defined(__AVR_ATmega2560__)
ISR(TIMER4_COMPA_vect)
{
sei();
doIndication();
}
void timerSetup()
{
//timer3 setup for calling doIndication function
TCCR4A = 0; //control registers reset (WGM21, WGM20)
TCCR4B = 0; //control registers reset
TCCR4B = (1 << CS12)|(1 << CS10)|(1 << WGM12); //prescaler 1024 and CTC mode
//OCR5A = 31; //2 mS
TCNT4=0; //reset counter to 0
OCR4A = 46; //3mS
//OCR4A = 92; //6mS
TIMSK4 = (1 << OCIE1A);//TIMER3_COMPA_vect interrupt enable
sei();
}
#endif
void testDS3231TempSensor()
{
int8_t DS3231InternalTemperature=0;
Wire.beginTransmission(DS1307_ADDRESS);
Wire.write(0x11);
Wire.endTransmission();
Wire.requestFrom(DS1307_ADDRESS, 2);
DS3231InternalTemperature=Wire.read();
Serial.print(F(“DS3231_T=”));
Serial.println(DS3231InternalTemperature);
if ((DS3231InternalTemperature<5) || (DS3231InternalTemperature>60))
{
Serial.println(F(“Faulty DS3231!”));
for (int i=0; i<5; i++)
{
tone1.play(1000, 1000);
delay(2000);
}
}
}
OPEN curvedPipe for pipeconnector 4 into 1 FLAT 2023 05 01 V4 dev a.SCAD
OPEN curvedPipe for pipeconnector 4 into 1 FLAT 2023 05 01 V4 dev a.STL
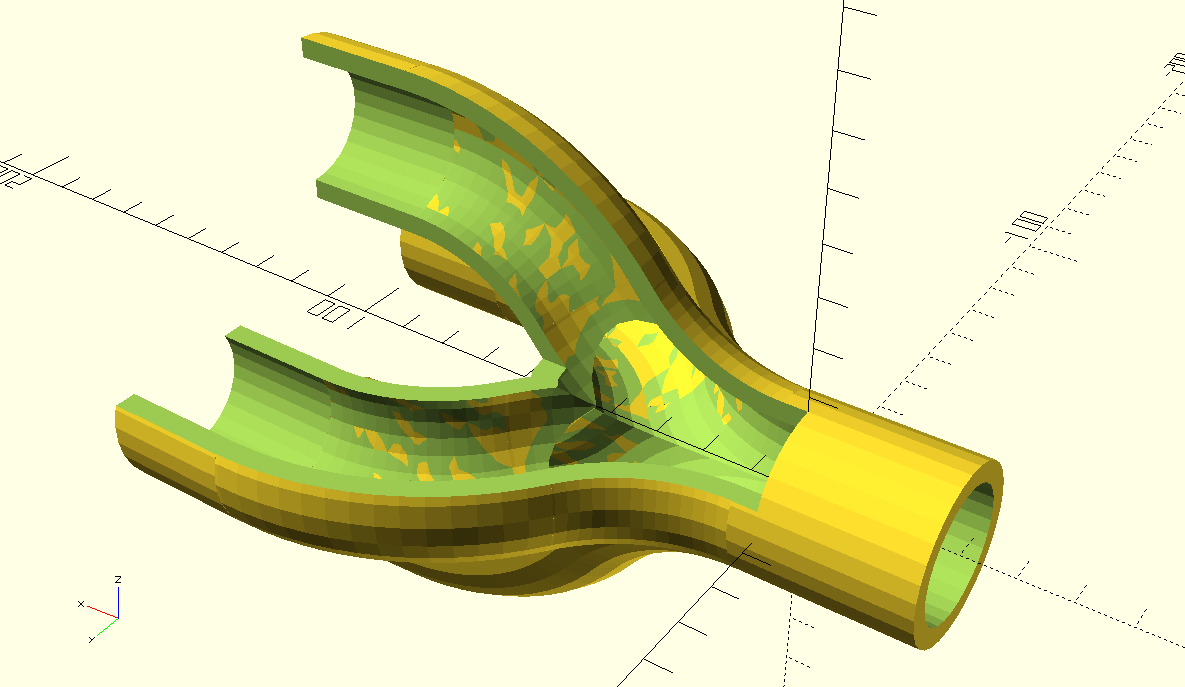
Inside view of the hollow pipes AND the cutouts, which required some setting changes of the Openscad program, w.r.t. higher CSG limits
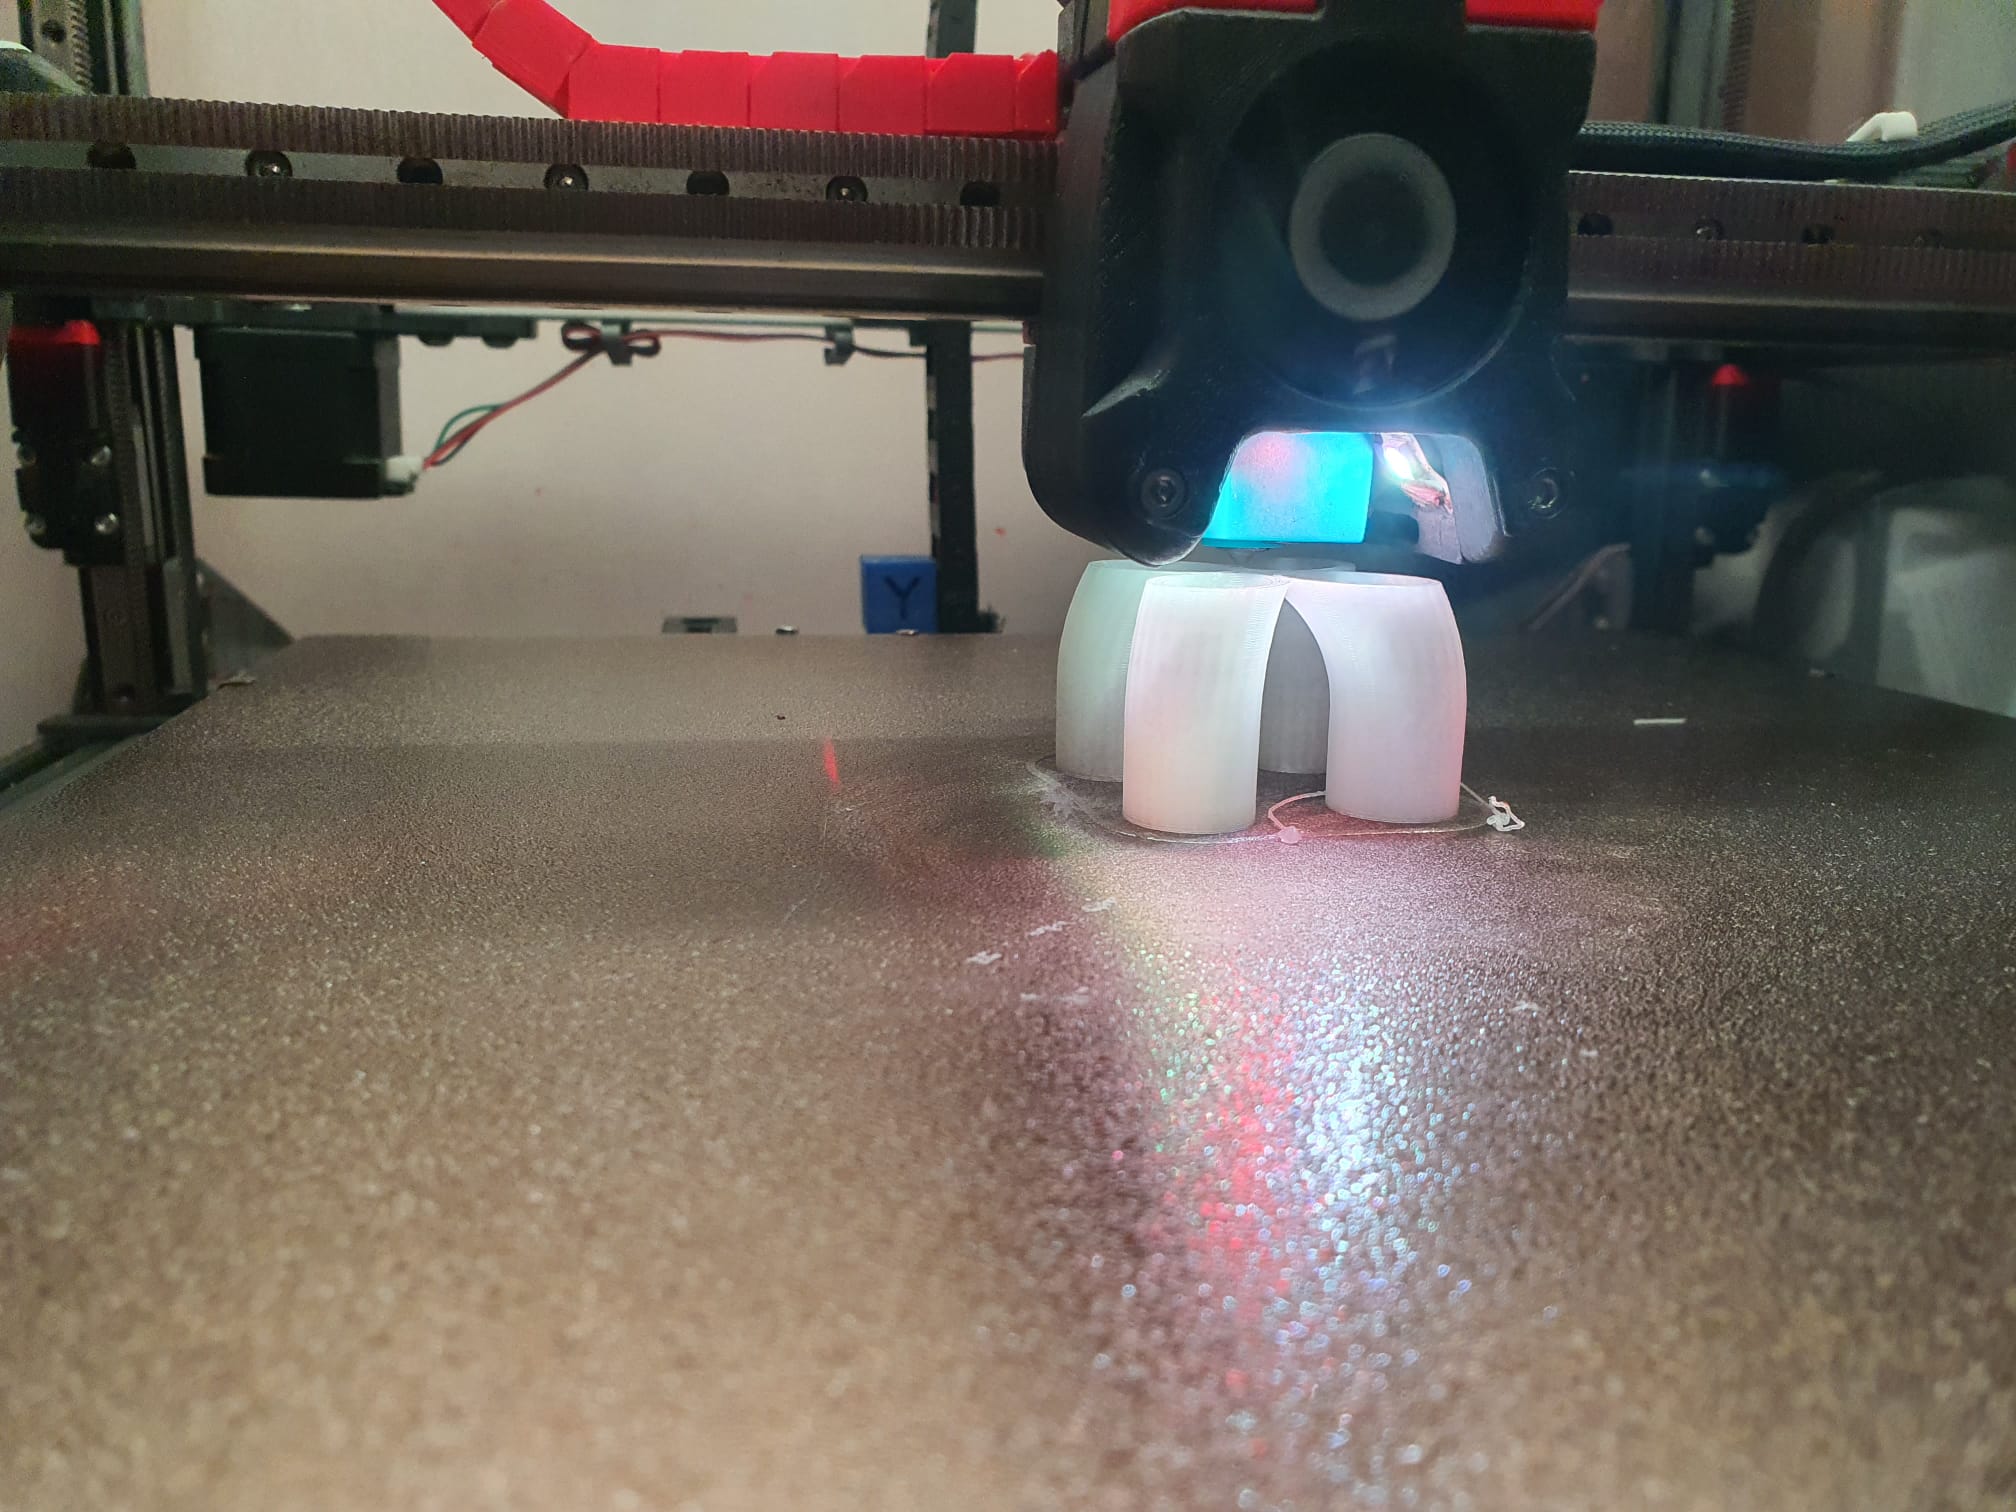 Video van WhatsApp op 2023-05-02 om 23.08.14
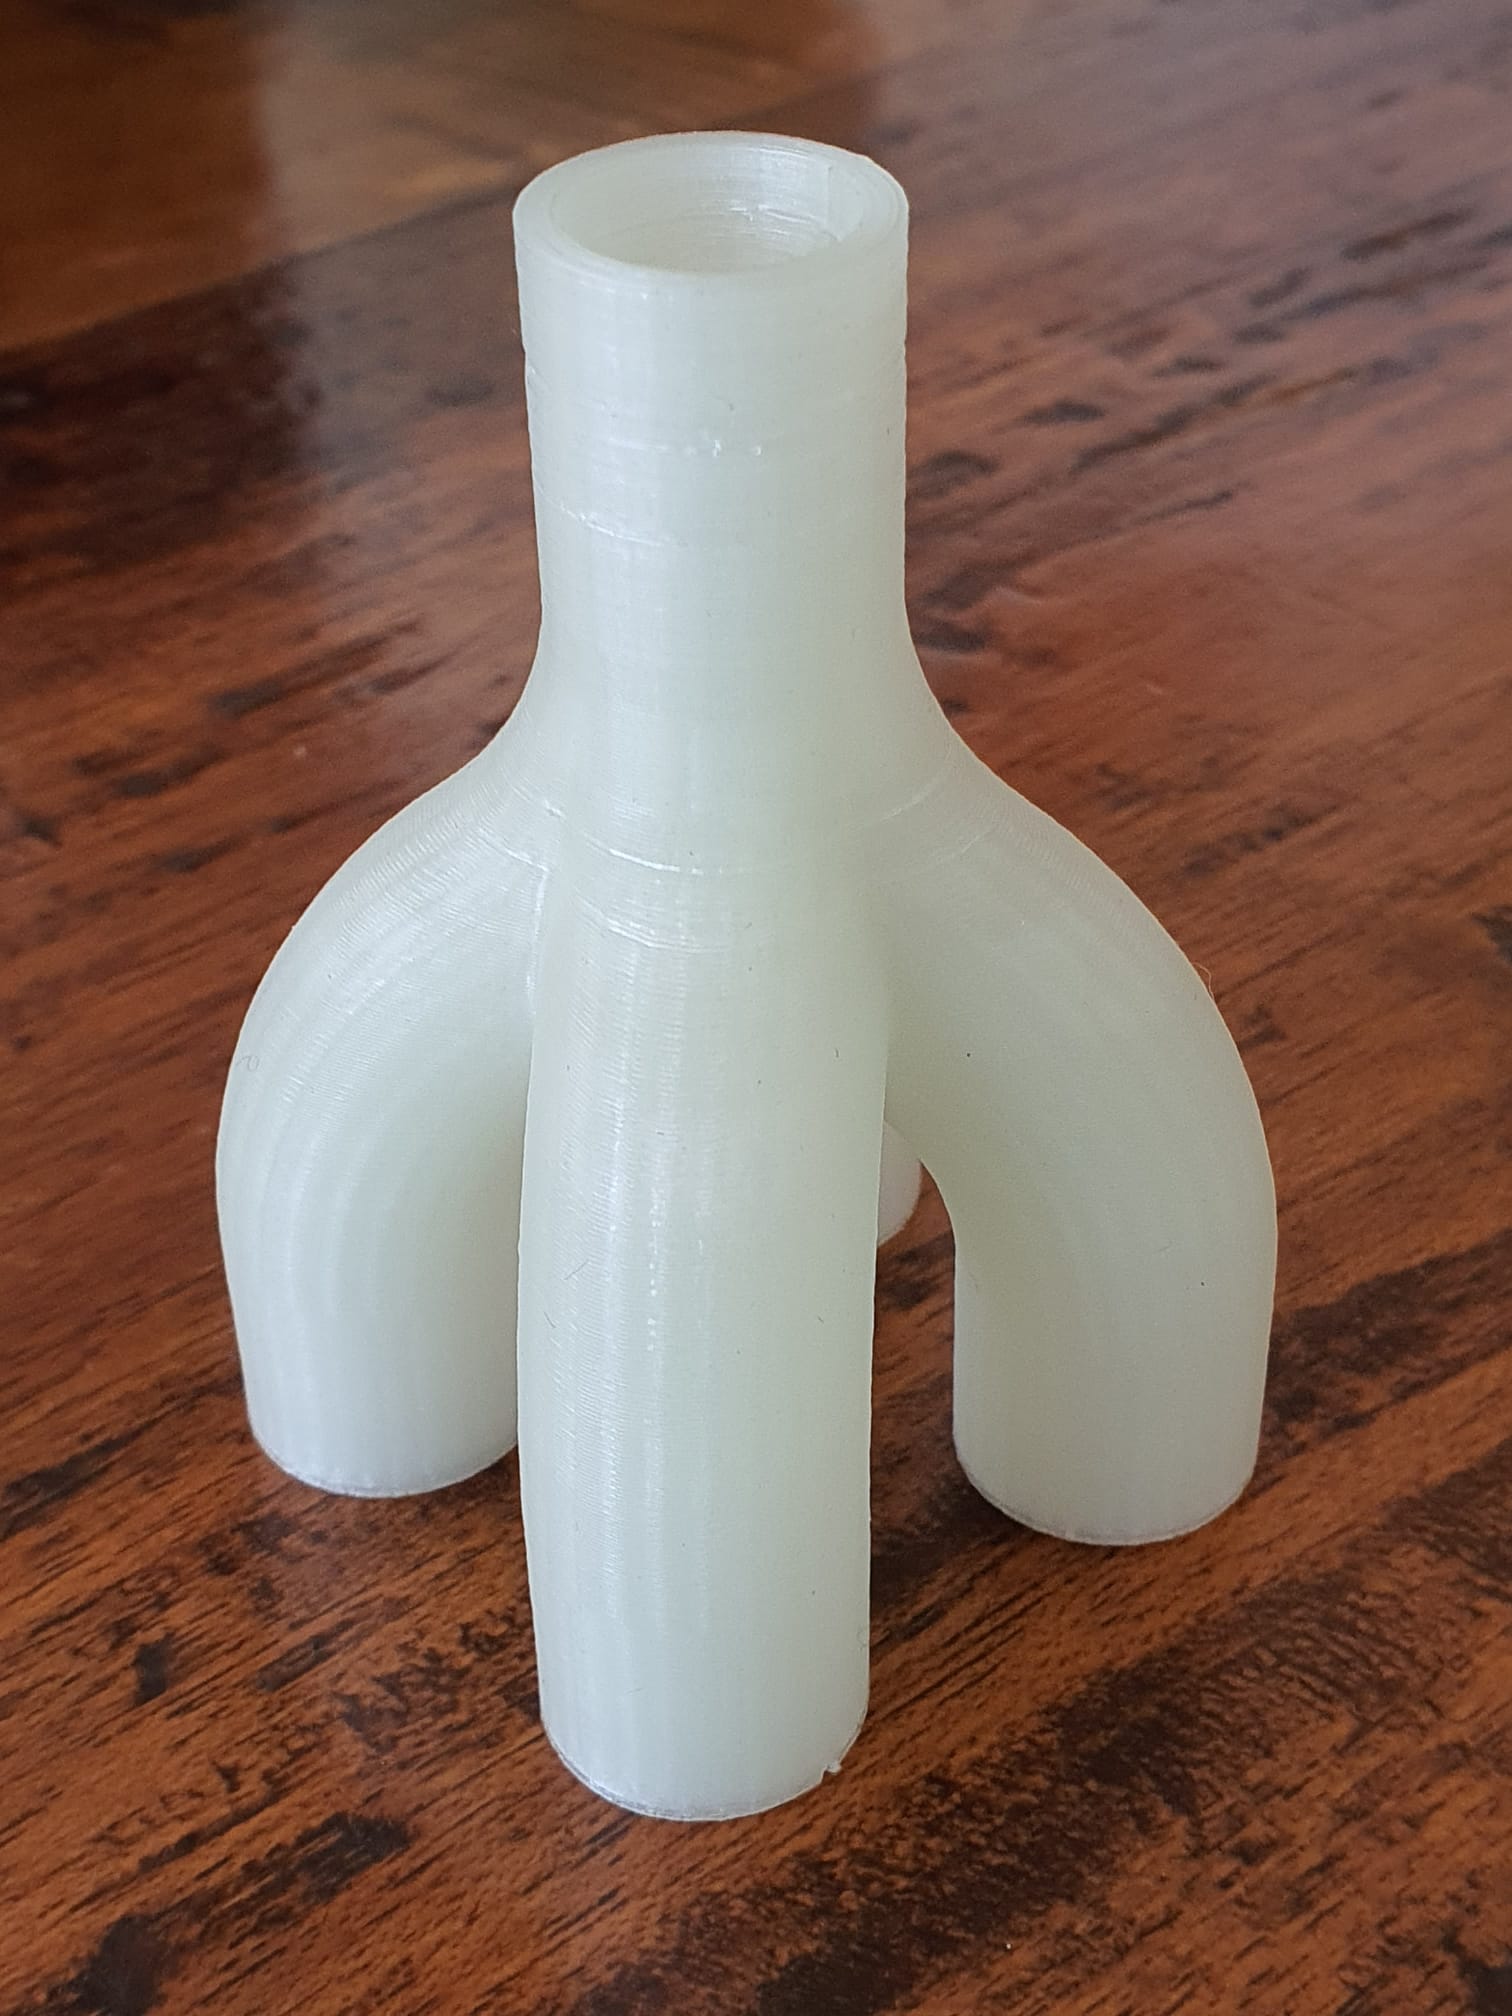
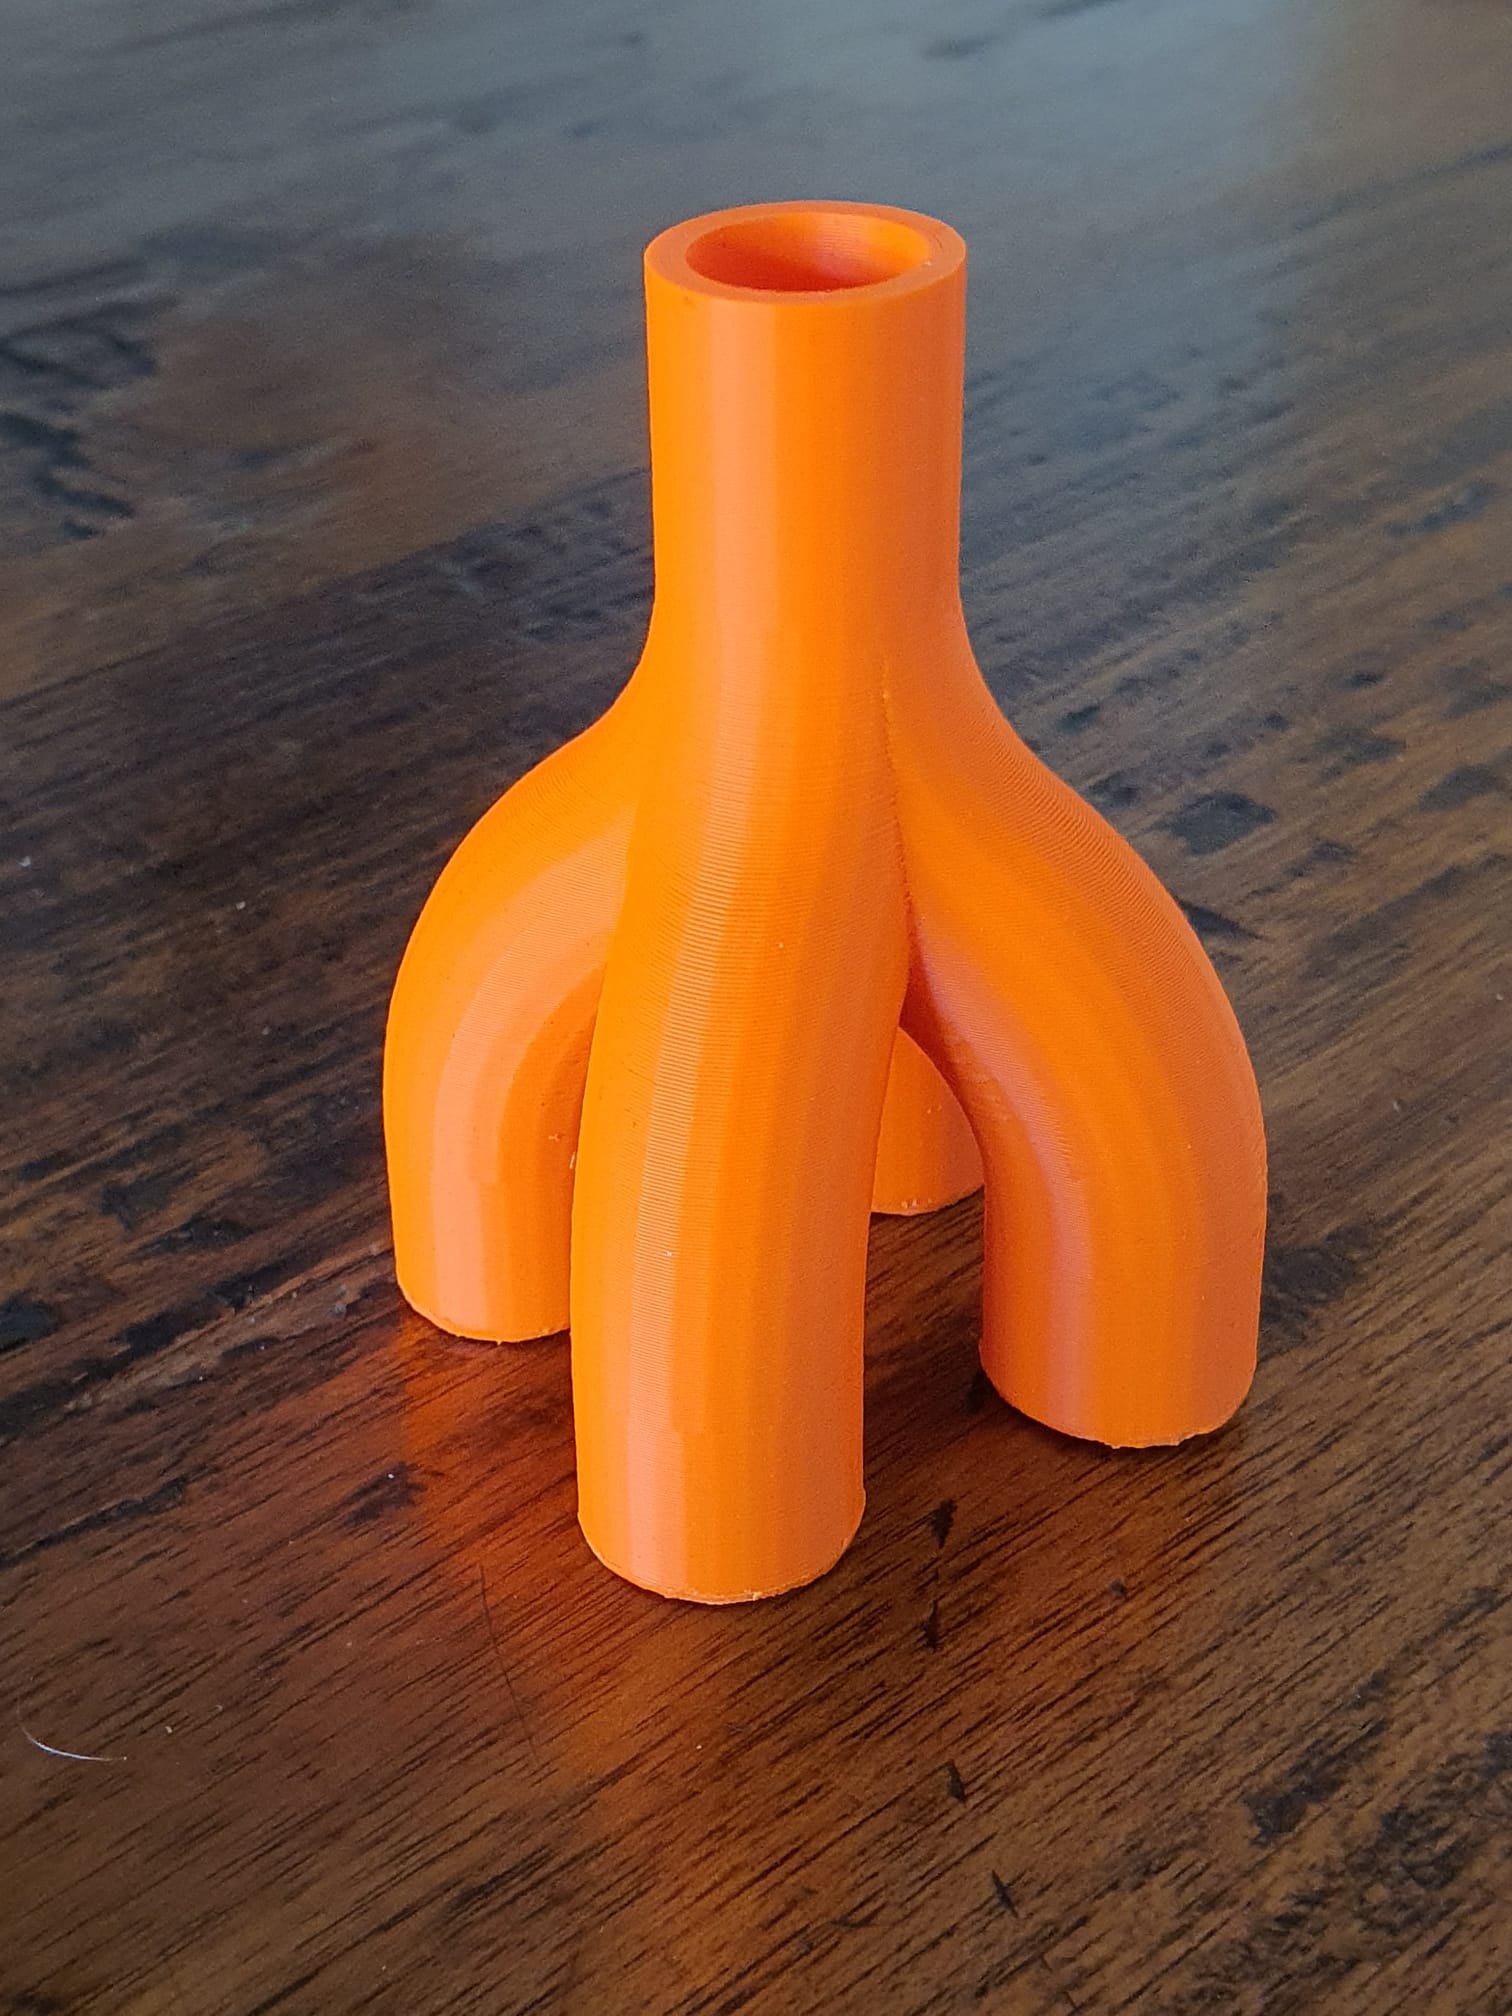

Pipeconnector 2 into 1 all tight_hollow 2023 05 03 V4 dev b STL download


Pipeconnector 3 into 1 all hollow 2023 05 26 V5 dev d 
Aangeschaft om mee te experimenteren: Een mini windgenerator met 24V, 3 fasen en 400 Watt maximale opbrengst. Inclusief regelaar om op een 24V accu aan te sluiten.
Daarachter komt de 24V DC naar 230V AC 2000 Watt , met het lichtnet gesynchroniseerde inverter.
Daarmee kan ik in huis alles aansluiten, behalve de grootverbruikers. Verlichting is natuurlijk geen probleem, en de laptop voeden ook niet. Voor de rest moeten we alles nog proberen, dat hoort ook zo bij een experimentele opzet.
De miniturbine komt op de nok van het dak met een verticale steigerbuis , tussen de huizen in en maakt geen herrie. Het ontwerp van de Savonius turbine windvanger is daar op afgestemd.

Als test worden ook de 5 oorspronkelijke ‘schelp’-achtige rotorbladen gemonteerd, waarvan zowel geluid- als energieproductie wordt gemeten.

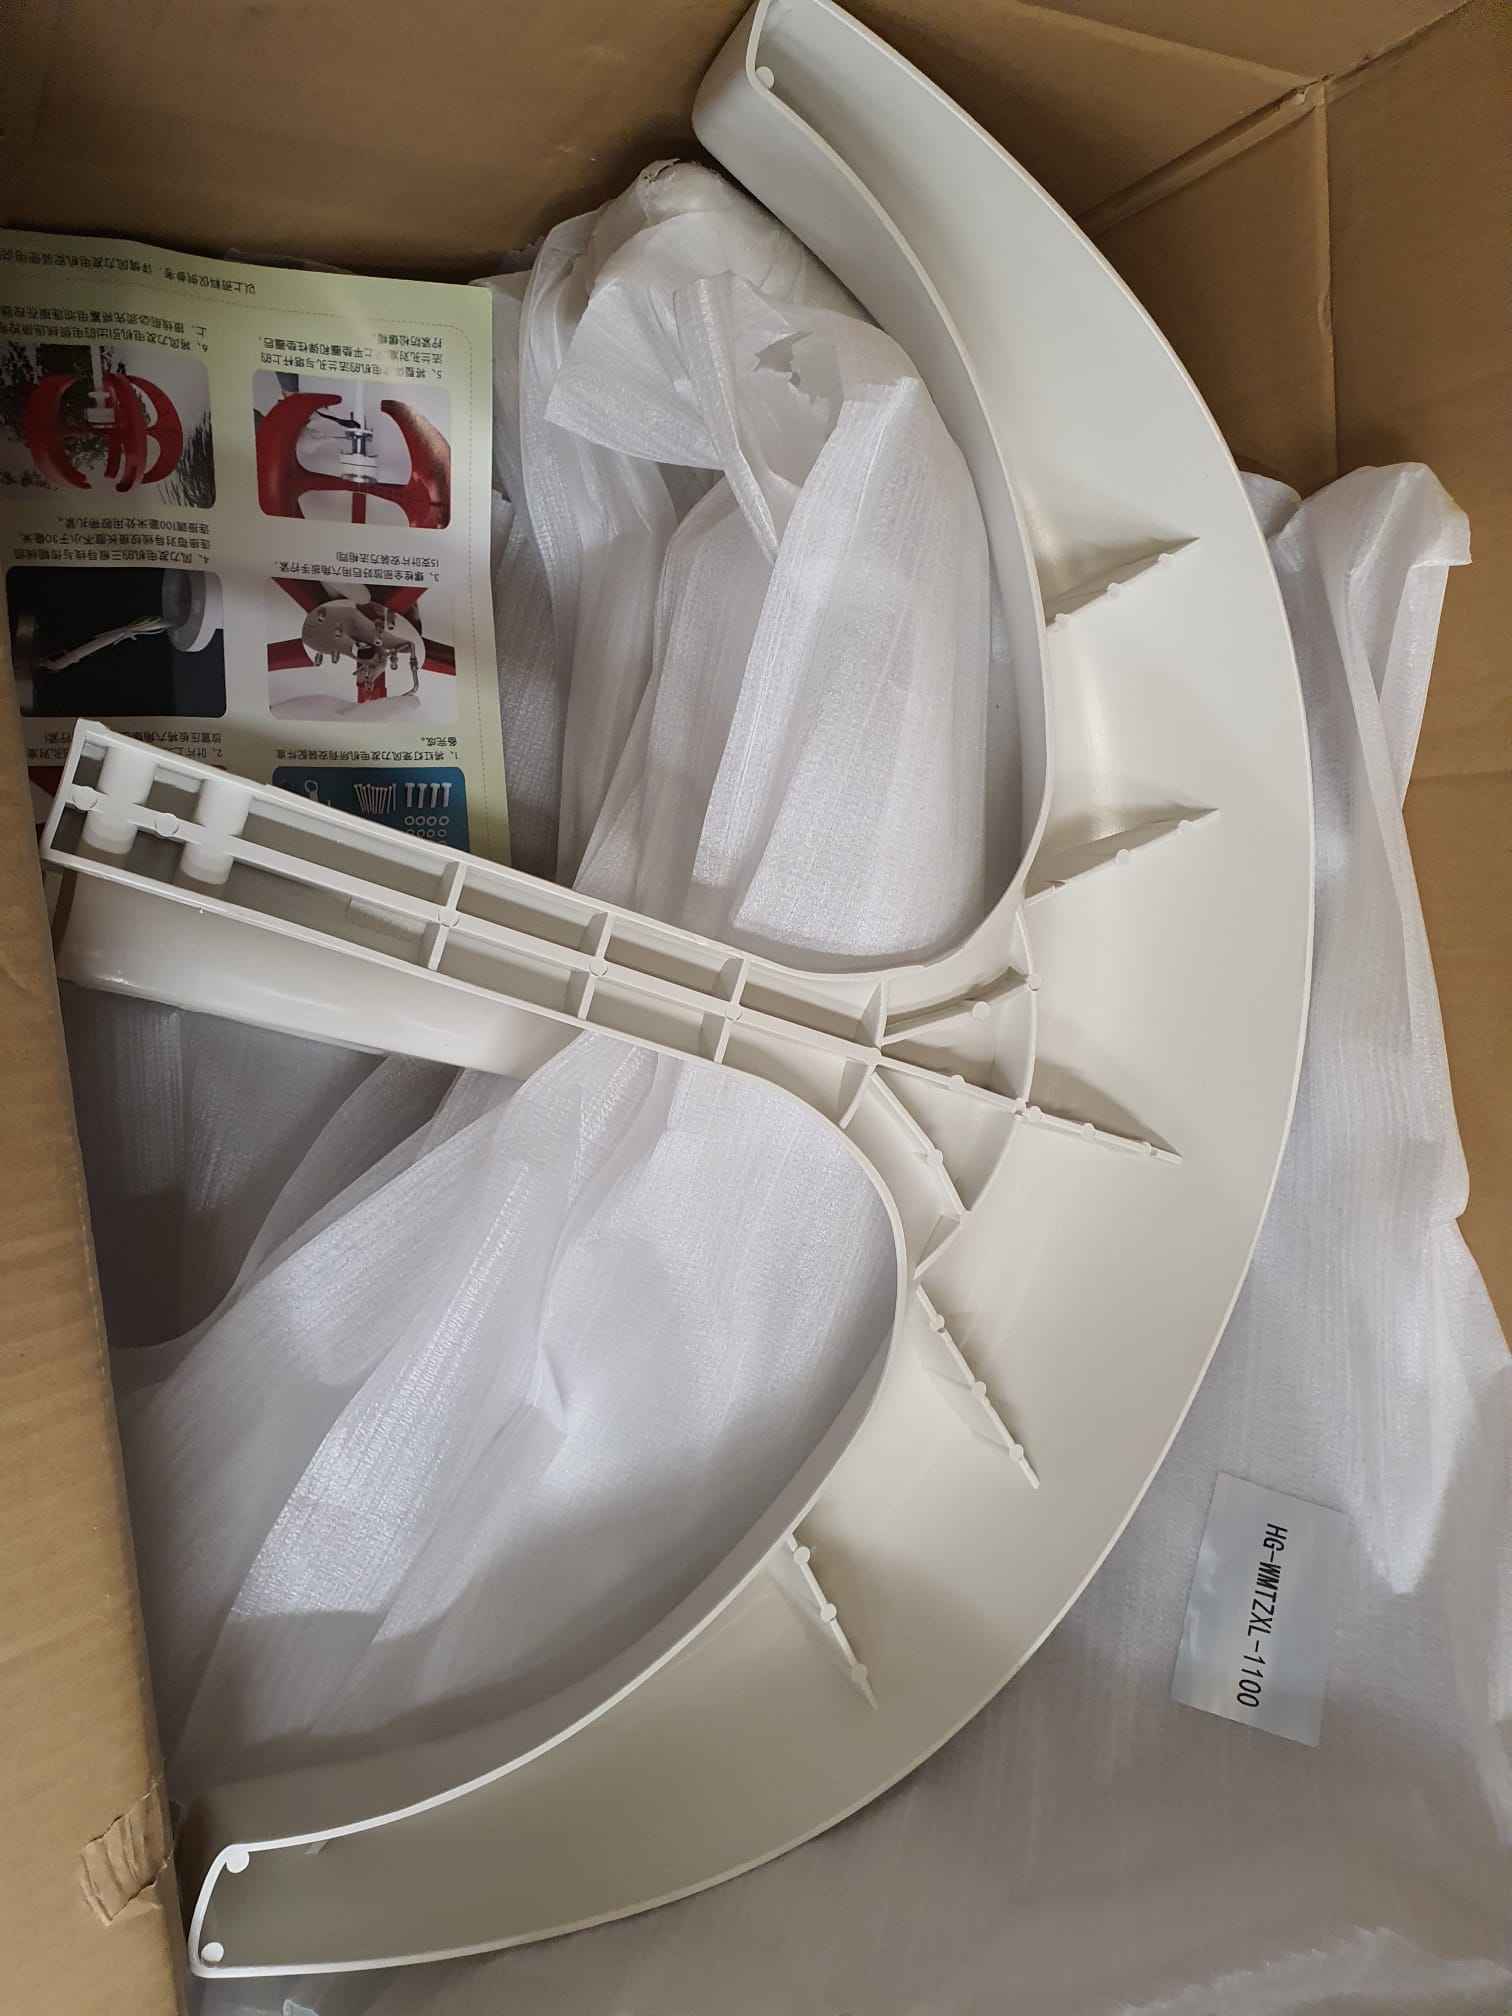
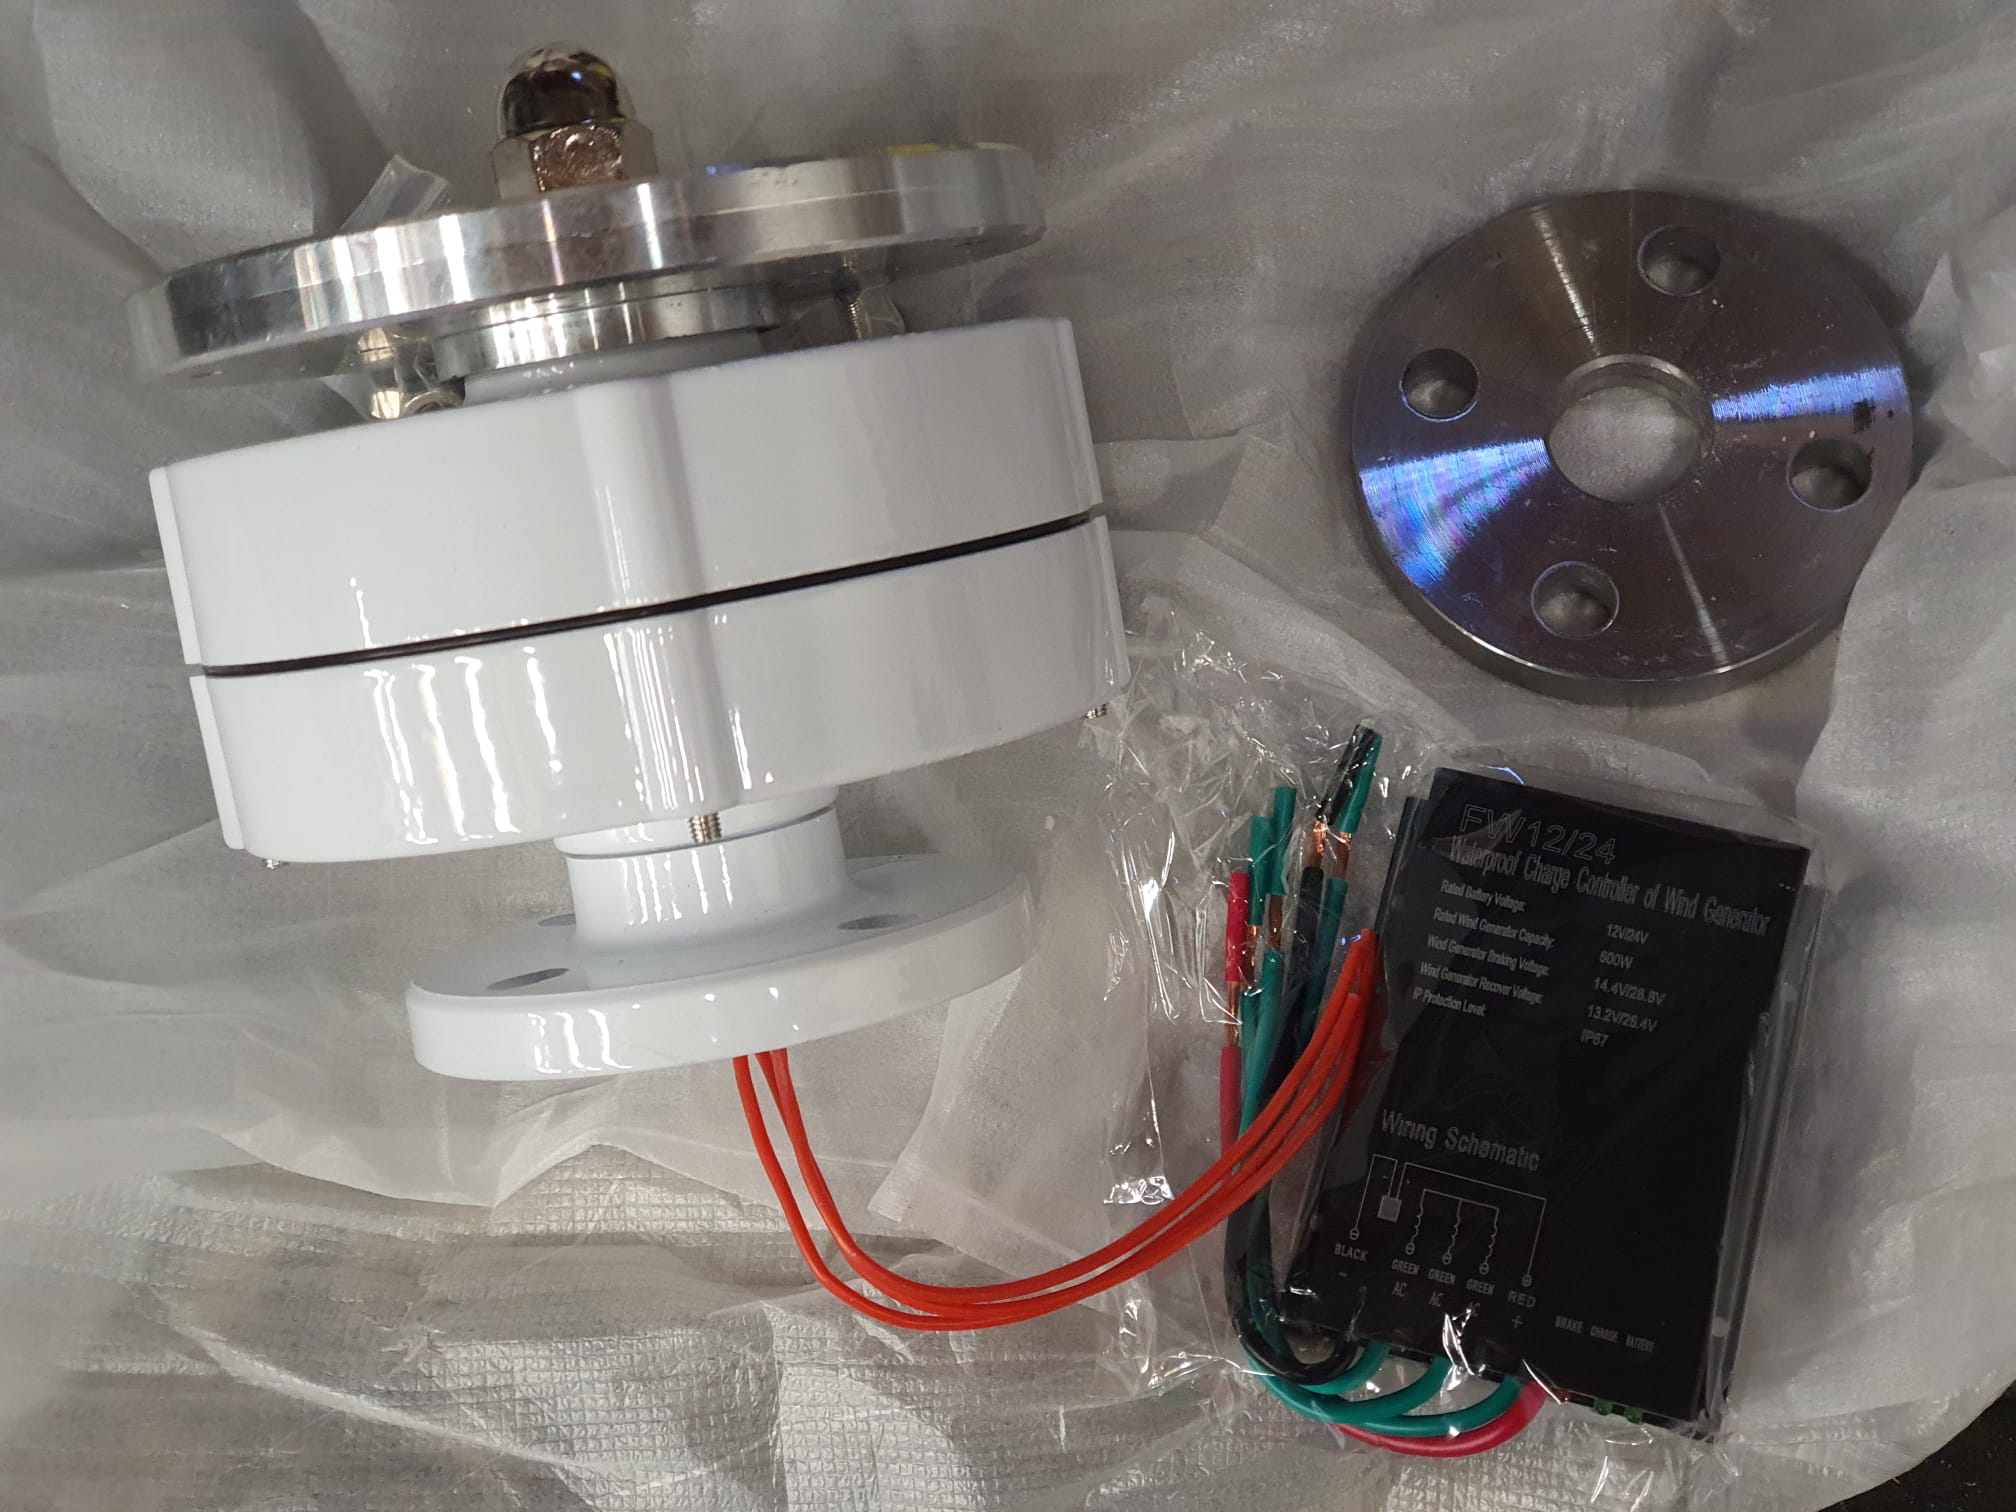
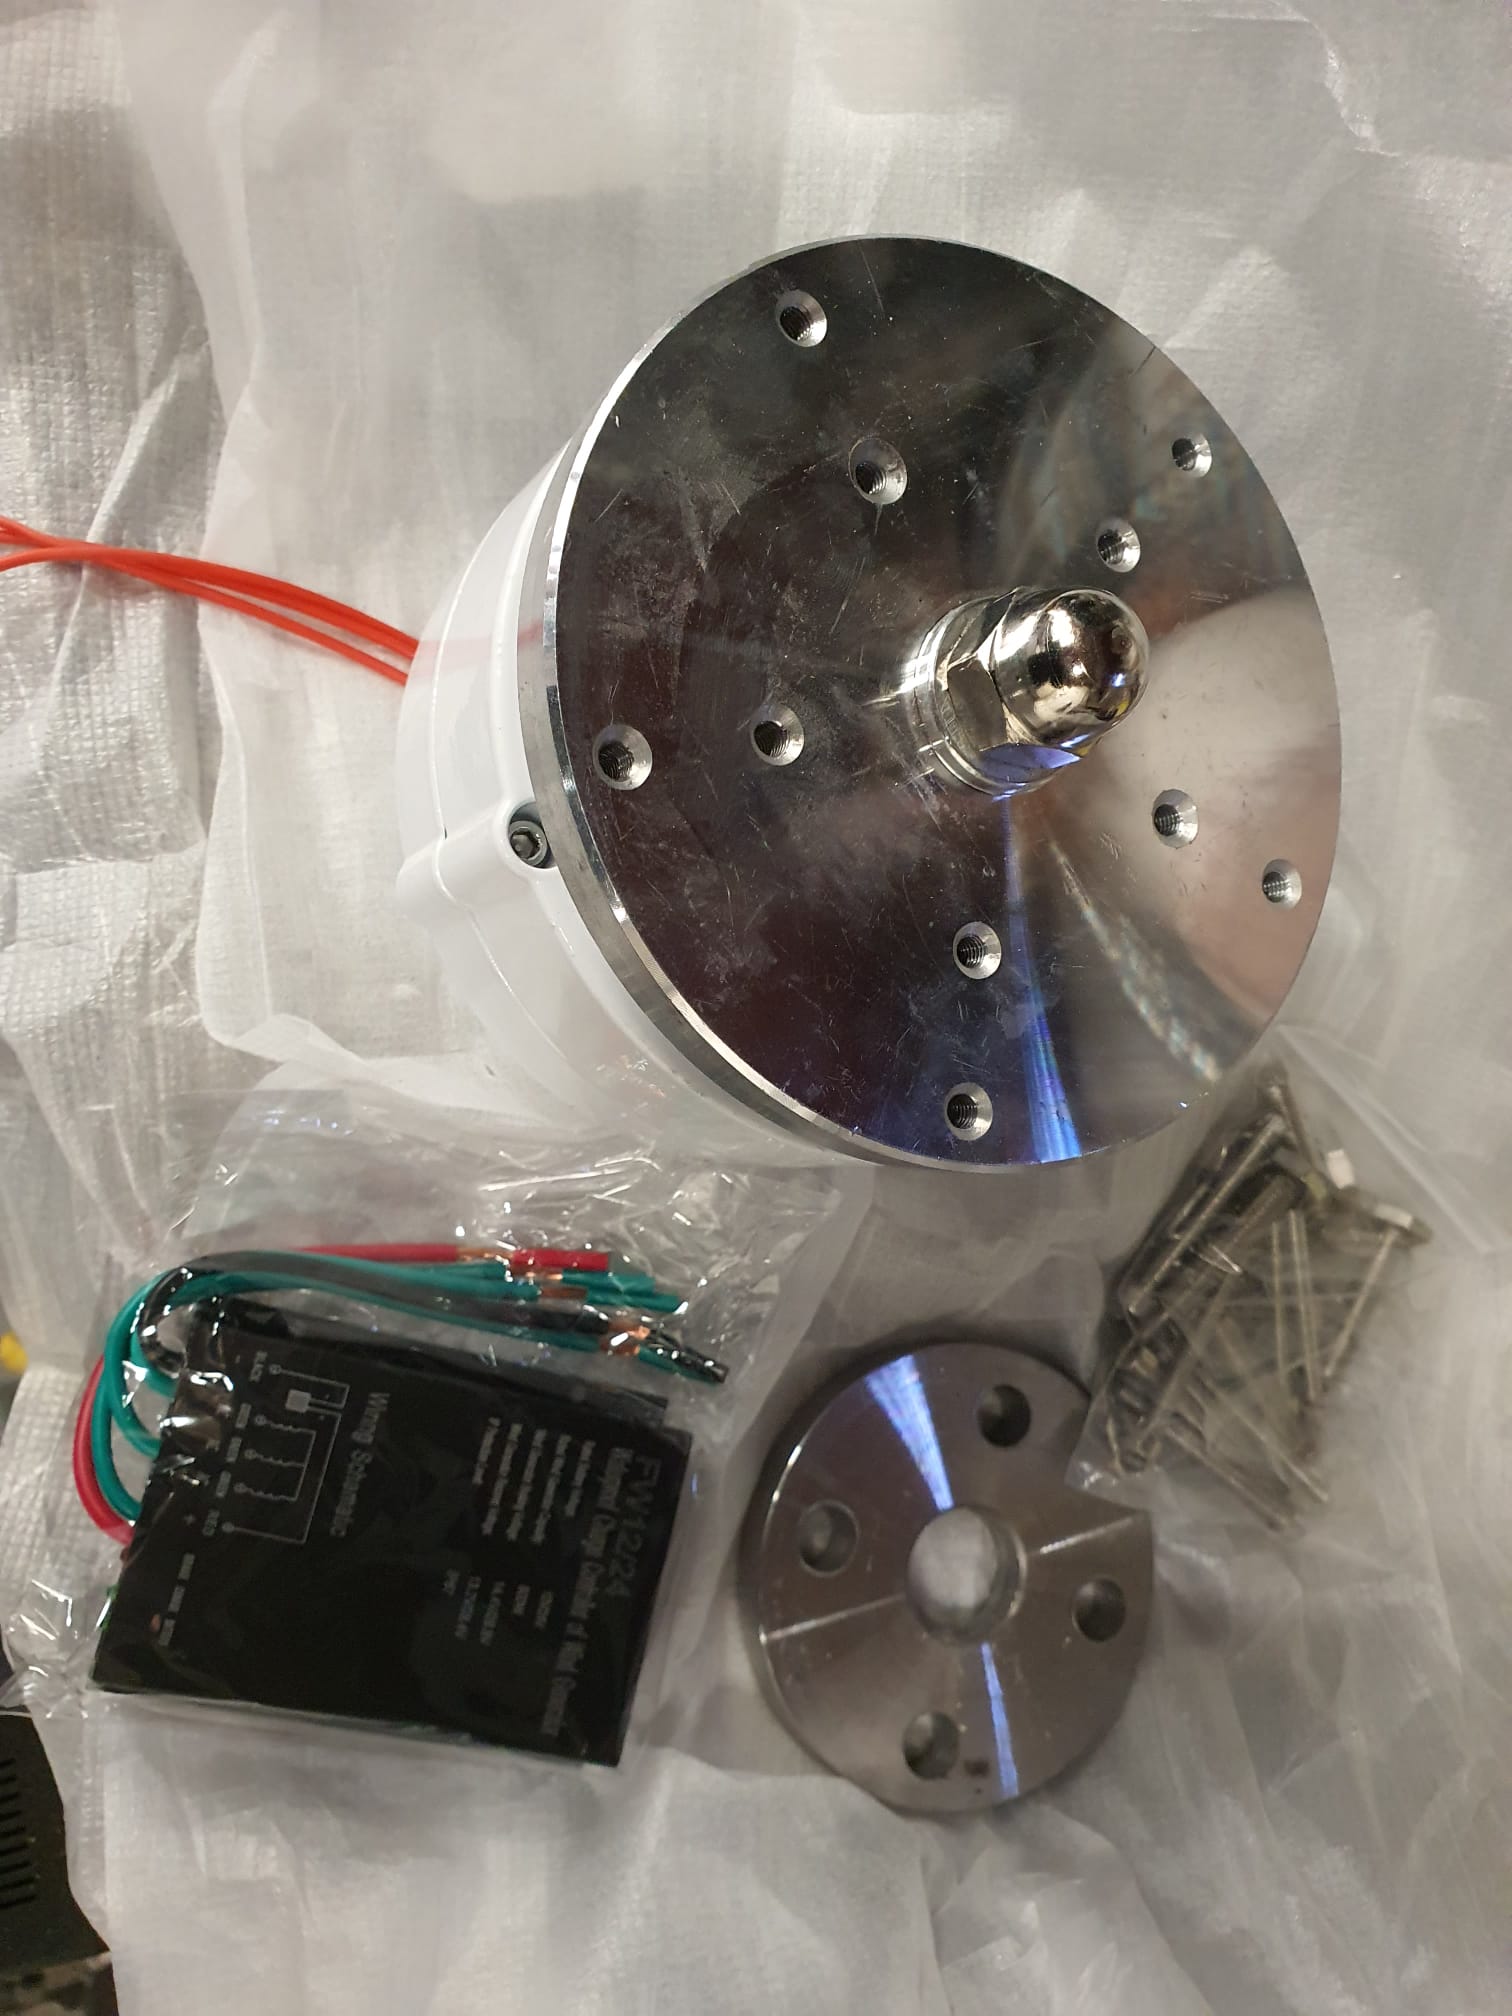

De buitenpijp wordt verticaal op het dak net boven mijn Velux dakraam geplaatst , zo hoog mogelijk tegen de nokbalk aan,.
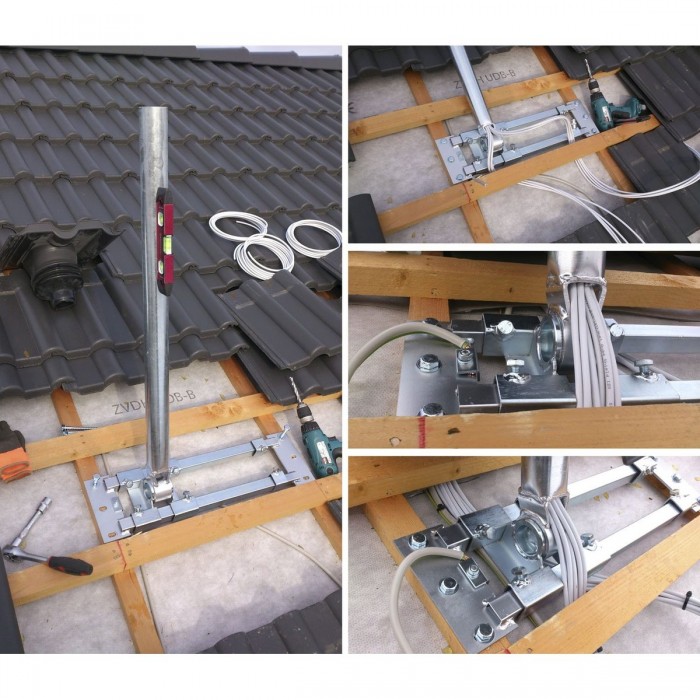
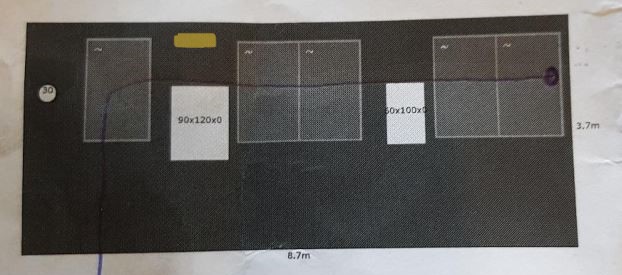

https://www.durasat.de/out/media/14473_DUR-line-Herkules_Produktinfo(3).pdf
De geaarde 3-fasekabel gaat door de mast door het dak naar binnen en de aarding van de mast en de gehele installatie komt rechtstreeks aan de al aanwezige aardinstallatie van de zonnepanelen.
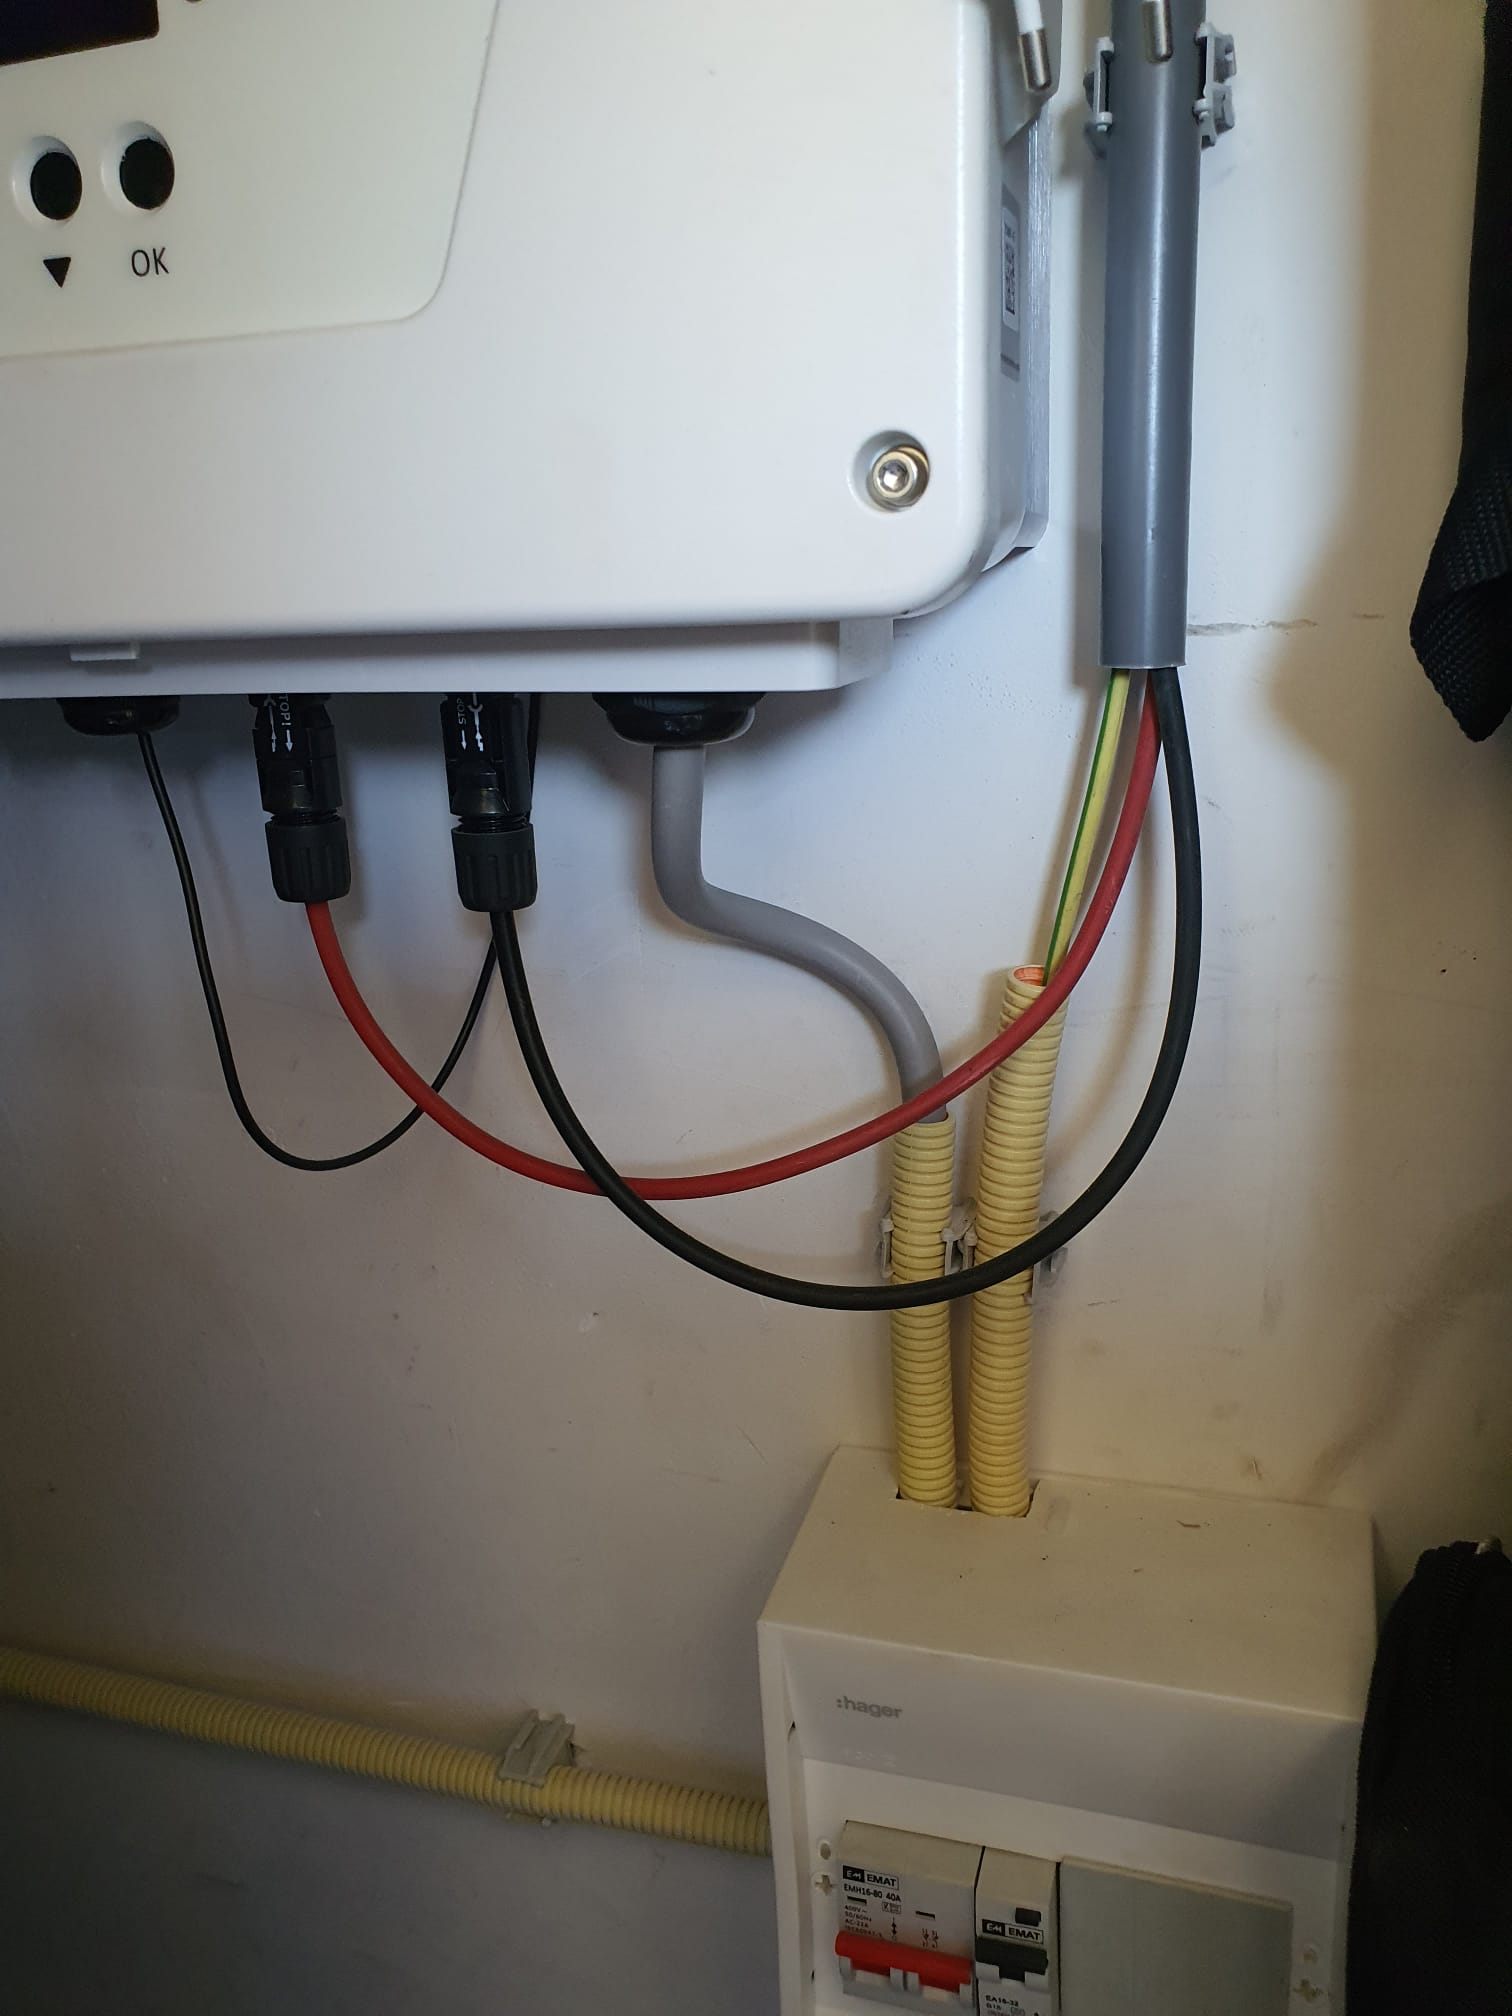
De regelaar en de gesloten accu komt in de afgesloten beluchte CV ruimte op zolder. Daar wordt de nieuwe windinstallatie aangesloten op de bestaande huisinstallatie, met een fasegestuurde omschakelaar.
De zonnepanelen (met een output aan 230V AC) gaan de 24V accu ook laden wanneer de windinstallatie onvoldoende oplevert en vice versa.
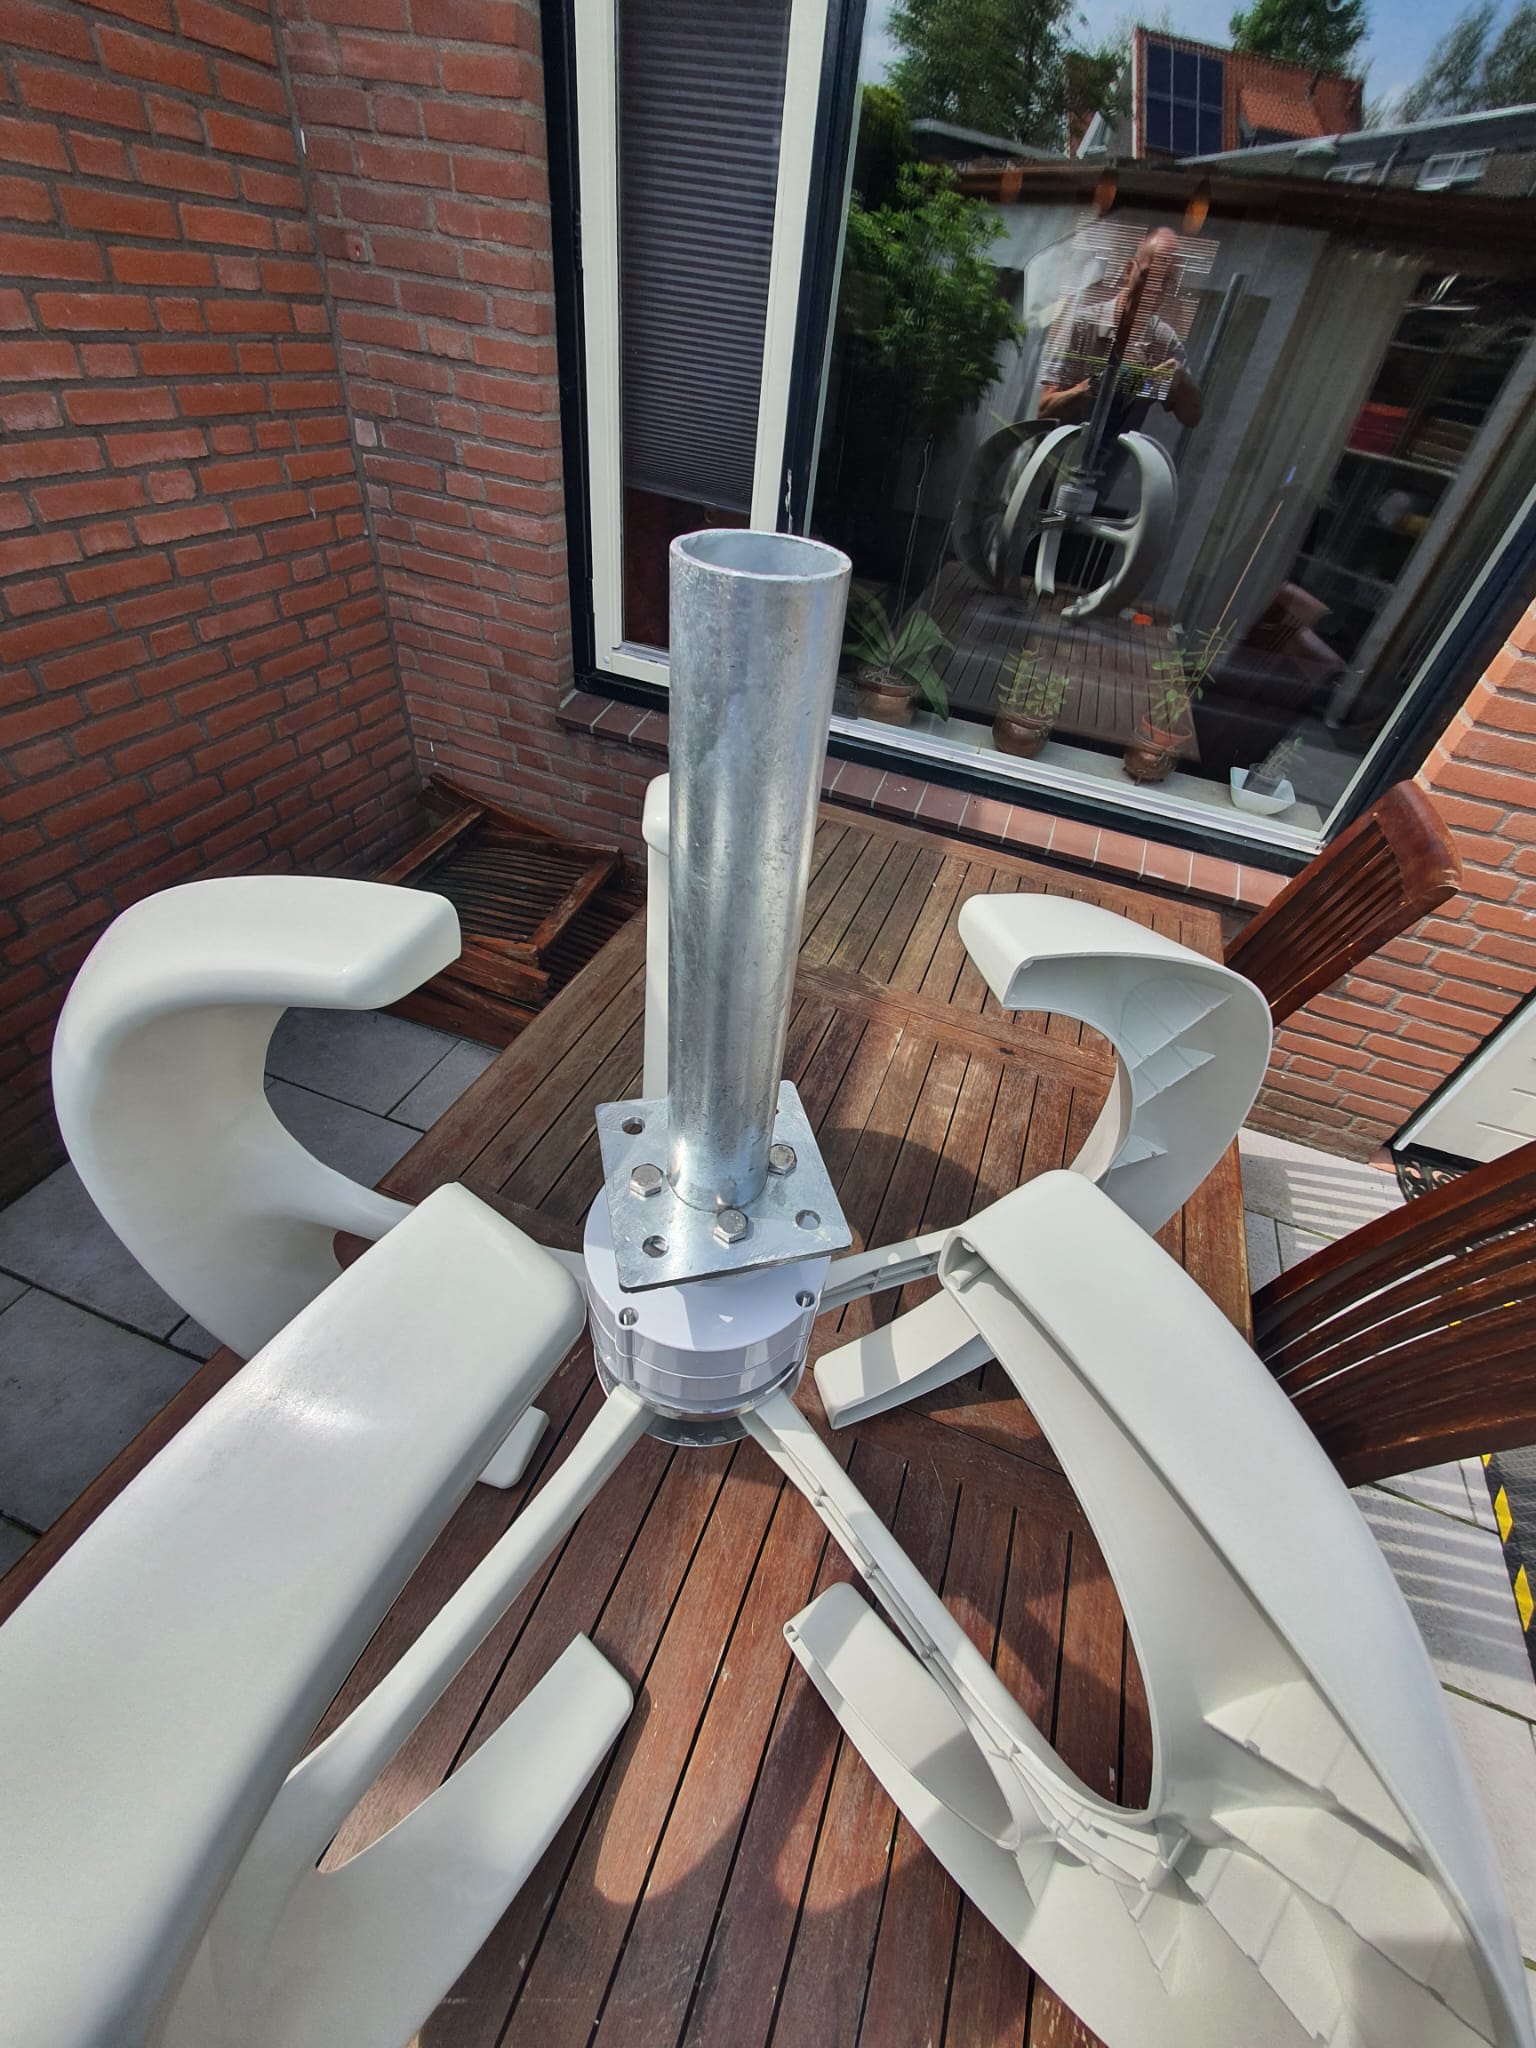
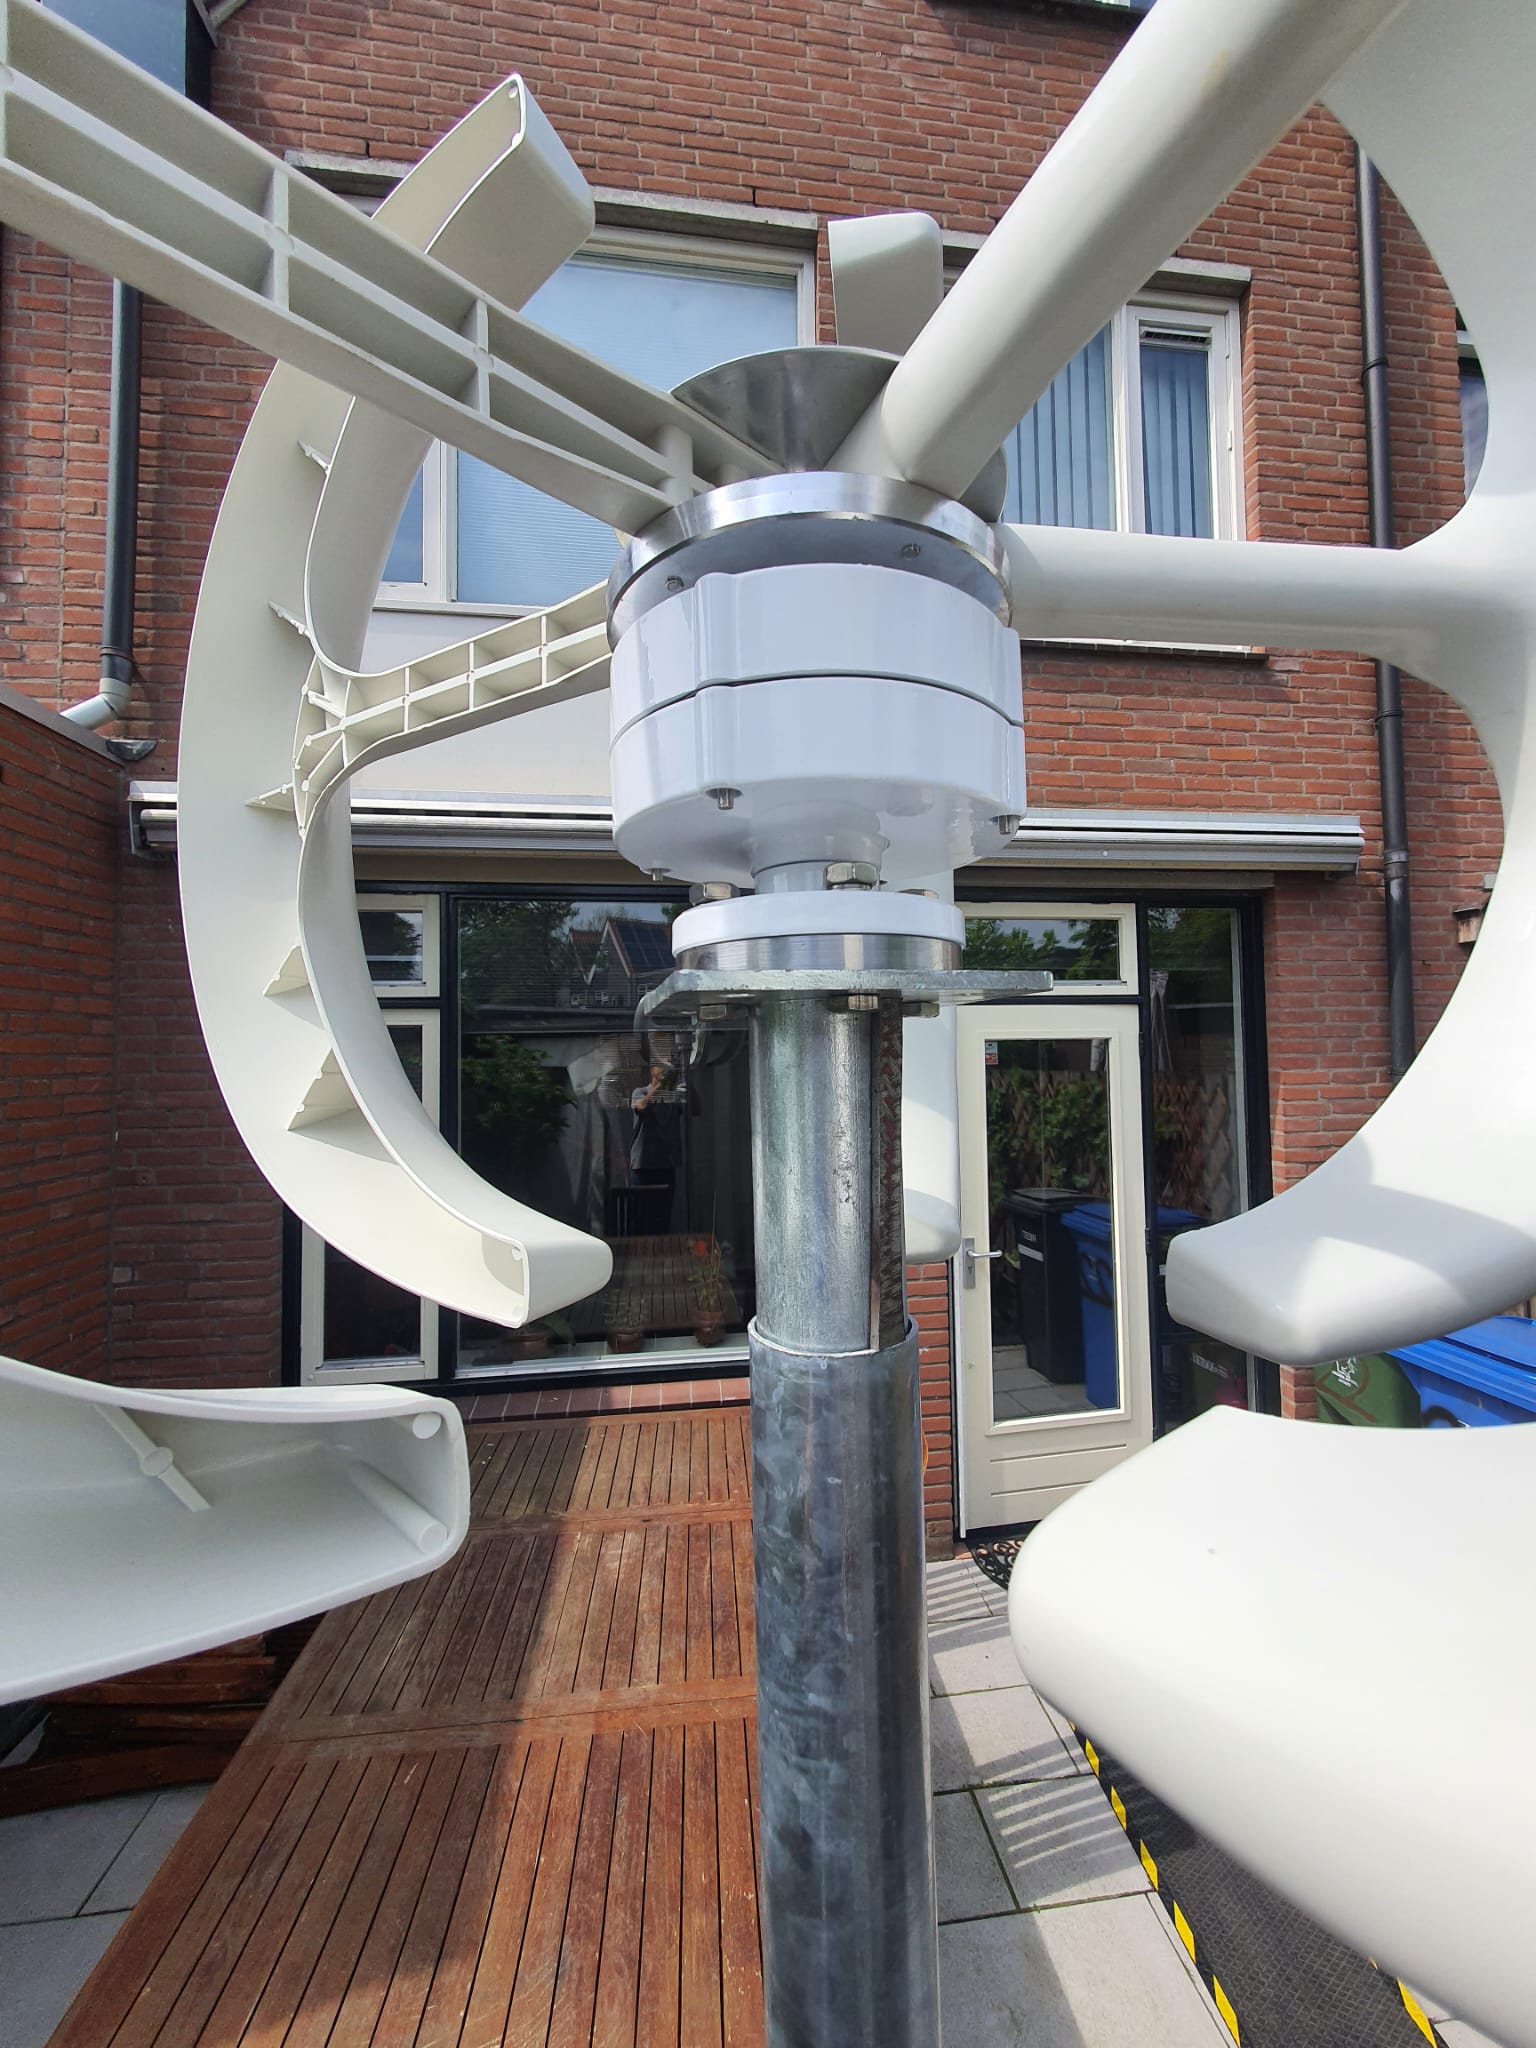


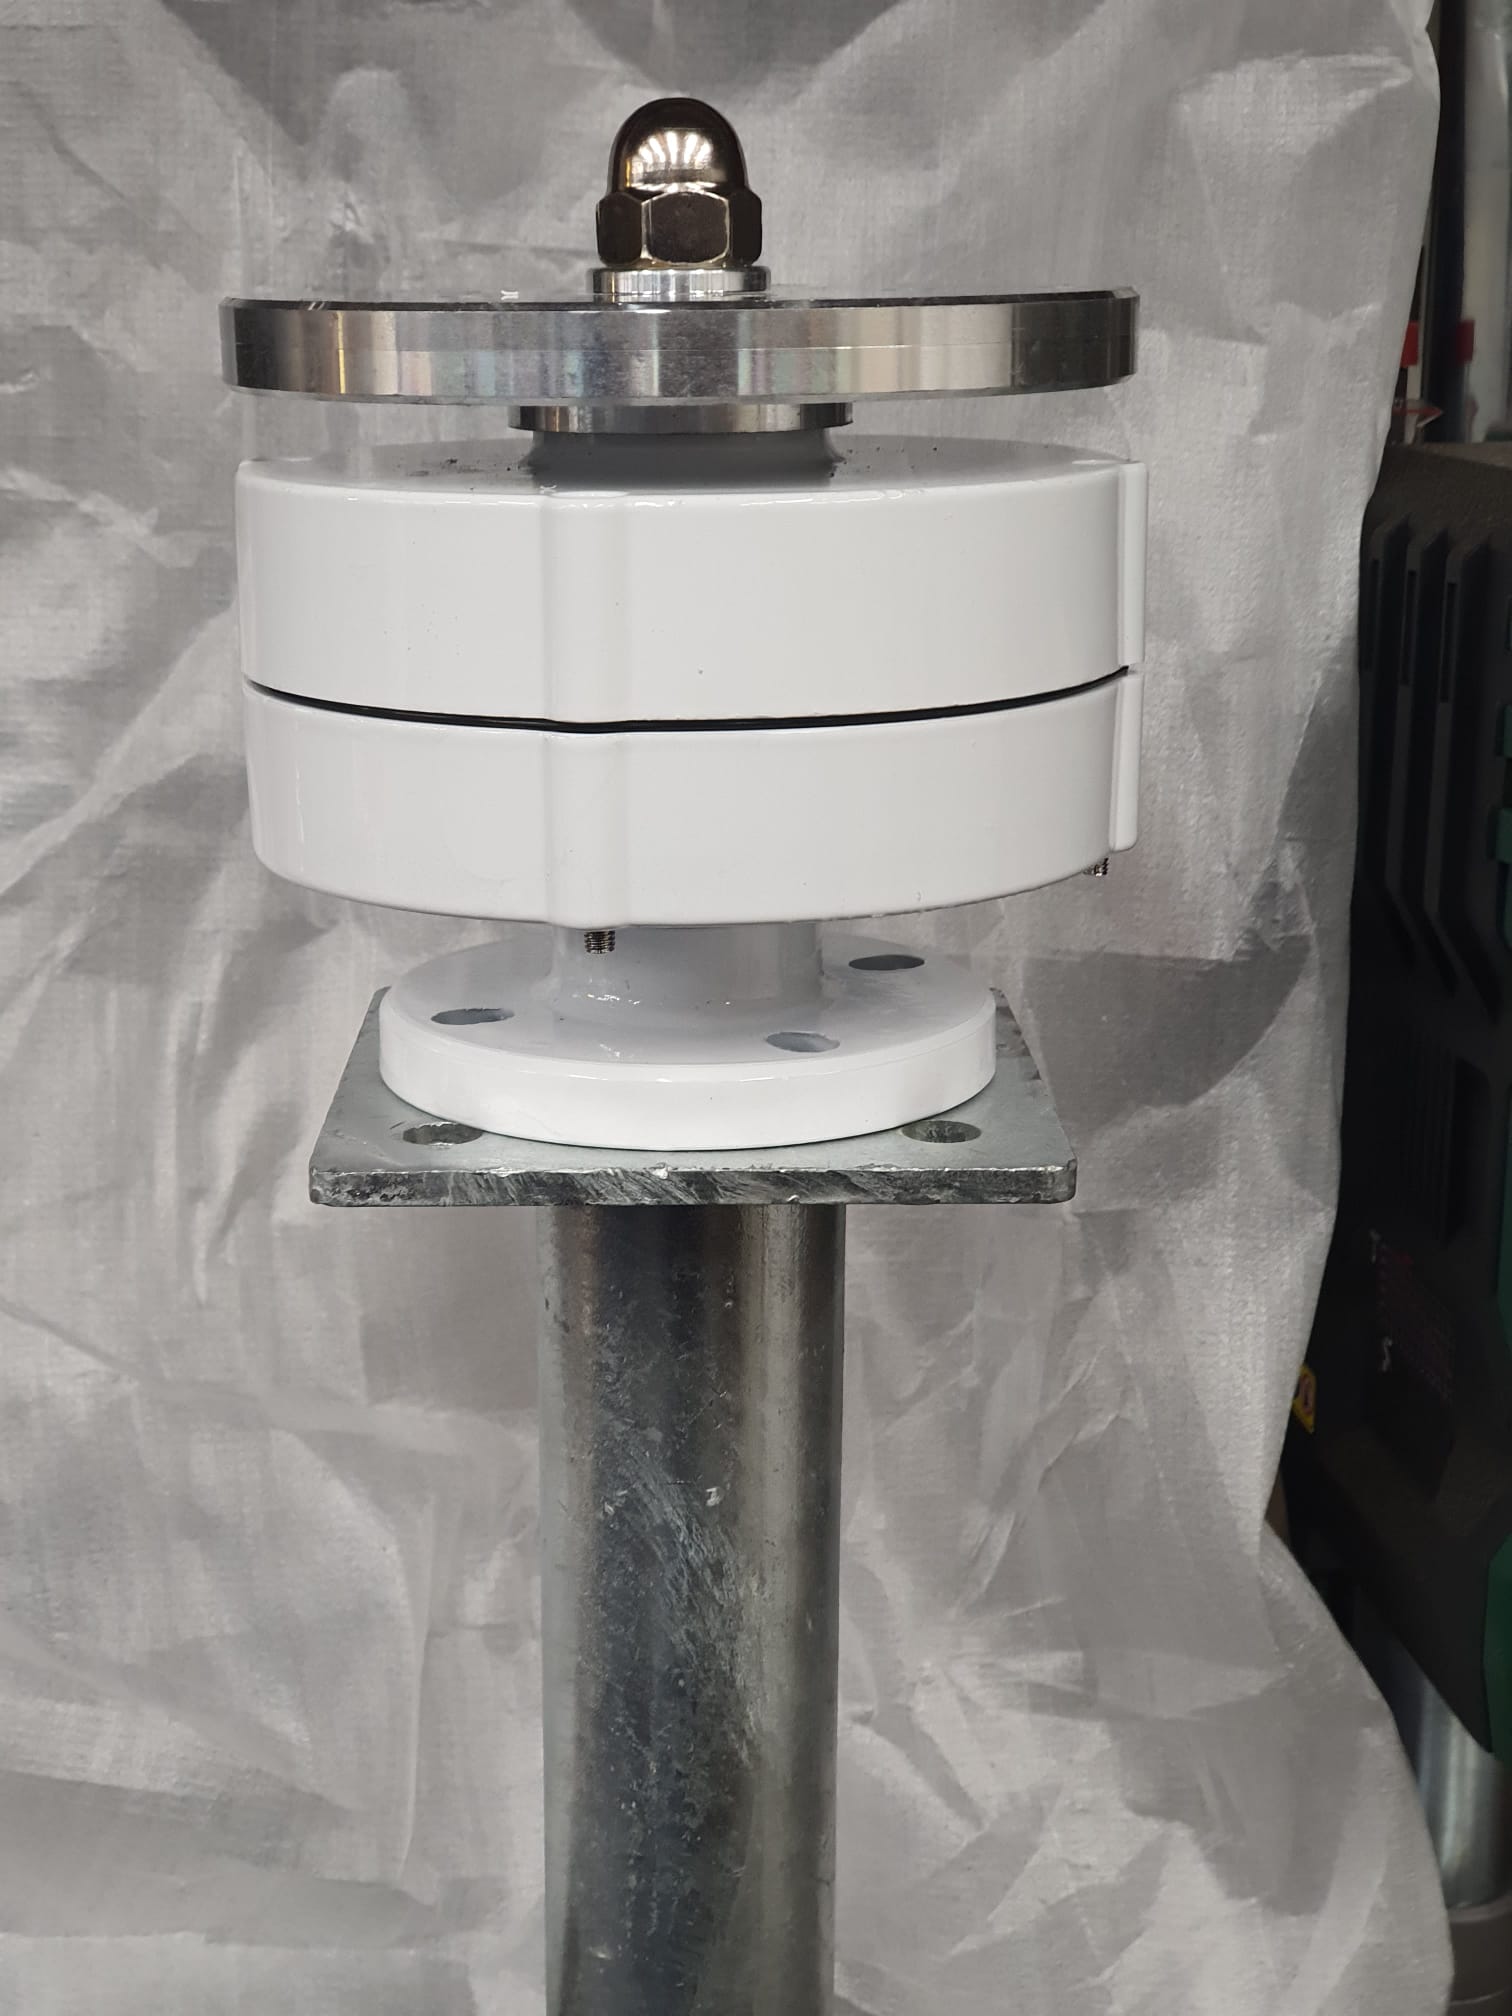
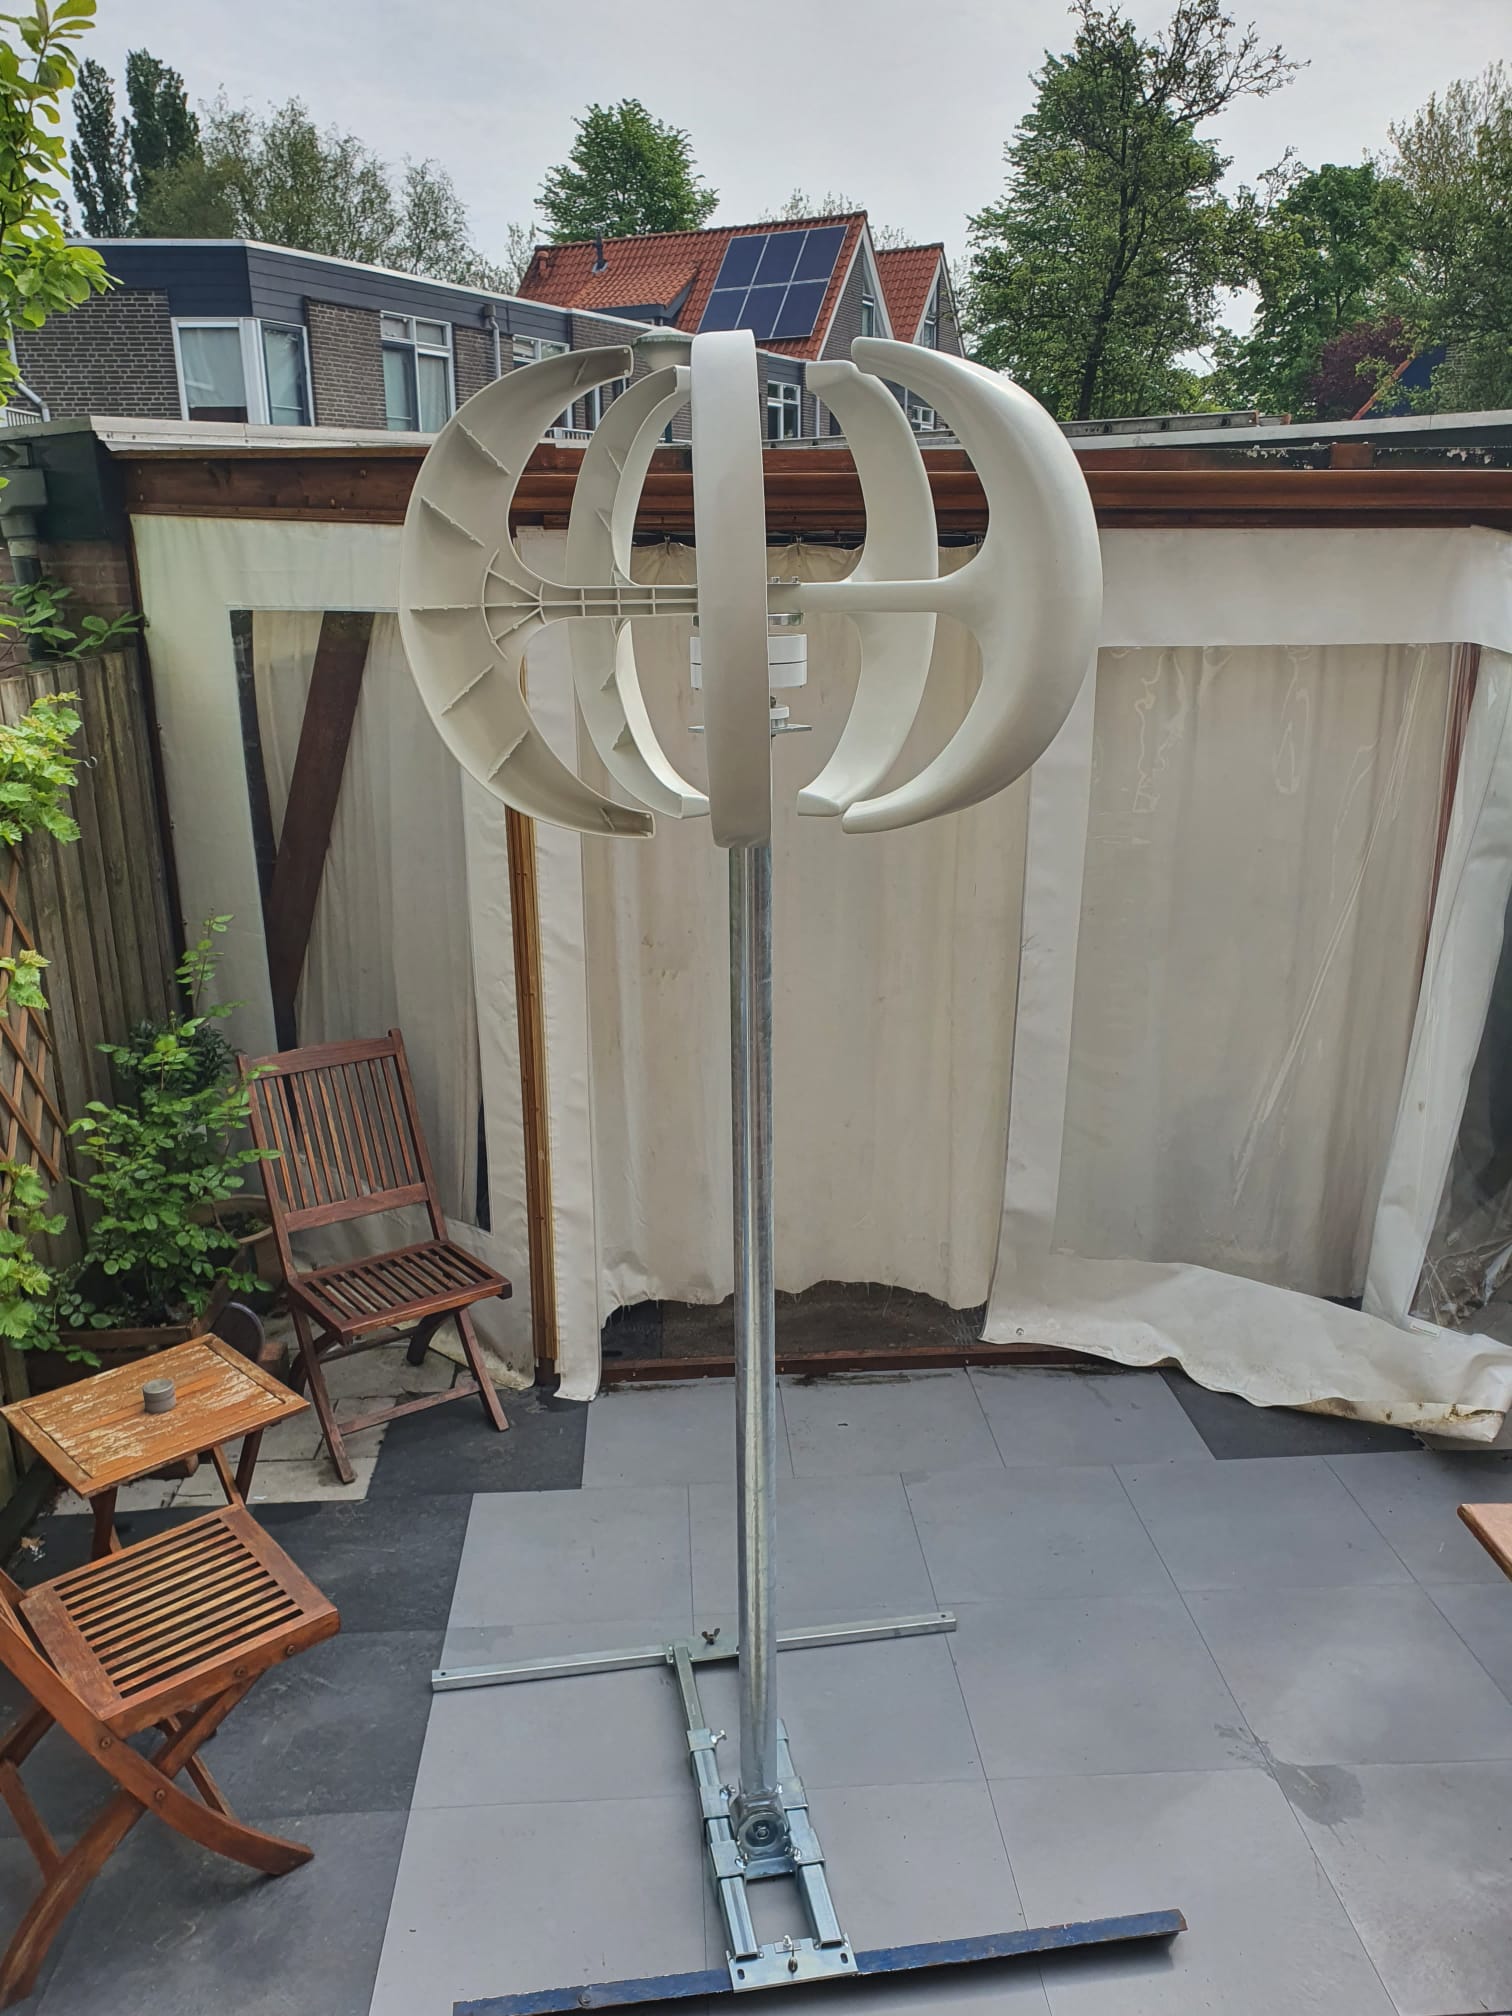

Whenever I drive off something higher than 4 inches,, I crash into the ledge that I drive off with the frame of the bike. Also, When driving on- and off the small typically Dutch roundabouts I often crashj both the Left- and the Right hand sided floorboards and also the jiffy on the pavement.
Coming from my previous bikes (HD-FXRS and my last was a Buell Ulysses), I never experienced these problems with those older bikes.
Therefore, I decided to raise the Heritage a bit and see whether this solves my problems. If not, I’ll sell the bike and buy me something else.
For the rear opf the bike I bought me a pair of adjustable “Ultima softail 2000-UP 116=233” shocks that I hope can be adjusted to be a bit shorter than the standard shocks.
For the front, I bought me a set of Zodiac 2 inch 41mm front forks lengtheners. See the attached photo’s:
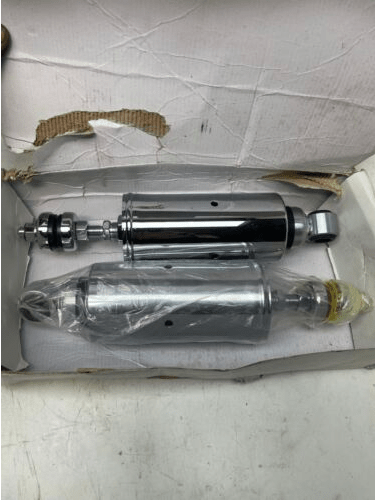


Tow bar ball cover 2-23 05 11 V1 Revd FREE STL DOWNLOAD

Geprint in rood en wit ABS op de Voron 2.4, met 260 graden


Er is ook een versie in facetvorm beschikbaar:
 Tow bar ball cover 2-23 05 11 V1 Reve facet shaped FREE DOWNLOAD

Tow bar ball cover Jimmy 2023 07 04 V1.1 facets

Tow bar ball peter cover 2023-16 06 12 V1 Facet_main FINAL size