Raise the HD Heritage FLSTCI (2004) 2 inches for improved ground clearance

Whenever I drive off something higher than 4 inches,, I crash into the ledge that I drive off with the frame of the bike. Also, When driving on- and off the small typically Dutch roundabouts I often crashj both the Left- and the Right hand sided floorboards and also the jiffy on the pavement.

Coming from my previous bikes (HD-FXRS and my last was a Buell Ulysses), I never experienced these problems with those older bikes.

Therefore, I decided to raise the Heritage a bit and see whether this solves my problems. If not, I’ll sell the bike and buy me something else.

For the rear opf the bike I bought me a pair of adjustable “Ultima softail 2000-UP 116=233” shocks that I hope can be adjusted to be a bit shorter than the standard shocks.

For the front, I bought me a set of Zodiac 2 inch 41mm front forks lengtheners.  See the attached photo’s:


Traction avant 1955 koffer ombouwen naar wieltje ??

Recent (9-2021)  kon ik een achterklep en wieldeksel van een wieltjes uitvoering overnemen.  Daarmee is de start gemaakt van mijn ombouwproject van mijn Citroën Traction Avant uit 1955 naar een wieltje-uitvoering.

De BN- uitvoering van een wieltje-achterbumper heb ik bij José Franssen nieuw aangeschaft.

Zo’n ombouw is een kwestie van (slechte) smaak natuurlijk, ik vind een wieltje-uitvoering gewoon veeel mooier aan de achterkant dan zo’n opgelegde kofferbak.

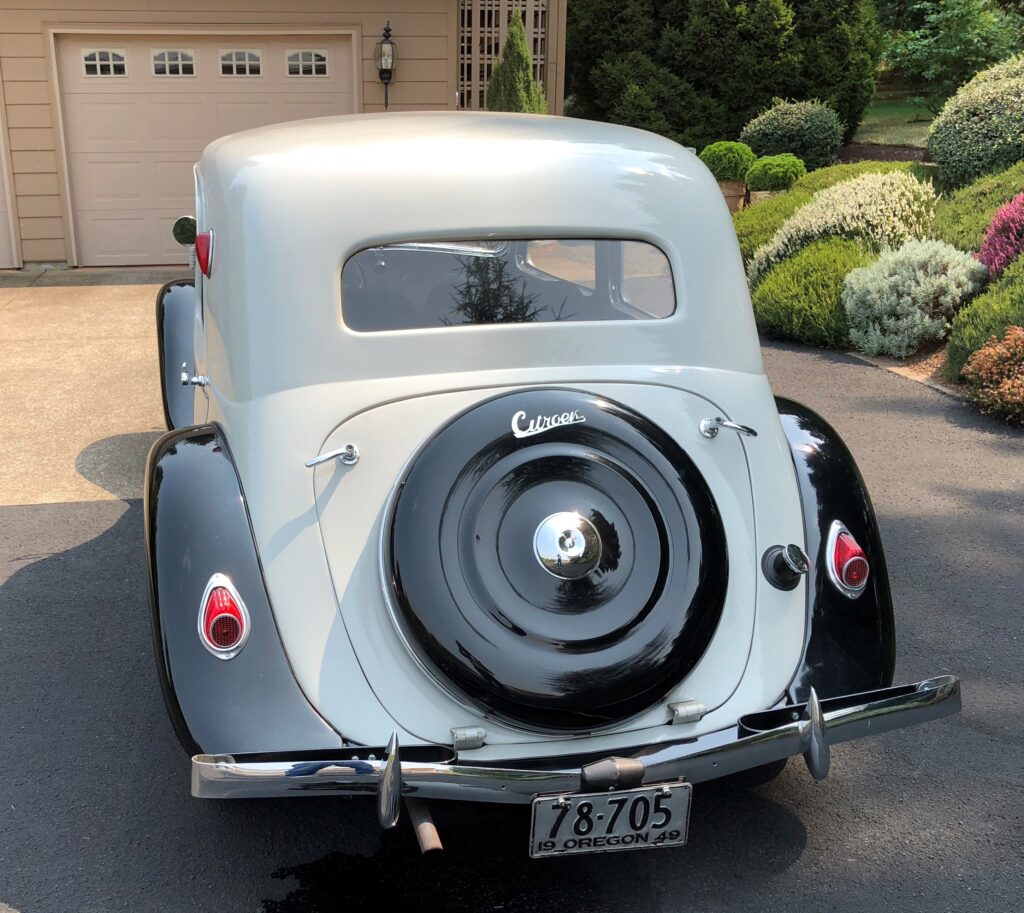
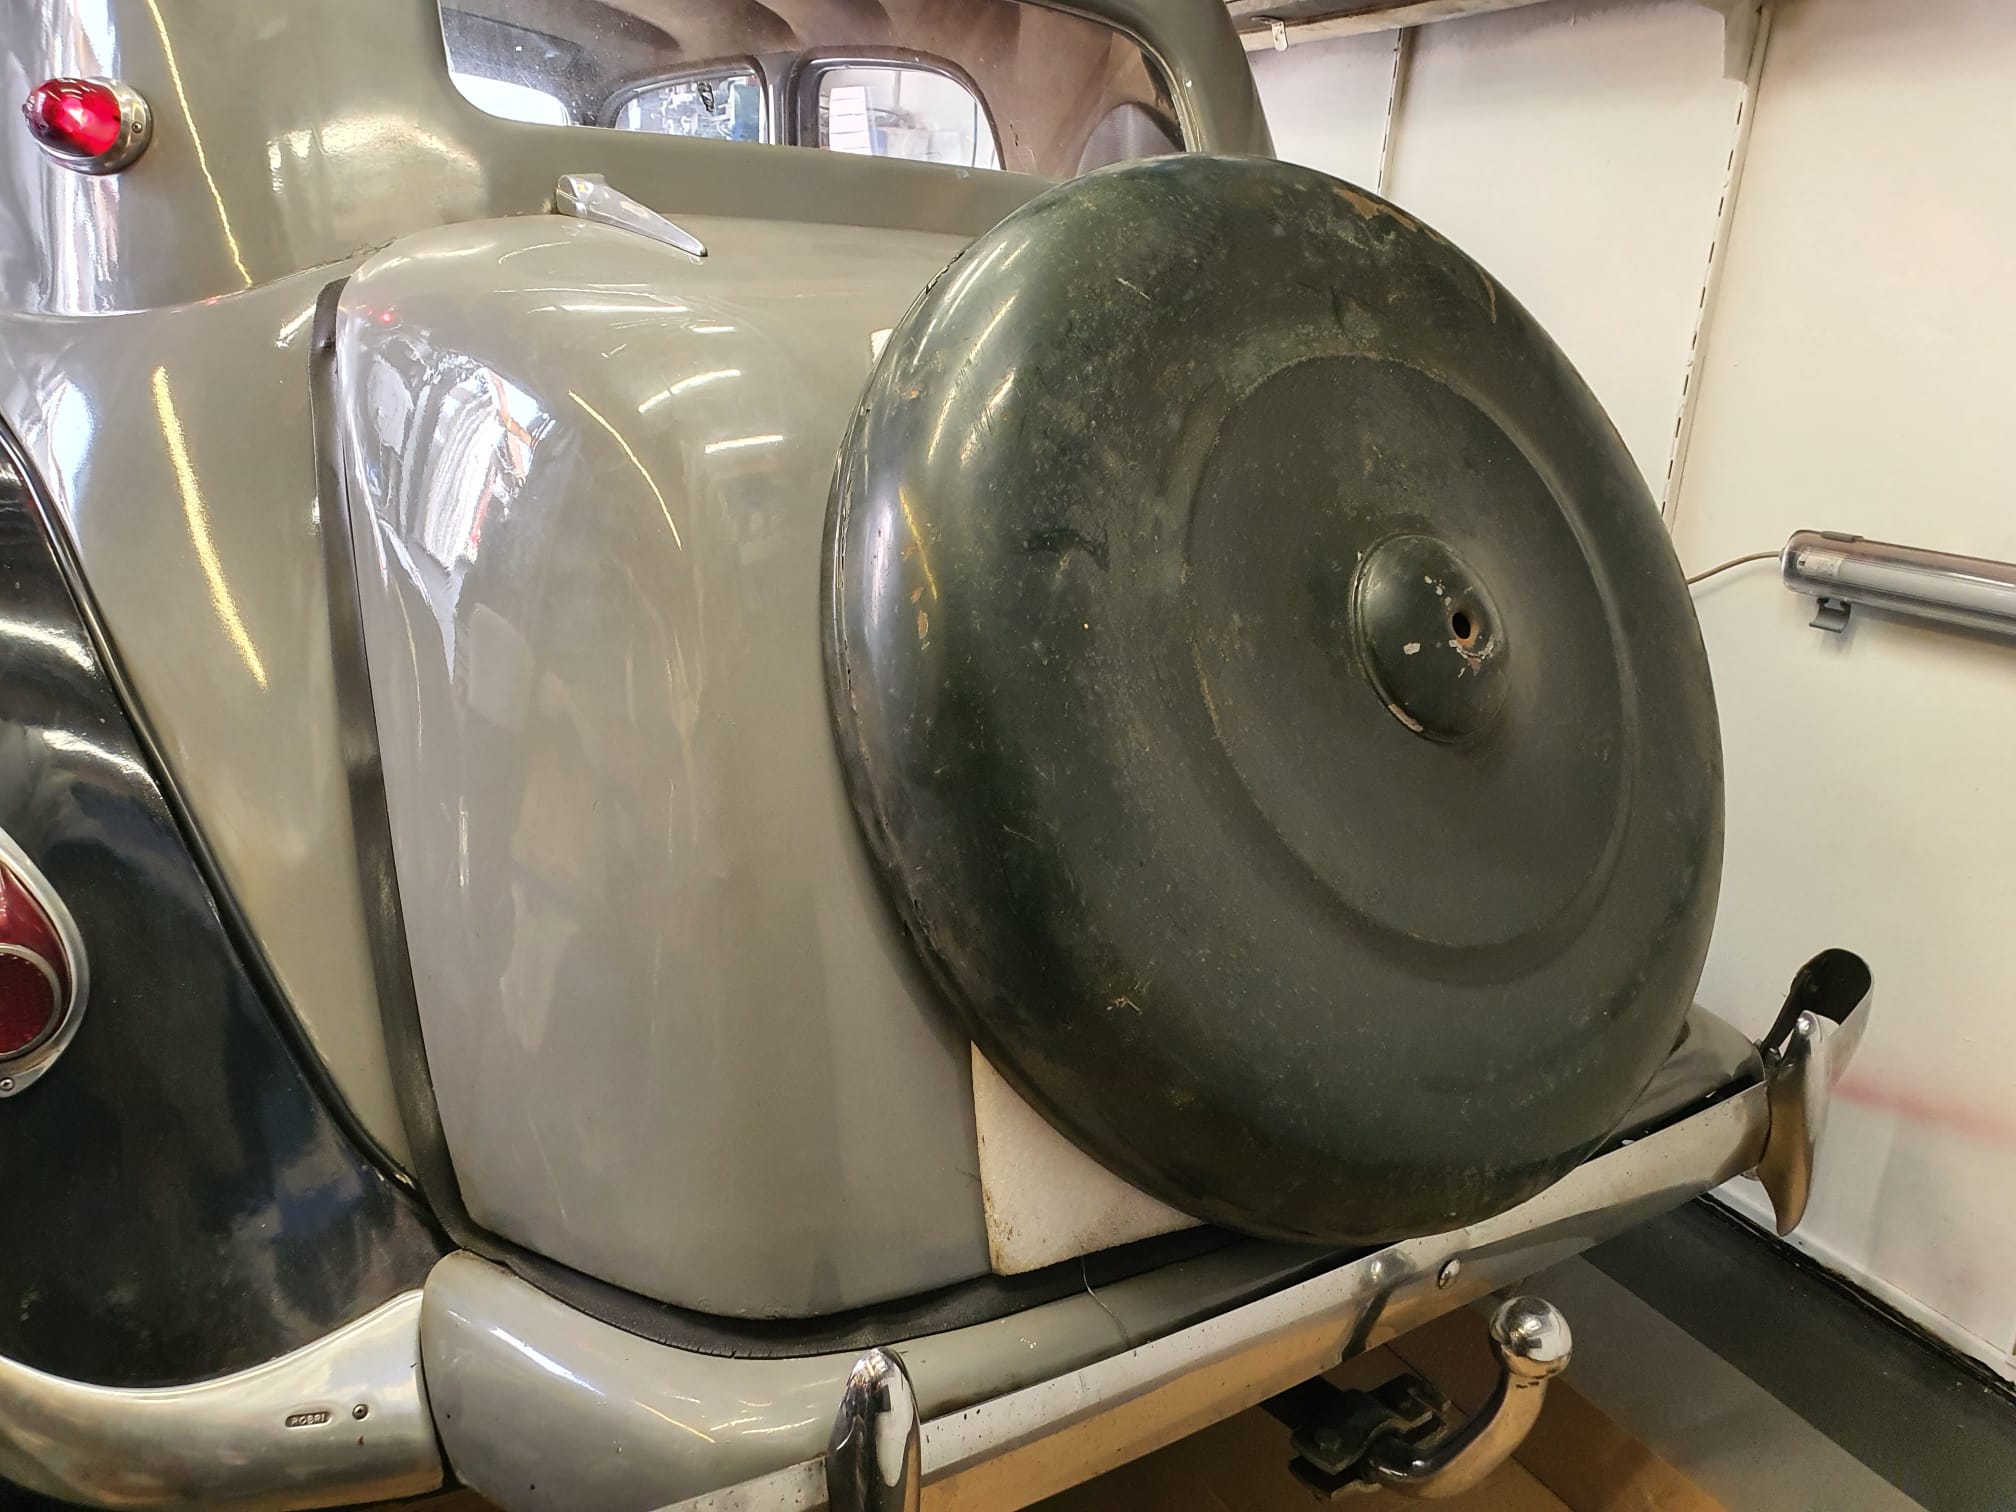
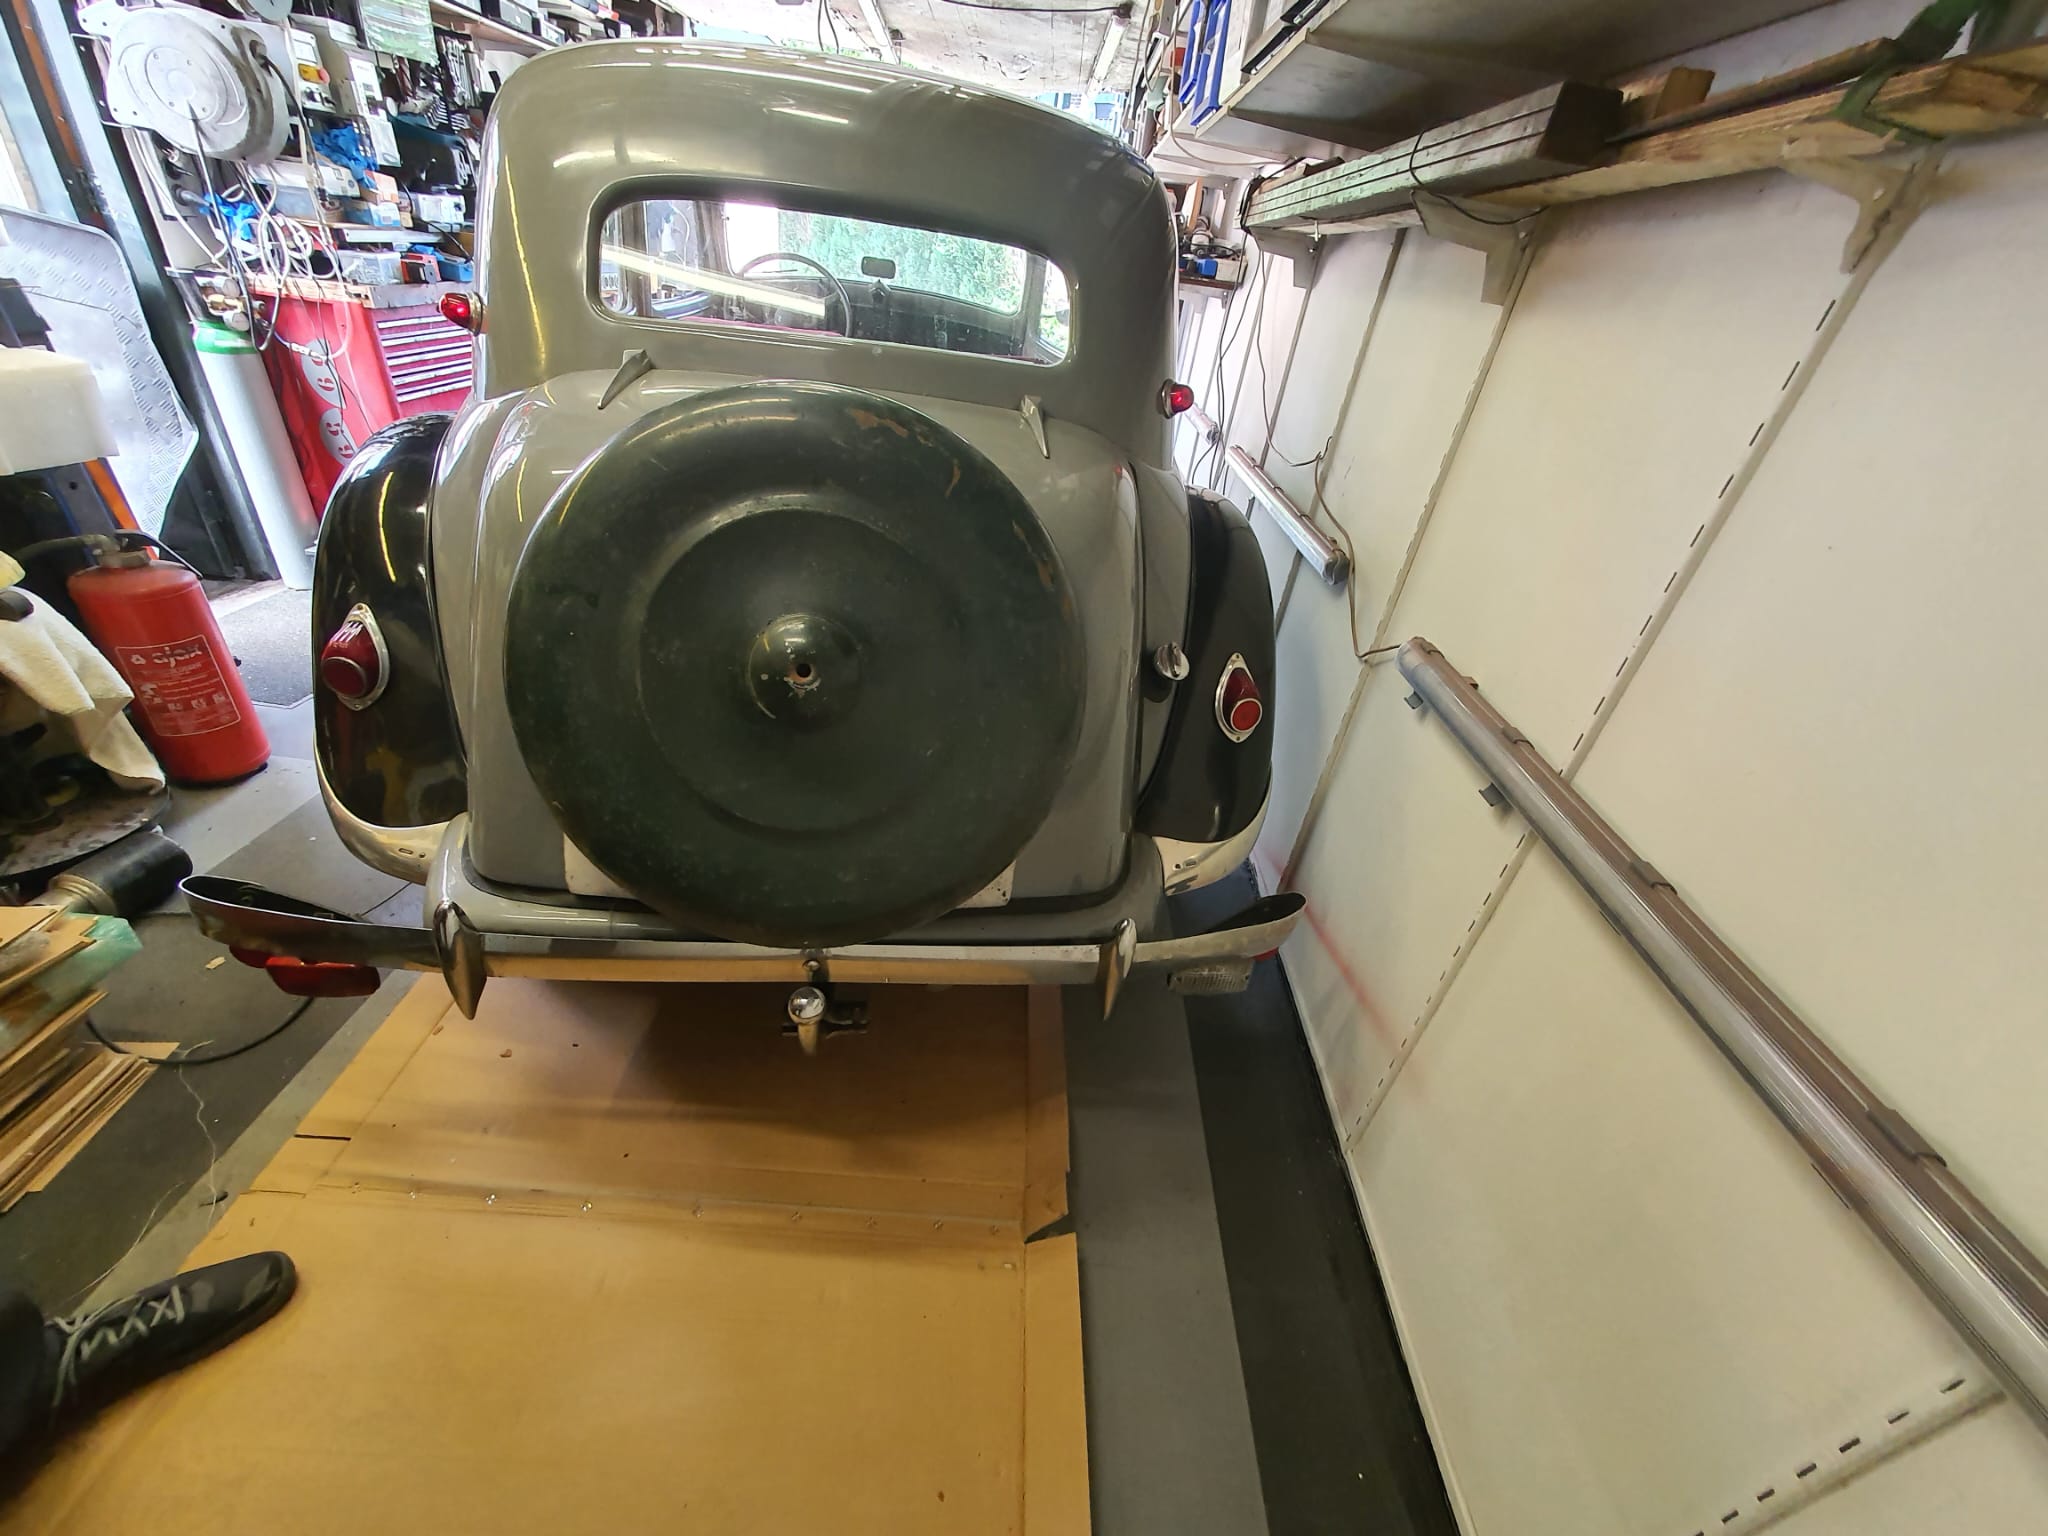
Onder zie je hoe mijn auto er ongeveer uit zou zien met een wieltje in plaats van een kofferbak:

  Boven zie je hoe een wieltje-uitvoering er zonder klep (en bumper) uitziet.

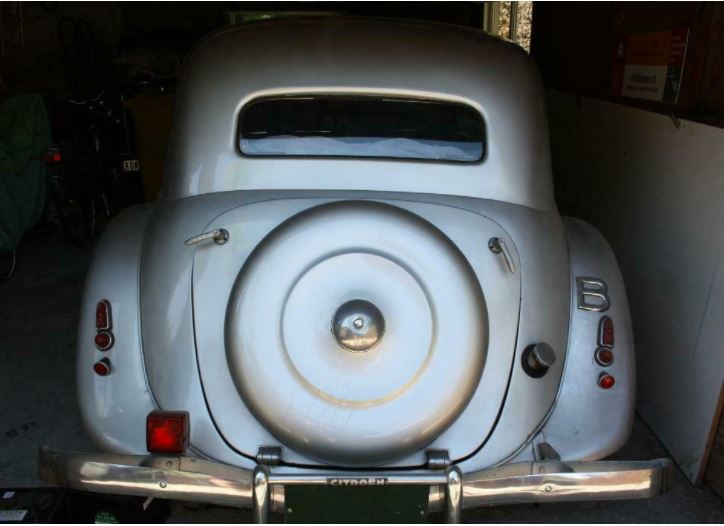
En, ter vergelijking hoe mijn auto er VOOR de ombouw naar wieltje uitziet:

Foto uit 2007

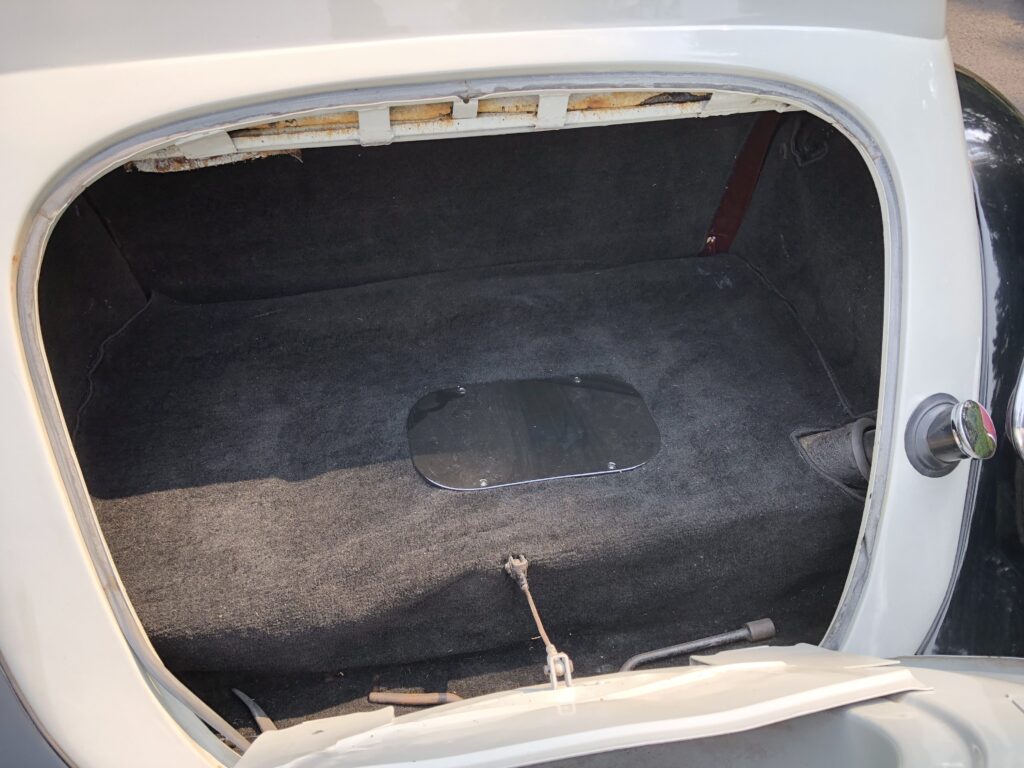
De koffer hangt aan het deel van de carrosserie direct onder het achterraam.

Bij een wieltje zit er nog een deel plaatwerk onder de ‘knik’ in het plaatwerk die onder het raam zit.  Dat mist grotendeels bij het koffermodel.

De benodigde klep, nieuwe scharnieren met montagebeugels, de wielcover en de bevestigings vleugelmoer! Alles al een tijd geleden op de kop getikt.

En de onderkant loopt qua plaatwerk helemaal door (grijs) , ook nog onder de kofferklep (grijze klep met zwart wieldeksel).  Dit moet sowieso nieuw worden geconstrueerd, en worden verbonden met de bestaande koffervloer plaat. Alles daaronder en -achter moet worden verwijderd dus ook de reservewielbak en de bestaande extra verlenging van bumperhouders en het ‘standaard’ extra aangeschroefd plaatwerk.

De spatbordpunten L en R zijn met een stuk plaatwerk verbonden, onder de vaste carrosserie (grijs). Dit plaatwerkdeel is als aftermarket deel nog gewoon te verkrijgen.


DE AANPAK – staat gepland voor eind 2023, na afwerken van de ID20 –

LPG tank eruit, benzinetank eronderuit halen.

De bak waar het reservewiel normaal staat moet eraf, en de achterspatborden moeten worden verwijderd.  De koffer moet er natuurlijk af en de scharnieren gaan eruit.  De bestaande randen waar de koffer tegen rust gaan er allemaal af, zodat de oude plaat een beetje felxibiliteit krijgt voor de passing met de nieuwe klep en nieuwe kleprand + aanvullend plaatwerk.

Eerst wordt een plaat metaal uit één stuk gebruikt waar de vorm van het kofferdeksel van de wieltje-uitvoering wordt uitgesneden, maar waar extra ruimte wordt gehouden voor de lekrand waar het deksel in komt te liggen. spatbord.   De lekrand / goot wordt gemaakt vanuit de binnenkant van de uitgesneden plaat.   Als de plaat met rand goed passend om de klep past, las ik de plaat aan de klep vast met voldoende kleine spotwelds. Daarna wordt het met de plaat inclusief klep vooral veel passen en meten op de bestaande achterkant.

Om alles strak te krijgen begin ik met de nieuwe klep als uitgangspunt, en daaromheen komt de rand die pas moet worden gemaakt op de oude achterkant.  Die rand wordt uit één deel van de plaat gemaakt, en teruggebogen . De plaat met rand die rondom de kofferklep moet komen wordt daarna met spotwelds aan de kofferklep gefixeerd. Daarna wordt het geheel op de juiste plaats gezet, waar nodig nog extra in model gemaakt. Als alles perfect past, wordt het met schroeven op de achterkant vast gemaakt.  Daarna met een dunne slijpschijf worden beide platen doorgeslepen en stukje bij beetje met kleine spotwelds gelast. Verveolgens de vorm waar nodig herstellen en aflassen, slijpen, en de koffer losslijpen.  Daarna de rand van de klep fixeren aan de kofferbodem en zijkant (van binnenuit).

Vervolgens de onderkant, onder de klep dus, van een doorlopend profiel voorzien tussen de achterspatborden in.

Scharnieren plaatsen en klep monteren.

Kaal maken, plaatwerk strak maken, primer, strak maken en spuiten.

Doel is het zo te maken dat alles eventueel ook nog kan worden teruggebouwd naar de kofferuitvoering.  Dat betekent dat de ruimte tussen het grote gat voor de koffer en de kleinere wielhouder-klep met een te maken uitneembaar plaatwerkdeel wordt gevuld dat met klemmetjes aan de binnenkant wordt vastgemaakt aan de rand van het bestaande grote gat.  Voor de binnenrand gebruik ik voorgevormde spatbordrand, daar is betrekkelijk eenvoudig aan te komen.

De achterbumper moet in ieder geval ook worden vervangen door een type voor een BN met een wieltje, dus een deuk naar benden in het midden.  De bevestigingssteunen van de bumper moeten ook worden aangepast omdat de bumper een stuk moet opschuiven richting de carrosserie.
De trekhaak komt daardoor wel een heel stuk verder naar achter (optisch, de trekhaak verandert natuurlijk niet) en ik denk erover om de trekhaak voorlopig maar helemaal eraf te halen en eens te zien of ik ergens een type voor een wieltje uitvoering kan vinden.

Gewoon even passen waarbij je goed kan zien dat de koffer te klein is voor het wieldeksel. Je moet echt naar onder toe, vandaar de ‘gedeukte’ bumper om ruimte voor het wiel te maken bij de wieltjes uitvoering…

Mijn Traction Avant ombouw naar wieltje

Boven mijn auto, onder een wieltje uitvoering, de verschillen zijn duidelijk zichtbaar!

Onder: Let op de uithouders aan de zijkant bij dit model, in plaats van de kabel die bij de oudere modellen vanaf de onderkant werd toegepast.  Het lijkt er trouwens op dat het profiel dat de achterspatborden verbindt afneembaar is.  Ik heb het alvast besteld.  Dat profiel kan ik mooi als maatvoering gebruiken om de binnenplaat te laten aansluiten. Het profiel moet ik na verwijderen van de onderbak dan tussen de spatborden monteren.

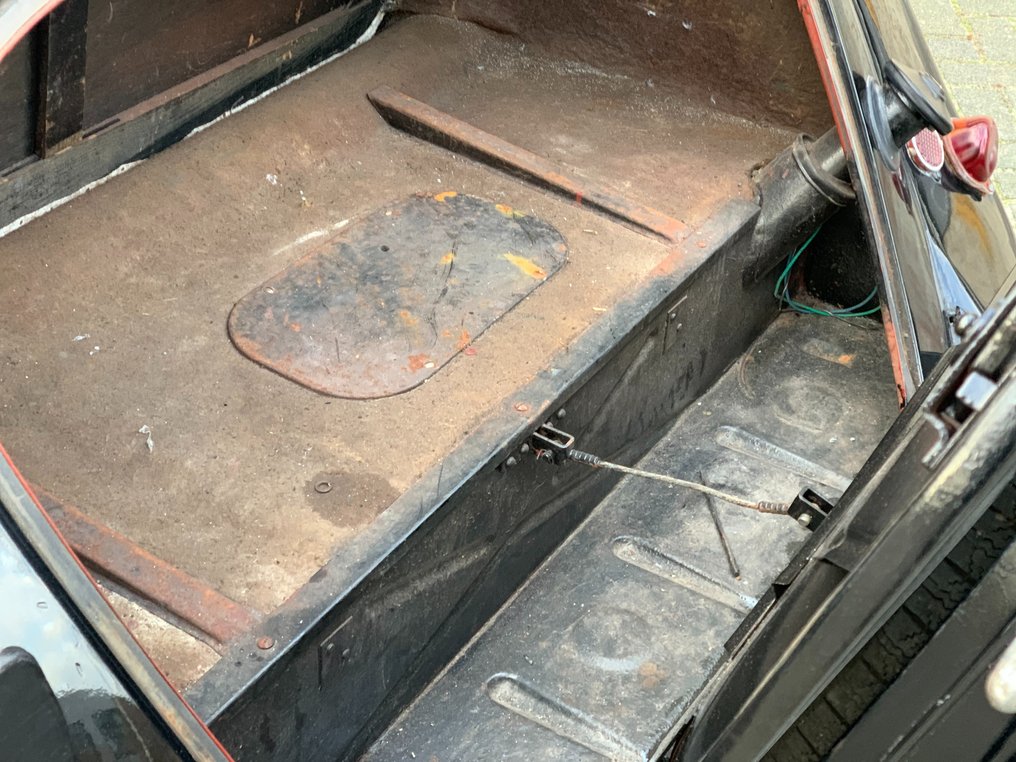
Onder: Gelukkig kan de rand van de kofferbakbodem blijven zitten en een groot deel van de onderbak kan ook blijven zitten.  Alleen het deel dat uitsteekt gaat eraf.   Als je rechts aan de zijkant van de bodembak goed kijkt, kun je de lasnaad van het deel dat uitsteekt goed zien, waar de pijl naar wijst.

Ricoh Company Ltd.

Traction avant 1955 big trunk conversion to wheel holder trunk lid

Recently (9-2021) I was able to buy me a tailgate and wheel cover from a wheeled TA version.

This was the start of my project to convert my 1955 Citroën Traction Avant into a wheeled version.

It’s a matter of taste of course, and I just think a wheeled version is much nicer than such an imposed trunk.

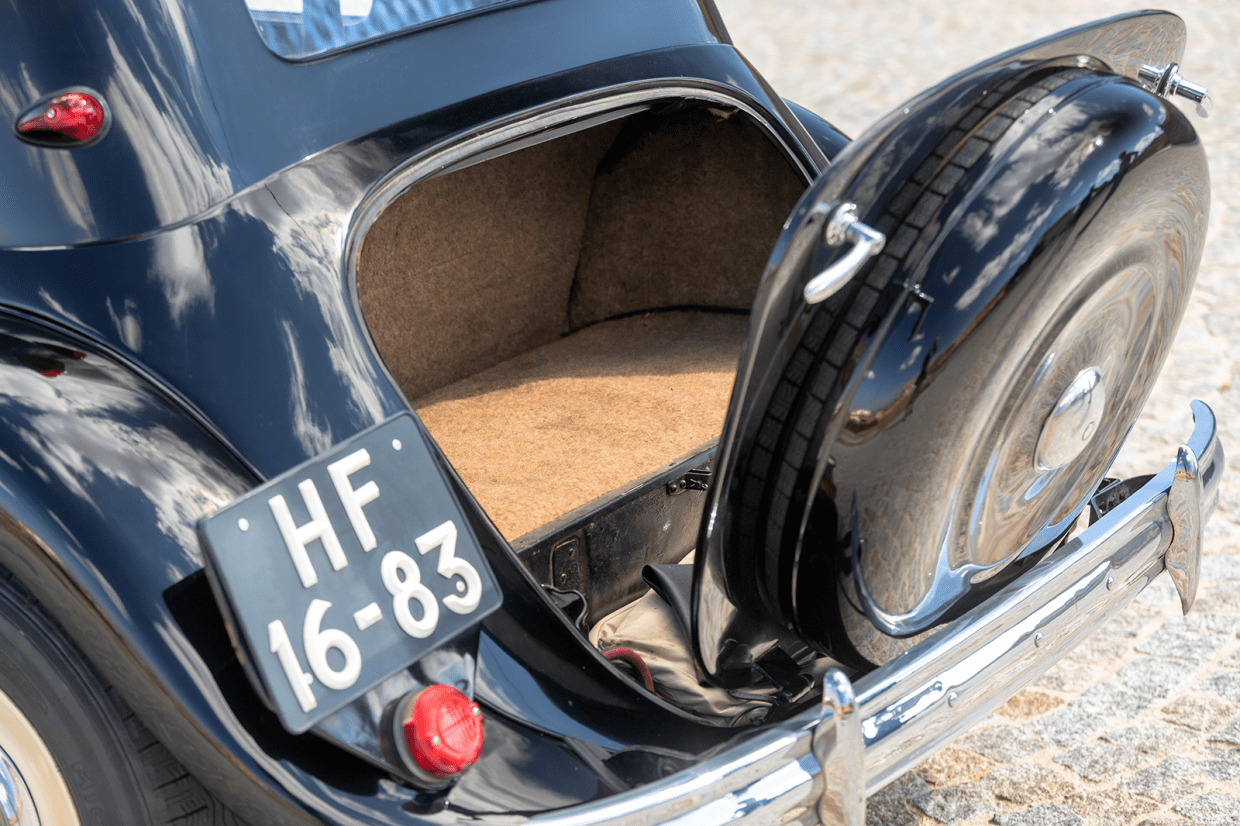
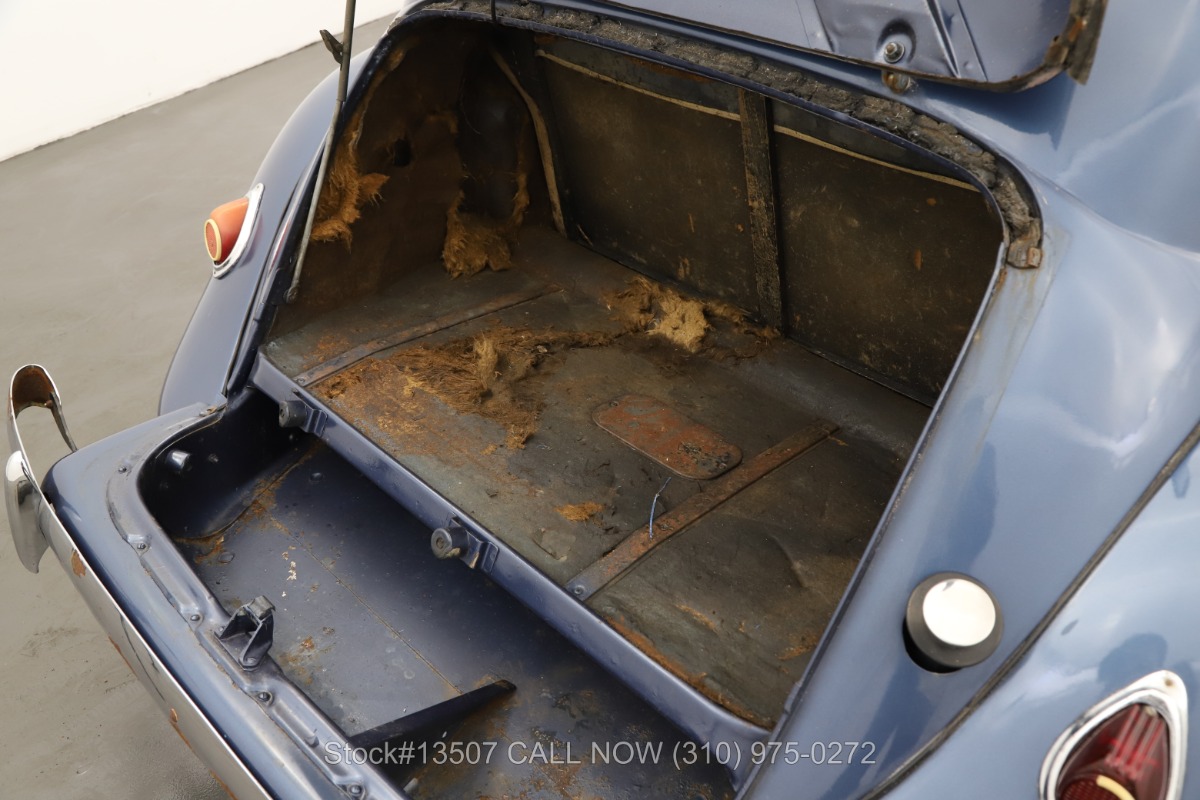
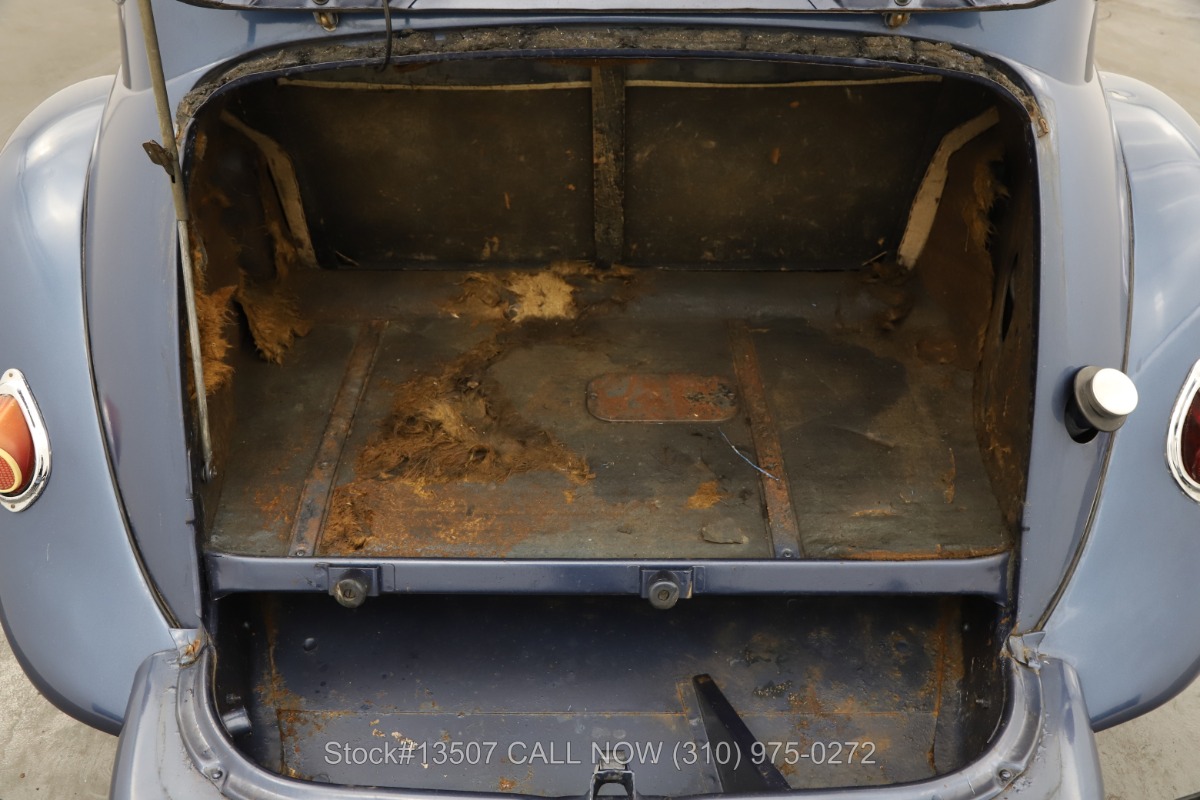
Below you can see what my car would look like with a wheel instead of a trunk:

So- we’ll need to go from the picture ABOVE to the picture BELOW!

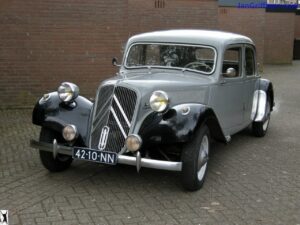
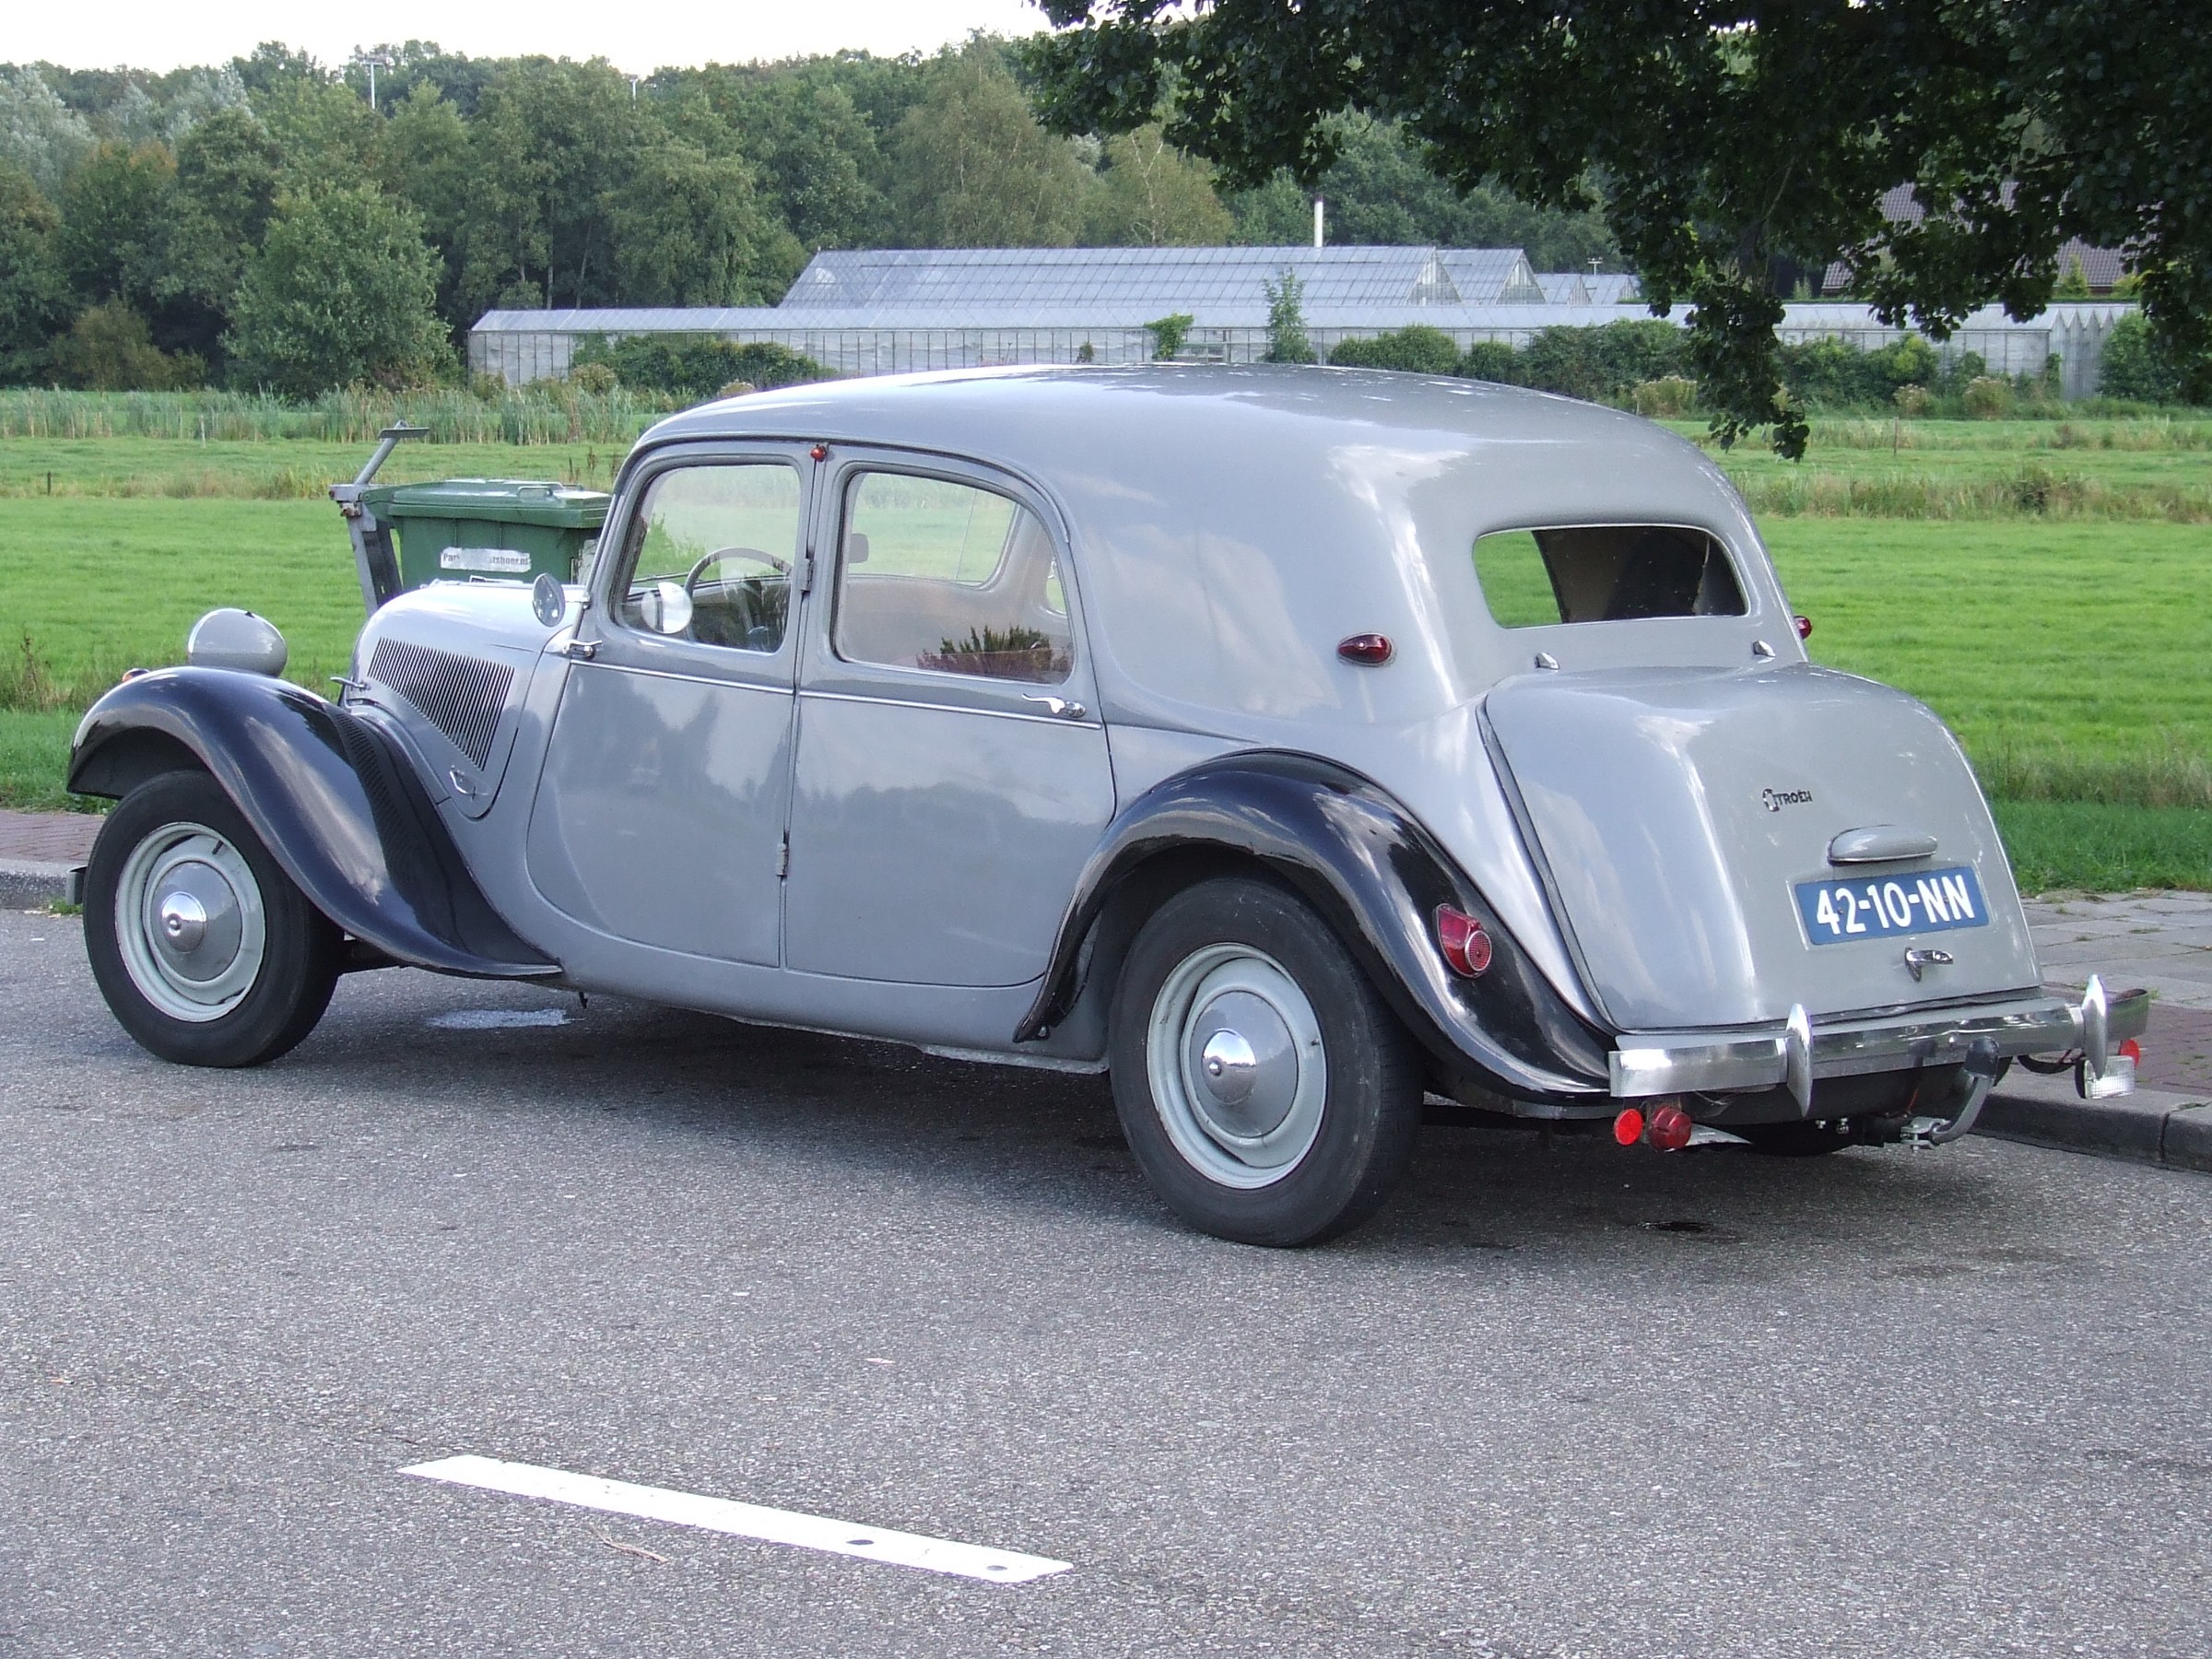
And, for comparison what my car looks like BEFORE the conversion to wheel:

Picture  dates from 2007

The trunk hangs from the part of the body directly under the rear window.

On a wheel version, there is still a section of sheet metal under the “kink” in the sheet metal that is under the window.  That is completely missing from the trunk model.

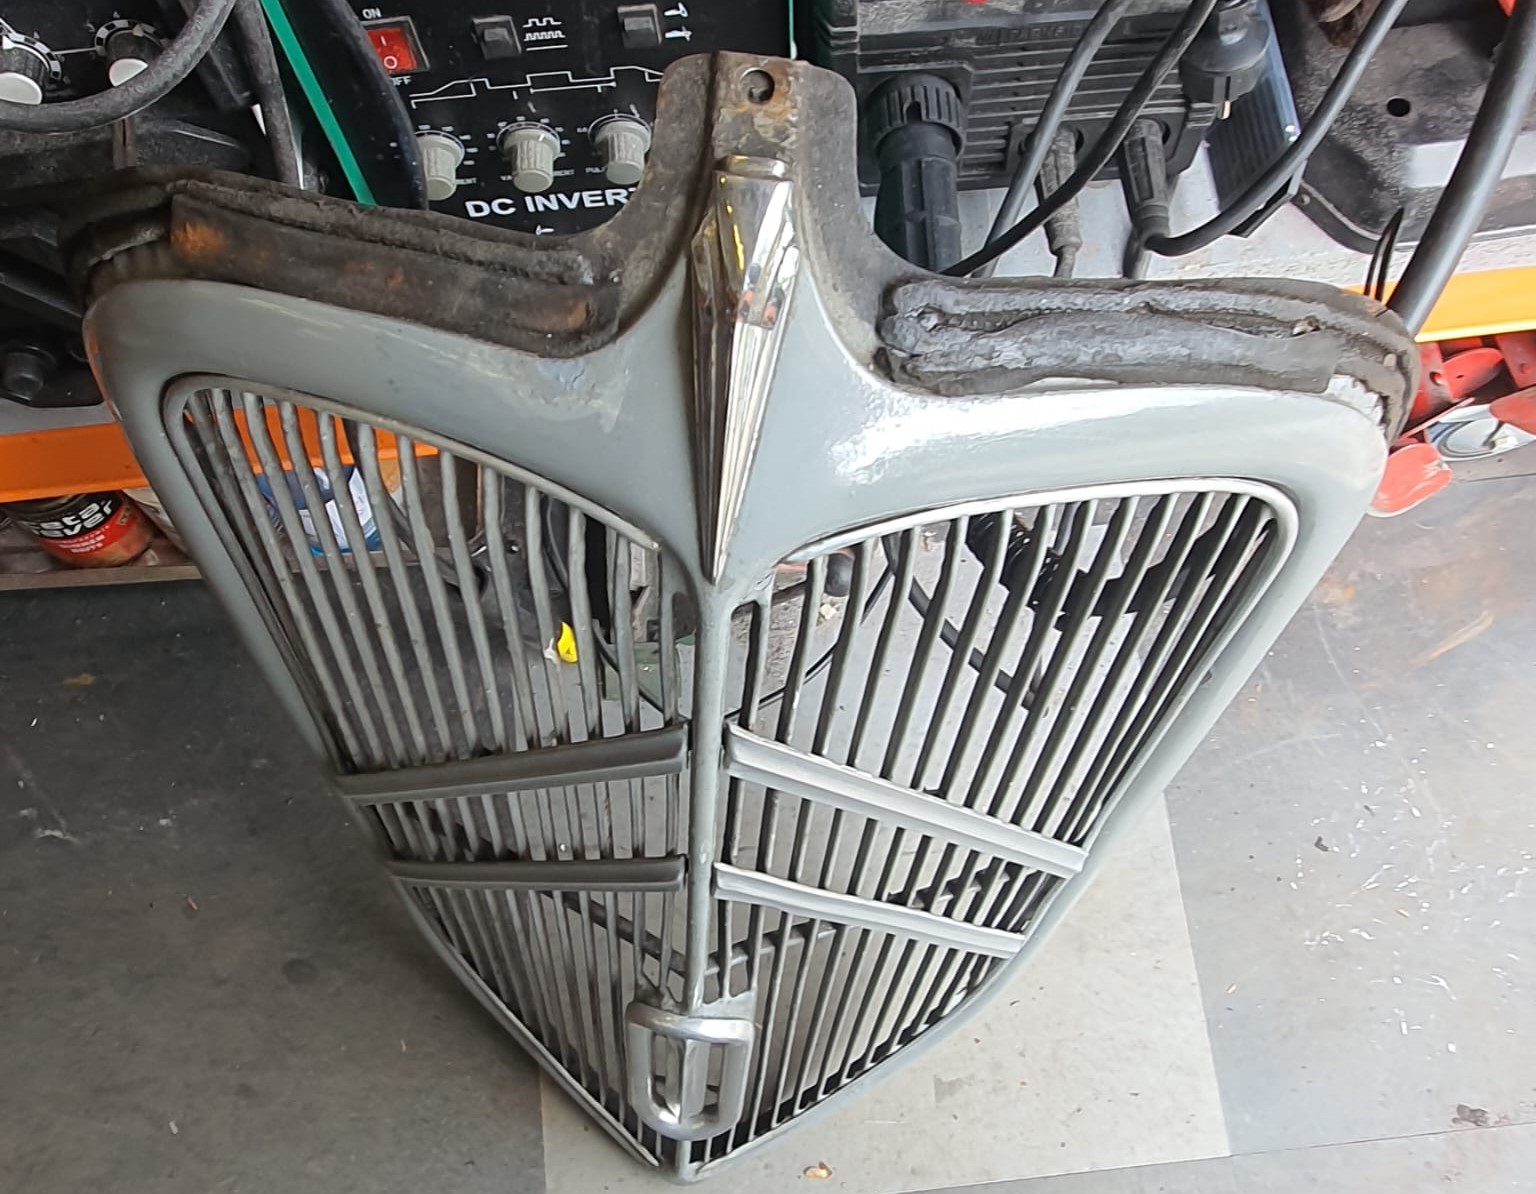
And the underside in terms of sheet metal runs all the way through (gray) , including under the trunk lid (gray lid with black wheel cover).  This should be constructed anyway, and connected to the existing trunk floor plate. Everything under and behind it has to be removed so also the spare wheel well and the existing extra extension of bumper brackets and the ‘standard’ extra bolted-on sheet metal.
The fender points L and R are connected with a piece of sheet metal, under the fixed body (grey). This sheet metal part is still readily available as an aftermarket part.

THE APPROACH – is planned for end of 2024, after finishing the ID20 –

LPG tank out, gasoline tank out from under it.

First, a new piece is made that follows the exact shape of the trunk lid of the wheeled version. To that, a sheet metal edge is made to fit into the hole created by removing the existing trunk lid. After that, it becomes mostly a lot of fitting and measuring.

The goal is to make it so that everything can also be rebuilt back to the trunk version if necessary. That means that the space between the large hole for the trunk and the smaller wheel holder lid will be filled with a removable sheet metal part to be made, which will be fastened to the edge of the existing large hole with clips on the inside. For the inside edge I will use preformed fender edge, which is relatively easy to come by.

In any case, the rear bumper must also be replaced with a type for a BN with a wheel, so a dent to the bottom in the middle. The mounting brackets of the bumper also have to be adjusted because the bumper has to move a bit towards the body.

This does move the tow bar quite a bit further back (optically, the tow bar doesn’t change of course) and I’m thinking about taking the tow bar off completely for now and see if I can find a type for a wheeled version somewhere.

Again: Fron ABOVE to BELOW conversion!

And this is how the license plate will be mounted after the conversion!  (The above picture is obviously not a 11B(N) but a TA15, as the bumper clearly indicates.


Just a fit where you can clearly see that the trunk is too small for the wheel cover. You really have to go down, hence the “dented” bumper to make room for the wheel at the wheel version….


BYD Atto3 install automatic front window wiper installation with rain sensor

After over six months of driving my Atto3, I still have 2 “residual” issues that  bother me.  (2023-05-12)

1) The climate control.

It is still not as I would like it to be. The temperature in the car still varies, despite a fixed temperature setting. But it thankfully no longer varies as much as it did when the car was delivered. I always have the car set at 19 degrees Celsius, and the interior temperature varies between 16 and 22 degrees with that. Interestingly, when driving at longer constant speeds, the temperature does stabilize after about 5 minutes at the set temperature. But when I leave the highway or get in a traffic jam, the temperature rises immediately and then it takes about 3 minutes before the temperature returns to the set temperature. If I then drive faster again for a few minutes or more, it gets about 3 degrees colder than the set temperature and only then does the temperature stabilize back to the set value.

After I figured out this “behavior” of the heat pump system, I never adjust the temperature again and learn to live with the increases and decreases because the temperature will eventually be readjusted. But the way this works is very annoying. It has been filed as a complaint with BYD Amsterdam, also because of the constant fogging on the inside of the car’s windows after parking at outside temperatures below 10 degrees Celsius.

2. The lack of an automatic rain sensitive wiper controller.

Due to the lack of automatic wiper control, I am going to fix this myself. So far I have done that with my cars on which no sensor or control of the rain sensitive automatic wiper control was installed off-factory.

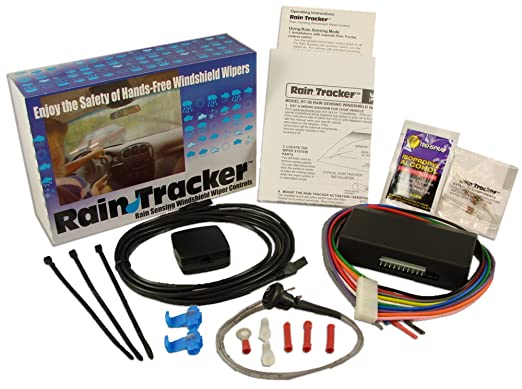
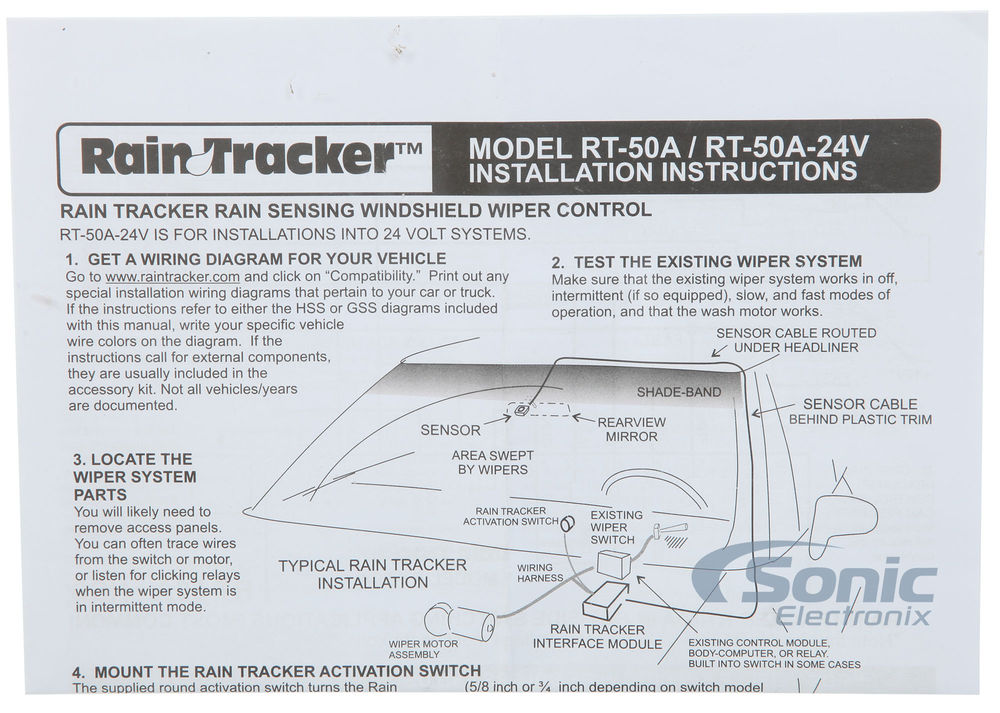
Previously I used the rain tracker RT-50A kit from Hydreon/Sonic for this purpose and since it is no longer available I use similar systems that are available in the market.


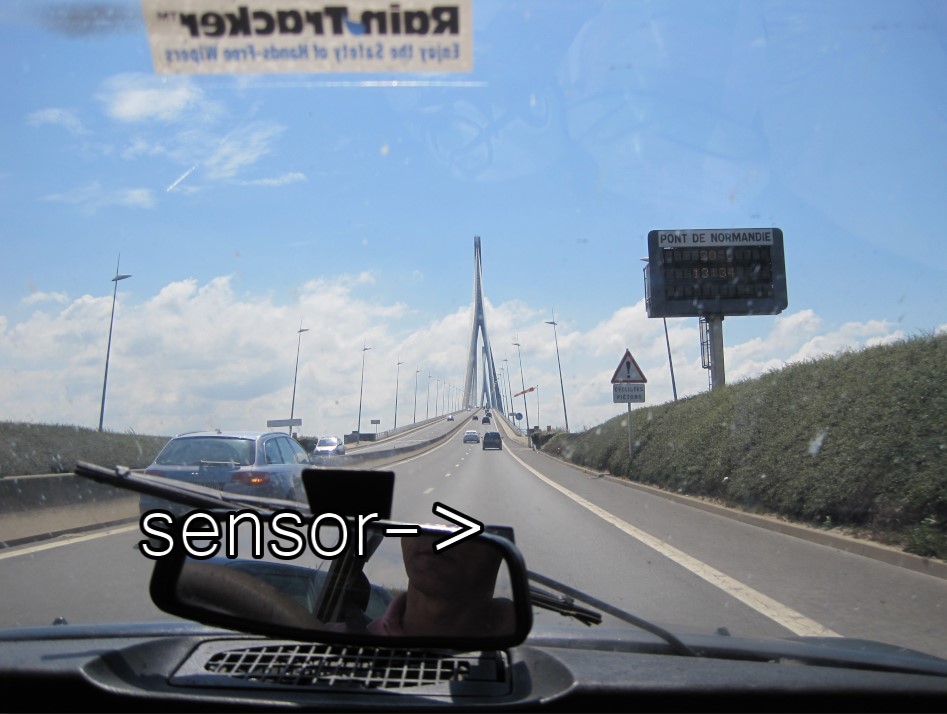
29-07-2010 Pont de Normandie, France with the Rain Sensor sticker. The installation is neatly concealed and the sensor sits against the inside of the windshield of the DS, just behind the mirror….

install_rt-50

RT-50A_Install_xbase.cdr

Vehicle-Specific Installation Notes RT50A

Actually, I would prefer to install an OBD2 system, but so far I have not been able to find an after market system for that. And building something like that all by myself will be too much work for me, also because I am not sure if the BYD Atto3’s wipers are indeed controlled with an addressable proprietary OBD2 control module.

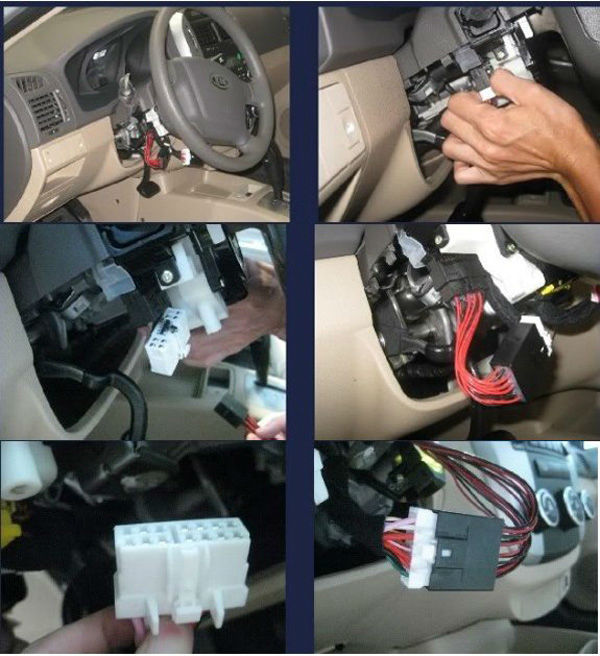
Therefore, I will go for the old school solution with standard wiring and an installation on the existing wiper switches. But then in the wiring harness under the dash. I know it’s not practical to “hack” such a drastic solution into the car in a relatively new auo but my irritation with the absence of this option is so high that at one point I seriously considered trading in the BYD Atto 3 for a Hyundai Kona or the like for this alone.

The standard wiring requires, in addition to the power supply from the switched 12V on-board voltage, an intervention in the connections between the wiper switches and the wiper motor. I am going for the simplest solution where I use the new module as an assistant for the existing installation. Then I can activate the new module with 1 extra switch that I neatly tuck away flat in the underside of the steering column. And then all the functions of the existing switches will remain intact. The new module then works in parallel with the original ‘single-wipe’ switch. So that means I will NOT have the ‘HIGH SPEED’ option automatically activated by the new module, and the new module will only use the default wipe speed for both single-wipe and continuous wipe.

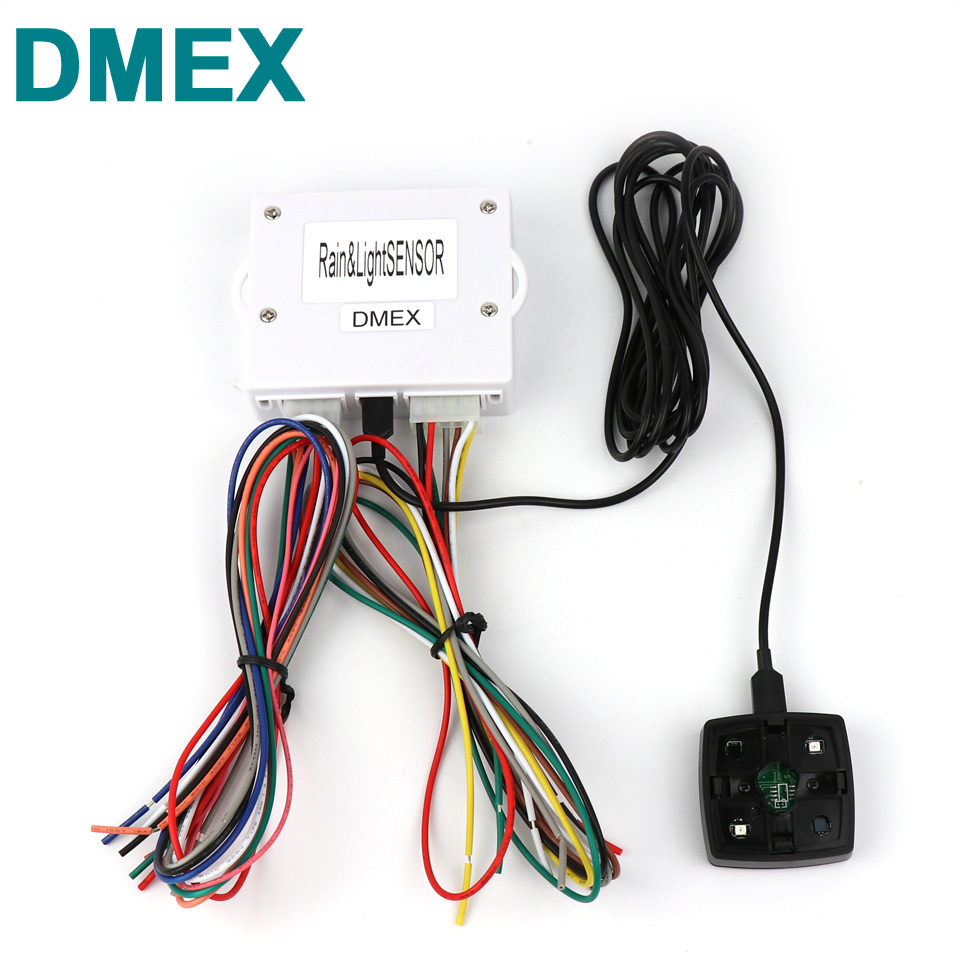
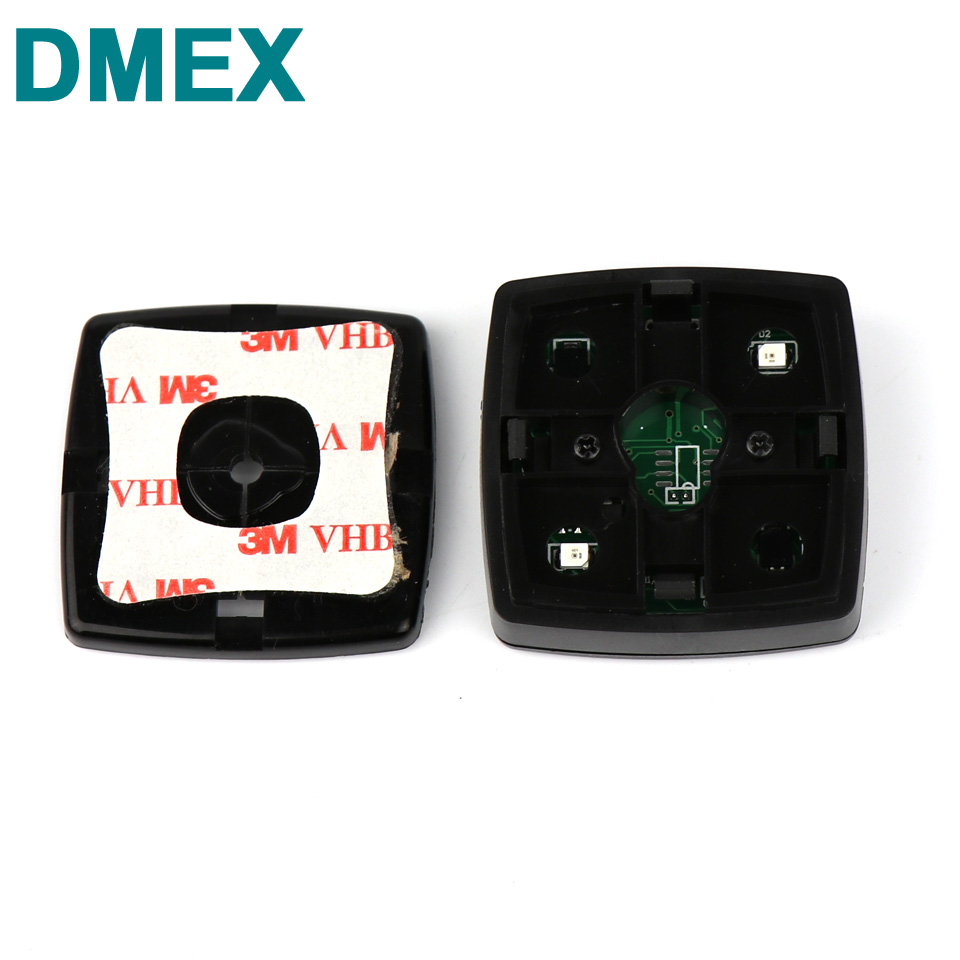
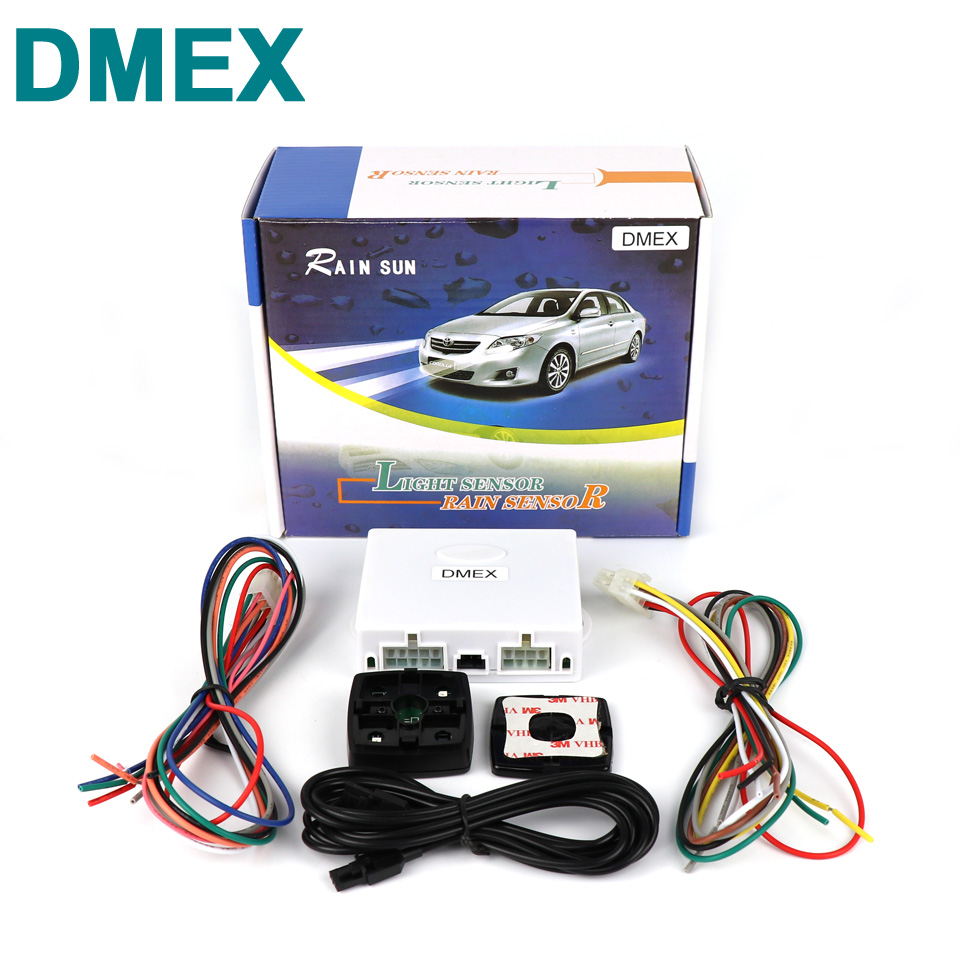
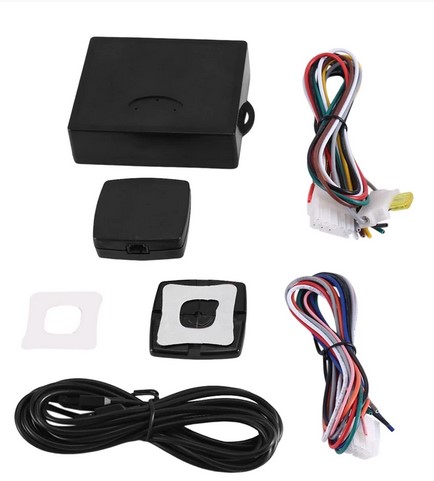
This is the new module I ordered from FRUUGO (China):


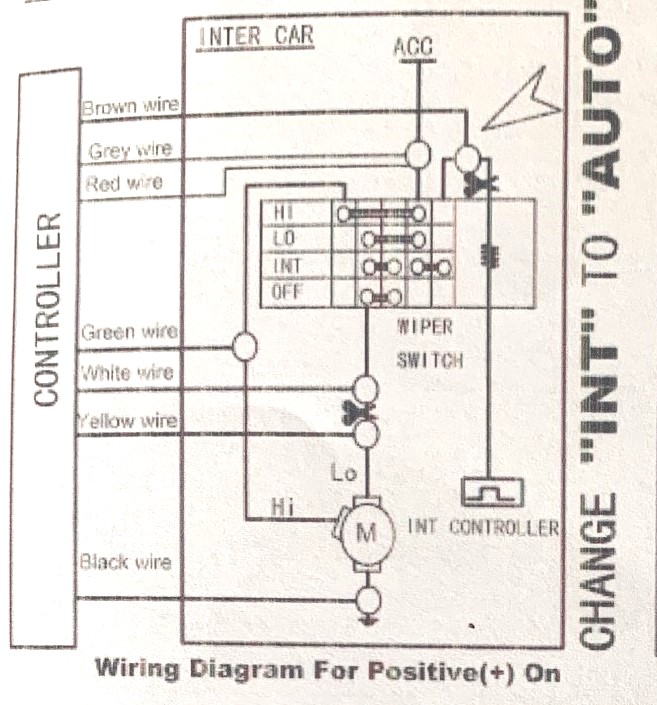
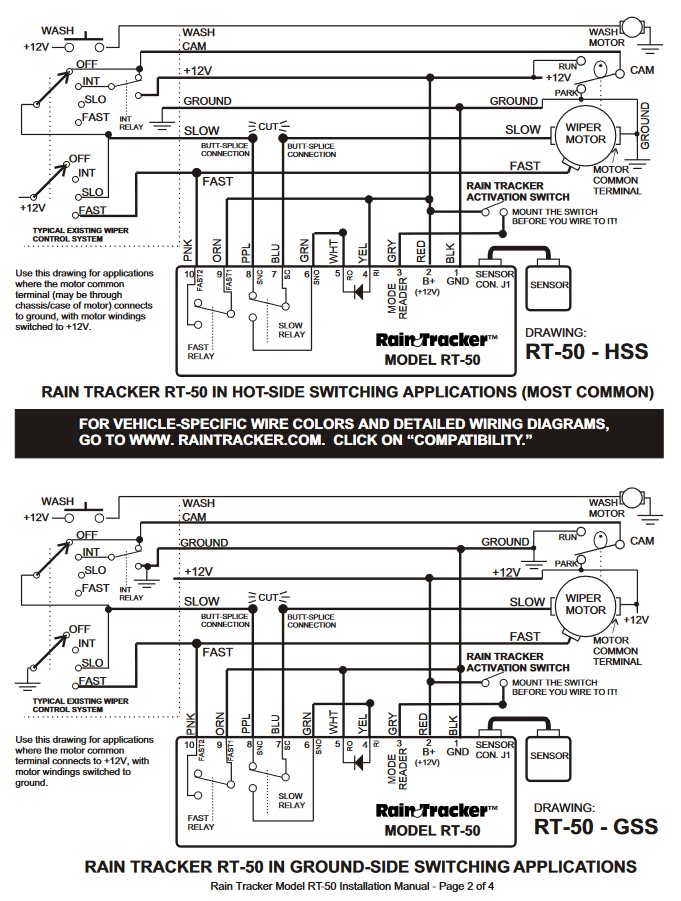
As shown in the above wiring scheme for a system where the wiper motor is used in the ‘positive’ power ON way (*and the motor’s common connection is towards GROUND), the connections of the following wires need to be made in the car:

CUT the existing connection from the interim controller to the wiper switch (that is on the steering column)  AND connect the wire you just cut (that comes from the INT switch) to the new module’s BROWN wire.  This is the main connection that sends a 12V pulse whenever rain is detected by the newly installed rain sensor.

Furthermore, connect the Grey and Red wires from the new control box to the switched 12Volts so the new module receives working power supply voltage.

Also, connect the Black wire to Ground, anywhere on the car.

Tham CUT the connection between the steering column’s wiper switch that is responsible for the SLKOW connection to the wiper’s motor an conne ct both cut ends to the White and Yellow wire from the new controlmodule.  Be  aware to connect the in the right way, i.e. YELLOW towards the wiper motor and WHITE towards the wiper switch!

Lastly, the GREEN wire from the new connection box needs to be connected to the HIGH speed wiper cable.

Since there is no on/off switch in the setup, the rain sensor will always be active as long as you set the existing wiper switch to the setting where the INT (or a chosen INT position, as for the Atto3 has multiple INT settings) position is connected to the  module’s active pulse wire (BROWN).

Hopefully the wiper switch will not be based on OBD2, since this will make it a bit more difficult to get the rain sensor module installed because it will then need to be hacked into the wiring of the wiper motor directly, and will require a to be installed hardware  switch to choose between the old and new situation.

For the Atto3, I will make a dedicated wiring scheme for the above whenever I will get to install the new system,  that will probably be during my summer holidays 2023 July/ August.

All in all, this is not a difficult installation BUT if you don’t get it right, you could damage the car’s electronics and I will not hold any responsibility for any damage fiollowing my setup for this or any other install.


Free STL download fridge beer bottle organizer by Jantec.nl

[vrm360 canvas_name=s1 model_url=https://jantecnl.synology.me/wp-content/uploads/2023/05/beer-bottles-adjustable-fridge-rack-with-45deg-squared-side-holes-V2a-2023-04-20.stl autostart = true rx=380 aspect_ratio=1.33333 hide_cmds=all]


Rear/top view

Front view

fits regular beer bottles of 330cl

//length regular beer bottle of 330cc is 238mm
//diameter regular 330cc beer bottle is 61mm

The beer bottle box in 3×3 bottles version measures 238 mm deep and  197mm wide & high.

beer bottles 3×3 fridge rack 2023 04 20


And a revised version that can be printed without support:

beer bottles fridge rack with 45deg squared side holes 2023 04 20


And a short version where the bottlenecks will stick out a bit:


beer bottles SHORT fridge rack with 45deg squared side holes 2023 04 20

STL download bierflesjes organizer voor in de koelkast C) Jantec.nl

[vrm360 canvas_name=s1 model_url=https://jantecnl.synology.me/wp-content/uploads/2023/05/beer-bottles-adjustable-fridge-rack-with-45deg-squared-side-holes-V2a-2023-04-20.stl autostart = true rx=380 aspect_ratio=1.33333 hide_cmds=all]


Achterkant
En zo staat ie in de koelkast!
Voorkant en doorkijkje naar achter

Voor gewone 330cl bierflesjes

De box in 3×3 flesjes uitvoering is 238 mm diep en 197mm hoog & breed.

Printen gaat het best met de achterkant van de flessenbox op het bed, dat is het deel waar de ronde gaten aan de achterkant van de flessen het kleinst zijn.

Als je printer max 200x200x200 mm aan kan, print dan de Z op 80%.

De flesjes steken er dan aan de voorkant  4 cm uit, dat kan ook prima!

Print meer boxen en zet ze naast elkaar, op elkaar etc.

beer bottles 3×3 fridge rack 2023 04 20


En een aangepaste versie om te printen zonder support:

beer bottles fridge rack with 45deg squared side holes 2023 04 20


En een korte versie::

beer bottles SHORT fridge rack with 45deg squared side holes 2023 04 20


Kort en kleiner in 2×3 uitvoering:

beer bottles 2×3 SHORT fridge rack 2023 04 21


En nog een hele grote wanneer je een 350mm brede 3d printer hebt:

beer bottles 5×3 fridge rack V2d 2023 04 21

Citroën ID20 cabrio (from 1970) : work on hold

Due to other priorities like the windmill on my roof, the new windows in our house and so on, I moved the Citroën ID20 convertible to the remote storage in September 2022.

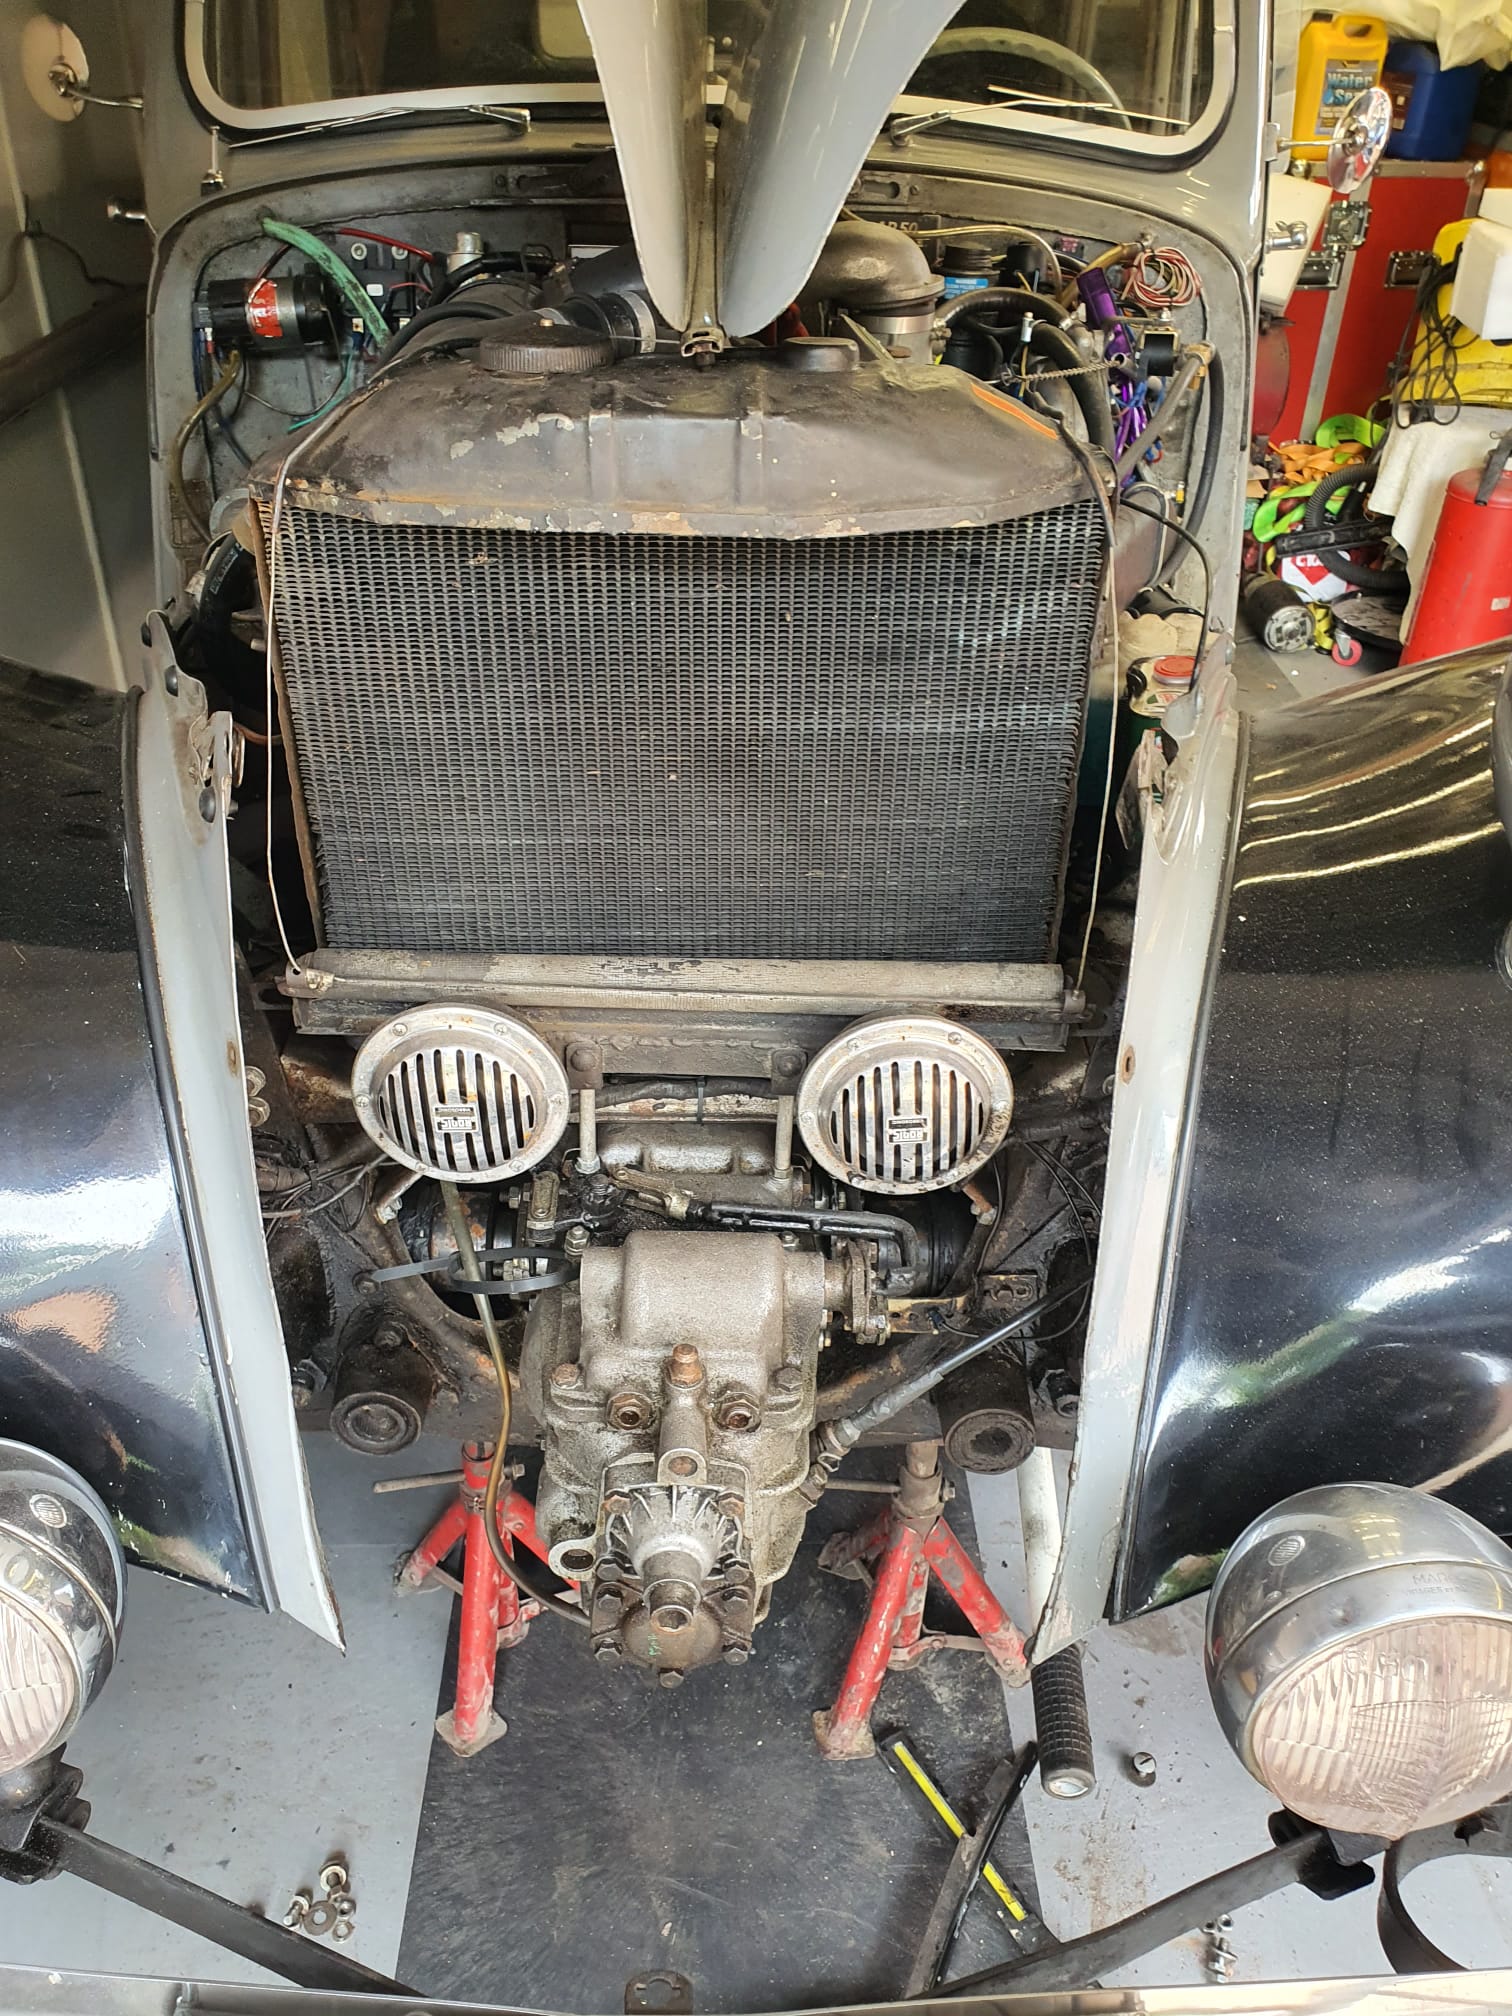
Meaning, I now (May, 2023) have the old Citroën Traction Avant 11BN occupying space in my garage. The Traction Avant is ready to drive, and with the 4-gear gearbox, in combination with the ID19 engine, this car is quite roadworthy.

I should really drive this car more, it is almost always just sitting in the garage…

Mazda 3 (2004) Android 11, 10 inch head unit with Steering Wheel Controls SWC

Just (2023-5-28) got the new Android 11 CARPLAY head unit installed in our red Mazda 3 //  1.3 BK(2004).

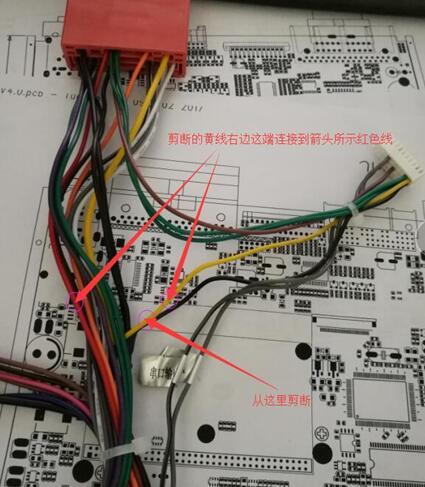
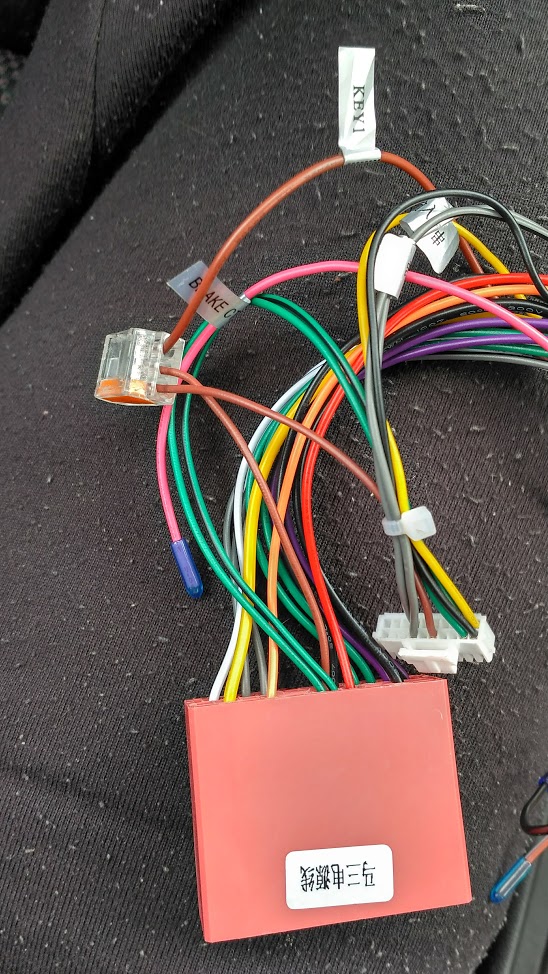
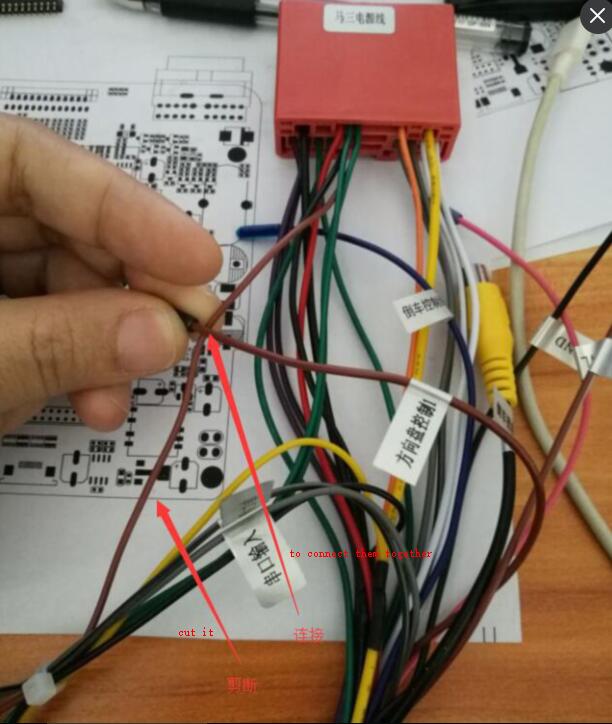
All went very easy, except the Steering wheel controls.  Turned out I had to cut the delivered control connectrion for SWC2 that went into the OBD control module and reconnect this directly between the head unit and the Mazda’s big connector.  Just like with our previous Android 6 head unit, which in the end got so slow that we decided to toss it for a new one.

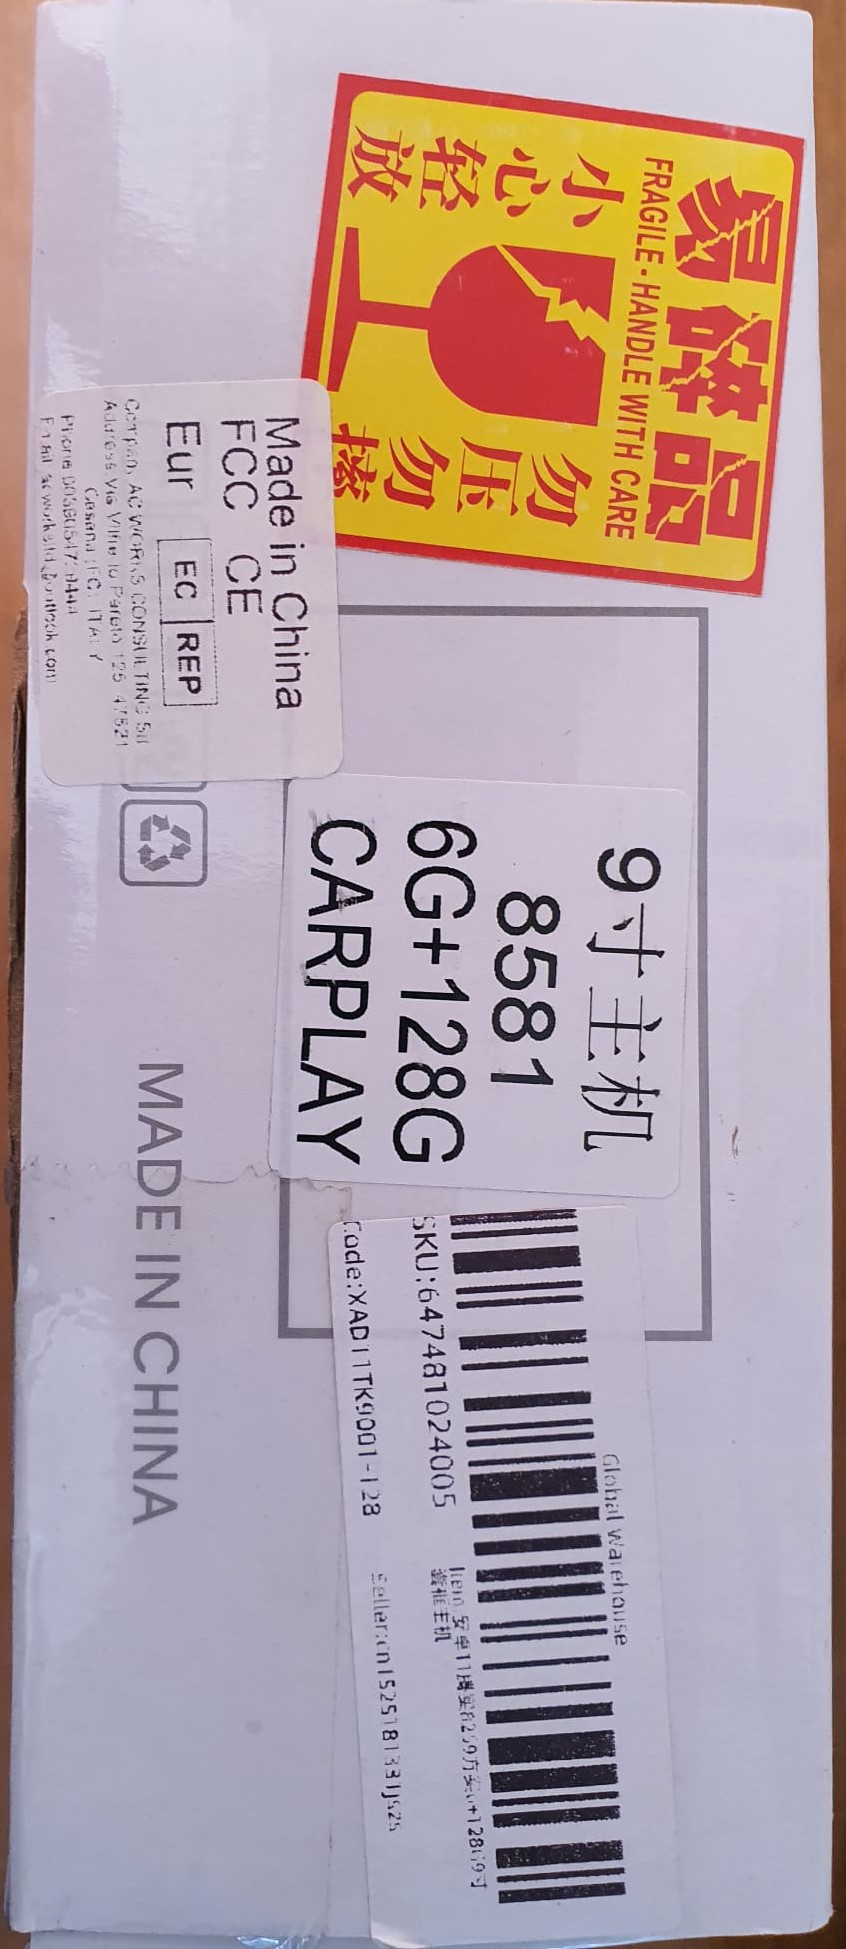
The new one is a very fast Andoid 11, octacore 1,6 Ghz 6GB/128GB device, we expect it to outlive the car this time!

We use it mainly for navigating and the new head unit has 2 IMEI’s so we can install a simcard or just share internet with our phone.  We also have android auto which can be sort of nice, although we’ll probably not use that.

The FM radio is very good, and the amplifier as well.

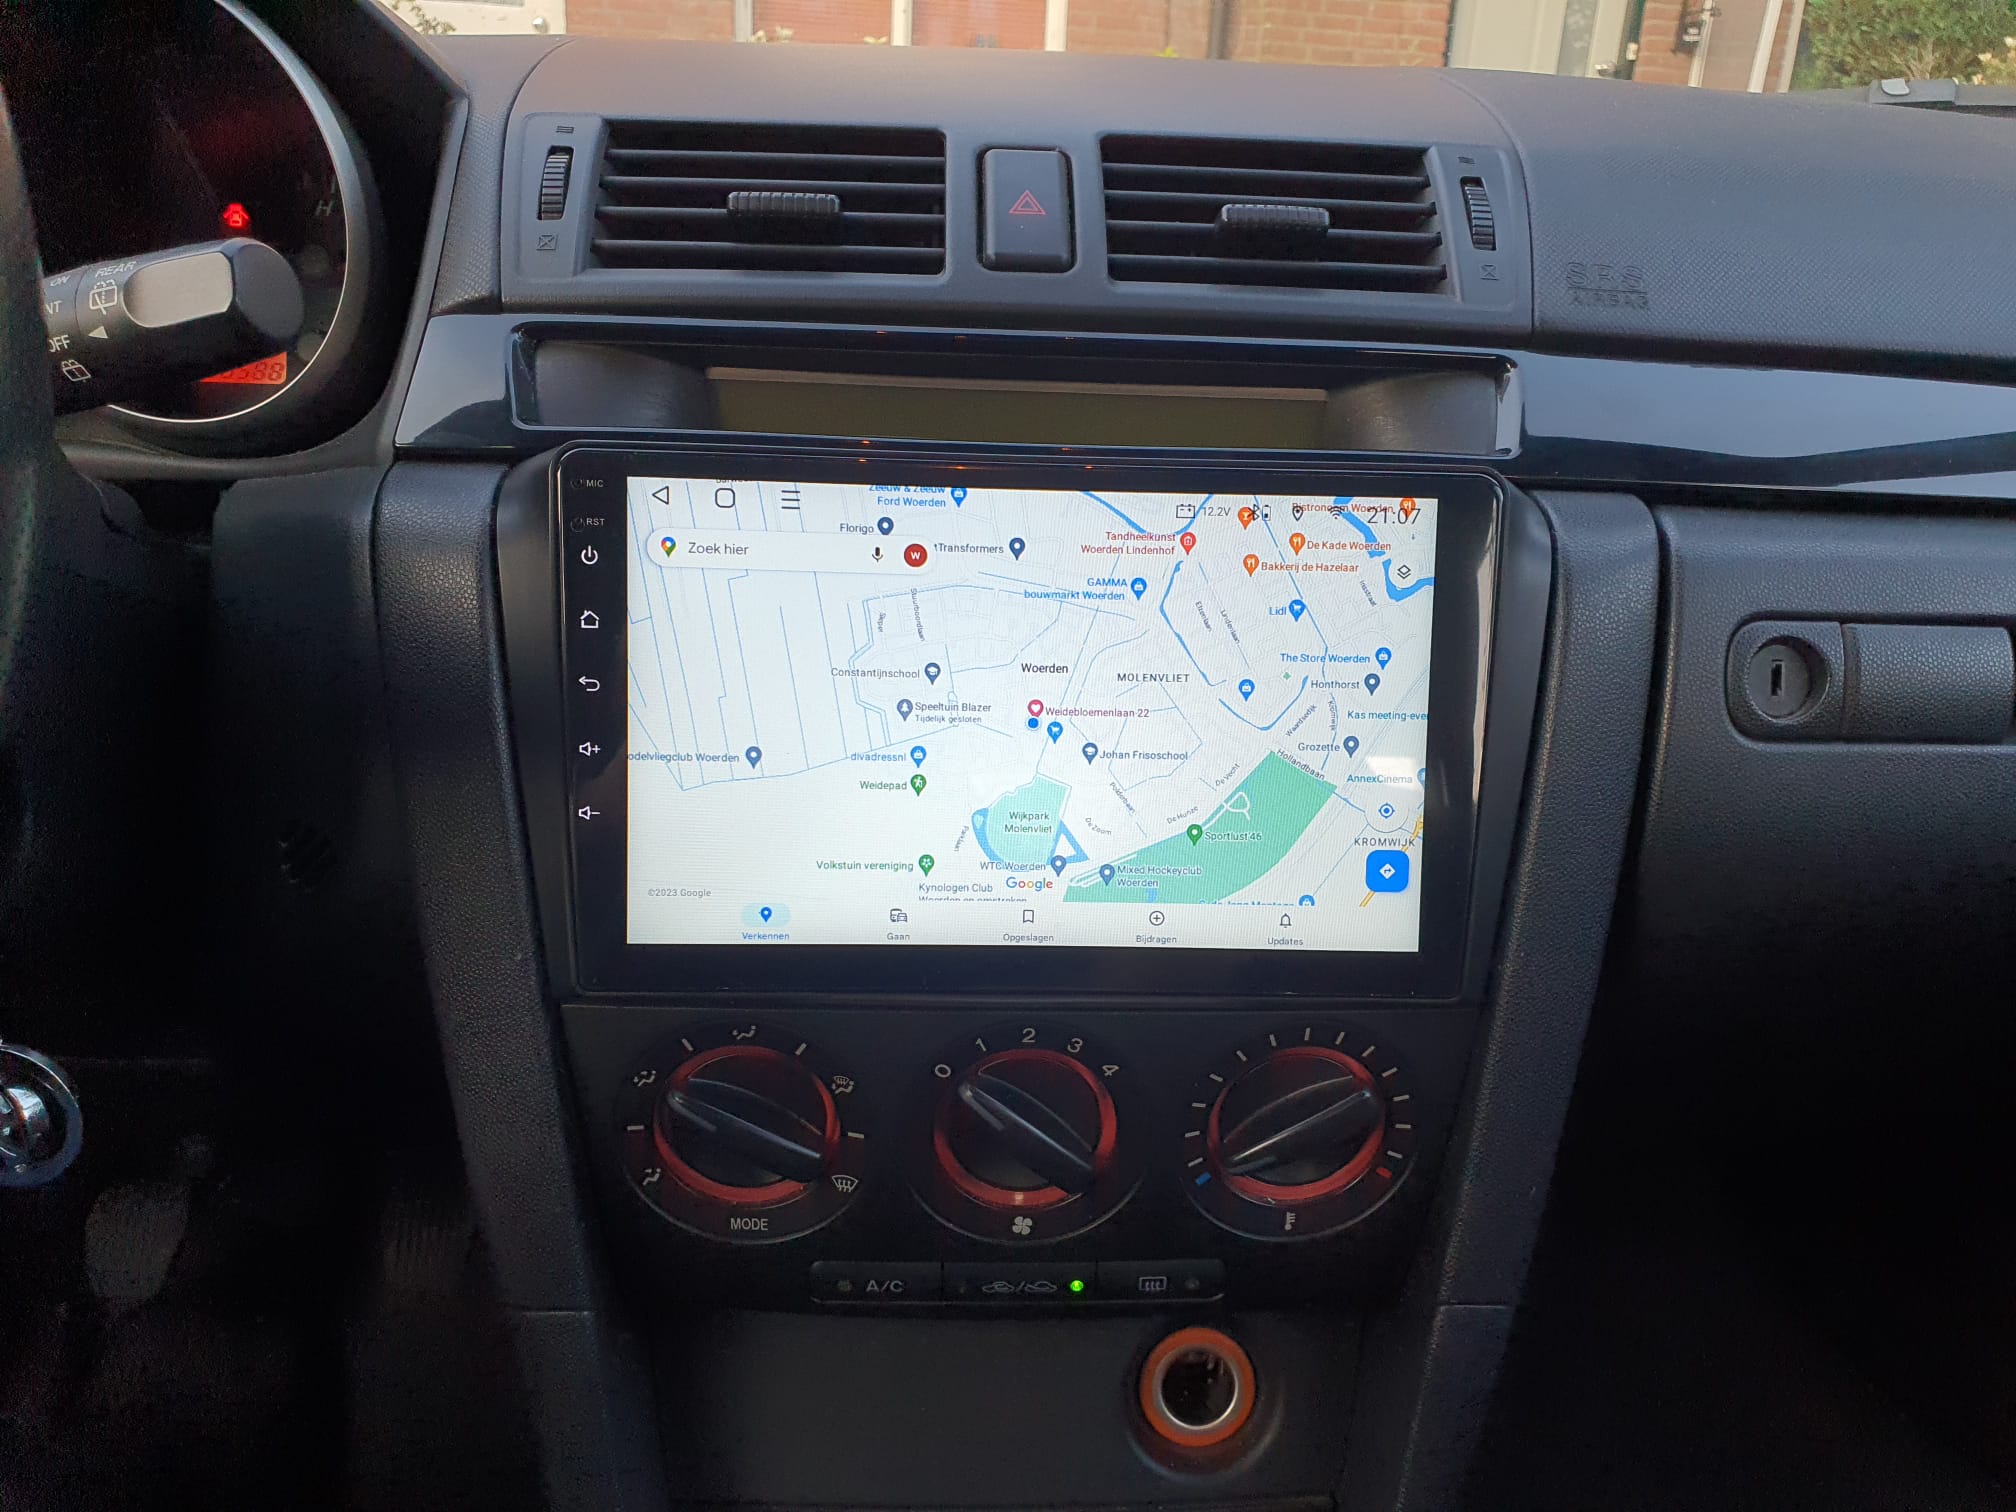
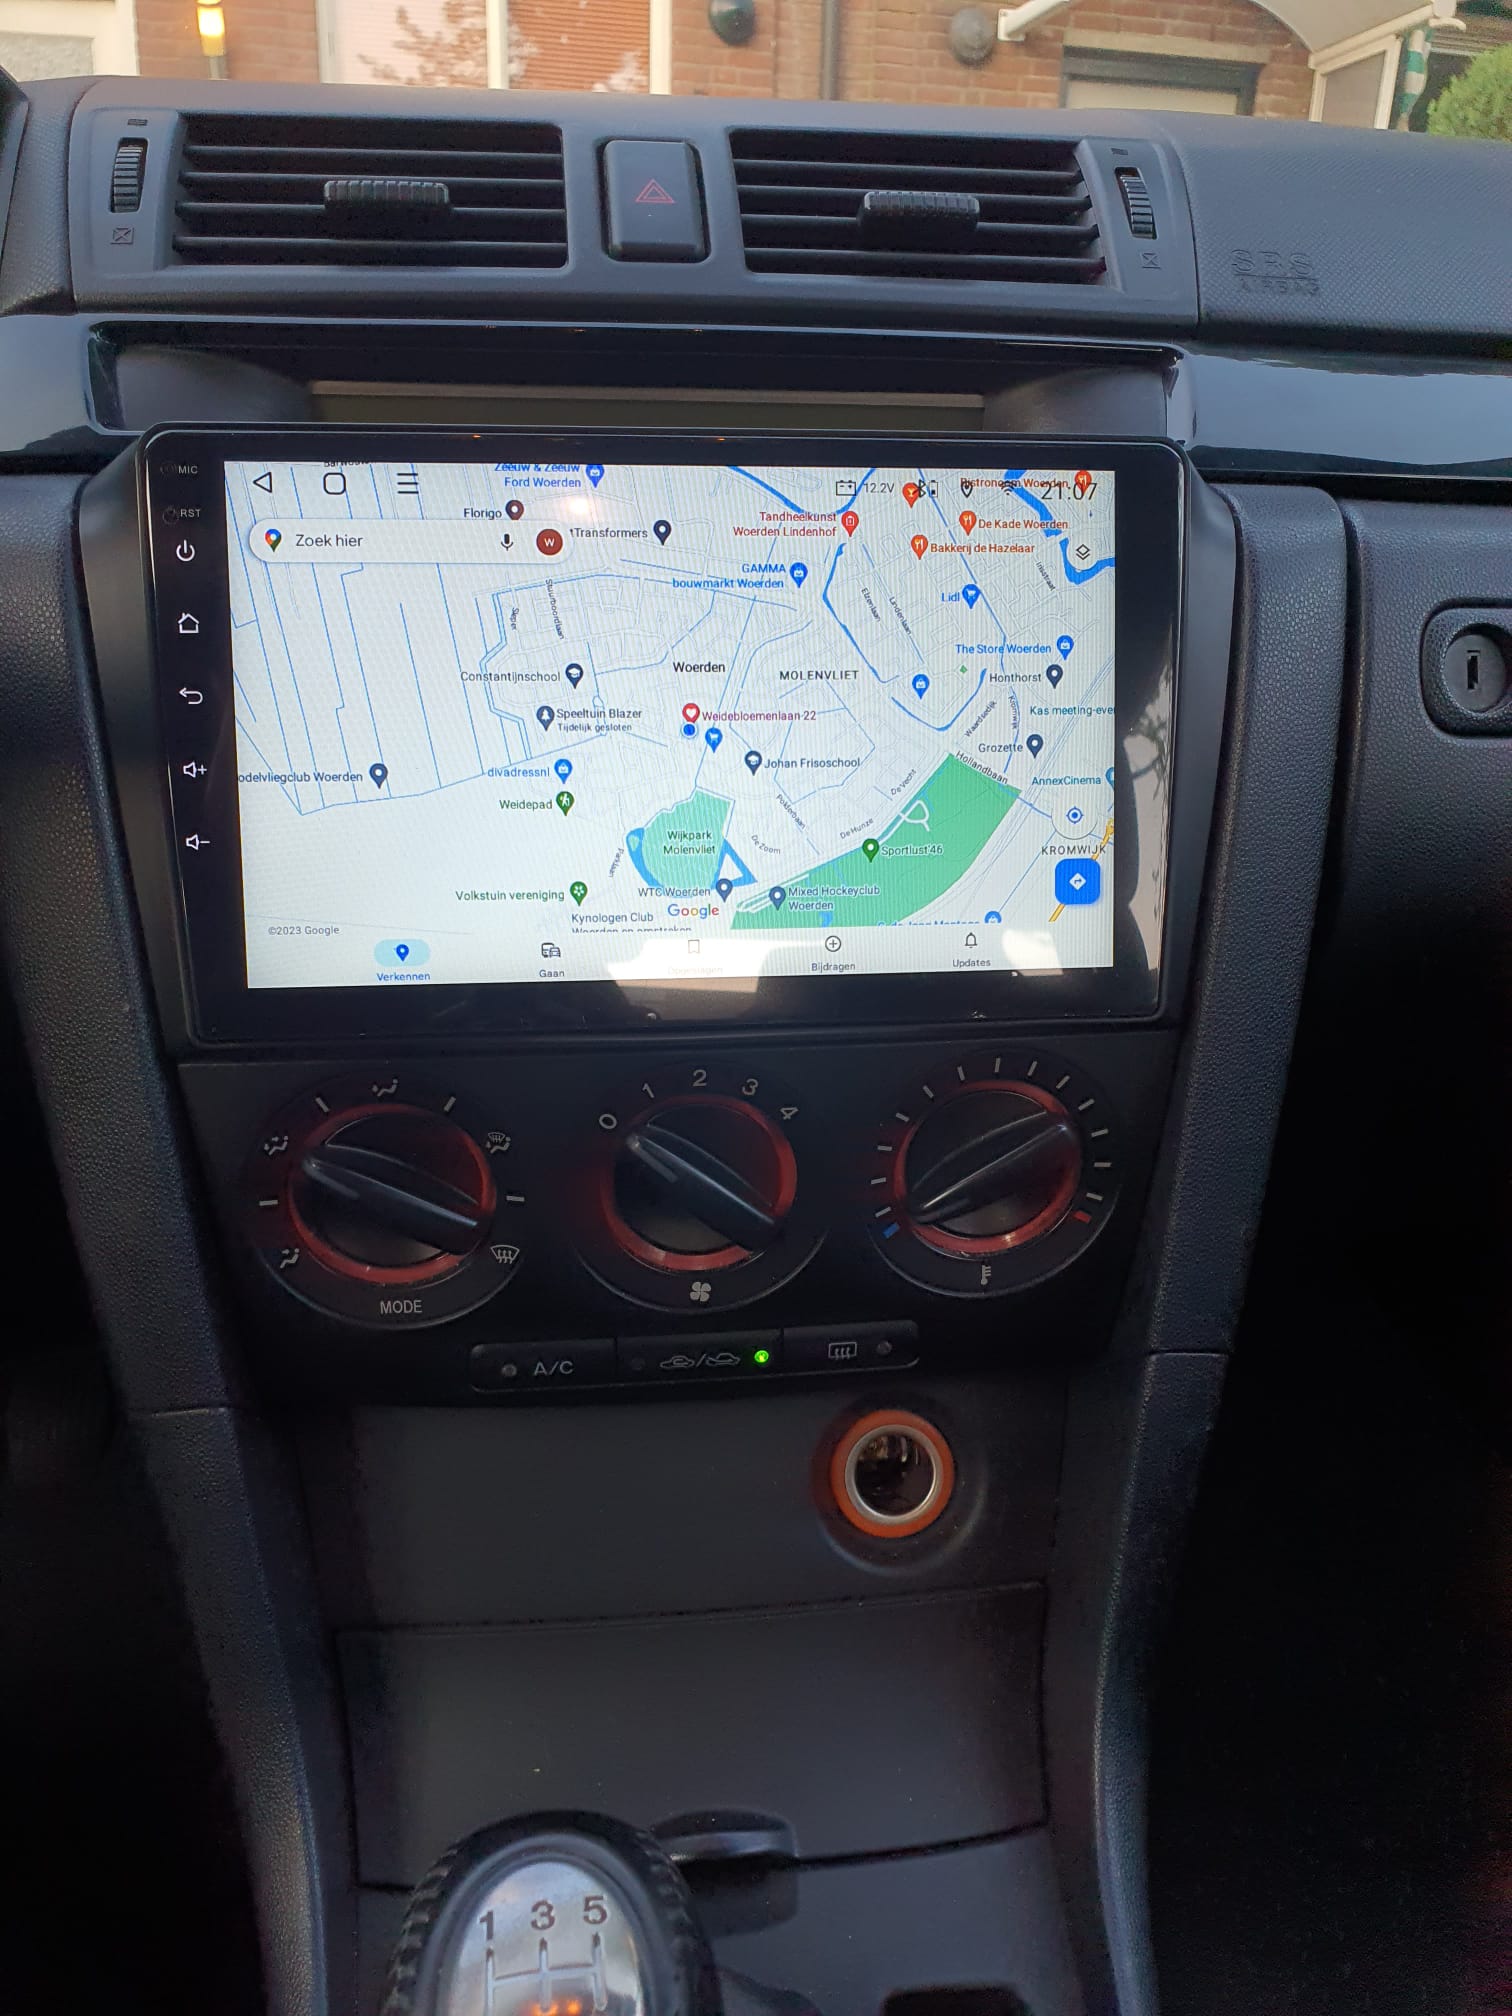
This is what it looks like in the car:

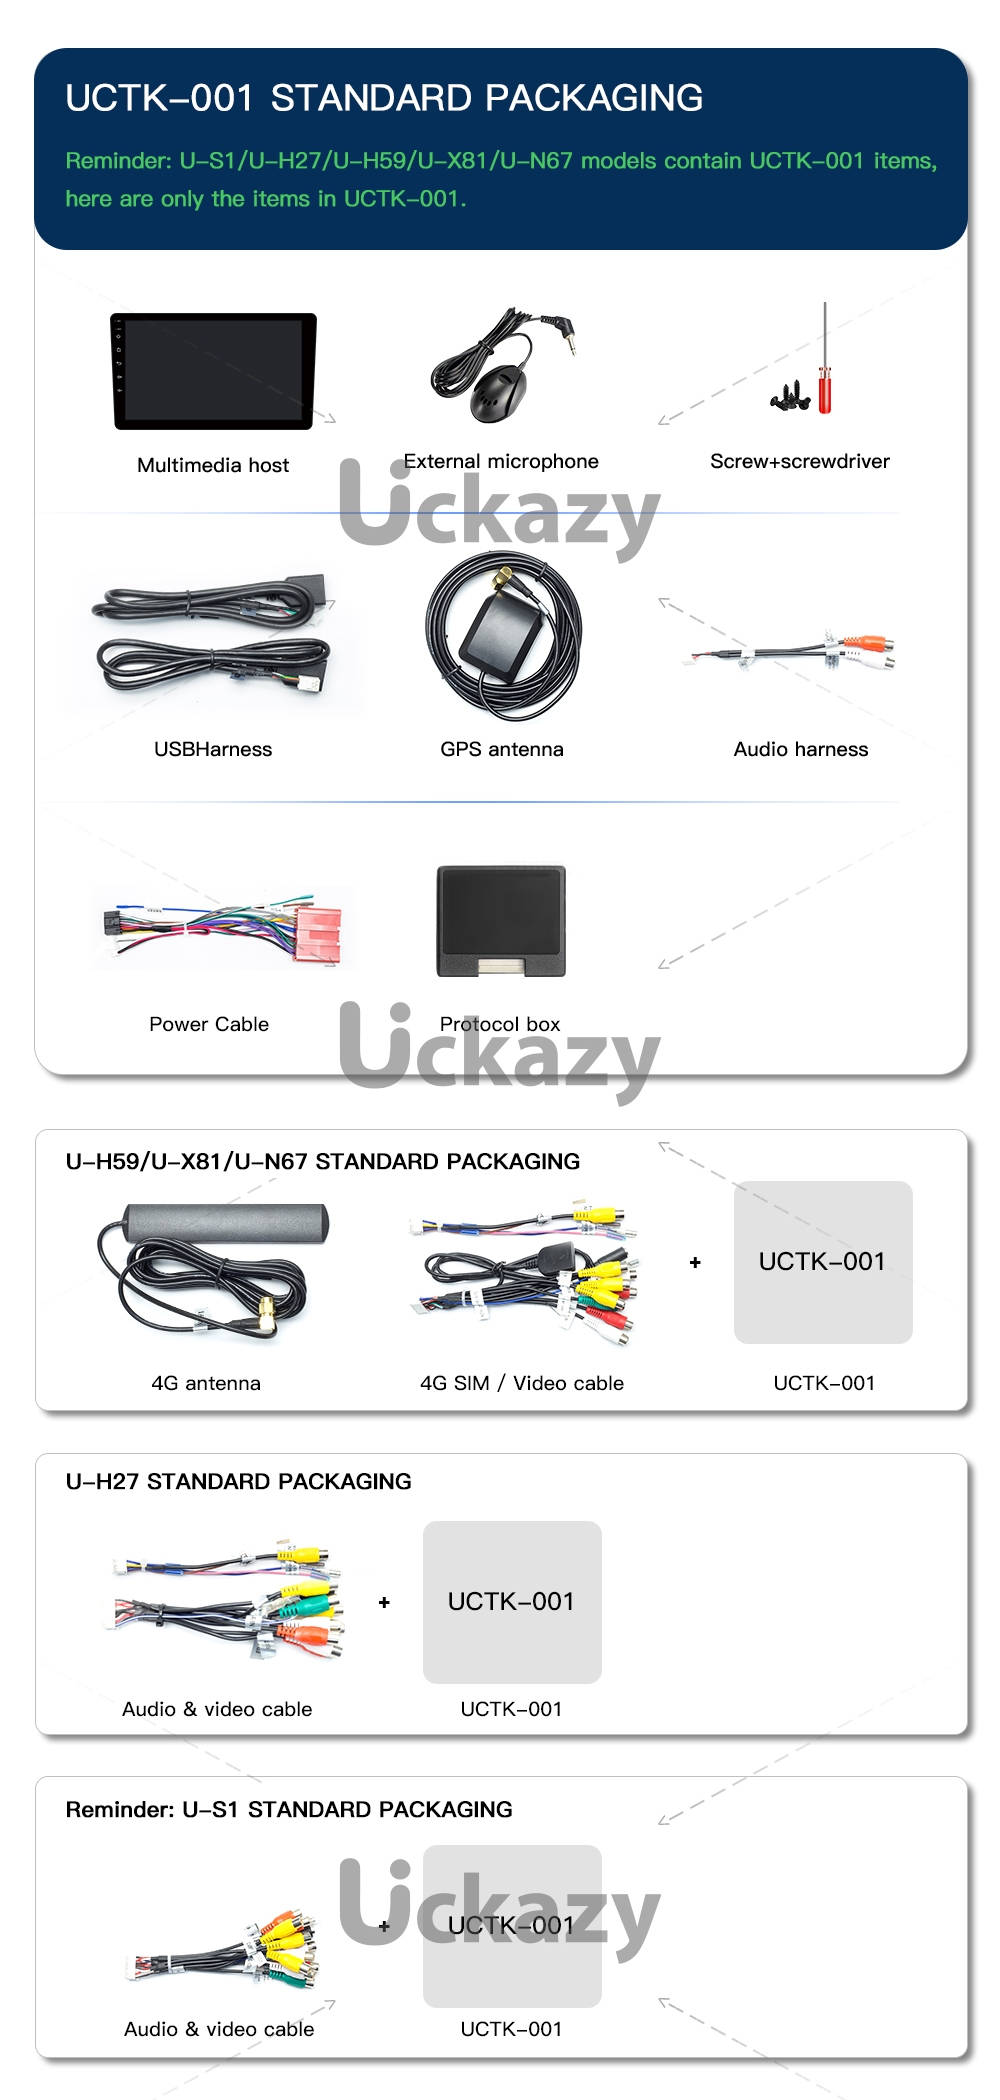
kopie aliexpress product pagina


Mazda 3 (2004) Android 11, 10 inch navigatie/radio/android CARPLAY unit met Stuurwielbediening SWC

Net (28-5-2023) de nieuwe Android 11 head unit geïnstalleerd in onze rode Mazda 3 1.3 BK(2004).

Alles ging heel gemakkelijk, behalve de stuurwielbediening. Het bleek dat ik de geleverde besturingsaansluiting voor SWC2 die naar de OBD-besturingsmodule ging, moest doorknippen en rechtstreeks tussen de head-unit en de grote connector van de Mazda moest aansluiten. Net als bij onze vorige Android 6 head unit, die uiteindelijk zo traag werd dat we besloten hem te vervangen door een nieuwe.

De nieuwe is een zeer snel Andoid 11, octacore 1,6 Ghz 6GB/128GB apparaat, we verwachten dat het de auto deze keer overleeft!

We gebruiken hem voornamelijk voor navigatie en de nieuwe head unit heeft 2 IMEI’s zodat we een simkaart kunnen installeren of gewoon internet kunnen delen met onze telefoon. We hebben ook android auto wat een soort van leuk kan zijn, hoewel we dat waarschijnlijk niet zullen gebruiken.

De FM radio is erg goed, en de versterker ook.

Zo ziet het eruit in de auto:

kopie aliexpress product pagina


BYD Atto 3- Software update naar NL en Android auto 7 juni 2023

Na de update van 7 juni 2023 is de Atto 3 helemaal in de Nederlandse taal in te stellen.

Ik begreep van een mede- Atto 3 rijder dat nu ook de airco problemen met het beslaan van de ruiten direct na uitschakelen van de auto moet zijn opgelost.

En wat nog belangrijker voor mij was: Android auto werkt nu ook!

Dus: Eerst Android auto activeren en pairen met je telefoon.

Elke Android 10 en beter telefoon werkt standaard al met Android auto dus aan je telefoon hoef je niets te doen.

Wel bluetooth aan zetten en accepteren als de auto daar om vraagt.

Android auto staat als nieuwe app in je app-overzicht (naar rechts swipen nadat je op home hebt gedrukt (het huisje onderaan).

Aanklikken Android auto en de rest gaat via een installatiedialoog.

Daarna start ie automatisch je scherm met de Android auto apps die vanaf je telefoon worden gehost.

Elke volgende keer kun je Android auto aanzetten via het naar rechts swipen vanuit ‘home’ en de app openen.

Of je kiest in het app menu voor altijd automatisch starten van Android auto wanneer je de auto start.

Na activeren van Android auto werkt het BYD autoscherm alsof het je telefoon is, dus als je op het icoon van een app drukt (op je autoscherm) zoals Google maps of whattsapp verschijnt dat op je autoscherm.

En vervolgens werkt het hele BYD systeem inclusief microfoon, geluid, bediening enzovoorts zelfstandig met de beschikbare apps van Android auto via je telefoon.

Ik navigeer nu als vanouds met Google Maps, maar wave kan natuurlijk ook.

Apps als whatsapp werken dan ook via de auto en wat extra leuk is: je kan kiezen om alles gelijk te laten voorlezen vanuit whatsapp, dan hoef je niet steeds op het scherm te kijken en kun je je aandacht bij de weg houden,

error: Content is protected !!