The motherboard of my Geeetech A30M was broken, due to a defective Y-axis motor as I experienced later. I ordered a new Smartto motherboard from Geeetech, installed it and it broke down again, due to the shortcut in the Y motor. Very strange defect since the smartto board uses plug-in drivers. However, unrepairable and a real pity to now be stuck with 2 smartto boards without any use for them with both having a defect on the Y output. Exchanging drivers did not help, cables exchange did not help either…
the original smartto motherboard
After replacing the Y-motor,I decided to go for a complete rebuild of the A30M. In the old files you can still see the original smartto experiences on the A30M HERE.
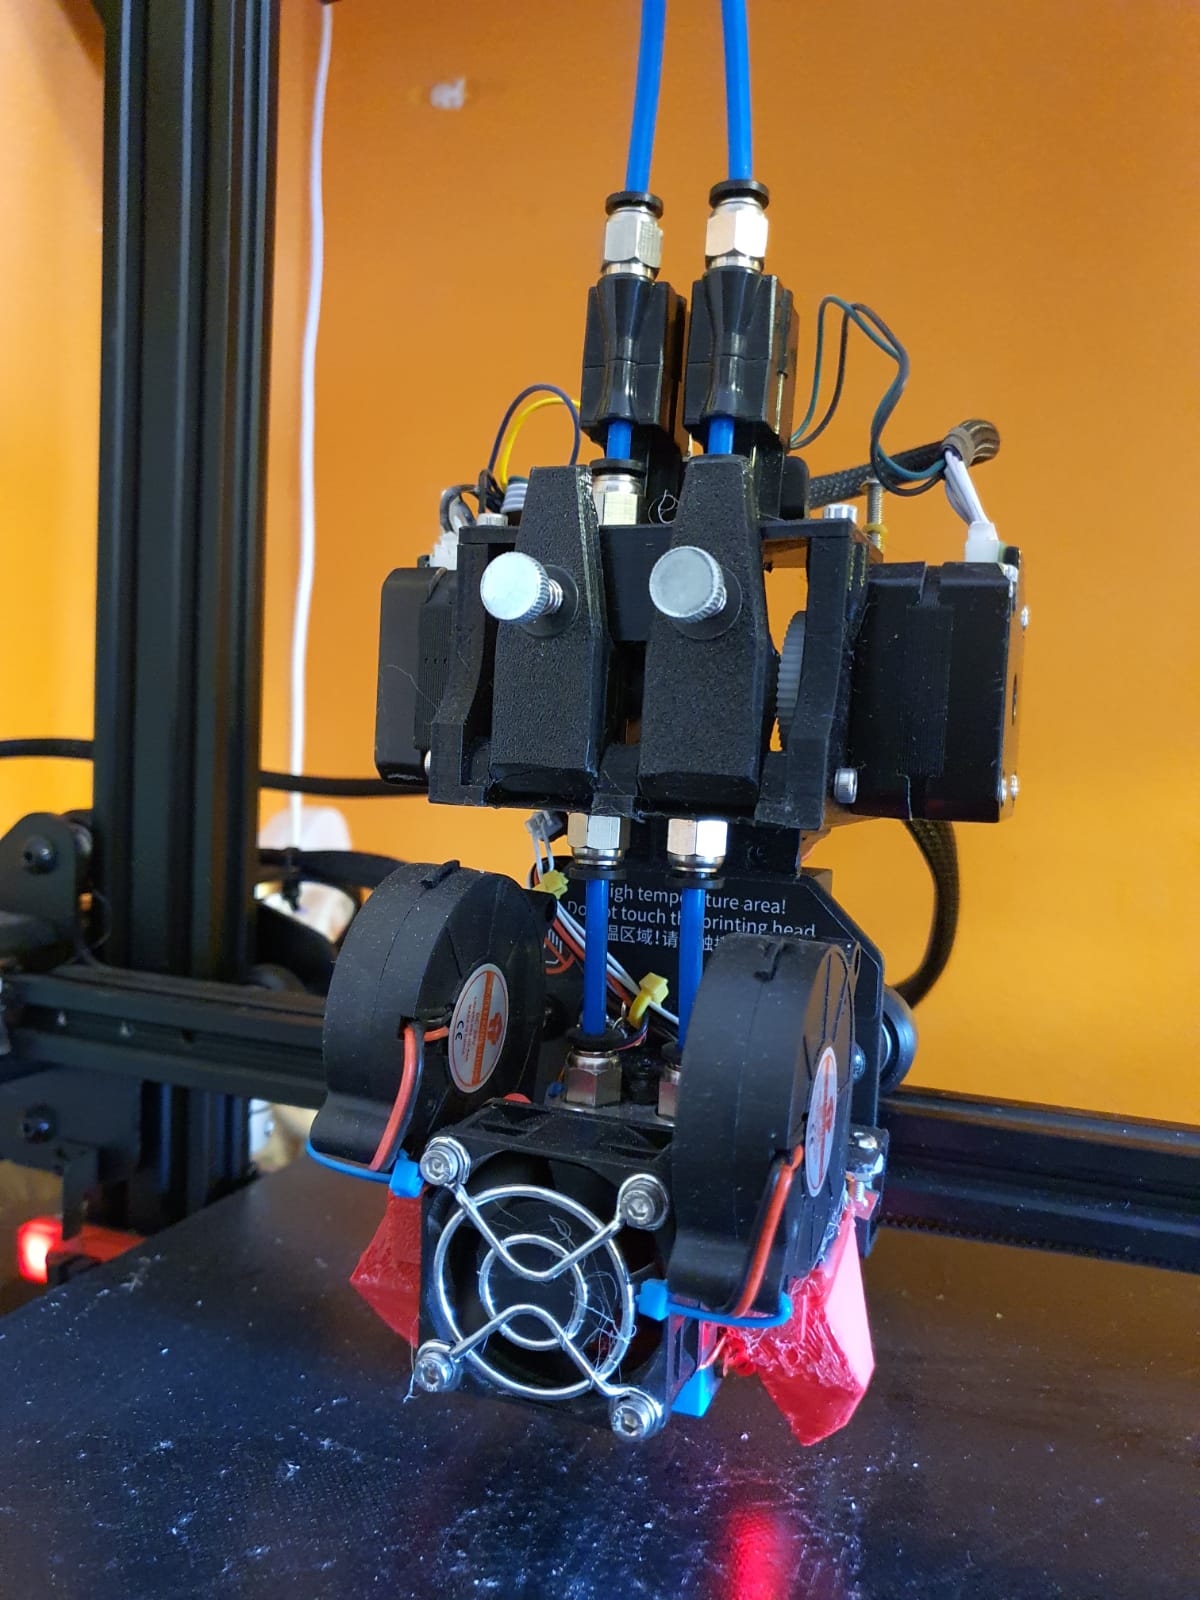
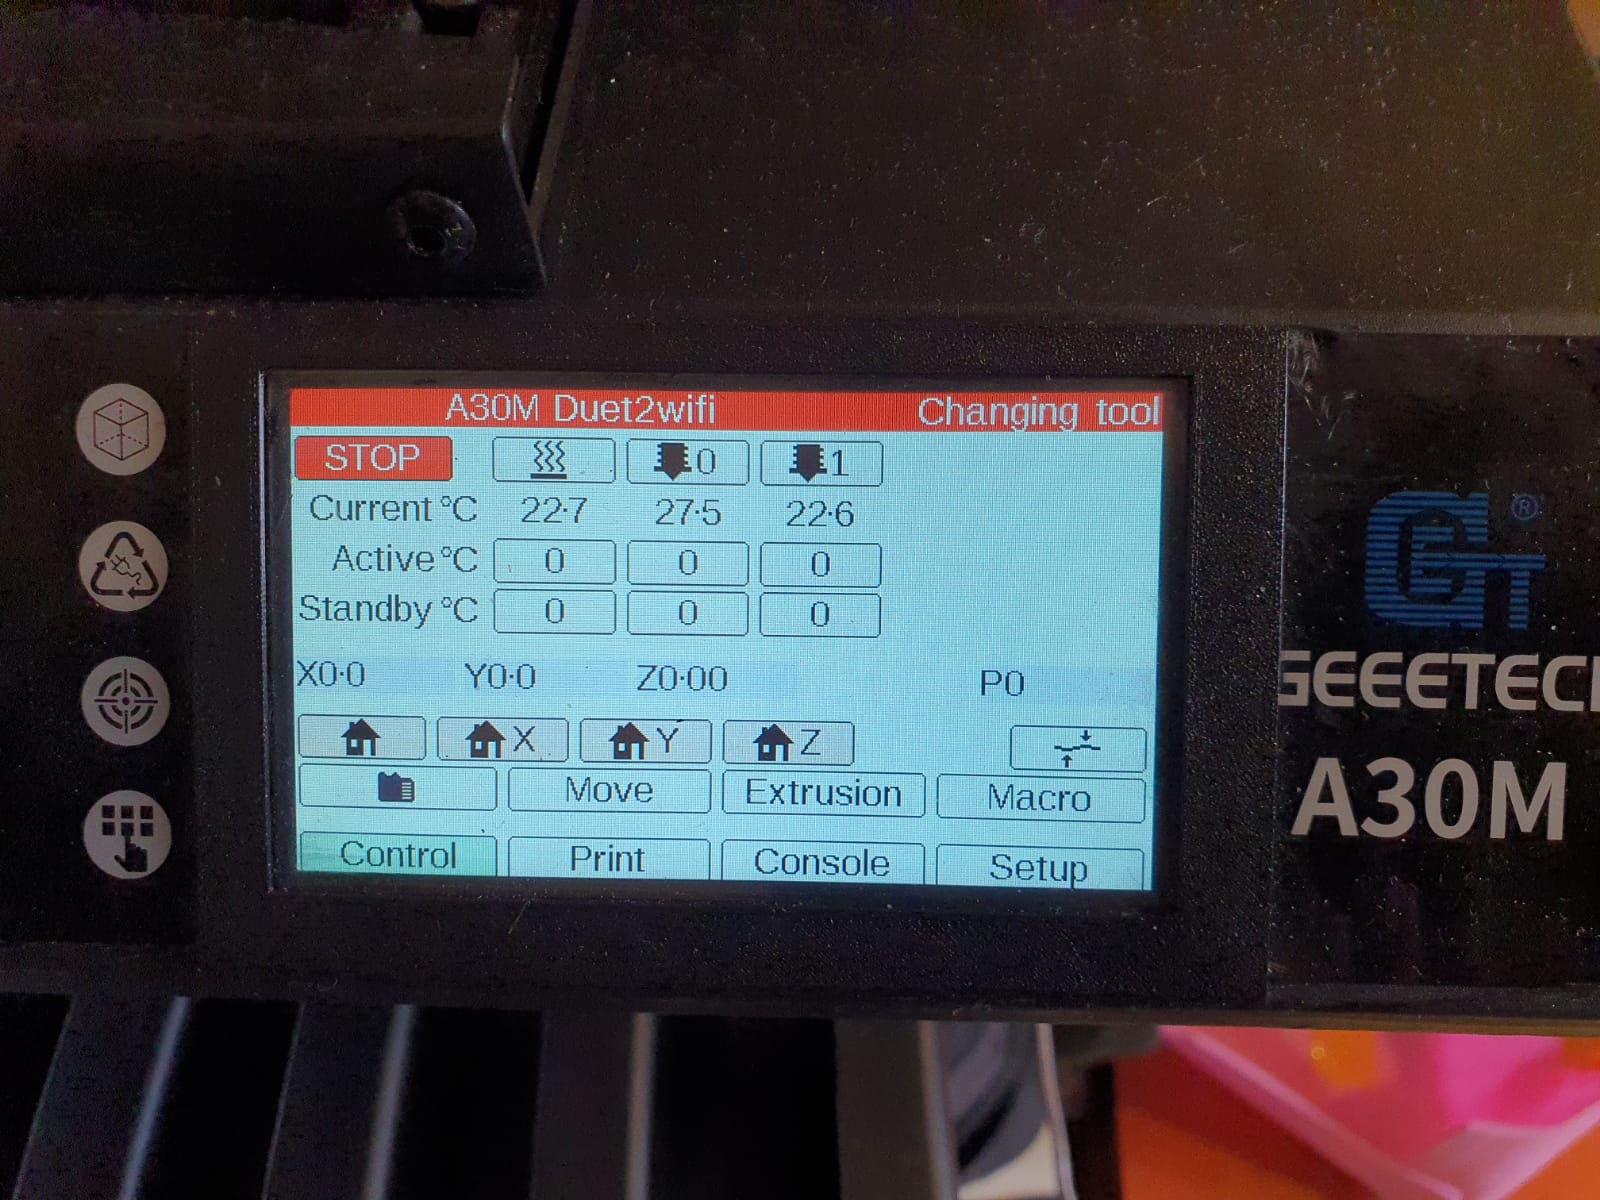
Above, the movie of the first Duet2wifi experiences and the Chimera hotend. Later, I decided to make the extruders direct-driven.
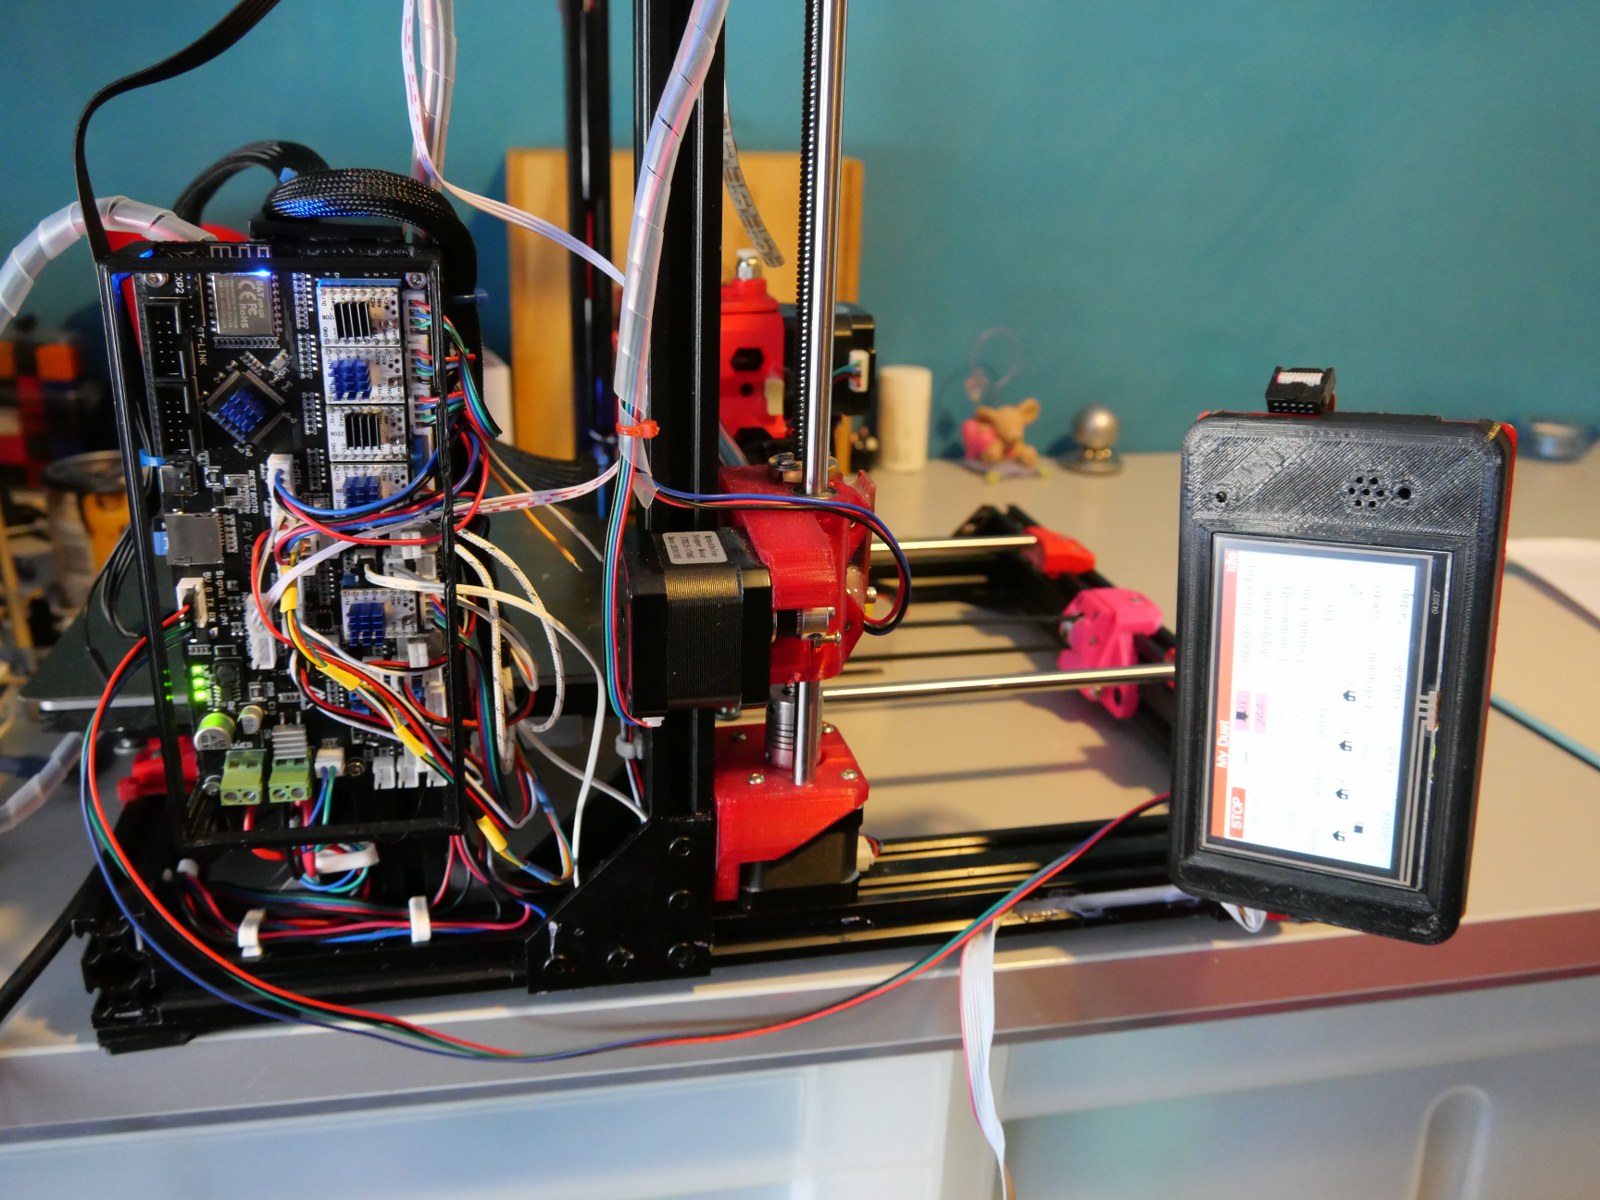
The chimera hotend, combined with dual direct drive bondtech extrudersThe inside of the box of the A30M Geeetech 330x330x350mm 3d printer with the PanelDue, Duet2wifi and the 5 ports extension board attached to the DuetThis is the Paneldue 4.3 inch touch panel as mounted in the A30M case, with a very slim bezel since the Paneldue is mounted flush with the front of the A30M case.
With a lot of WS2812 connected in serial and some 5Volt power supplies, you can get very creative! I used some specific hardware like an octoswitch to get the required voltage levels to drive the WS2812’s in 8 strings of a lot of LED’s, in tubes. Watch the videos!
Since the FLY_CDY_V2 STM32 board comes without any firmware installed, I made a simple link for you to download and extract everything you need to a 2-16GB microSDcard.
Just download, extract, burn as-is to SD and plug it in the board, fire the board up and all works!
Make sure you follow the guideline HERE for getting attached to the board via wifi by using a USB cable and YAT terminal on your PC to get the home wifi SSID and Password programmed to ROM into the board, AFTER you installed firmware by putting in the SDcard and firing it up.
The settings in config.g at the SDcard are made for a Cartesian XYZ machine with triple extruder. This can all be changed to fit your build in config.g.
For a delta, use THIS DUET2wifi DELTA config.g and change the pin_name of bed heater according to the FLY_CDY_V2 name convention (thus: use bed instead of bed_heater).
For more info about the board and connecting to the electronics, steppers, endstops, filament sensors, BLTouch, Neopixels etcetera go HERE
Please donate $1 to my paypal account if you use (parts of) my developed materials so I can continue to share nice stuff for you to download
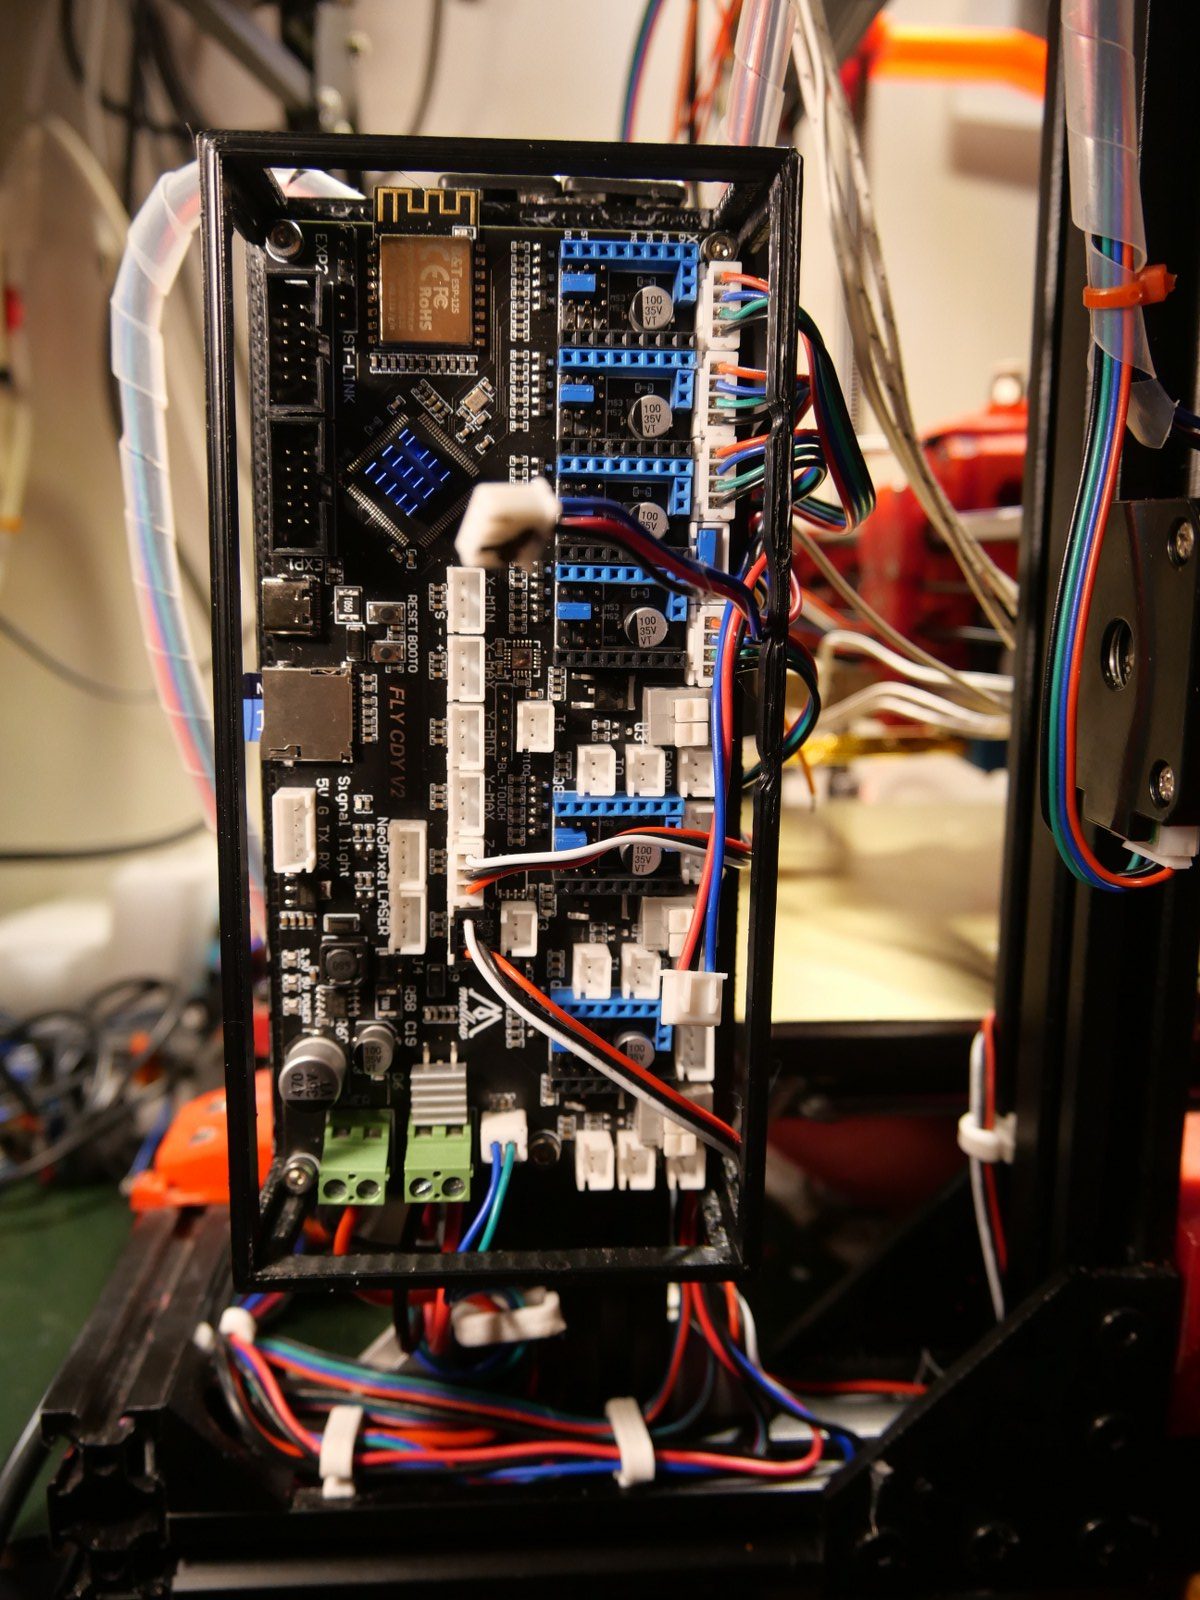
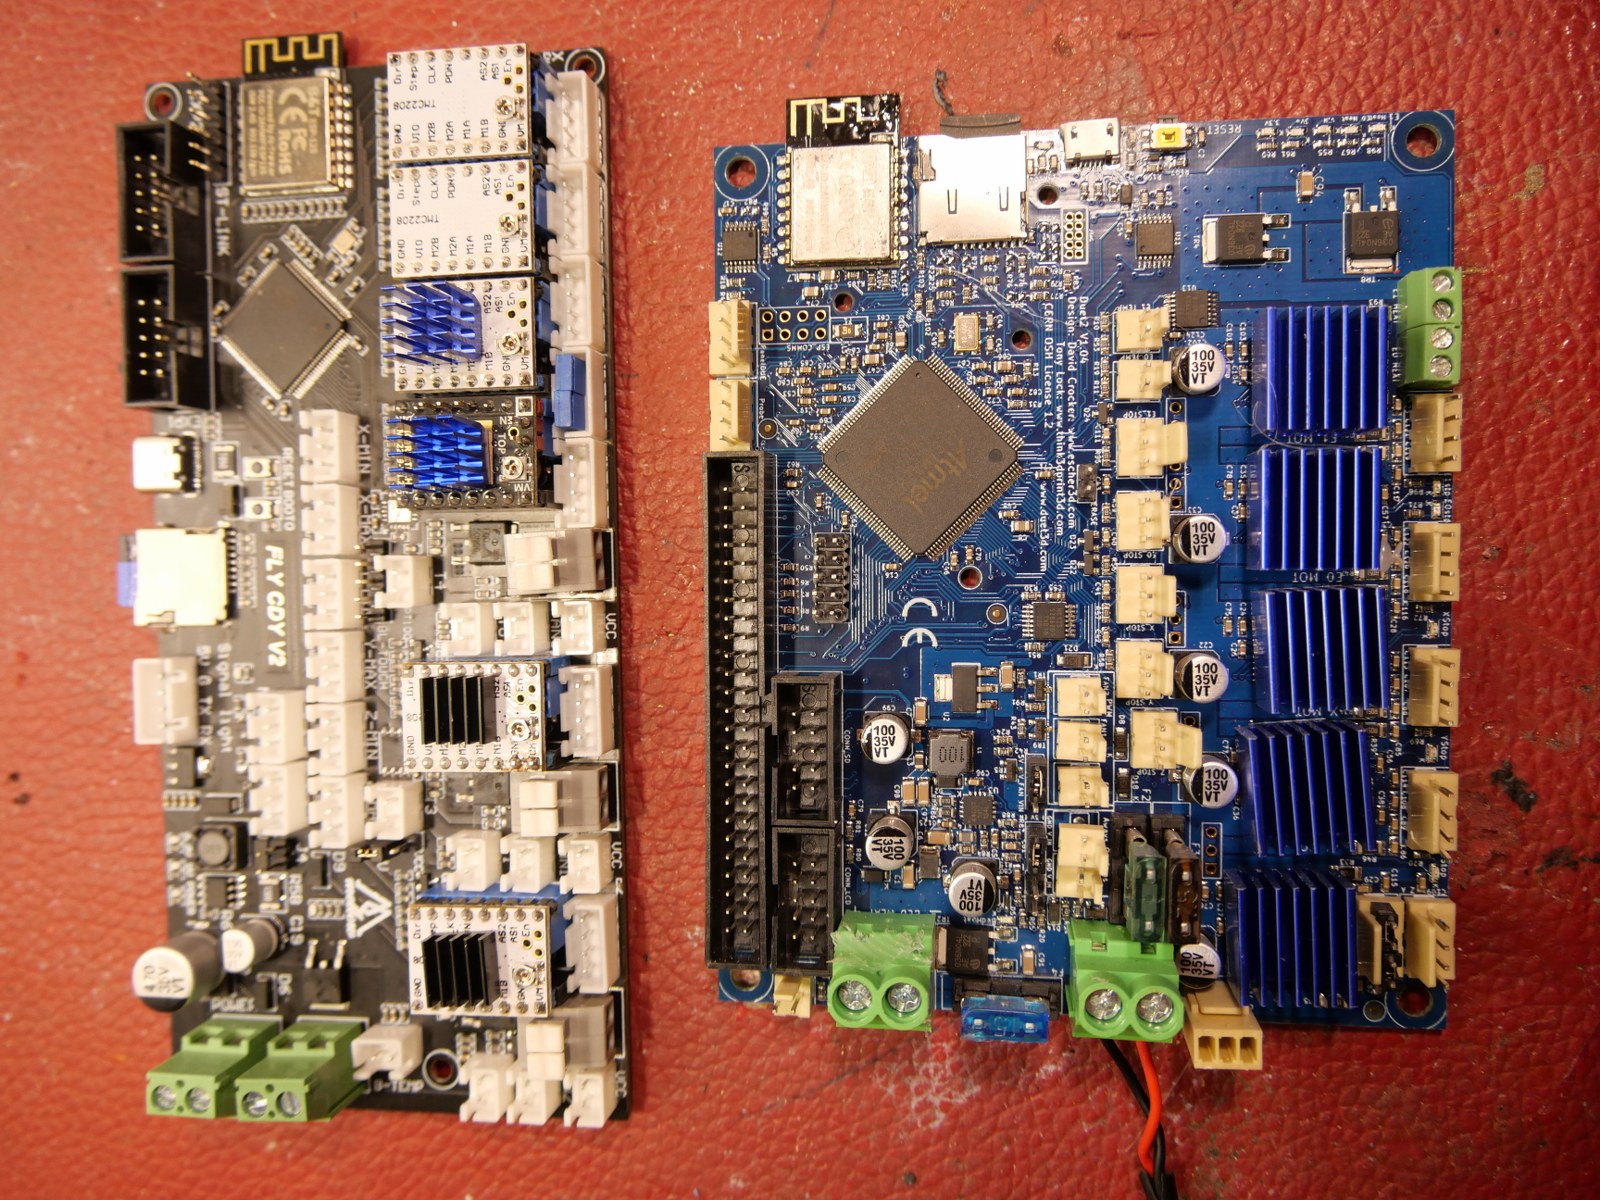
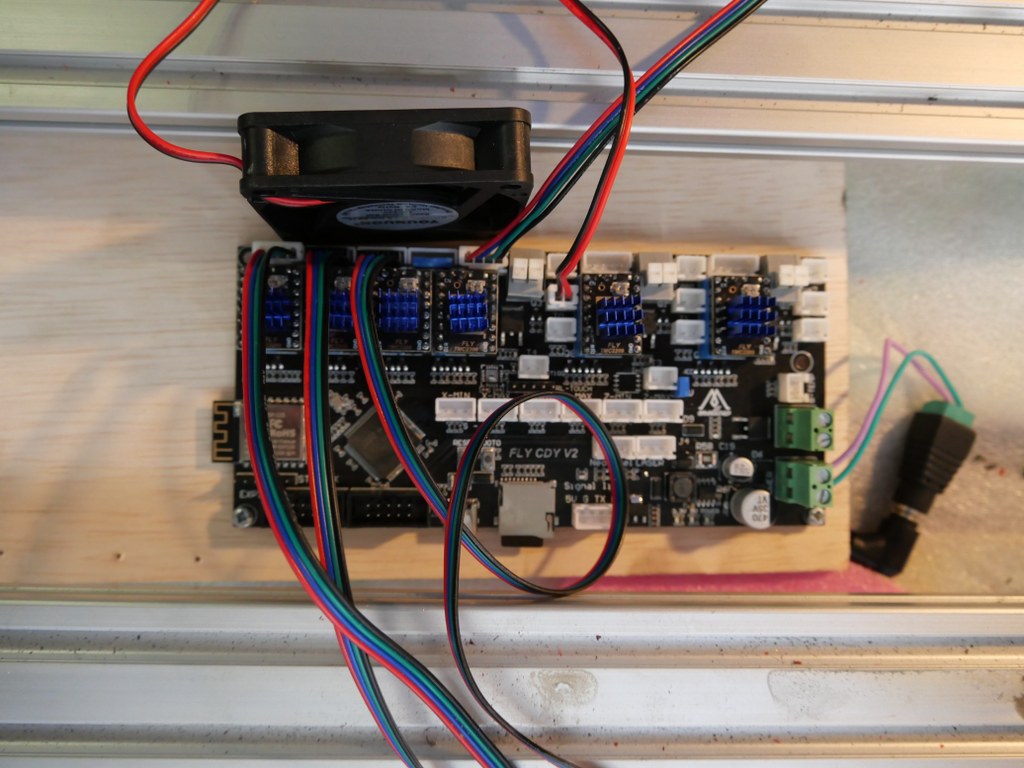
I replaced my Duet2wifi with the Mellow’s FLY-CDY-V2 motherboard
My cloned Duet2wifi MB that was running in my I3 bear suddenly refused to start up any longer, so I decided to put my recently purchased Mello FLY-CDY-V2 motherboard in the I3 bear printer. Up to now, the makerbase Duet2wifi clones keep working properly and all other clones die on me…
During the replacement process I encountered the following issues:
The microSD card sleeve on the board was loose on 1 side. I noticed that the board just got in a frozen status now and then. The solution I finally discovered was that the microSD card holder had to be soldered back to the board, so the SD card made better contact with the little metal parts inside the holder. Since the repair, no problems anymore!
The connectors of the Fly vboard are standard X254 connectors, which I prefer. But, the Duet uses propriatary ones so I had to replace all connectors. But, I shortened all cables in doing this so I now have a very neat looking etup.
I had to print a new case for this board. I found only 1 available version that also had a fan in the cover. Slick and well ventilated. Available on Thingiverse!
The available help on internet like Github pages are all well documented but you must be certain to choose the V2 version of the board for firmware and so on since the FLY-CDY (without V2) is a completely different board with another processor (LPC). be aware that things are not comparable between the two boards. The V2 is not just an upgrade!
The rest on the board is quite clear with regards to usage and placement. All self-explainatory.
The only way to connect your paneldue is via the serial 4-pin connector. The block cables don’t work ‘as-is’. The paneldue works flawless.
The firmware and DWC software works very well on this STM32-based board. Also updating works flawlesssly.
The difference that matters most to me is some little issues like different naming conventions, pin naming differences between the 2 boards and so on. Nothing very difficult but is makes it impossible to swap your configs between the boards without some editing. I would thing=k that cloning should be done more reliable, that would make the board sell better imho.
There is no breakout/expansion port. Due to the chosen processor, the potential of the Due2wifi with the many expansion possibilities is niot available on the CDY-FLY-V2.
What you do get on the FLY-CDY-V2:
Neopixel port up to 60 WS2812 LEDS (10 max or more with seperate 5V PSU)
max 4 heaters ( 1 bed, 3 other)
max 4 temp sensors (1 bed, 3 others)
max 3 controllable (PWM) fan outputs
max 6 steppers with any sort of (pluggable) drivers (UART only, no SPI)
max 6 end- (or other) switch inputs
12-36 Volt power input
BLtouch port fully functional
wifi unit
DWC webbased DUET2wifi controllable
Laser port
A limited number of controllable GPIO pins are available on the EXP2 and EXP 1 port, this could be used for driving accessories like magnets, valves, extra LED’s and so on (via uplifters/Mosfet boards)
Jumper for setting the power to the min/max switches at VCC or 5V (choose 5V!!)
If you want, the option to have PT100 chip installed gives you 1 input for PT100
The Duet2wifi firmware suite is available for this board through a specific development Github page, and as long as this is maintained updates for the board’s reprap firmware and DWC are available.
For what it’s worth, the articles I write are not only based on my opinion and experience, common sense is also part of my written content.
In the first place you should ask ourself what you would define to be a professional 3d printer. Is it about price, durability, quality, size, usability, repeatability, speed, portability, cloud-based usage, shared usage, or possibly some other requirement that you find inportant? If you read the world’s professional literature about 3d-printing, it is always about either making one-off products or prototypes for complex (machine, dental, medical) purposes, or it has to do with printing parts in series for a specific branch of industry. In both cases, the to be printed material is mostly nothing like the hobbyist uses. Professional printing goes from carbon/fiber to stainless steel, ceramics, titanium and so on. Most professional production printers are in the price range above 30 k Euro.
3d printers from 500 Euro up until 15 k Euro are usually very good and precise at printing with common materials like ABS/PLA/Nylon/PetG, Carbon/wood et cetera and have a higher price tag than standard consumer models due to specific added value like the ability to print really big models, heated chamber, multicolor et cetera.
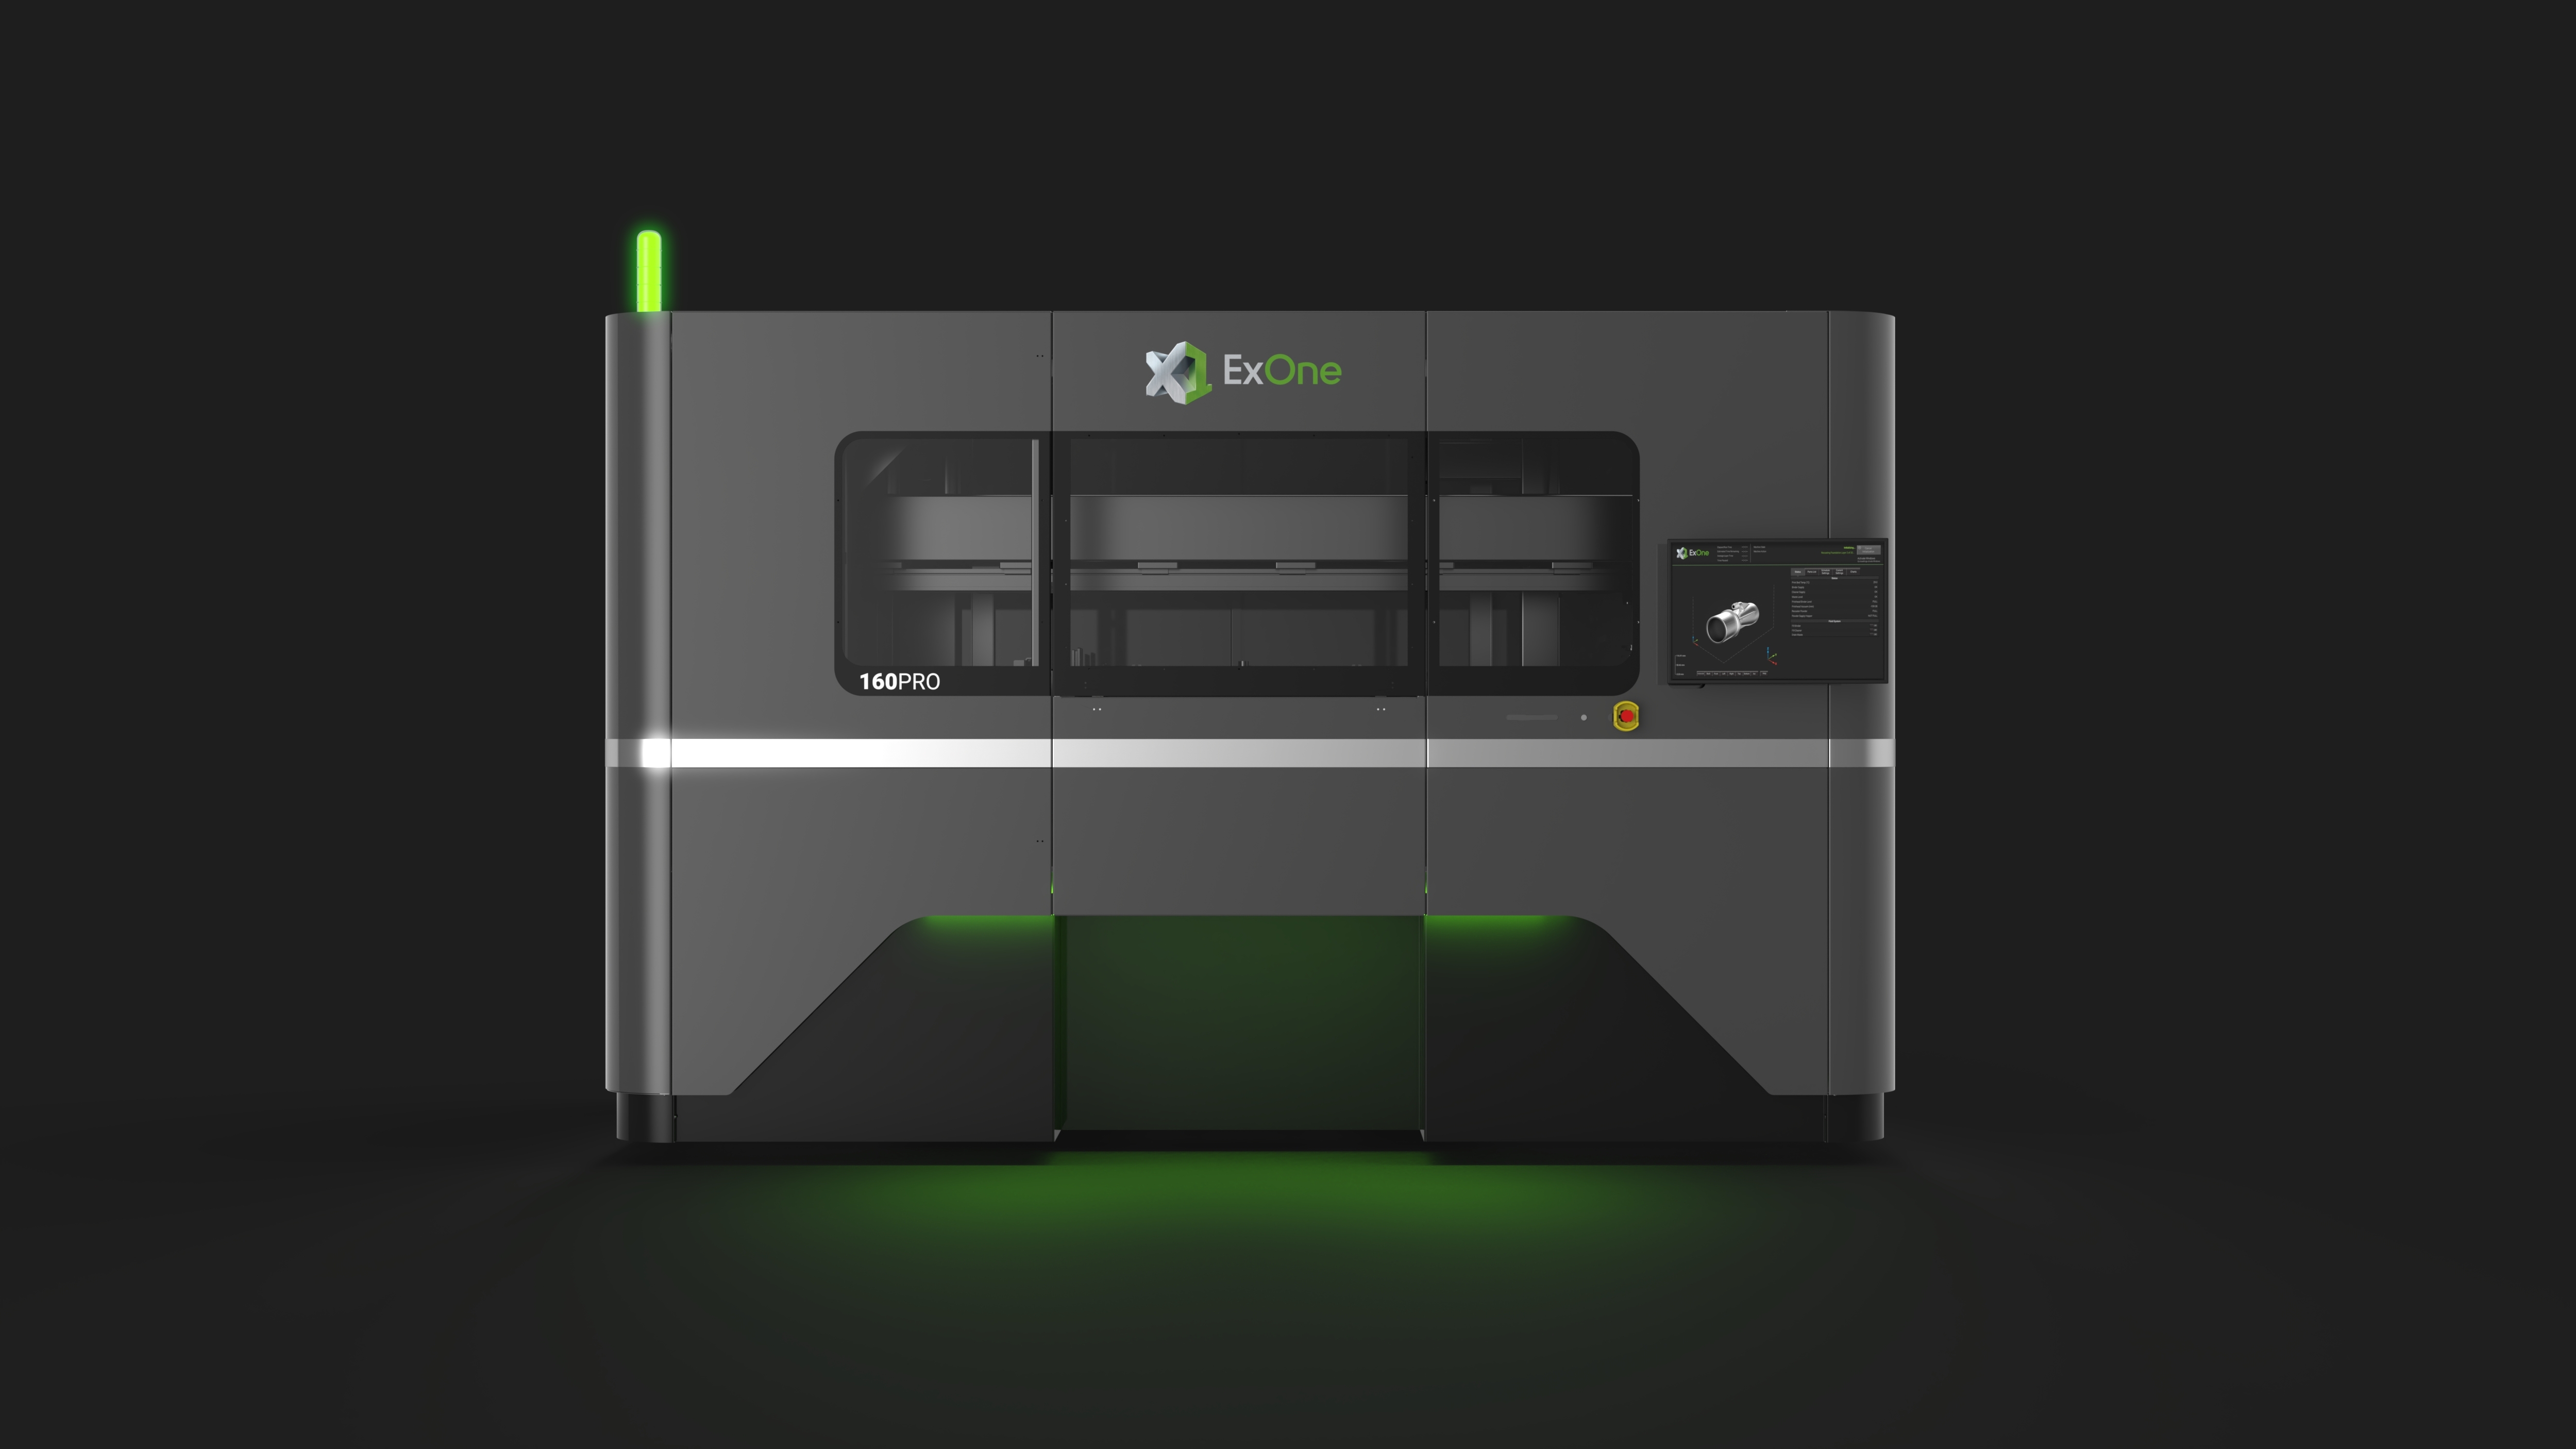
The X1 160Pro™ is the world’s largest metal binder jetting system and is now shipping to customers. A controlled-atmosphere model of the system, capable of high-volume aluminum and titanium production, will be available in late 2022. (Photo: Business Wire)And- after printing, most of these printed parts need post-processing like sintering for aluminium.
BigRep PRO™
The price for professional 3d printers is a summation of a number of drivers, like:
Developing / staffing
Developing / materials, software and so on
Tools, offices, warehouse and so on
Patents costs
Price and quality of materials
Production costs
Marketing costs
Post-delivery costs (Service/maintenance)
With the hobbyist’s 3d printers, there is really only one driver for the costs, which is materials and production. Of course the quality is an issue here because cheap parts of lesser quality will make products of lesser quality. All other drivers from the above list are not required and/or have already been put in the public domain and are therefore not put in the final selling price. With professional 3d printers, the production numbers are usually low, quality high and developing processes are usually lengthy and expensive. Thus, the price per sold 3d printer will be uplifted a lot from the development related costs. On top of this, the real development of 3d printing is not even starting. The pioneers that develop printers will have to keep developing over and over again. Only when professional 3d printers will be in a stable production phase and development is more like tweaking than making large steps, it is possible to see prices drop.
So- to answer the question: No, professional 3d printers are not overpriced. But- they are expensive and are only interesting if you already need products that can be made today with such a specific printer. Think of car parts development, Formula 1- engine developments and so on. In these industries, it is very expensive to get a mold and rework a rough newly developed product in the conventional way so a 3d metalprinter will fulfill an already existing need. And the investment will pay back very quick due to the fast production times. And- the engineers that design a part can just use their existing tooling to make designs for 3d printing.
Deze 5-voudige hot-en cold end combinatie wordt geinstalleerd op mijn A30M met het Duet2wifi board+extension board (5-voudig met plug-in drivers).
De A30M heeft al onafhankelijke Z-stepper motoren.
De Duet2wifi heeft 5 stappenpoorten, en het uitbreidingsbord heeft ook 5 stappenpoorten. X,Y,2xZ, en 5 Extruders is een totaal van 9 dus dit gaat inderdaad passen!
Ik zal nieuwe bedrading maken voor de 5 extruder steppers boven op het A30M frame met 5 bowden buizen naar de hotend.
Aangezien de hotend niet mengt, zal dit een eenvoudige klus zijn om in config.g. te krijgen.
Voor de slicer zal het ook eenvoudig zijn.
Voeg gewoon de extruders toe tot een totaal van 5 stuks.
Voeg de juiste filamenten/temps/ geen offset toe dus zet offset X en Y op 0.
Het werk zal voornamelijk zitten in de tool changing files voor T0-T5 waar retraction- en extruding settings nodig zullen zijn.
Zoals ik n u werk met de 4-voiudige toolchanger van E3D kun je beter de retractie door de slicer laten uitvoeren, dus daar ga ik in eerste instantie mee aan de slag!
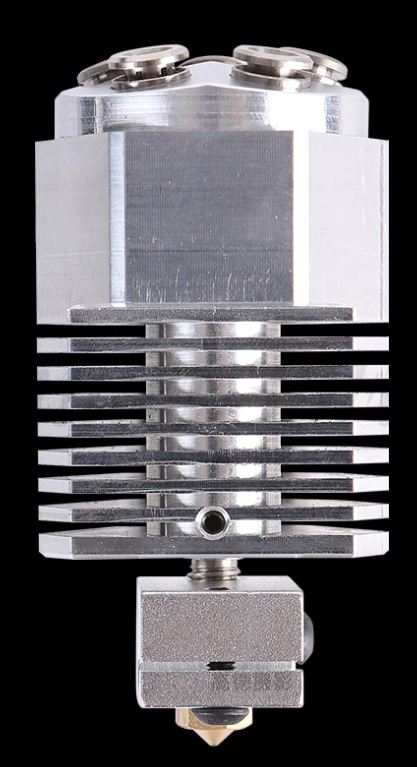
Voor de hotend heb ik een nieuwe setup beschikbaar waarmee ik snel de nozzle kan veranderen.
Dit zal het mogelijk maken om deze setup voor allerlei toepassingen te gebruiken.
Qua hardware moet ik nog wel een plekje vinden voor de Z-sensor, zo dicht mogelijk naast het hotend.
Door de tijd die ik als gevolg van de Corona situatie kreeg (mei, 2021), had ik wat tijd over om aan andere dingen te besteden dan alleen maar werken.
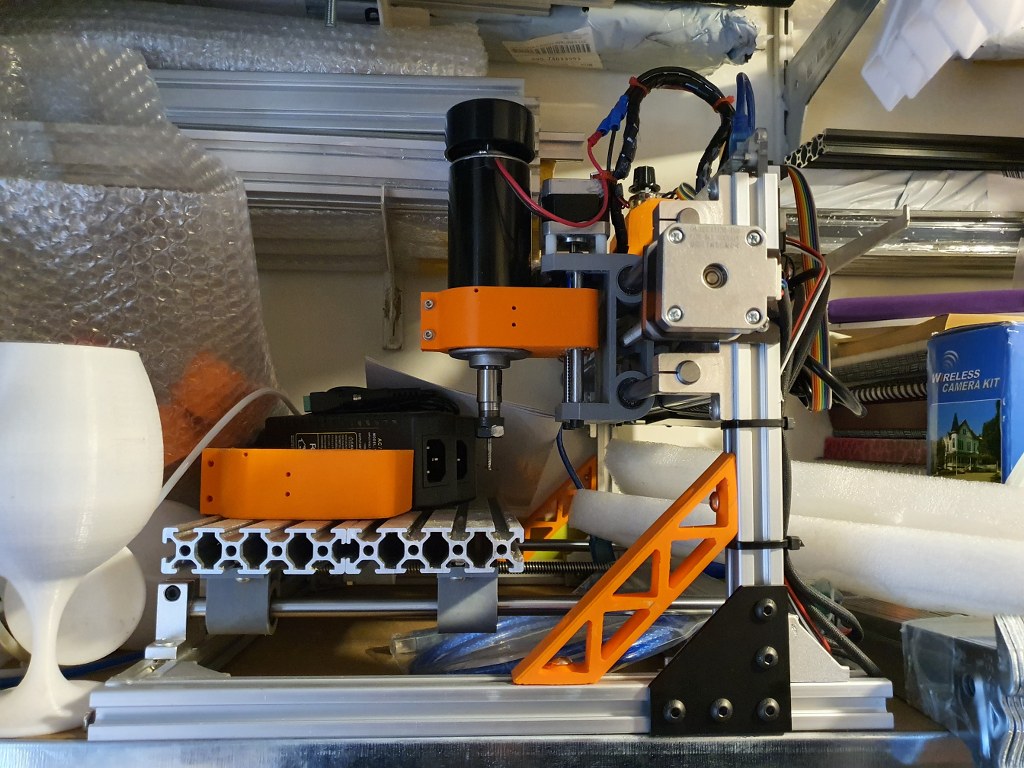
Ik had al een opgewaardeerde 3018 CNC-machine met een 0,5 kW spindelmotor:
en een eenvoudig GRBL 3-assig bord dat heel goed werkt. Maar- het zou leuk zijn om een CNC machine te maken die echt met aluminium kan werken en eventueel ook met koper en messing. Ik heb in het verleden al wat onderzoek gedaan naar wat voor CNC machine geschikt zou zijn voor mijn doelen. En de IndyMill CNC macine zat al meer dan een half jaar in mijn hoofd.
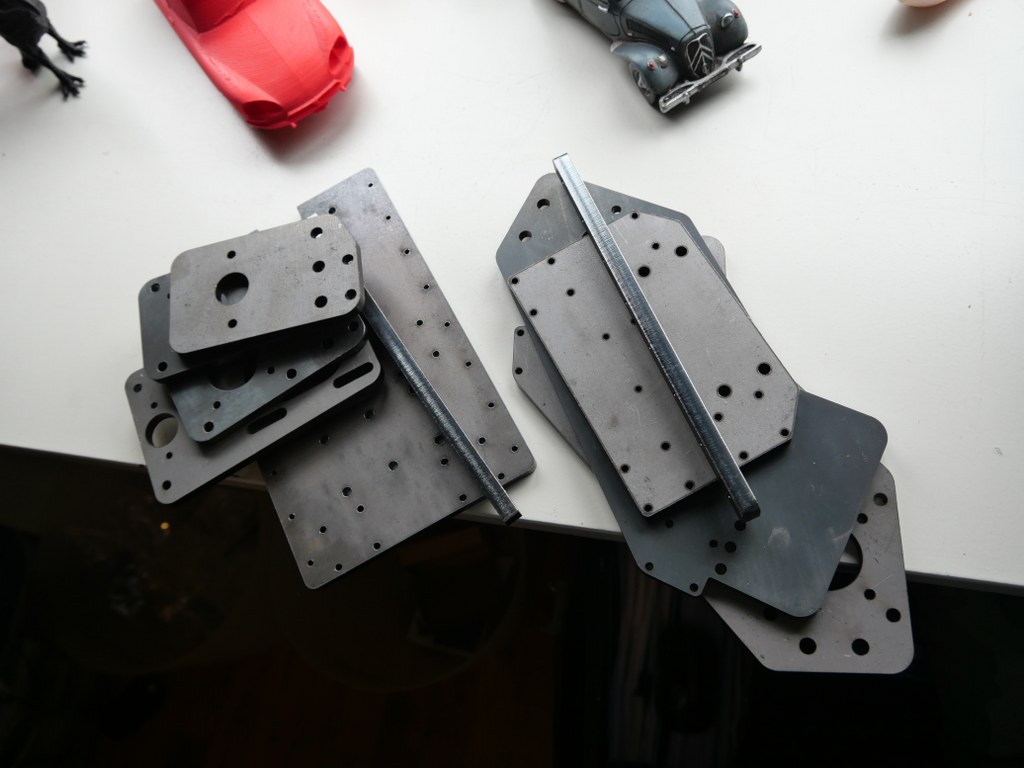
Dus- vorige week heb ik de handleiding en de stalen platen besteld:
voor de bouw en heb wat andere onderdelen besteld bij Ali. Ik heb ook al aardig wat onderdelen op voorraad, uit mijn 3d printer voorraad. De Nema23-motoren en de extrusie, moederbord, drivers, voeding, schakelaars en sondes zijn al beschikbaar.
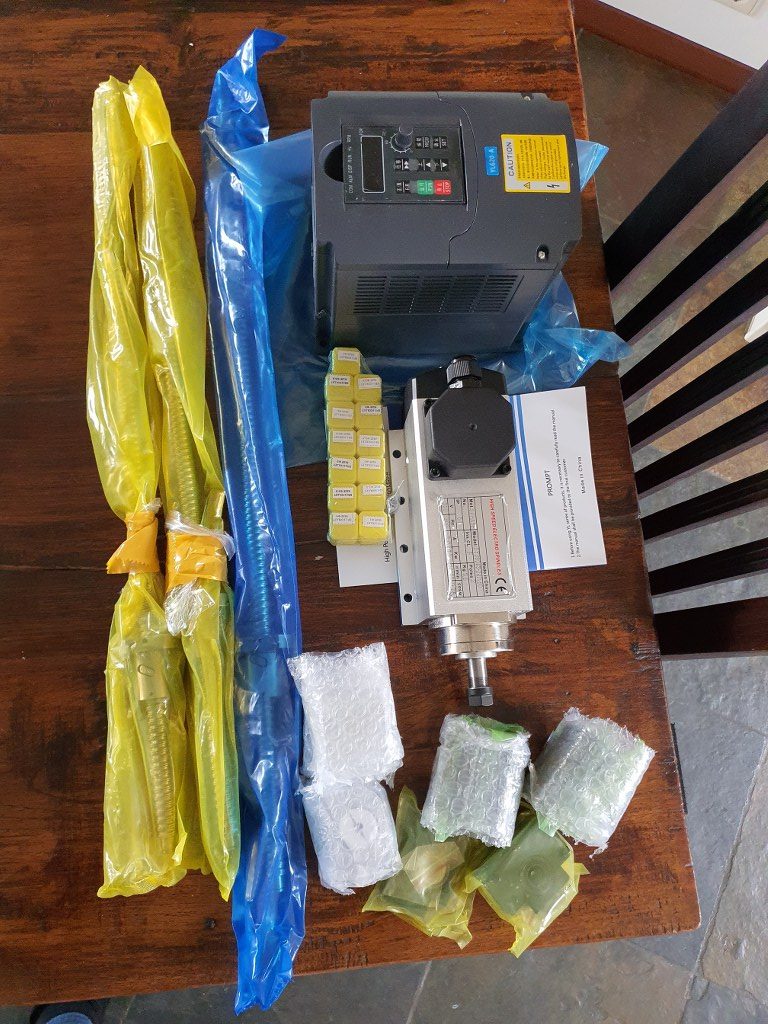
2021-5-09; First parts delivery for the Indymill: 3 ball bearing leadscrews with kit of end bearings and screw block holders, the frequency regulator 1 phase in, 3 phase out and the 1.5 KW 3 phase spindle of 3.6 kilograms
De benodigde geprinte onderdelen worden op dit moment geprint (begin mei-2021). Ik print alle geüpgrade STL’s, de laatste versie, omdat deze vrij beschikbaar zijn op Thingiverse (zoek gewoon op IndyMill) . En dan zie je de kracht van delen: het ontwerp was al geweldig, en met de upgrades is het nog beter geworden. De geüpgrade versies van de ophangpunten voor de lineaire lagers zijn echt een stuk steviger dan het originele ontwerp en de nieuwe eindstophouders zijn erg handig om te hebben.
Ik heb de kosten voor het bouwen van deze machine ruwweg berekend en het was een stuk goedkoper dan het kopen van een vergelijkbare CNC machine van deze grootte. Als je verstandig inkoopt, kunnen de kosten voor alle materialen net onder de Euro 1000 uitkomen, als je de originele BOM volgt en inclusief de 1,5 KW luchtgekoelde spindelmotor met regelaar….
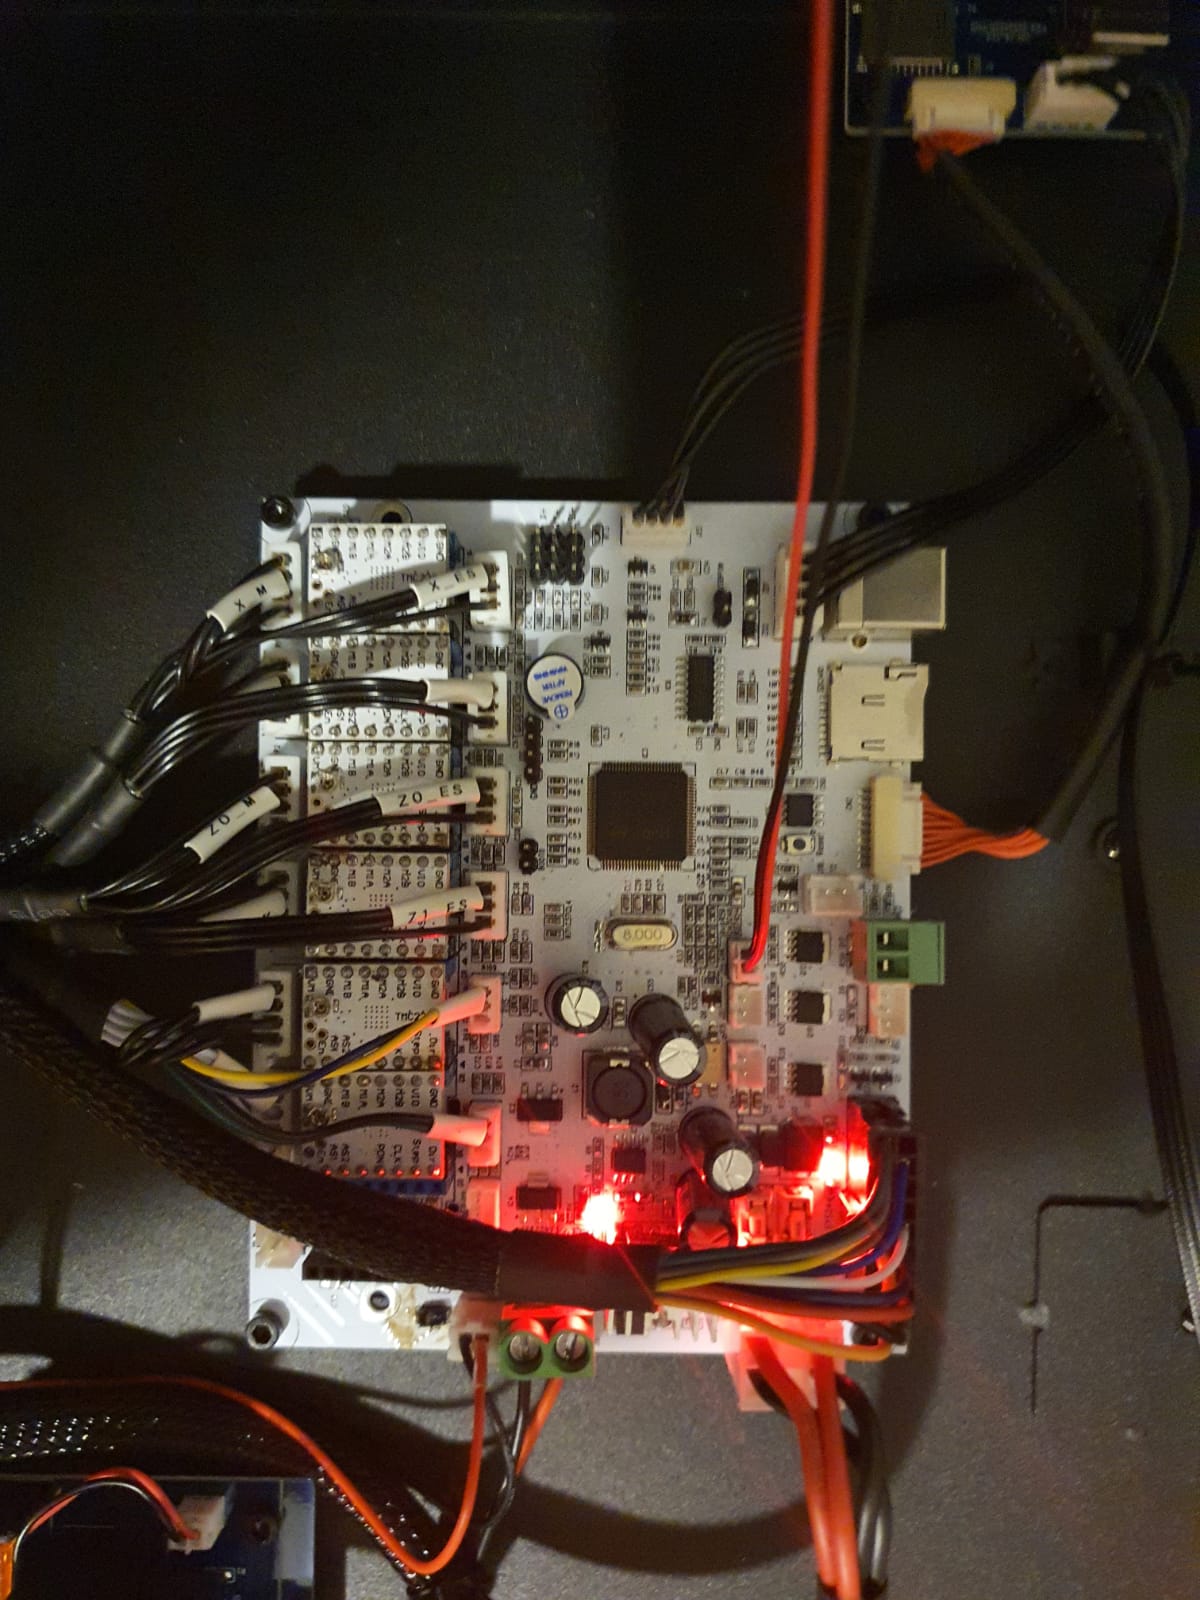
Als je een ander board wilt installeren dan de standaard Arduino UNO met het standaard Arduino CNC shield, kan dit je een extra bedrag van 120 tot 500 Euro kosten. Ik gebruik een FLY_CDY_V2 met Mellow’s originele TMC2209 stepper drivers. Vergeet NIET de schakelaars aan de onderkant van deze steppers op ON te zetten als je sensorloze homing wilt gebruiken!
Mijn toevoegingen aan de originele bouw:
Momenteel gebruik ik een 10 Ampere afneembare 24V PSU, zal een 30 Ampere worden.
Sensorloze homing met behulp van een FLY-CDY-V2 moederbord en TMC2209 stepper drivers. Dit werkt geweldig maar ik ben verder gegaan om eindstops toe te voegen en een stabielere en verwisselbare setup te maken.
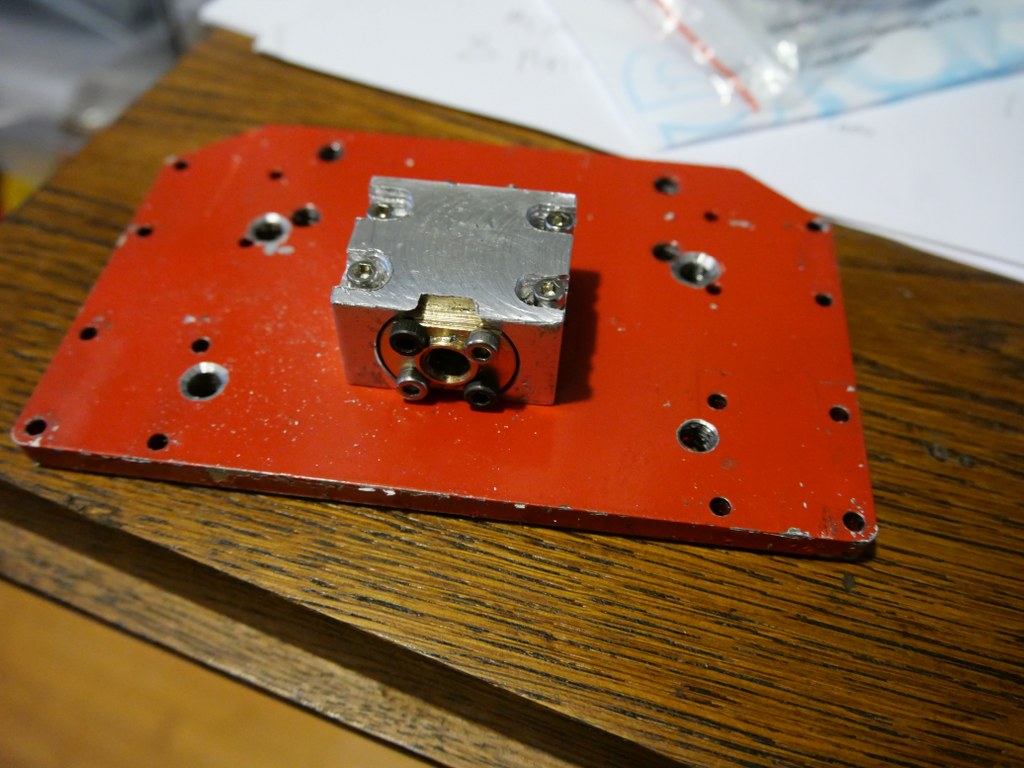
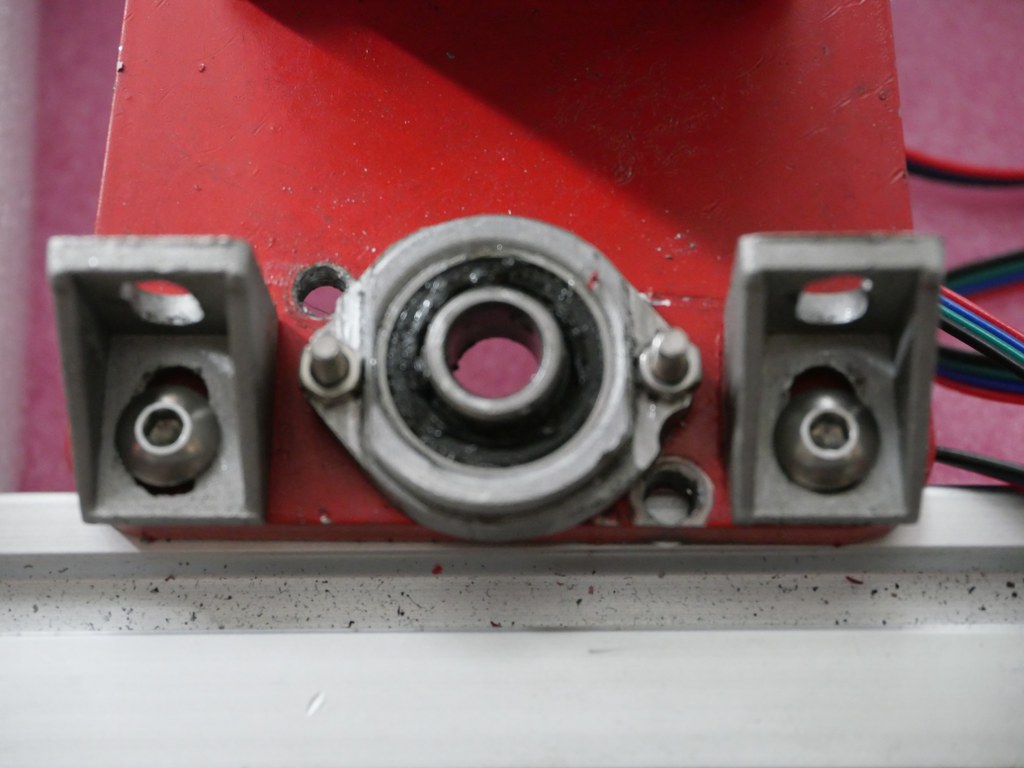
Originele bevestigingen en gebruik van de houder van de kogellagerschroefmoer, en van de originele BK12 en BF12 lagerhouders om te voorkomen dat de kogellagerschroef de verkeerde kant op beweegt.
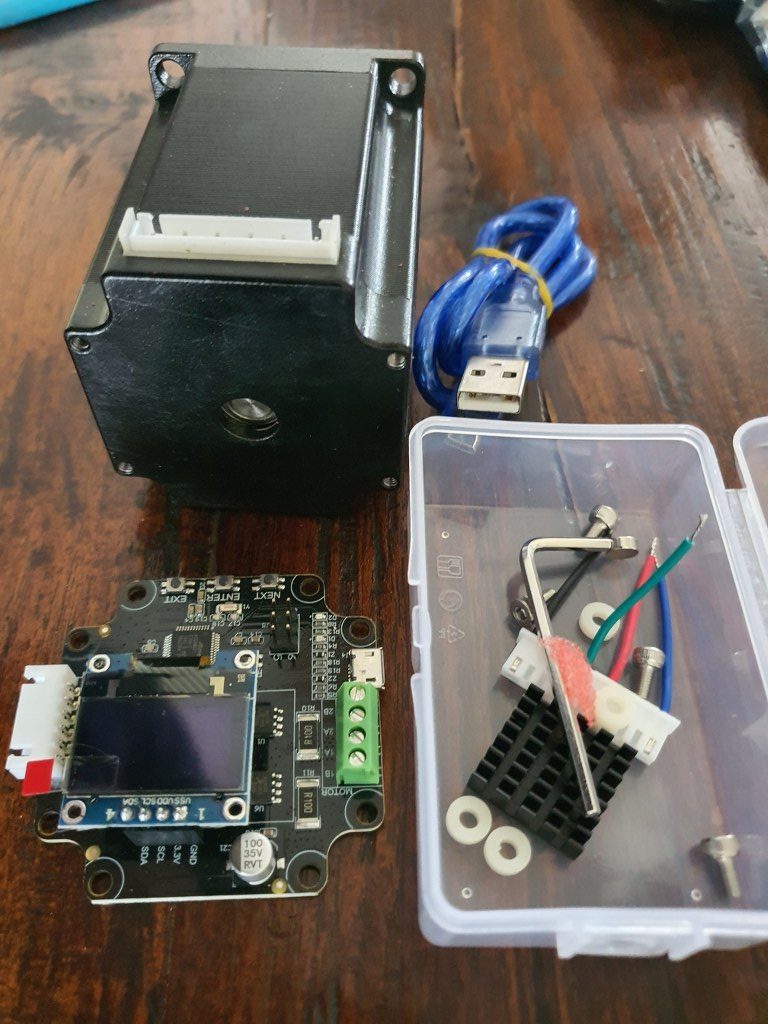
Gesloten lus NEMA23 stappenmotoren drivers MKS Servo57A V1.0 zal worden gemonteerd aan de achterkant van de steppers, nog te monteren, maar zal conflicteren met sensorloze homing
Nema 23 stepper with the Closed loop kit
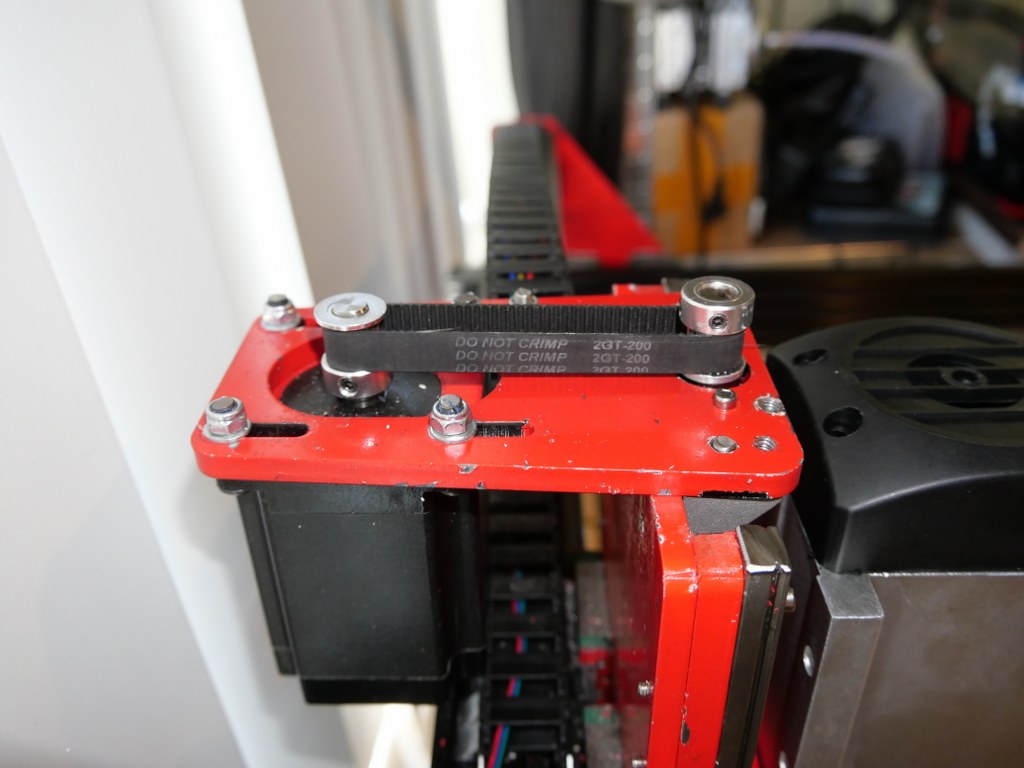
10 mm GT2 200 mm riem tussen de Z-motor en de Z-leadscrew met GT2 10 mm brede 16-tandwielen
Op de Duet support website is een project beschikbaar om zo’n apparaat om te bouwen naar een seriële interface, met een geprogrammeerde Arduino (pro) mircro of -nano ingebouwd het apparaat:
Stevige verbindingsplaat tussen de achterzijde van de bovenste en onderste lineaire rails van de X-as. Moet nog komen.
Piëzo-probes op alle start- en eindposities van de assen, in plaats daarvan heb ik eerst de FLY CDY V2 reprap board met TMC2209 en sensorless homing, en later met mechanische eindstops.
Koelvloeistof nevel installatie en vloeistof verzameling-, pomp, reservoir enzovoort is besteld. Moet nog geïnstalleerd worden, en de pompen leverden niet voldoende druk voor de koelvloeistofnevel, moet naar een andere oplossing zoeken.
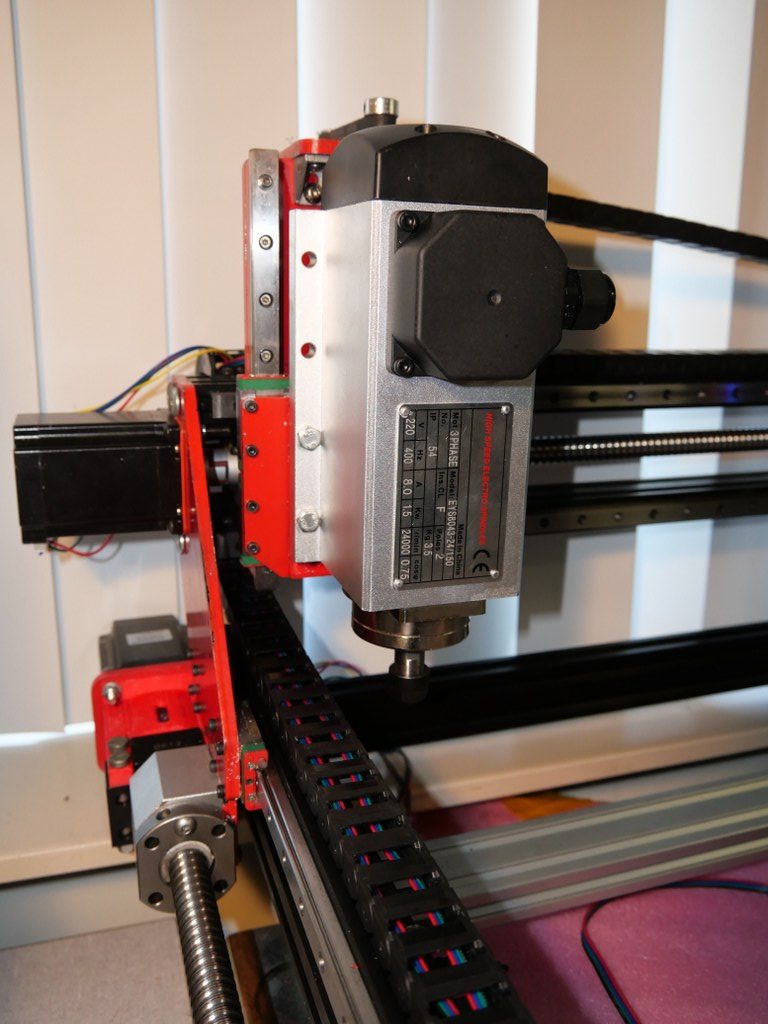
Onafhankelijk aangedreven (en onafhankelijk afgestelde homing) Y-motoren om eventuele problemen tussen links en rechts te voorkomen. Dit werkt feilloos met de FLY_CDU_V2 reprap setup, maar het kostte me heel wat uurtjes finetunen om te werken met de 3,5 kilogram zware spindel motor…
2080 profielen rondom (ook voor en achter) met 4 extra brede hoekbeugels eronder. Ik koos ervoor om dit anders uit te voeren met 3 extra bodemverbindingen en hoekbeugels, omdat ik de voorkant van het frame laag moet zijn en plaats moet maken voor de vacuümslang van de spindel.
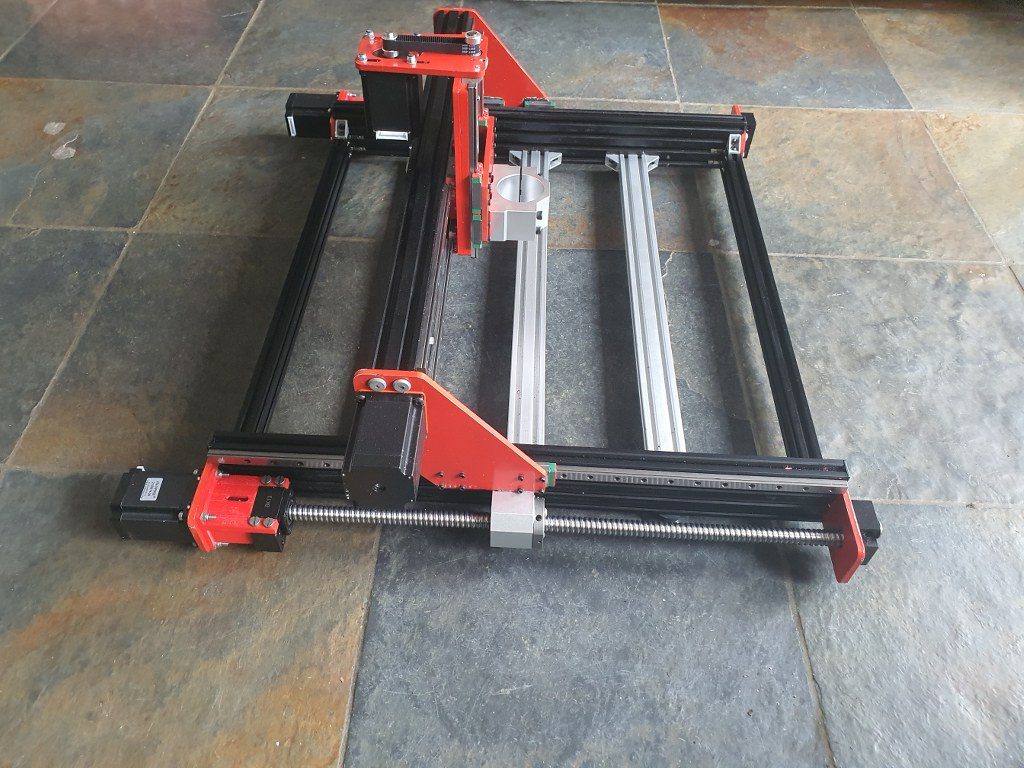
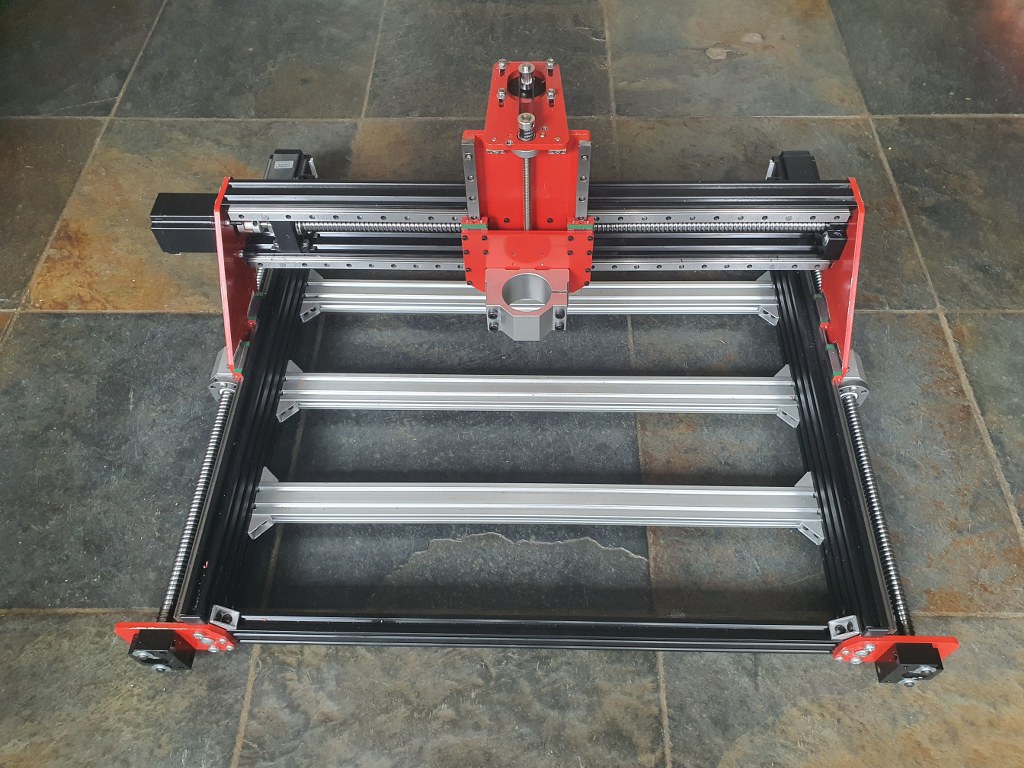
Anmd – the frame as it is ready, but with the spindle holder of the 500 Watt motor. I will not use this motor after all for this build–
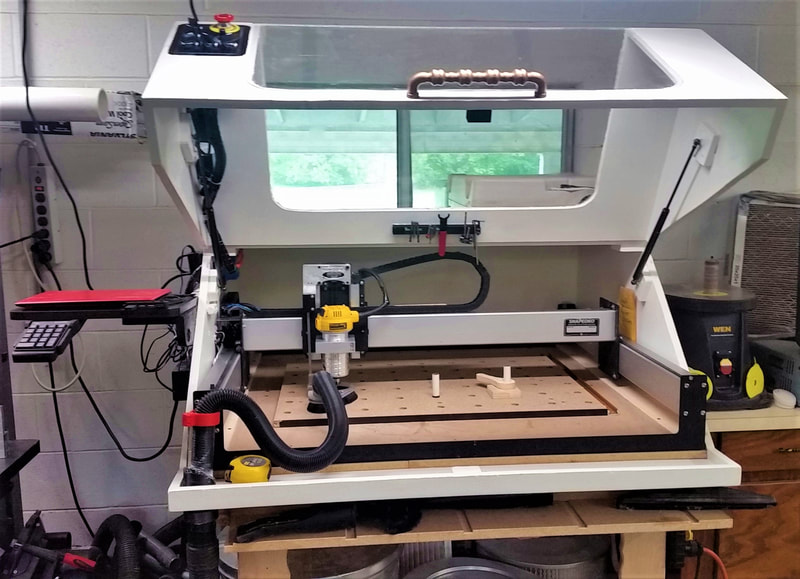
Slimme behuizing met Scheppach stofzuigeraansluiting zoals dit voorbeeld van https://www.shophacks.com/cncenclosure.html#/ DIT IS ECHT NODIG!
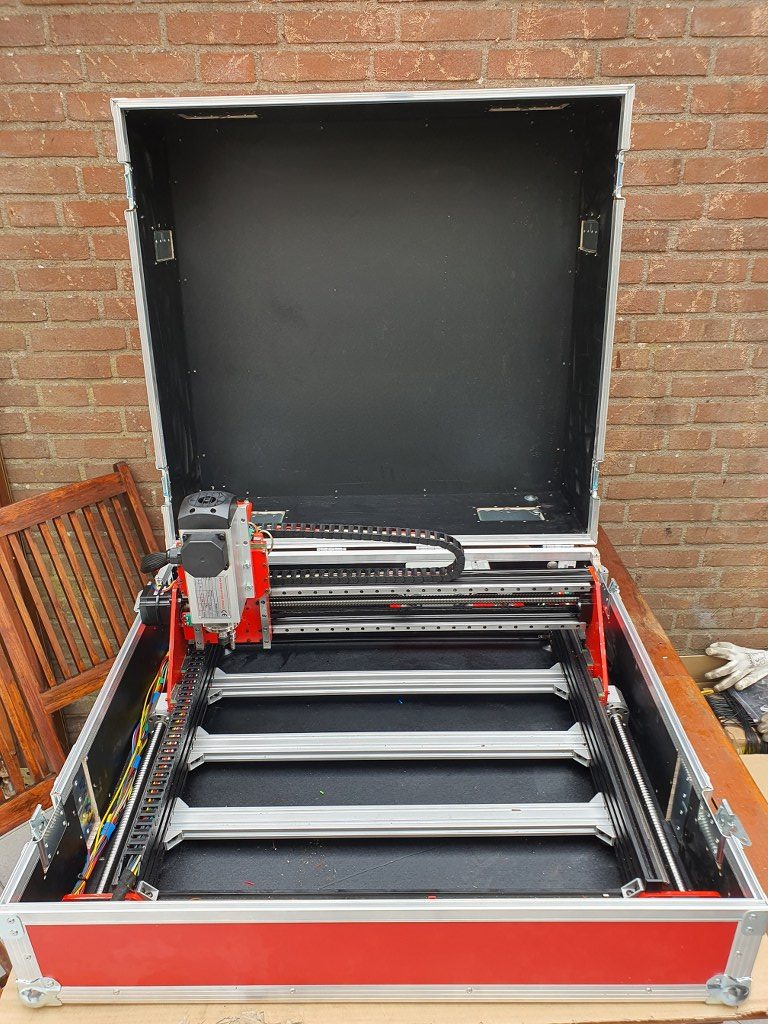
My solution for an enclosure ia a 84x78x45 cm flightcase
Beschermkappen voor alle geleidingsschroeven en lineaire rails (besteld in China)
Later indien mogelijk: Wielen aan de achterkant of aan 1 kant en een handvat aan de voorkant (of andere kant) om de machine gemakkelijker op te bergen en op te bergen, dit heb ik onder de flightcase gemonteerd!
Gemakkelijk afneembare besturingseenheid (en) met stevige connectoren, is al gemaakt en in gebruik.
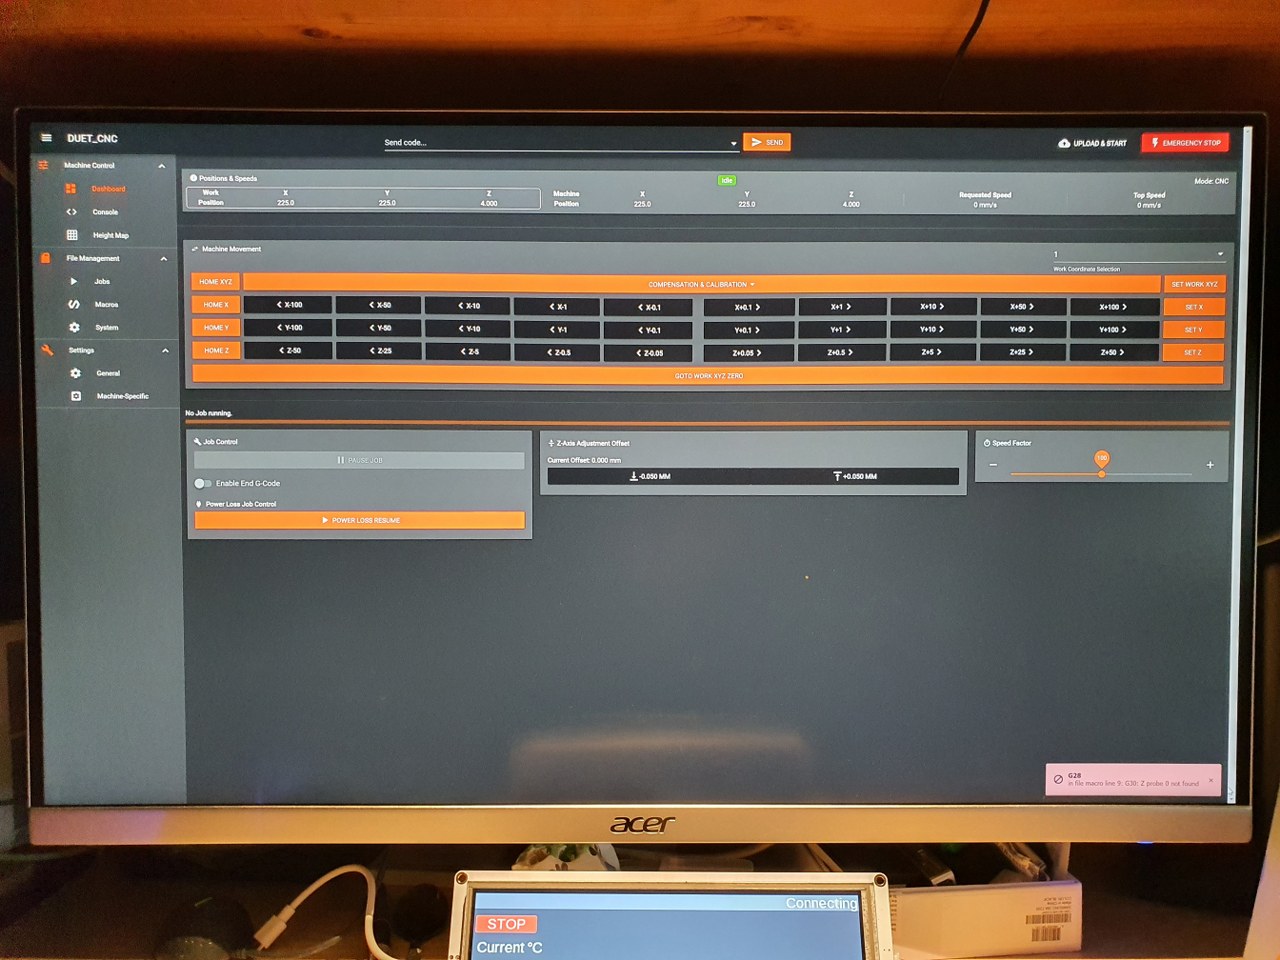
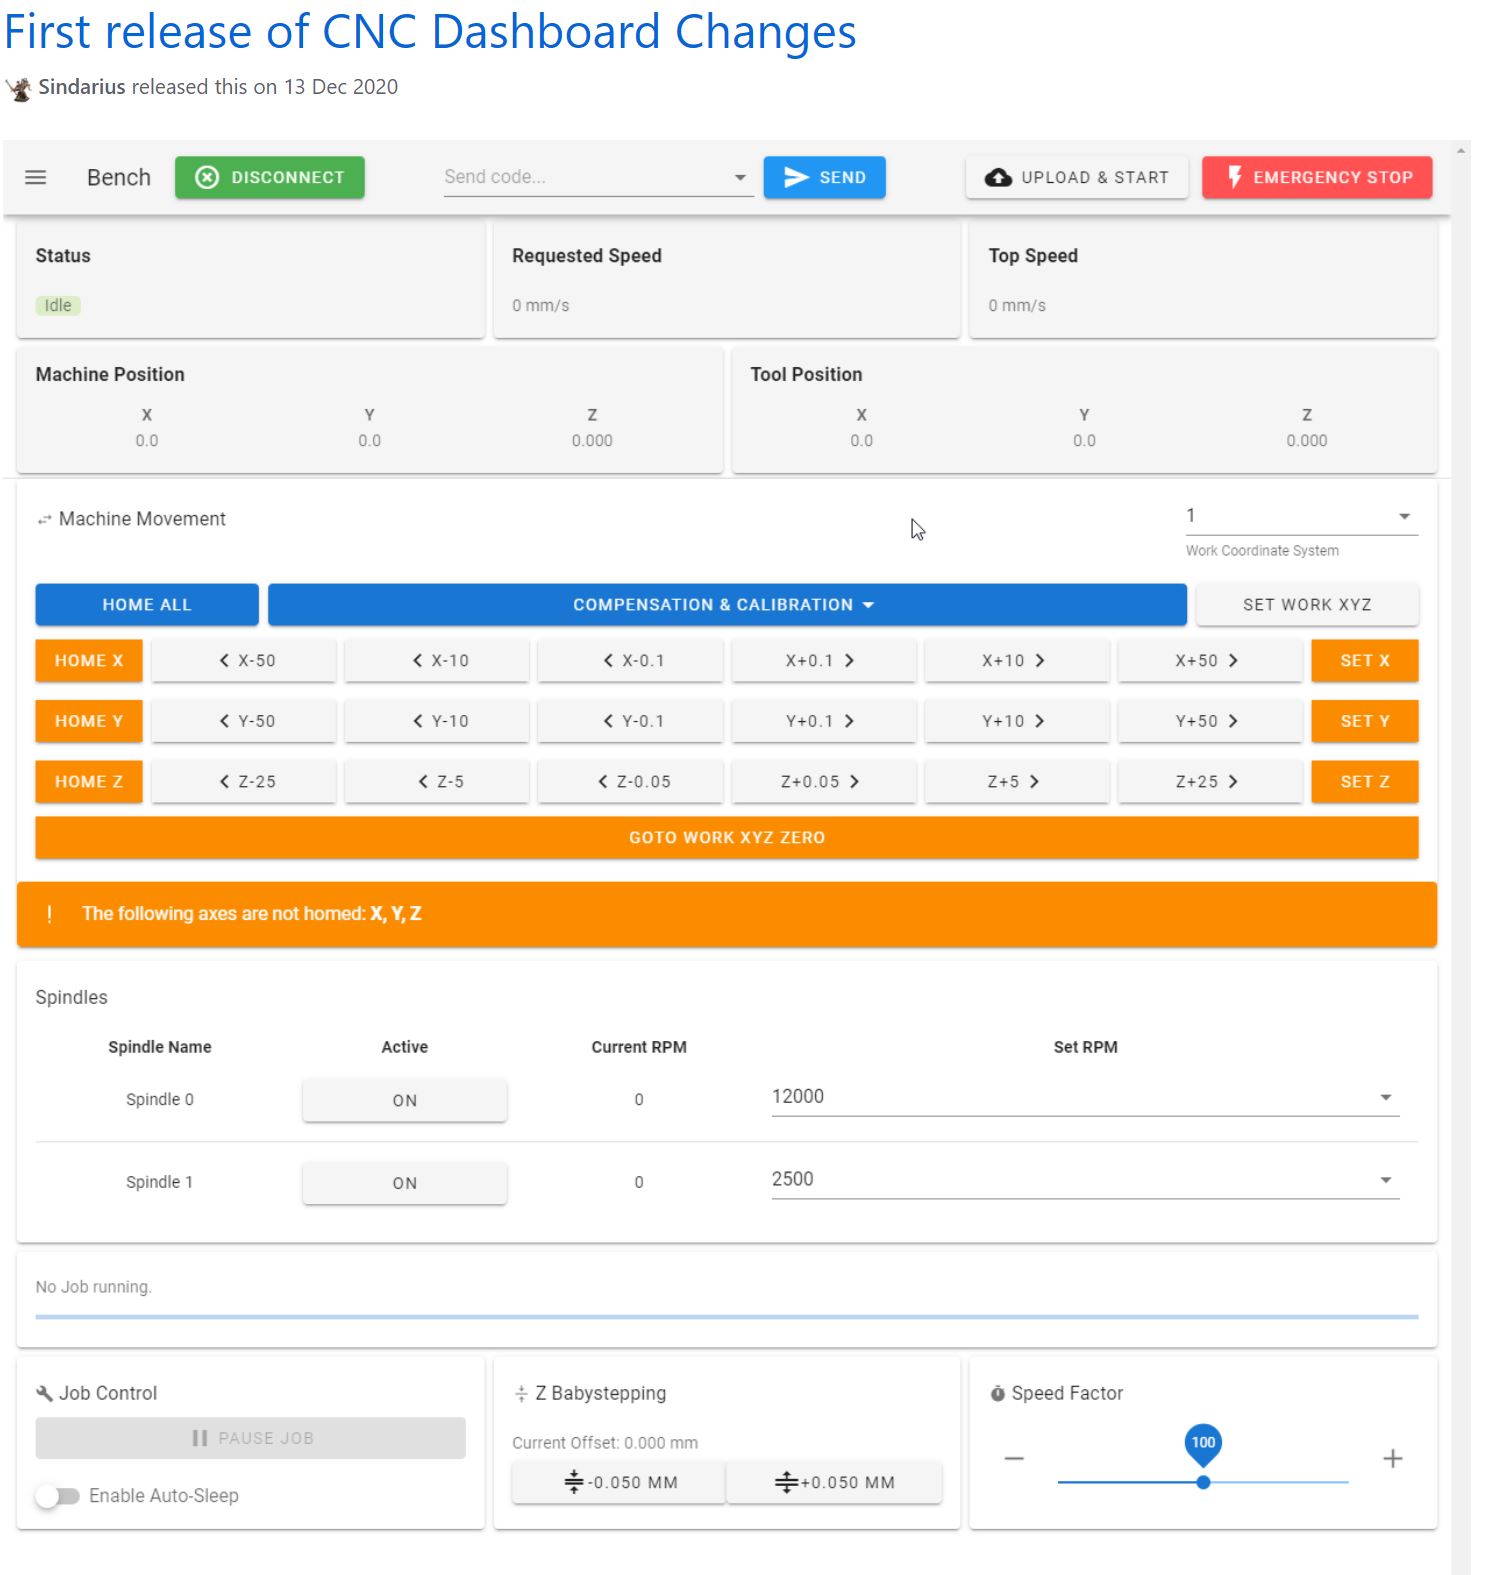
Ik ben begonnen met een FLY_CDY-V2 reprap board om te experimenteren met reprap CNC en de webinterface die voor deze setup is ontwikkeld. Dat werkt allemaal prima en is in de praktijk getest. De controle van de spindle controller loopt via een omvormer van PWM naar 0-10 Volt en werkt inmiddels ook prima via M42 S (0-1) besturing


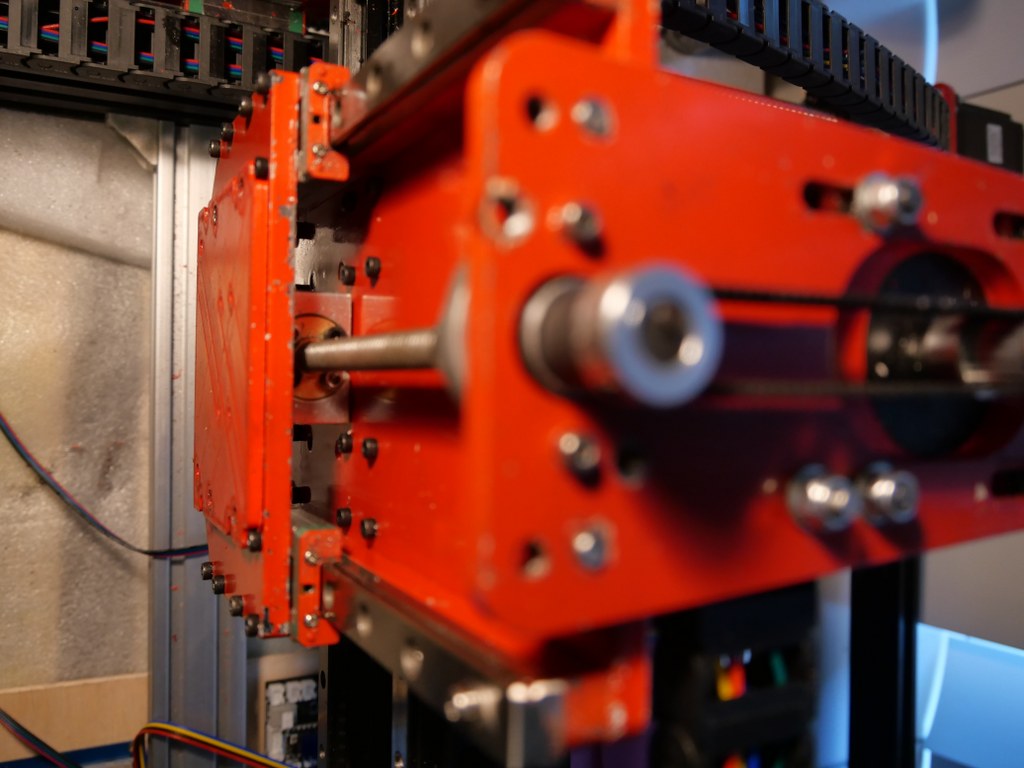 En een verbeterd toplager voor de Z-aandrijvingsas
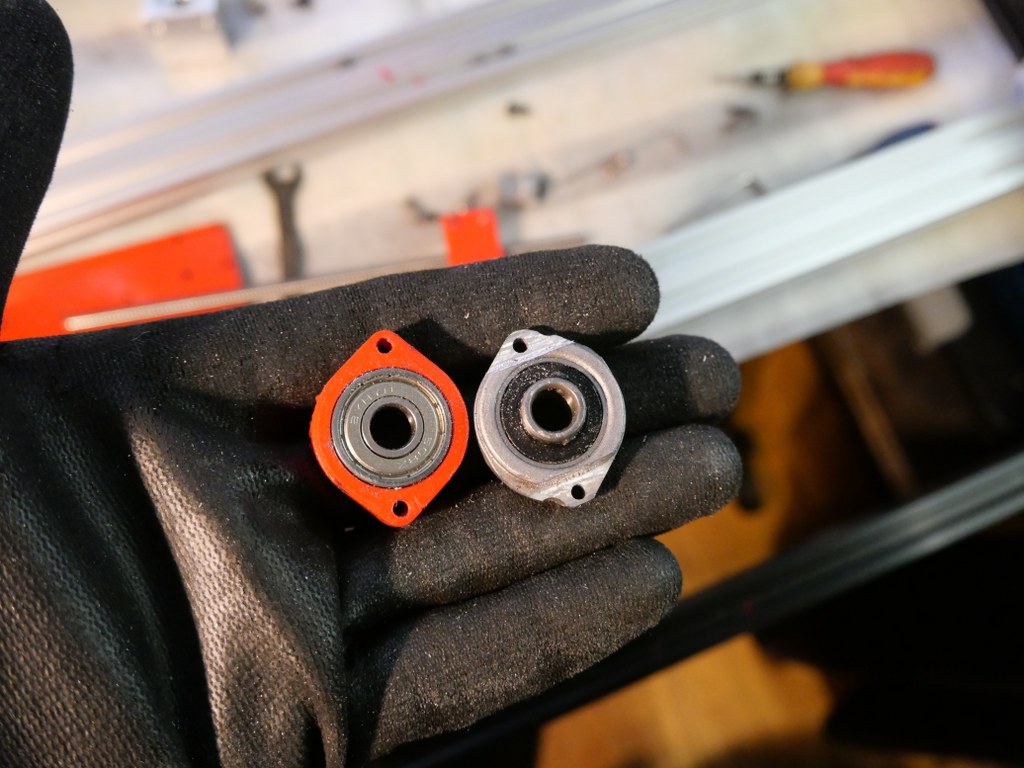


 Dit is in eerste instantie gedaan met slimme dubbele homing van de dubbele Y assen, en geeft me veel meer controle over de machine. Het is ook al mogelijk om gewoon op GRBL gebaseerde Gcode naar de USB poort van de machine te sturen, en het reprap FLY board gewoon als gcode-interpreter te gebruiken om de machine te besturen. Maar voor nu gebruik ik de webinterface. UIteindelijk ben ik overgestapt naar het gebruik van eindstops op alle assen, vanwege de bump in omschakelen van stealthchop naar XX met de Mellow TMC2209 drivers. Dit is een vervelend bij-effect van sensorless homing.