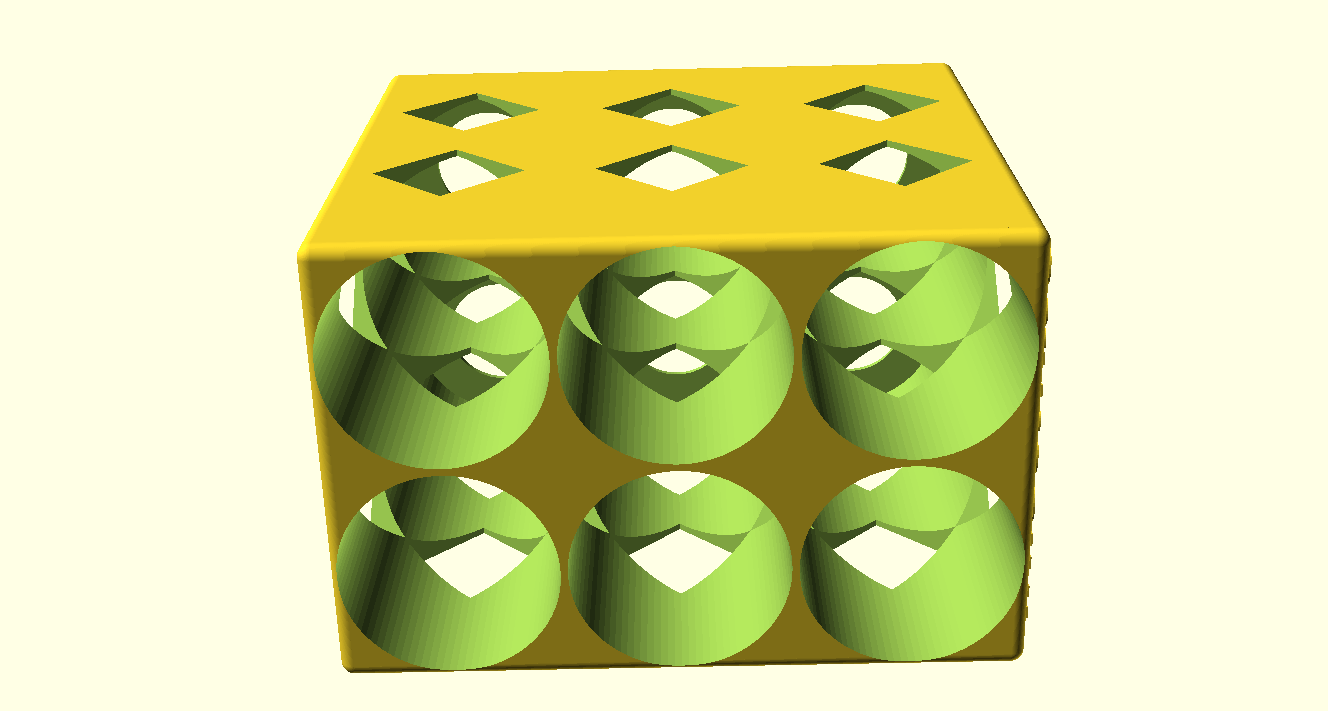
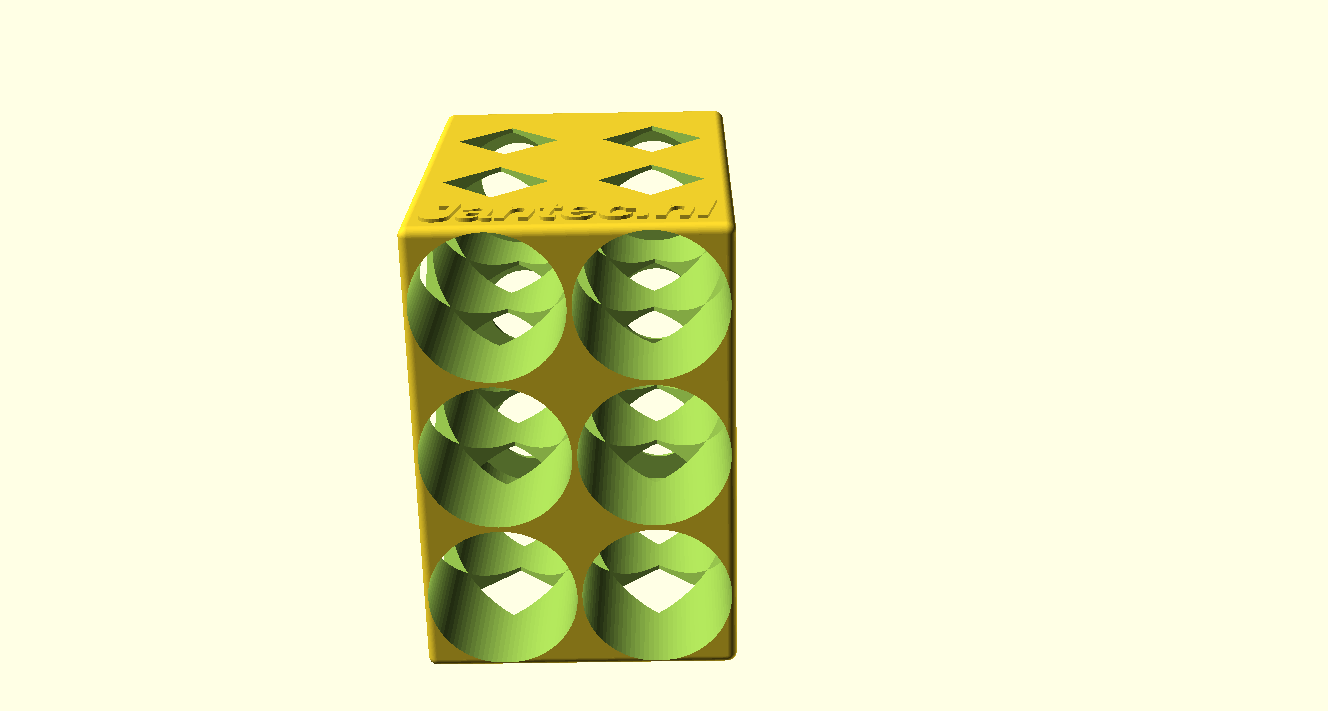
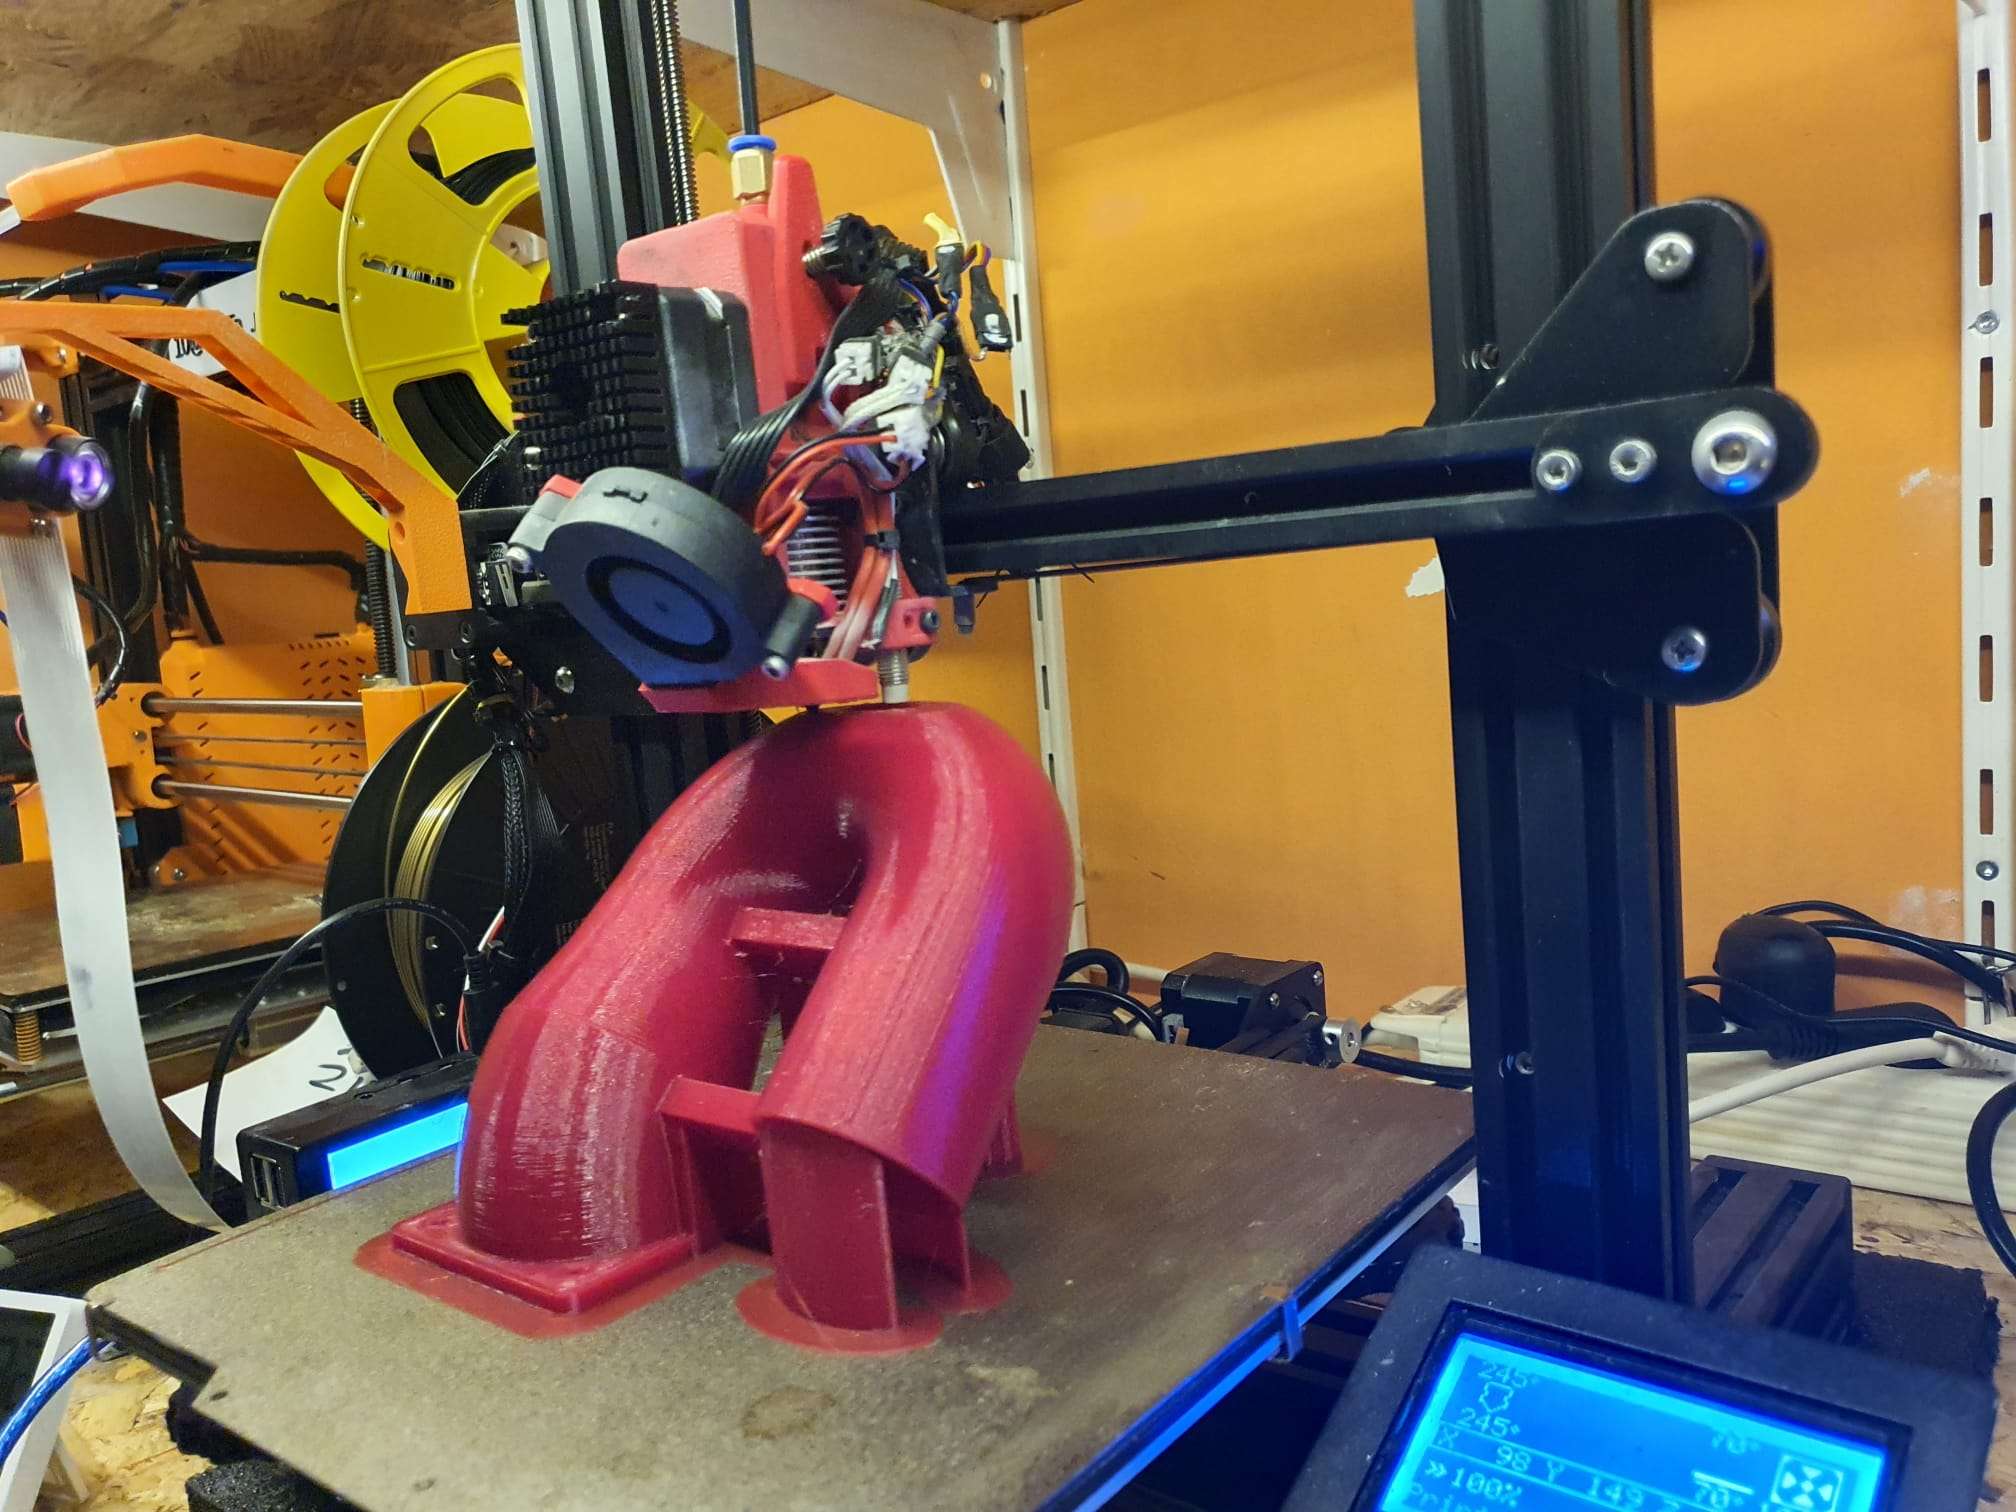
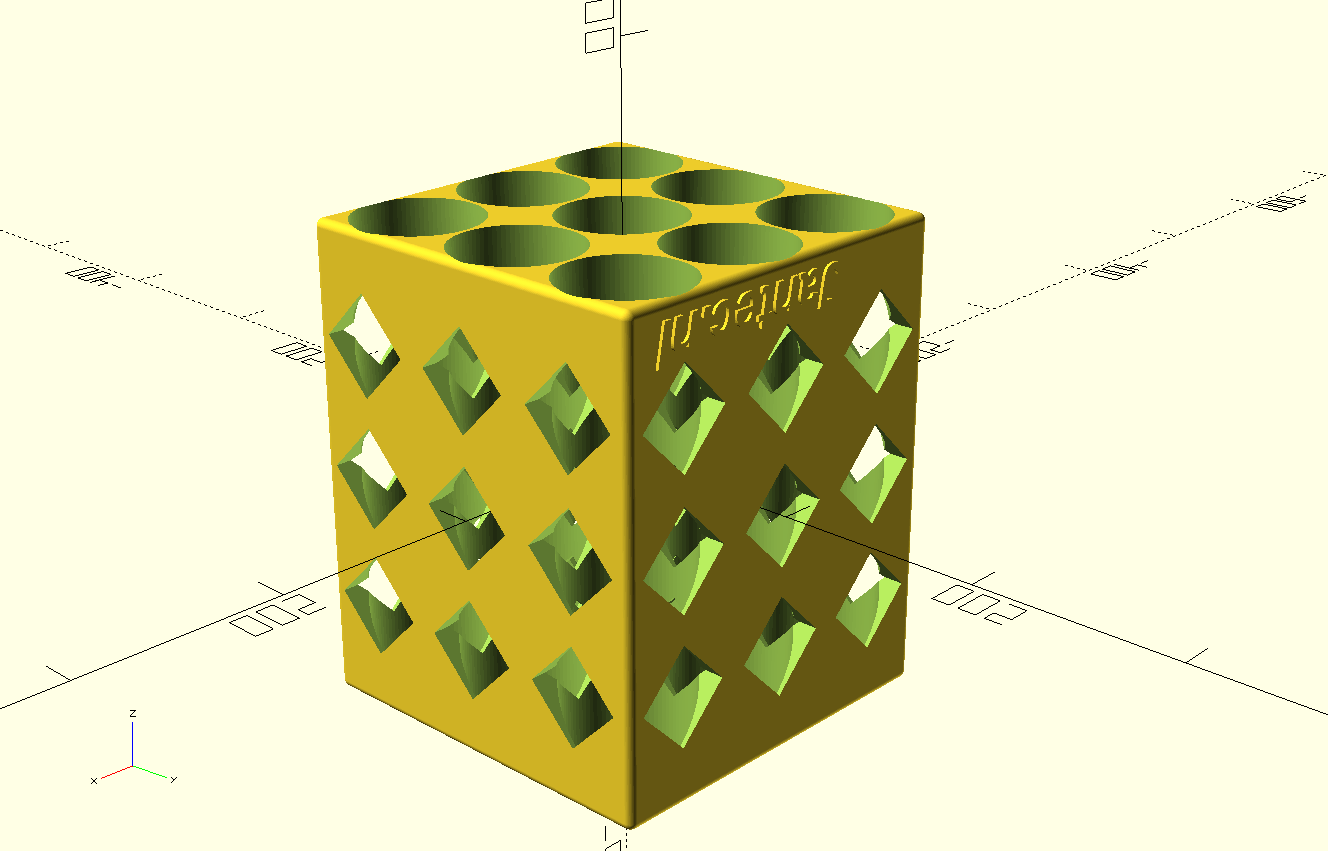
AchterkantEn zo staat ie in de koelkast!Voorkant en doorkijkje naar achter
Voor gewone 330cl bierflesjes
De box in 3×3 flesjes uitvoering is 238 mm diep en 197mm hoog & breed.
Printen gaat het best met de achterkant van de flessenbox op het bed, dat is het deel waar de ronde gaten aan de achterkant van de flessen het kleinst zijn.
Als je printer max 200x200x200 mm aan kan, print dan de Z op 80%.
De flesjes steken er dan aan de voorkant 4 cm uit, dat kan ook prima!
Print meer boxen en zet ze naast elkaar, op elkaar etc.
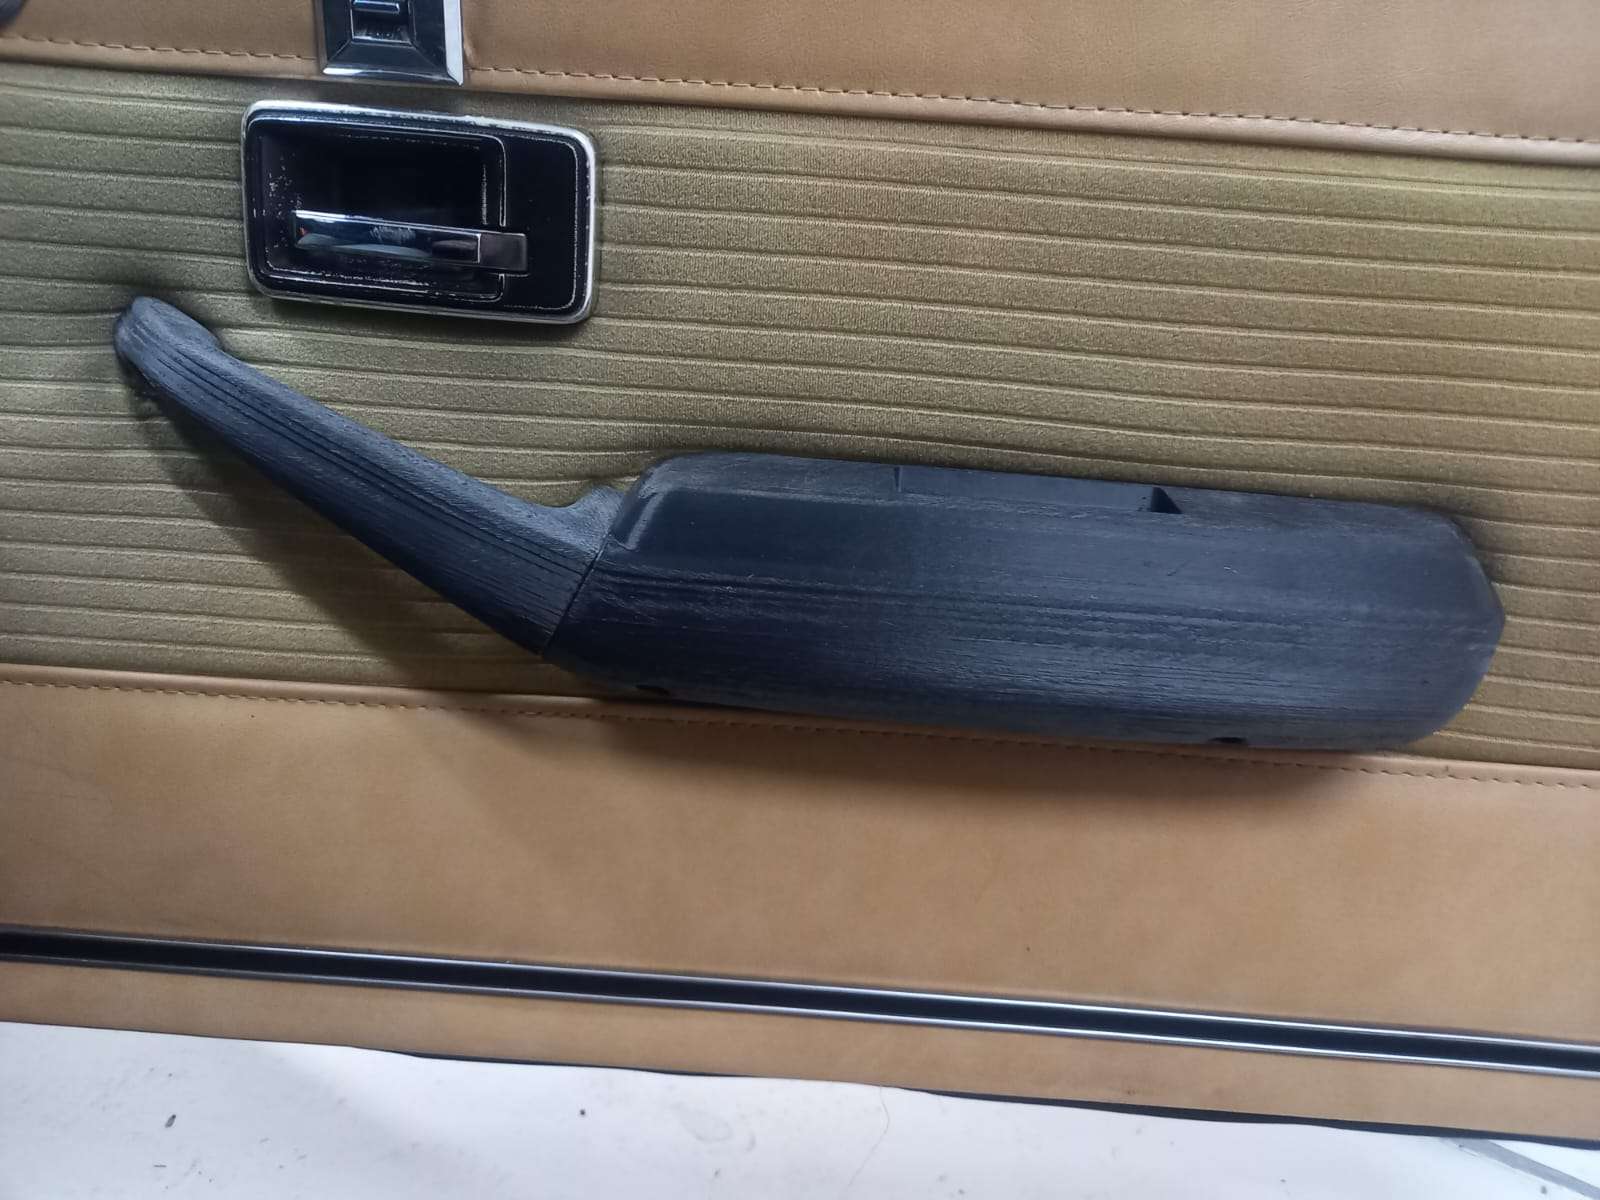
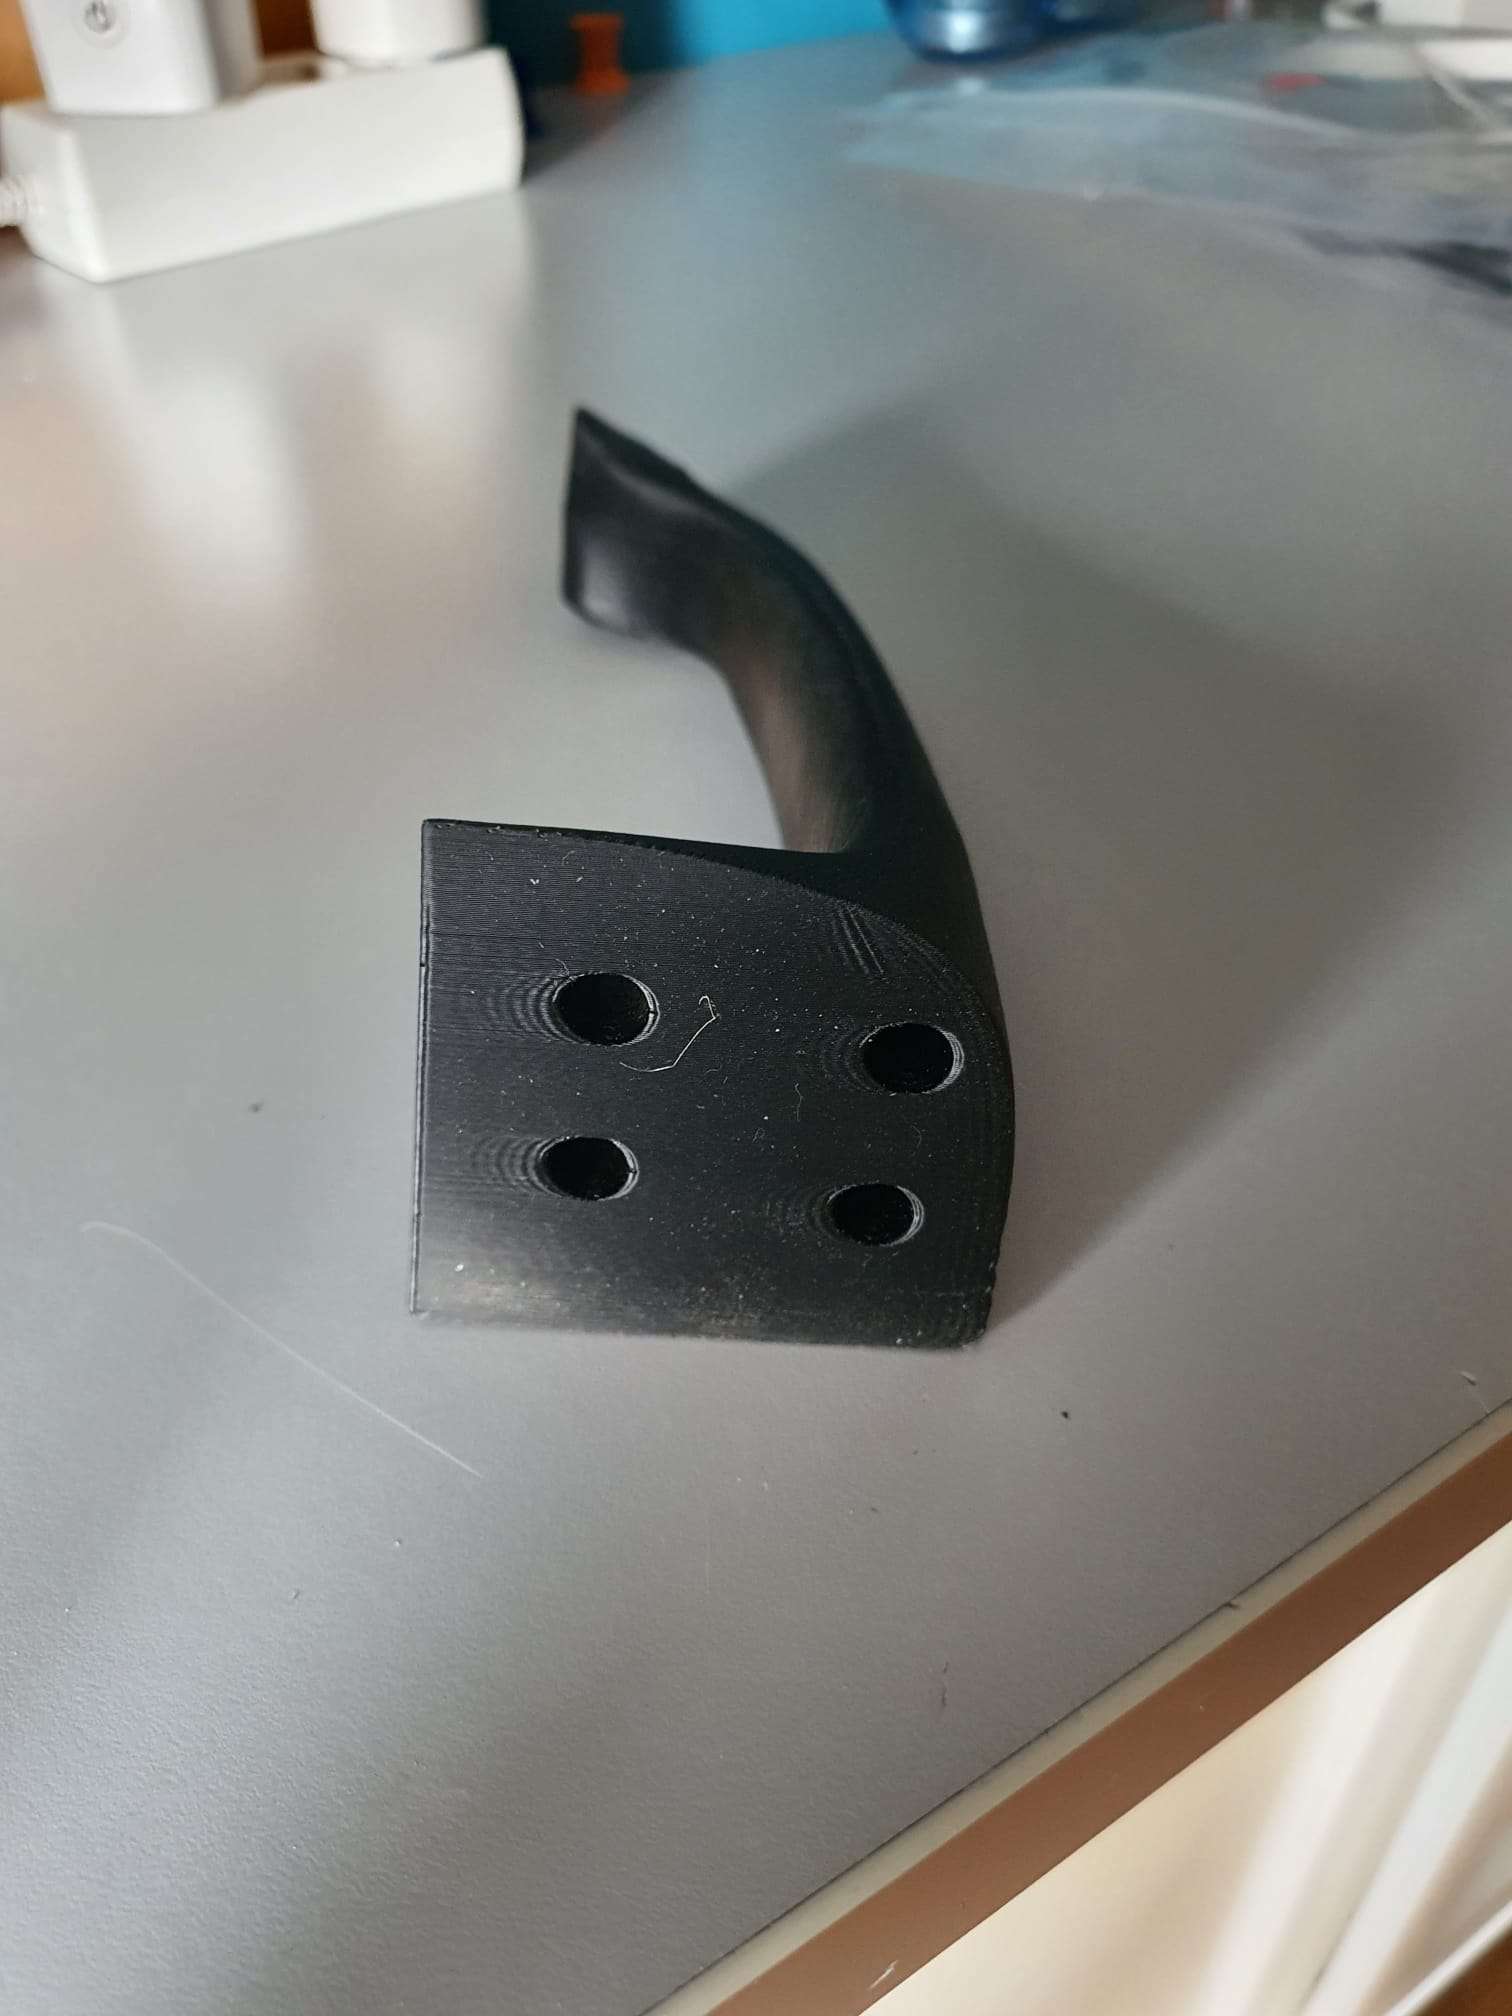
My brother owns a completely overhauled Chevrolet Camaro with power windows (I believe from 1969 or 1971) and asked if I could scan, improve and reproduce the armrests since these are both quite sloppy.
This type of Chevrolet Camaro is the only version that has these large armrests and they are a typical product from those days.
Manufactured from plastic and covered with some kind of latex.
Due to time and usage these armrests are both L and R broken between the actual armrest and the handle that is used to close the door.
This handle is at the front of the door and with these long and heavy doors some force is required to close the doors.
Therefore, we will try to modify the armrest with an additional handgrip in the large part of the armrest.
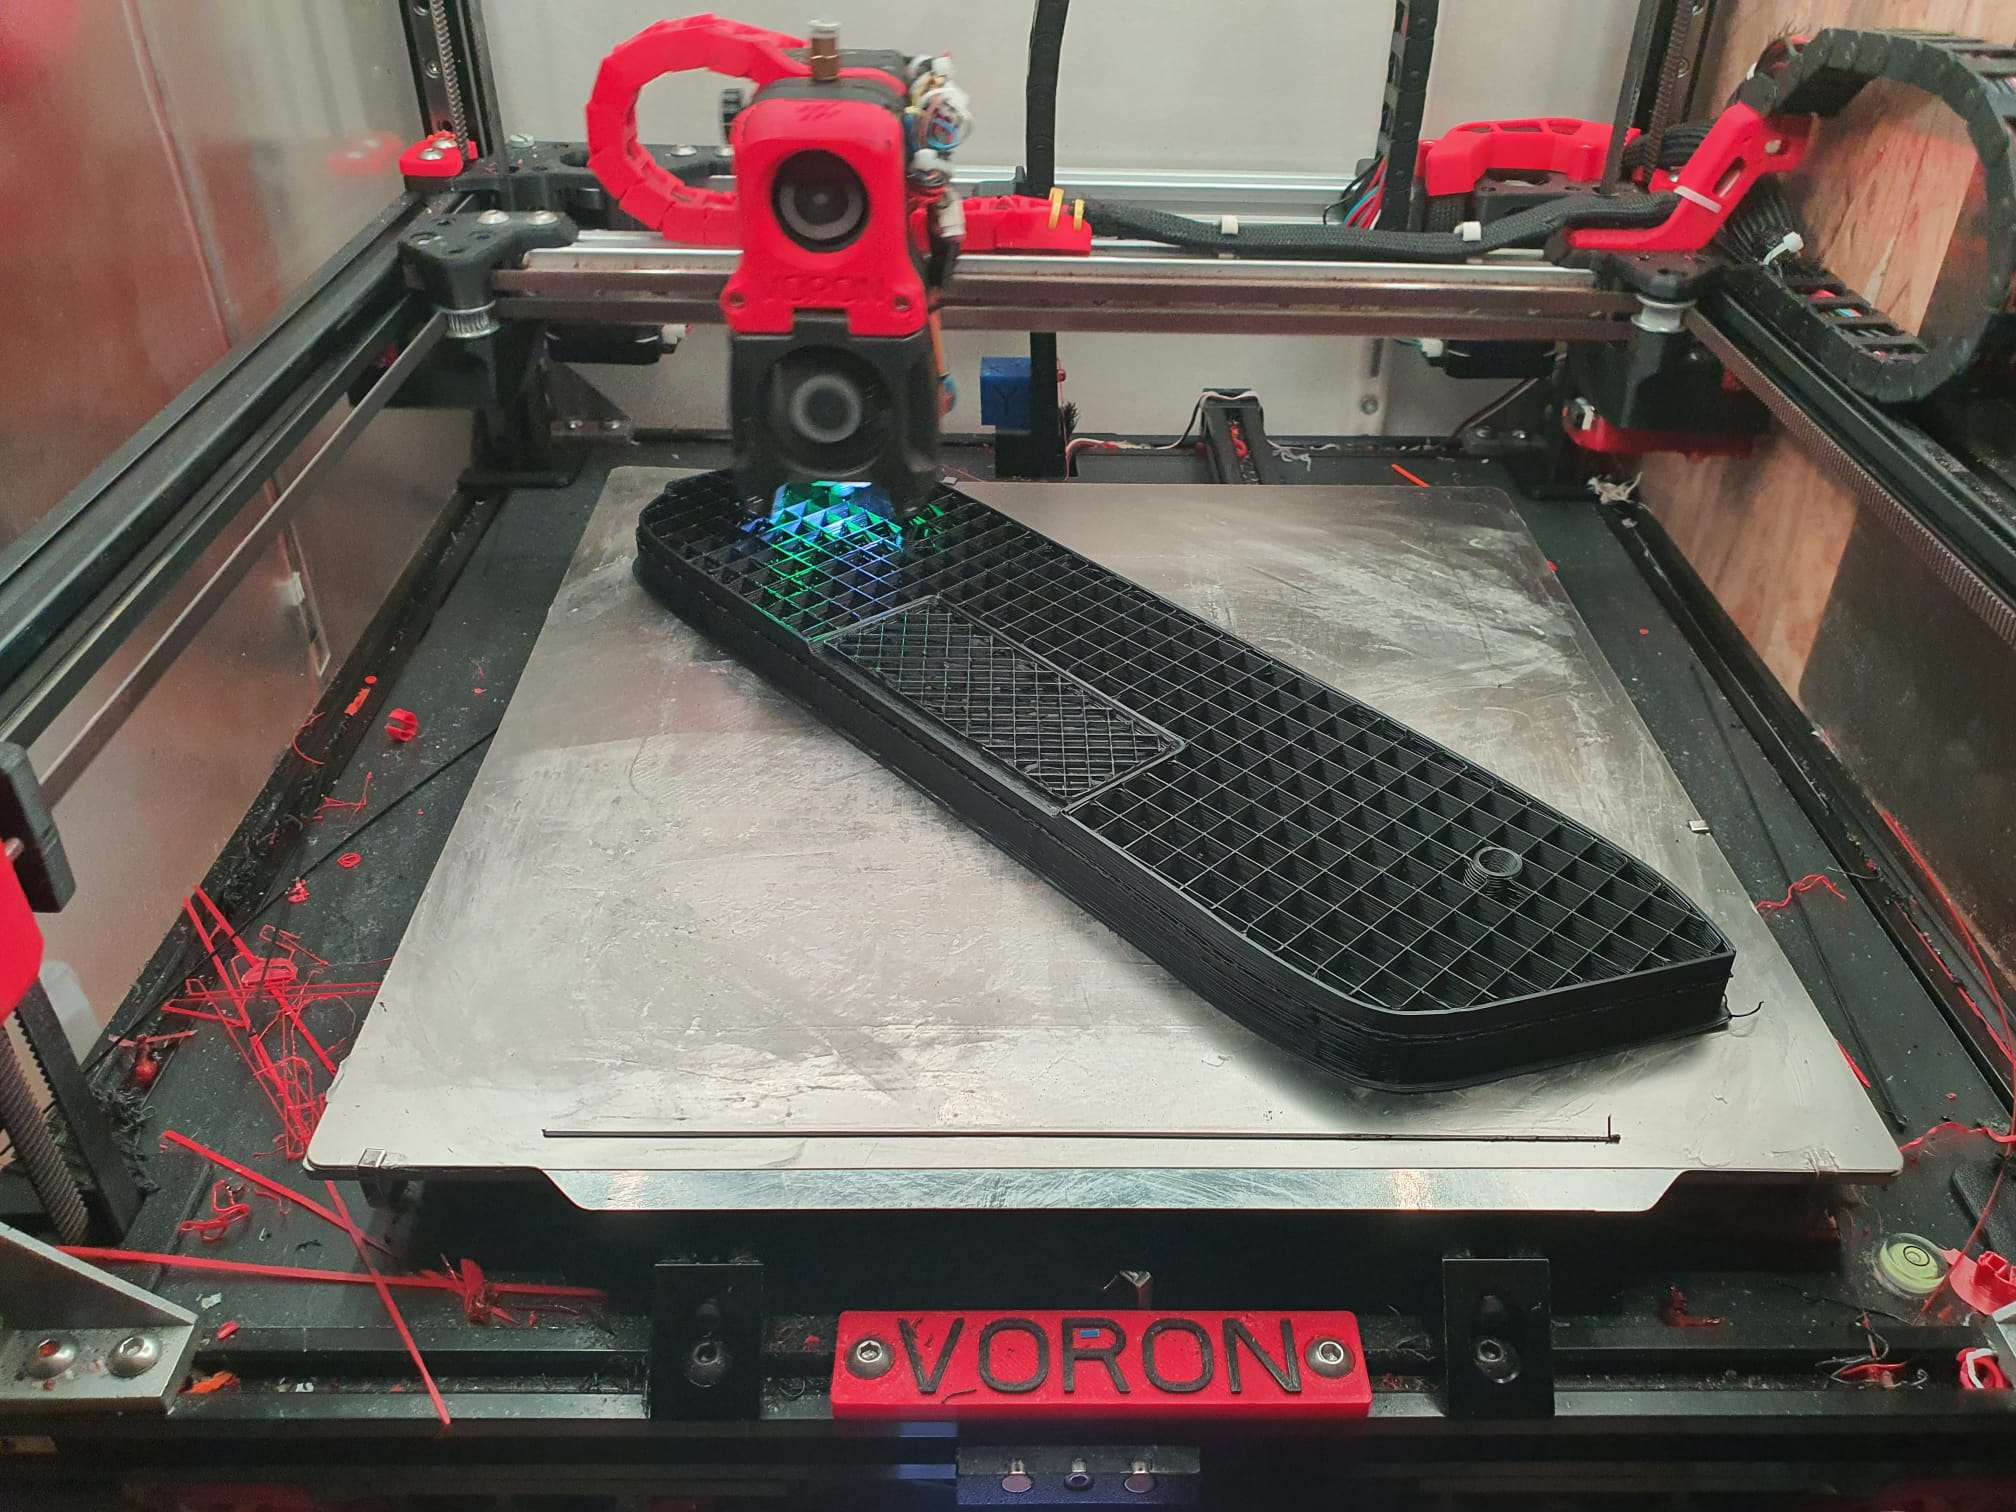
So- I used my Creality lizard scanner to scan one of the the original armrests and cut the design in 2 connectable parts. This makes it printable om my Voron300.
After reproduction, the part will get a new leather cover.
After the right hand side is made to fit perfectly, we will also mirror the design to produce the armrest and handle for the left hand side as well.
We will add our pictures to this post as we move along!
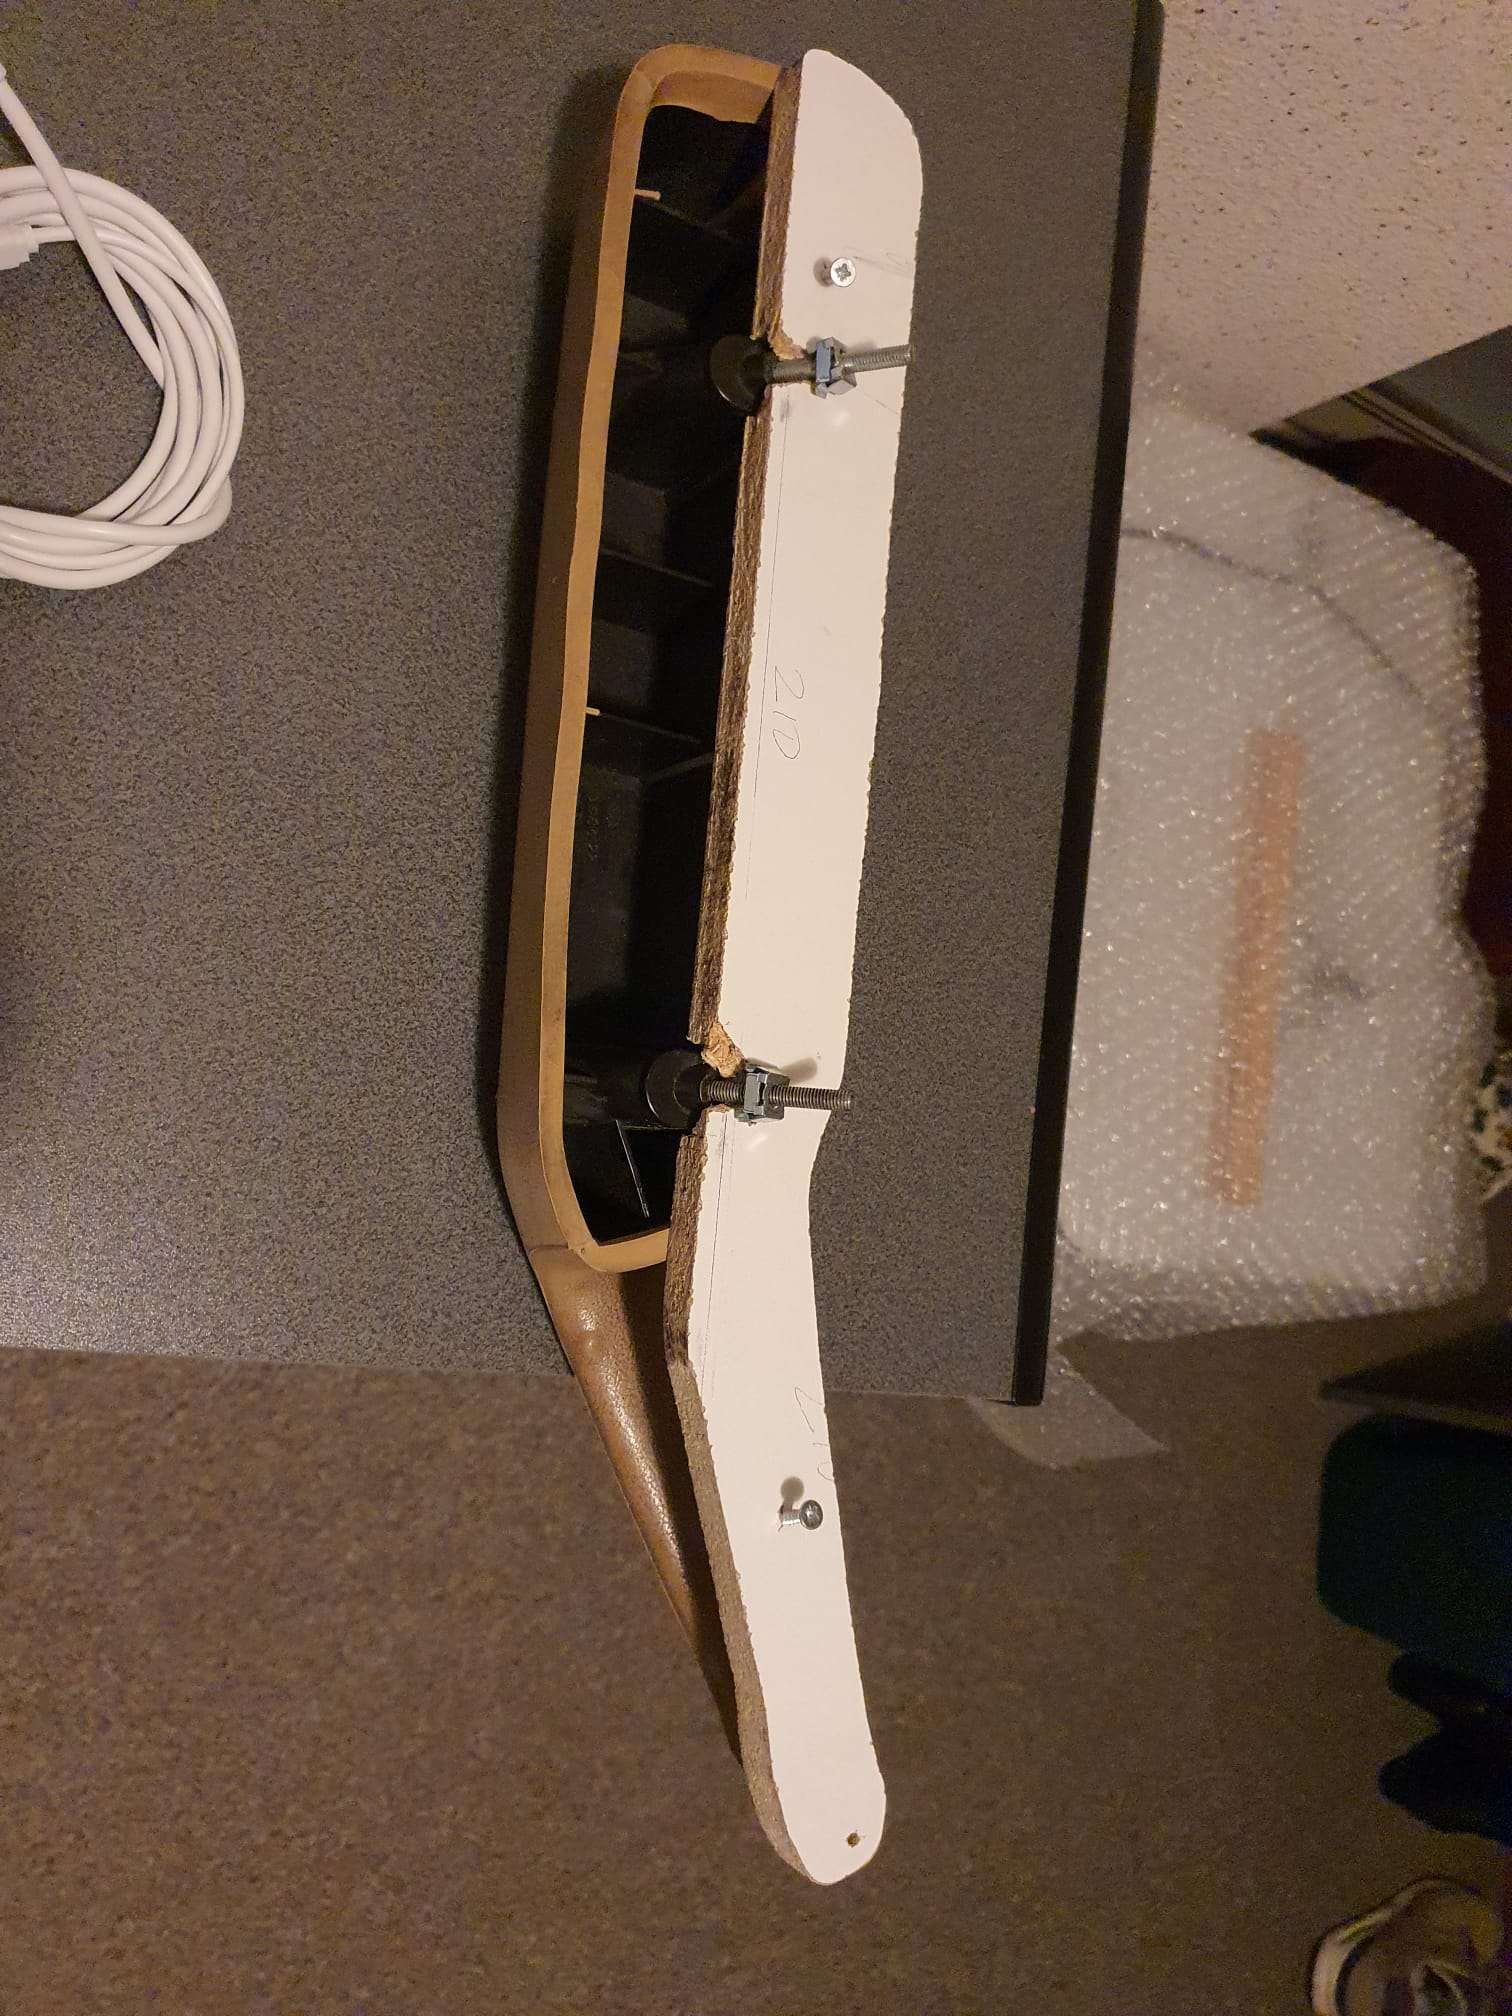
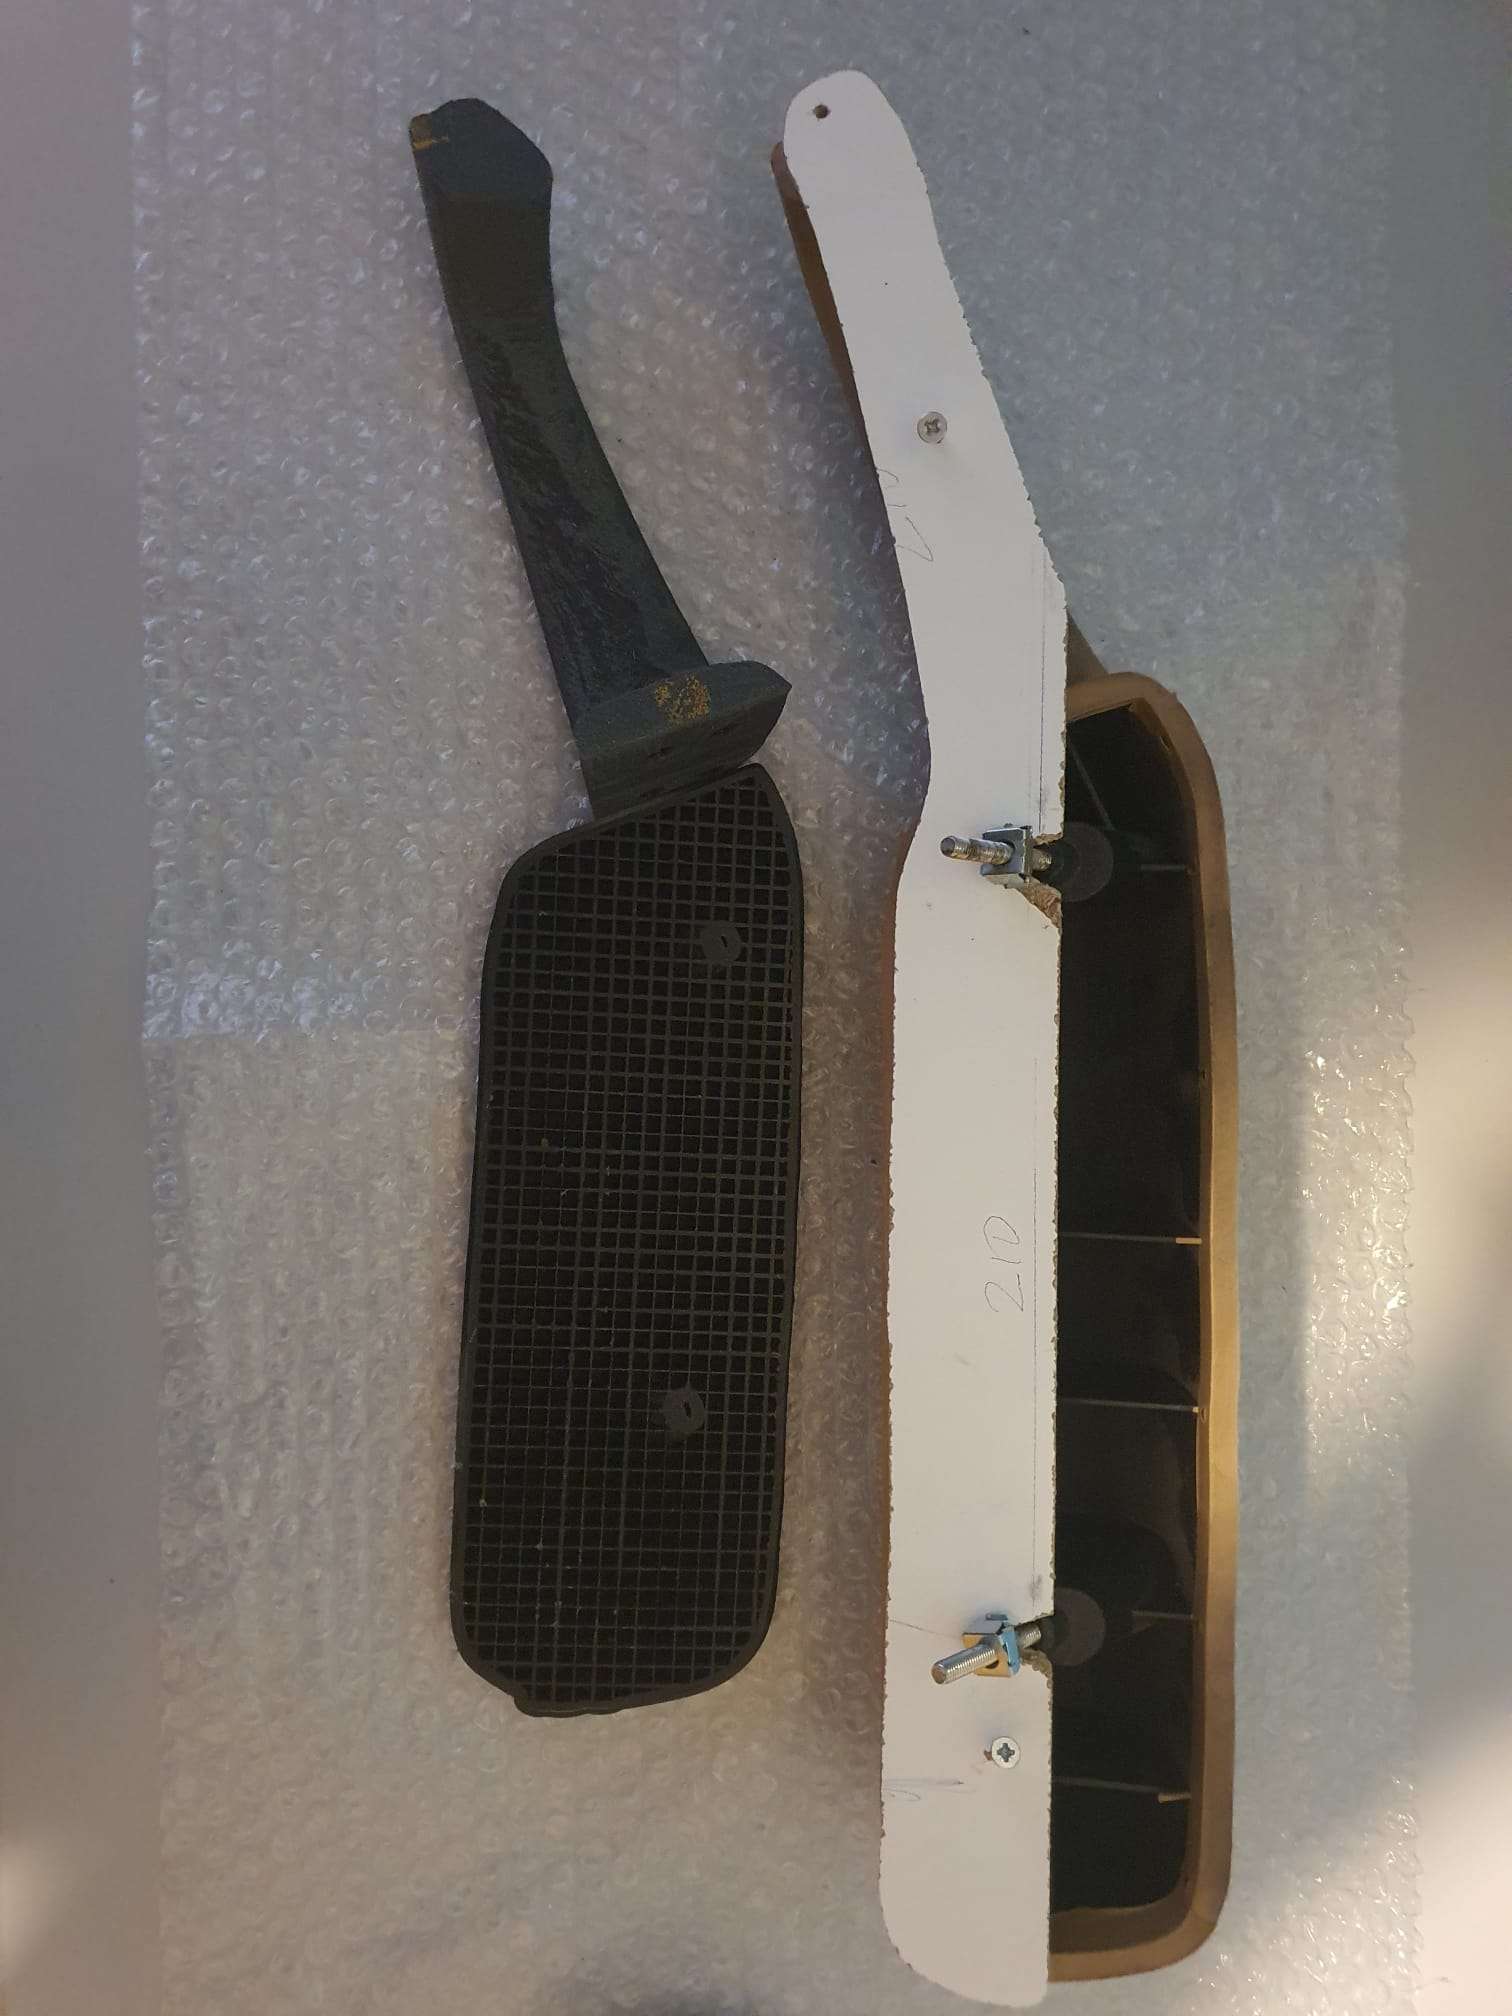
The final result of the two 3dprinted parts joined on the right hand doorAnd the part for the LEFT door of the carFor proper scanning, I had to fixate the front of the armrest.
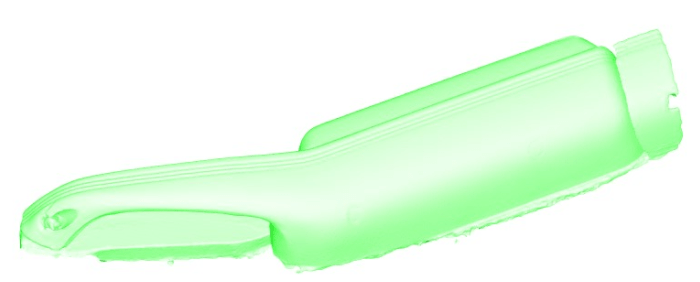
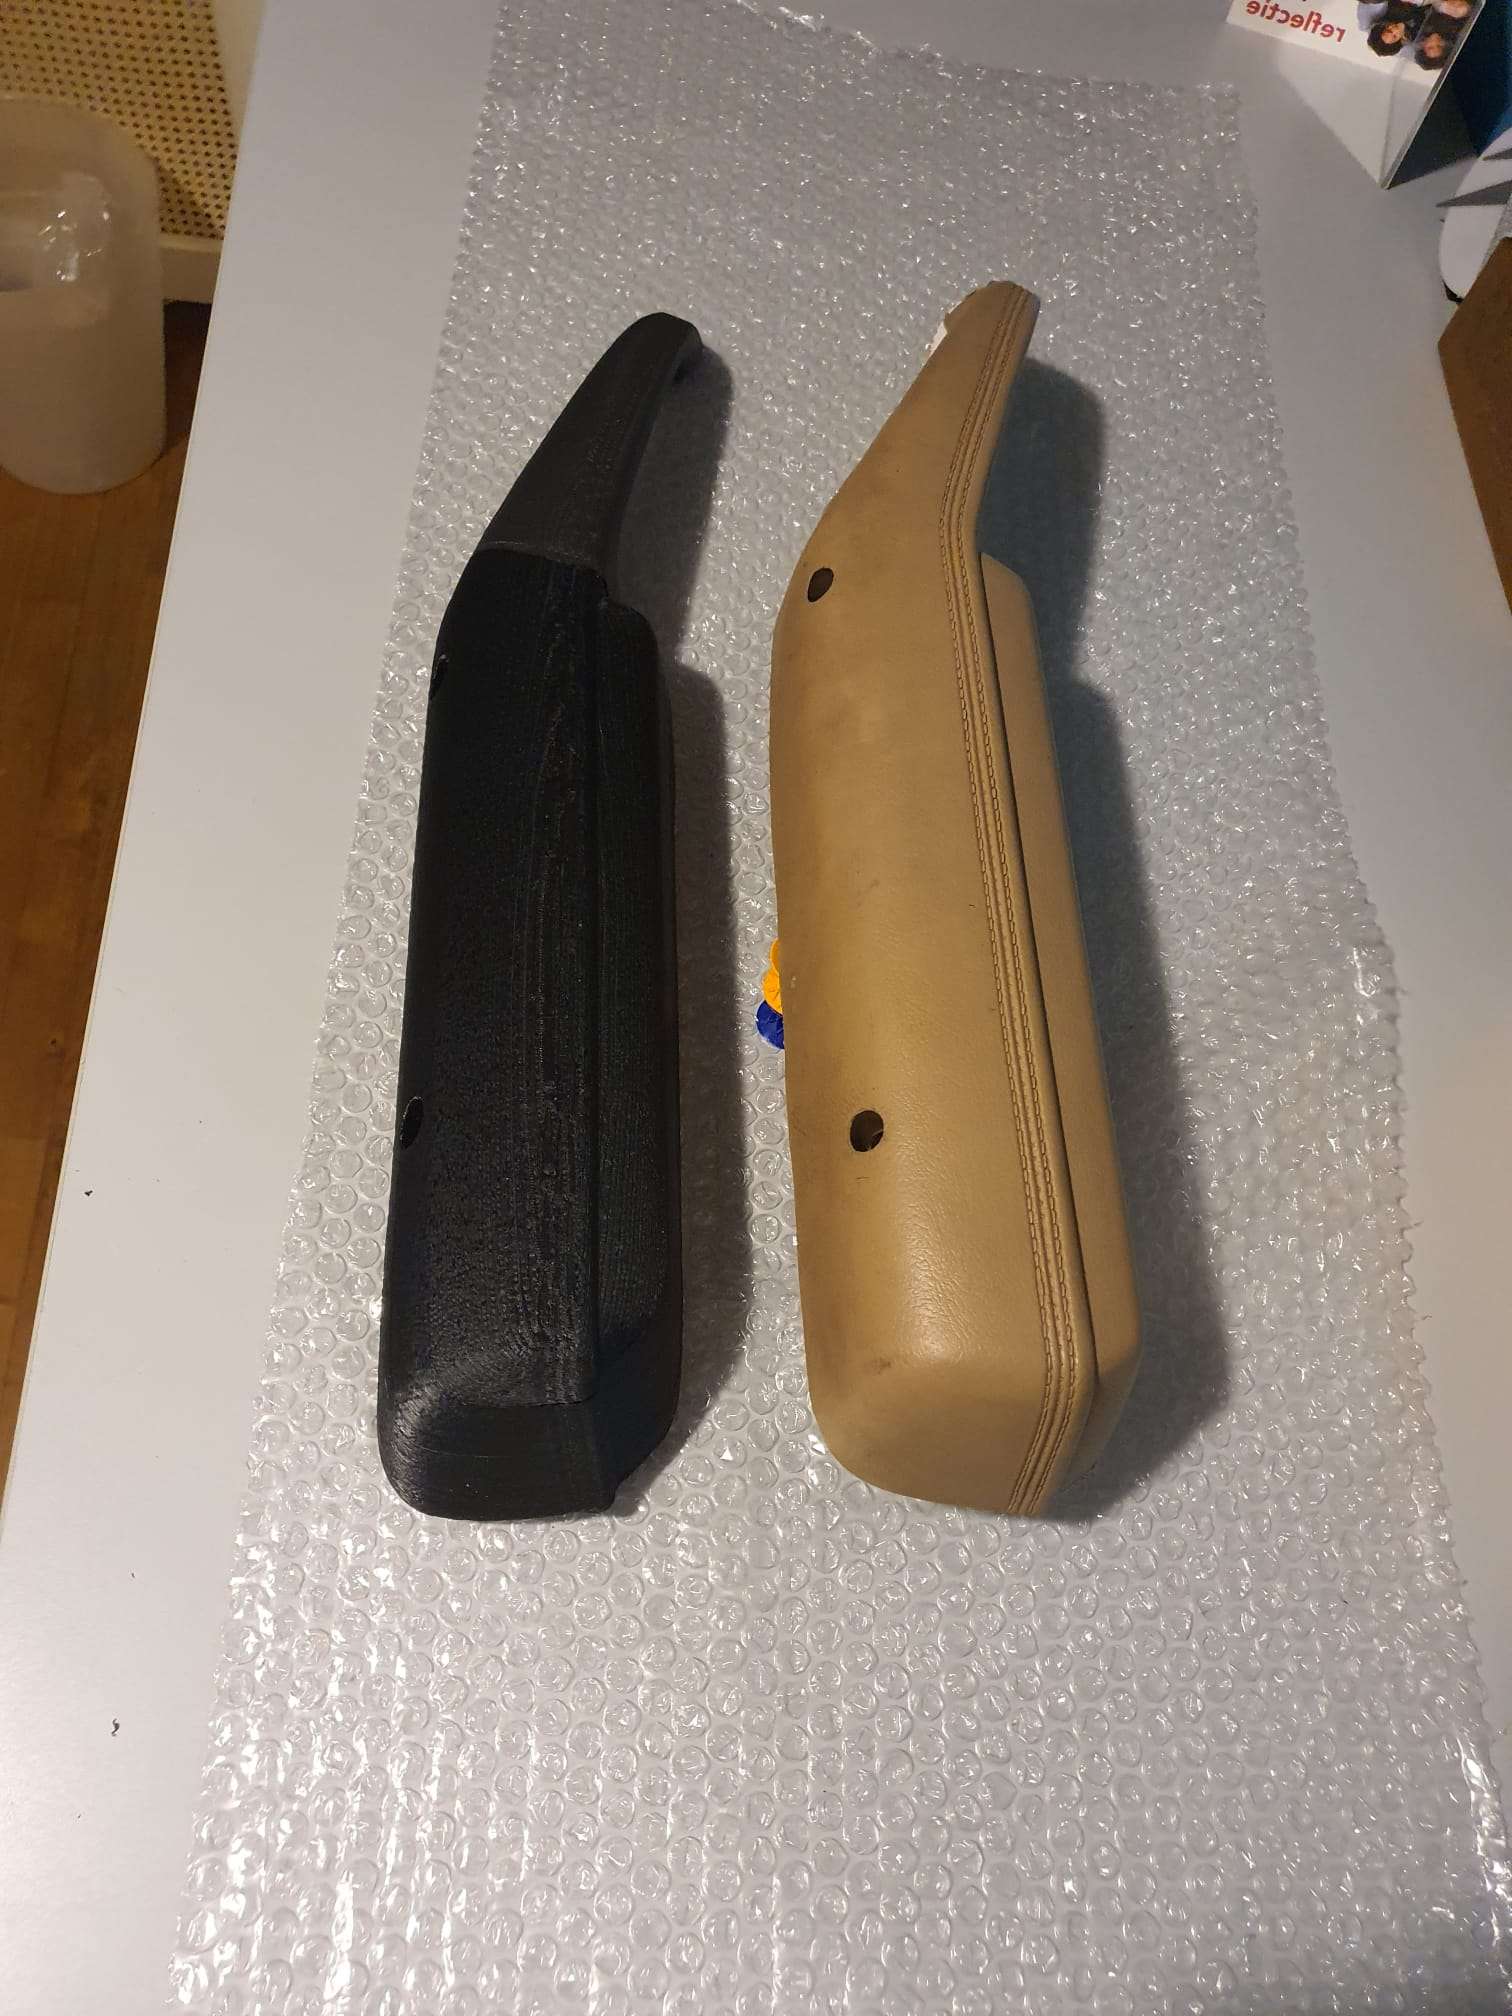
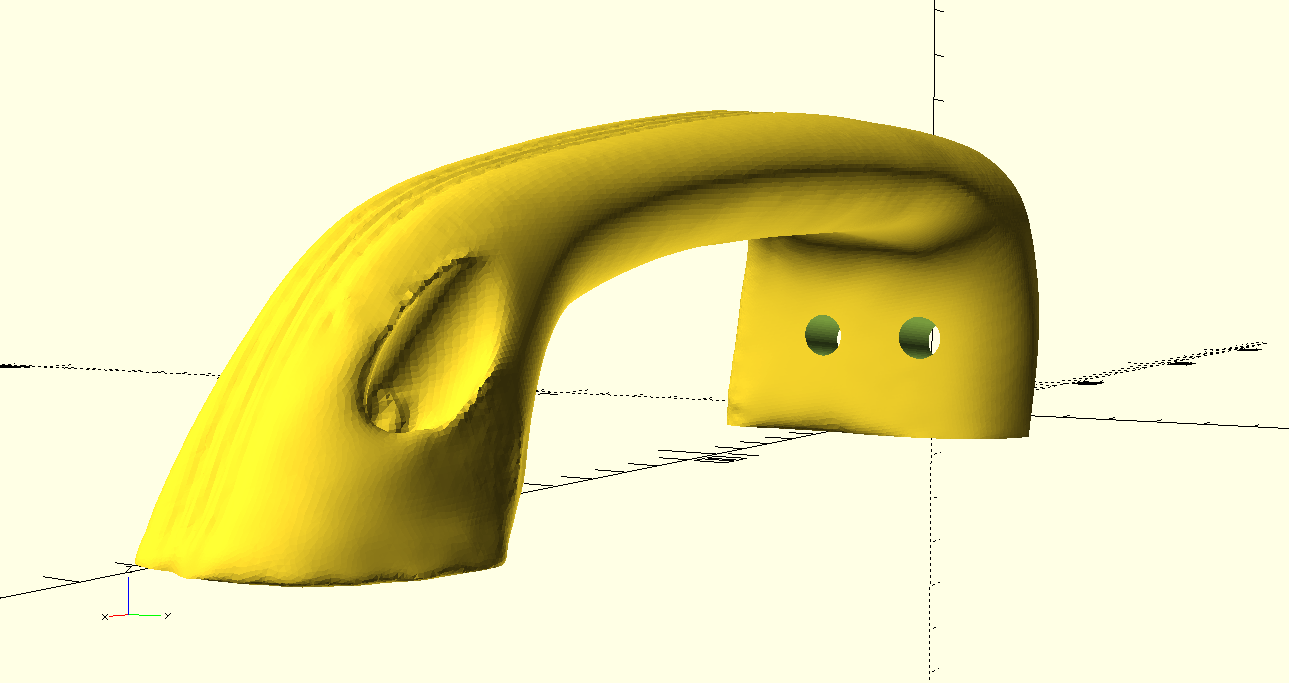
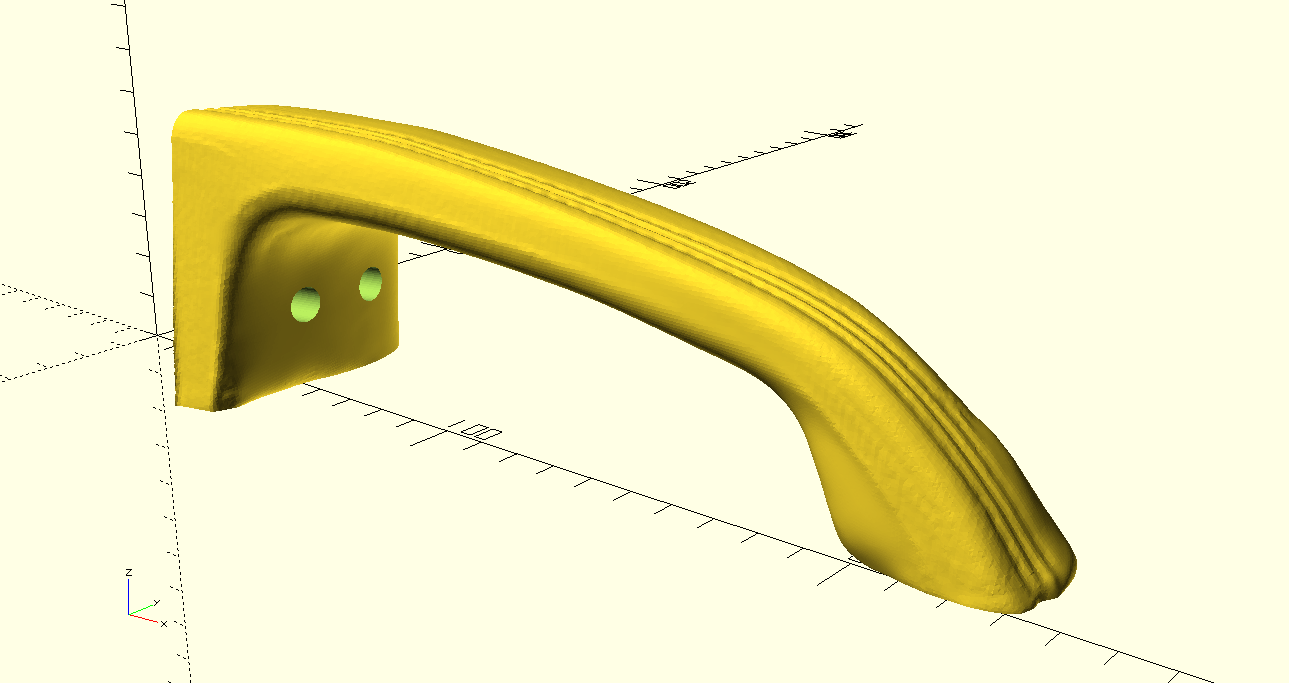
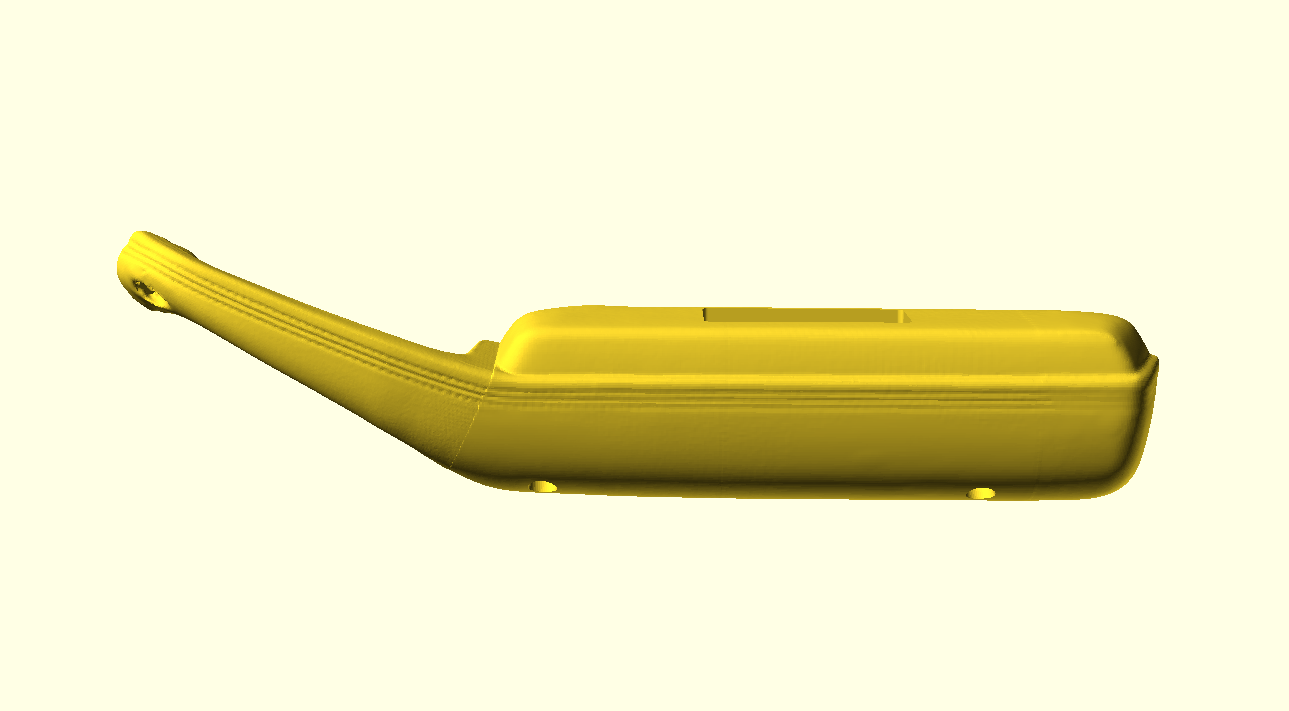
Scanning did produce a nice textured 3d mesh of the armrest BUT the scan proved to be inadequate when we mesured the length of the scan. This was 8.5 cm (more than 3 inch) shorter than the original armrest.
Above shows an impression of the scan that I made with the Creality lizard 3d scanner. After many retries this was the best I could get. It took a lot of rework to get it to a 100% match with the original armrest. The armrest is actually too large to be scanned with the Lizard’s rotating platform so it had to be done manually.In the above picture the diverted length is clear, left is the print of the scan (after rework to get rid of all debri).
Also, the mounting holes were only visible as small round indents in the hull and due to the length decrease they were not at the correct position.
And-another problem occured due to the broken plastic inside the connection between the armrest and the handle: It was very difficult to scan the original armrest with the plate attached. The plate was however very needed because the handle needs to be fixated to get it at the right position for proper results with scanning.
Plus, the mounting spot that is at the end of the handle was severily damaged and the scan obviously also reproduced this ugly spot. I reworked this with meshmixer.
Fixing the above and making the 3 mounting holes into the design with a Cad/Cam program (I used both meshmixer and Openscad to get everything done) proved to be very time-consuming.
All in all- I always do my time-keeping when I do specific work- it took around 72 hours of my PC time to get this all done, up until the workable version of the STL files that were OK to be printed.
For scanning I use my Creality lizard scanner on my gaming laptop with built-in RT3060 GPU.
For editing, I use my newest ACER XPS13 laptop with thunderbolt, connected to my Razor external thunderbolt RT3060 graphics box and an external hi-res monitor.
3D printing is the next step that is very time consuming, but thankfully I only need to start the prints up and afterwards get the prints off the machines.
I made about 6 versions of both the designs and the printed parts before everything was OK.
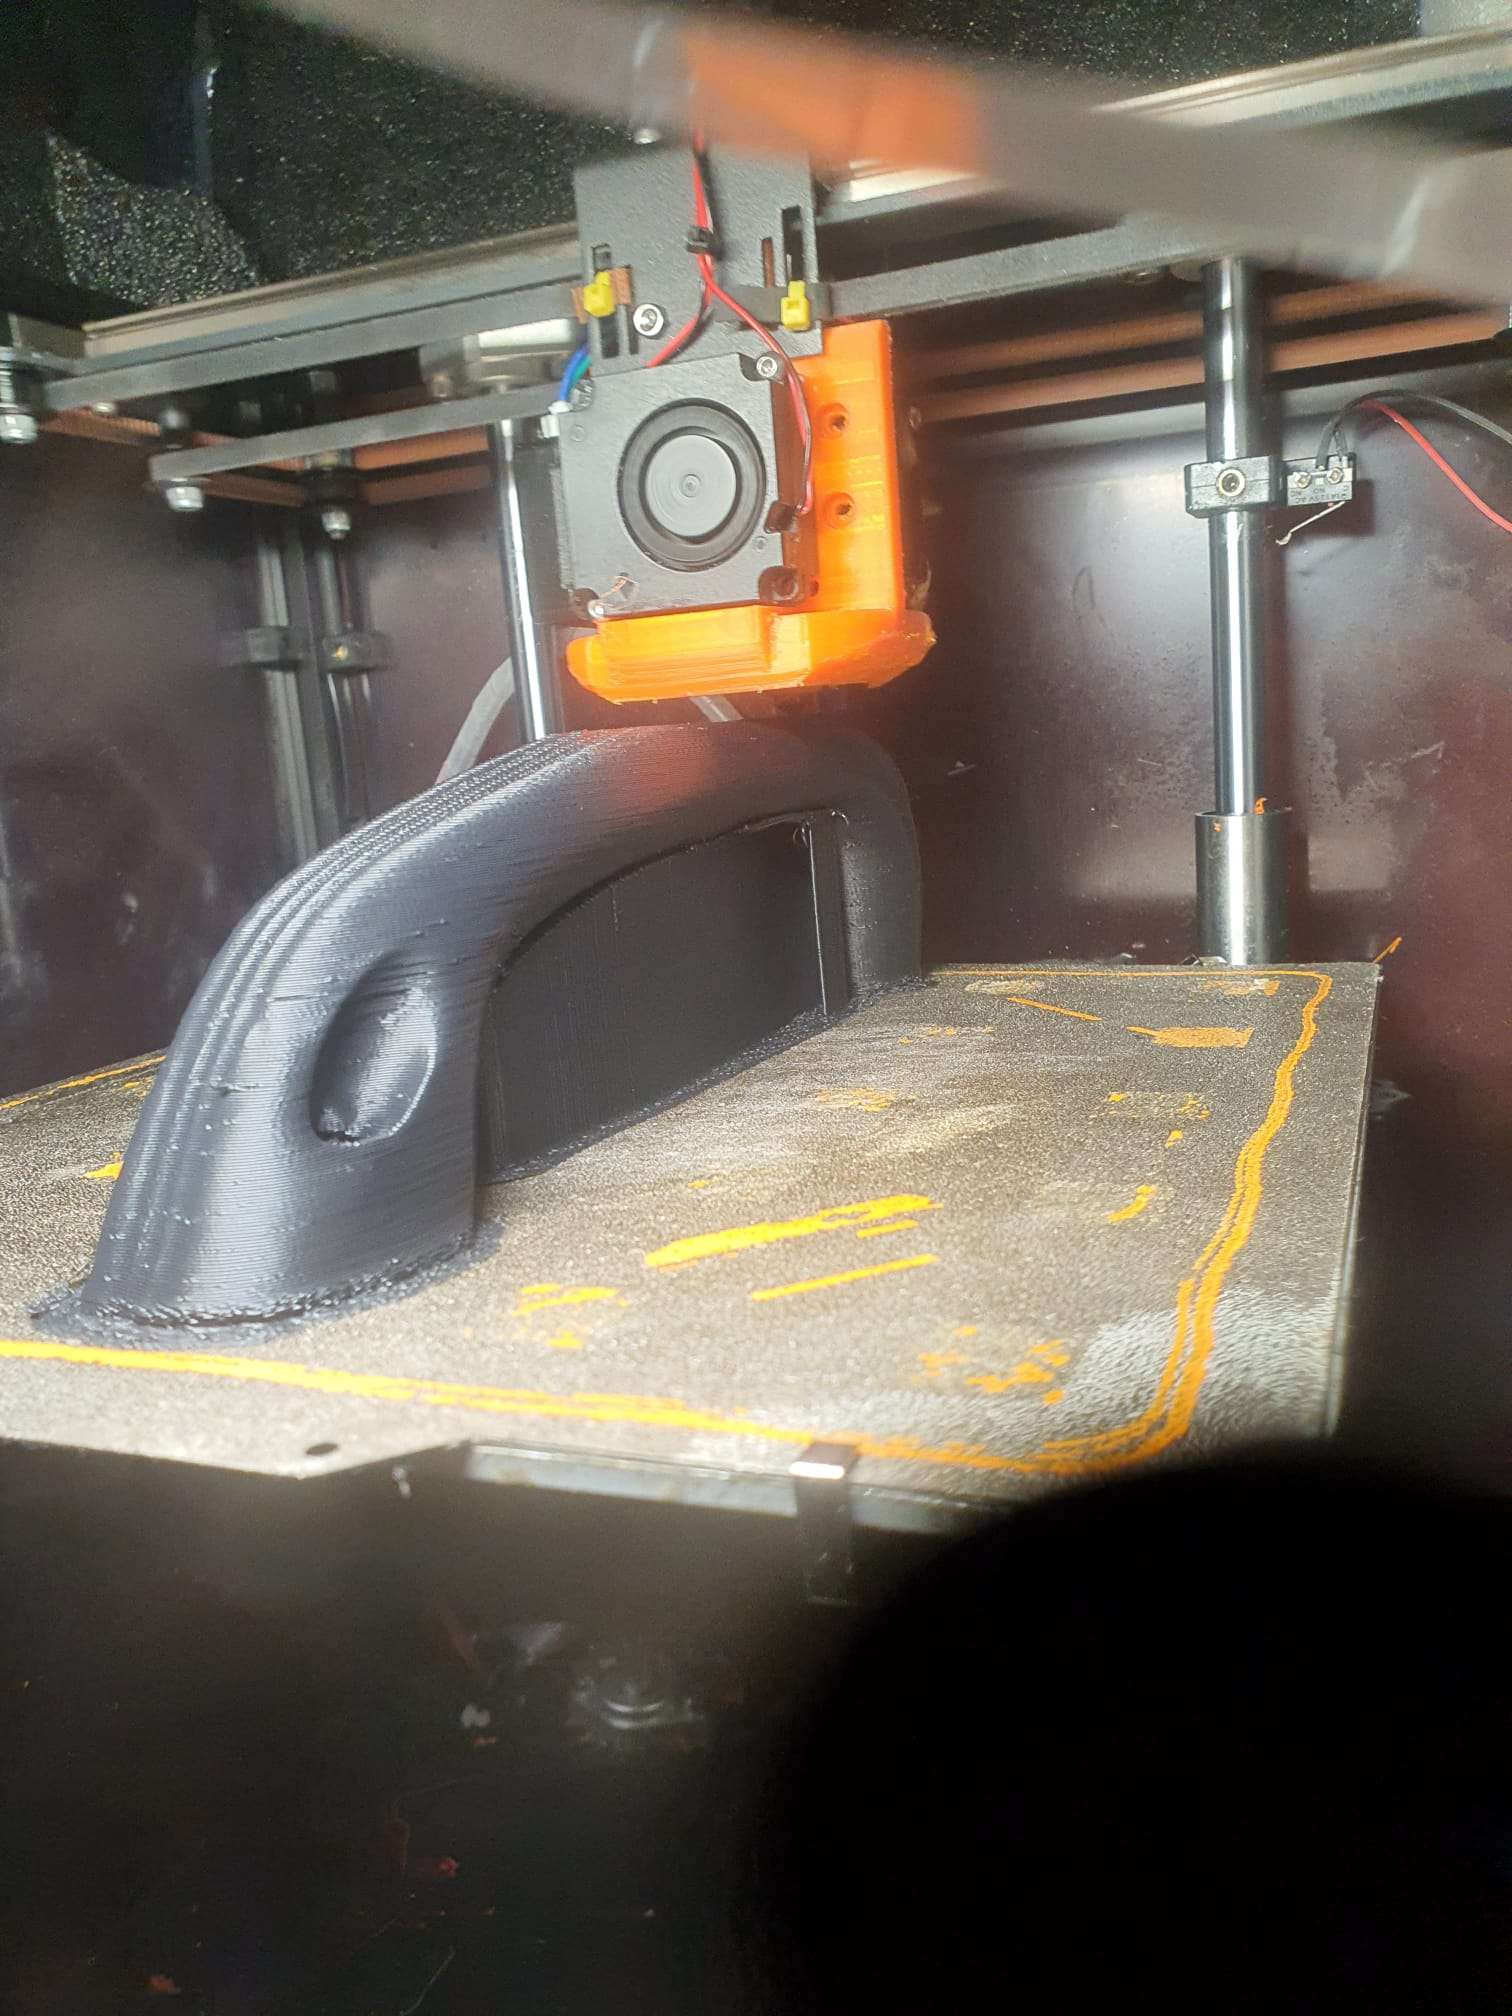
The handle prints in around 6 hours on my twotrees sapphire pro at 100mm/s, 0.3 mm layer height with hi-temp ASA filament (0,6mm nozzle and BIQU high temp direct drive hotend installed).
The large armrest 387 mm long part prints in 20 hours at 0.3 mm layer height, ASA high-temp filament on my Voron 2.4 with a 0.5 mm nozzle.
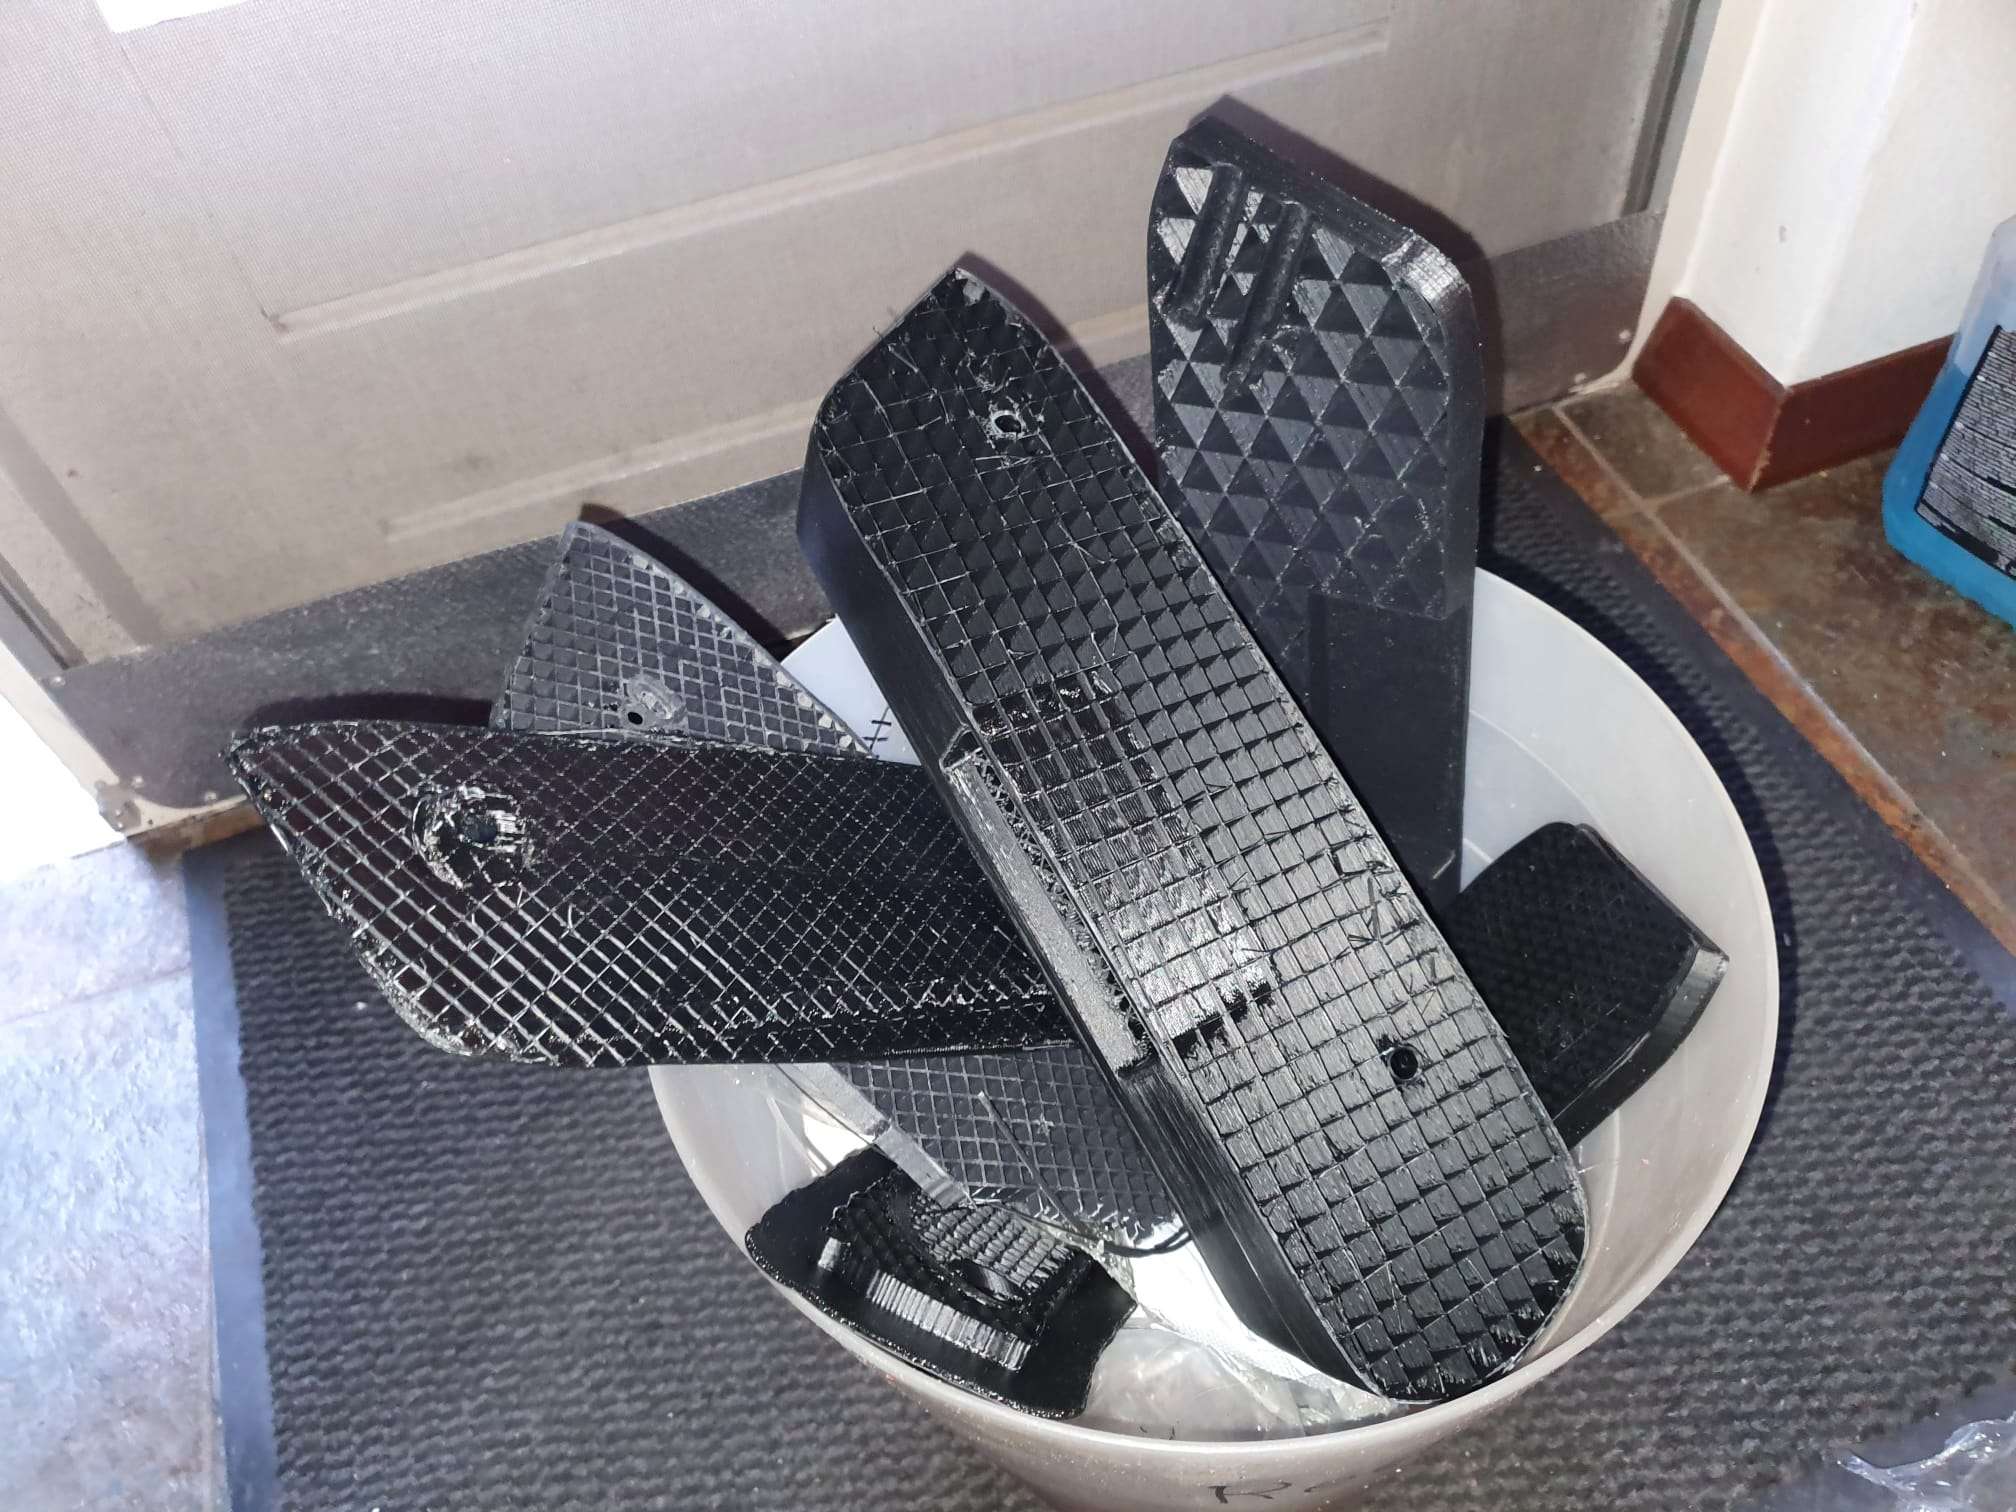
The results are shown below:
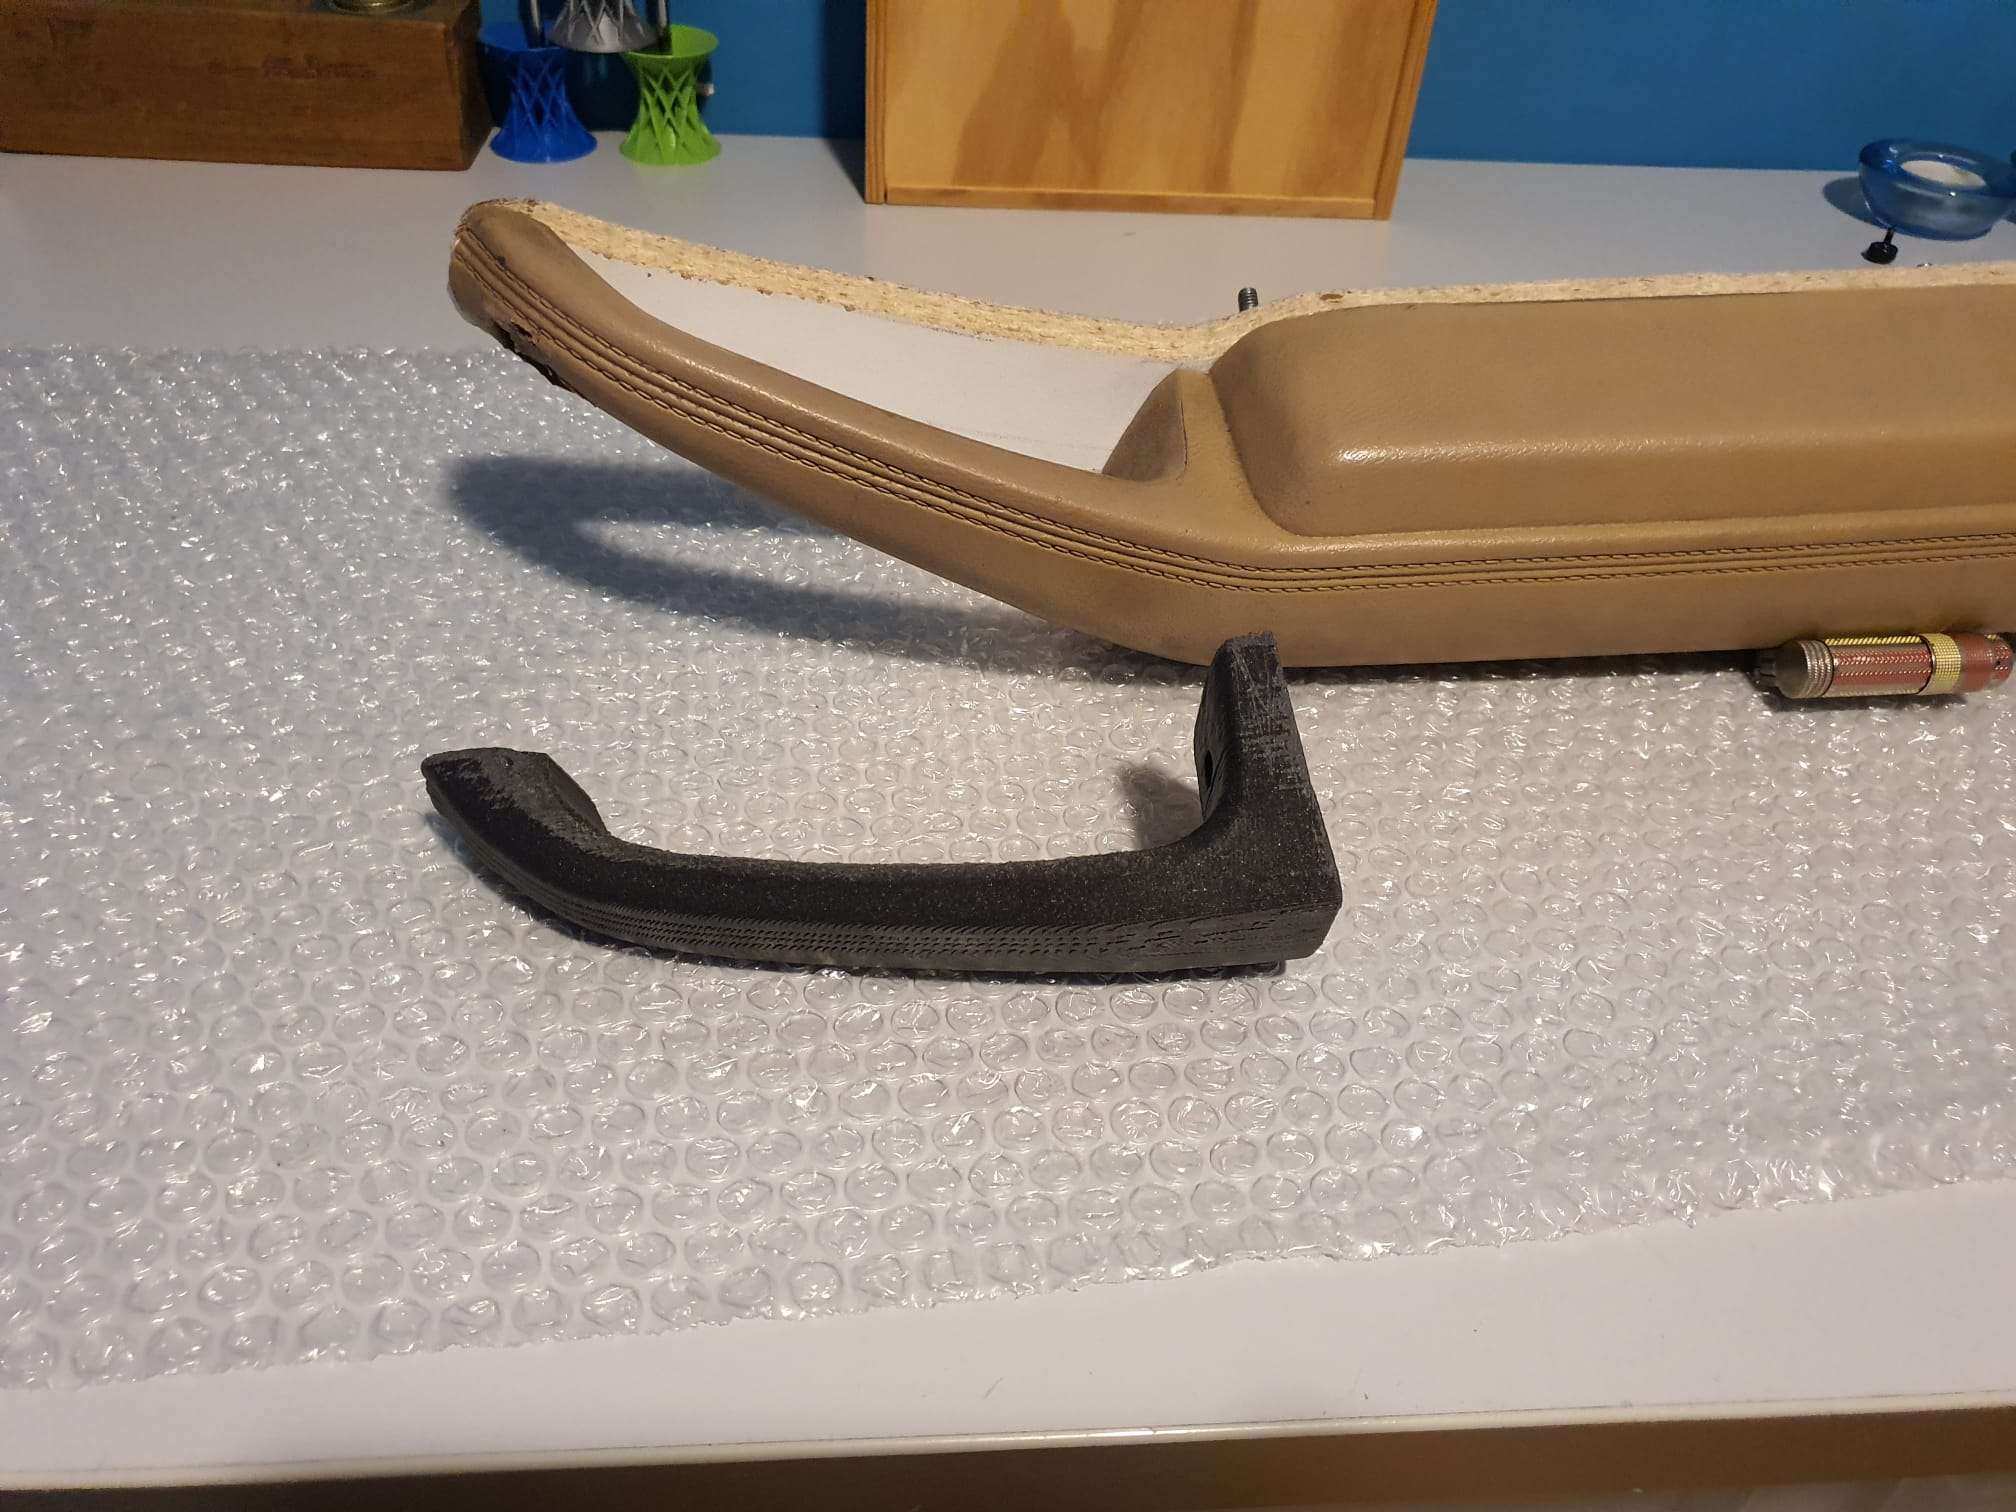
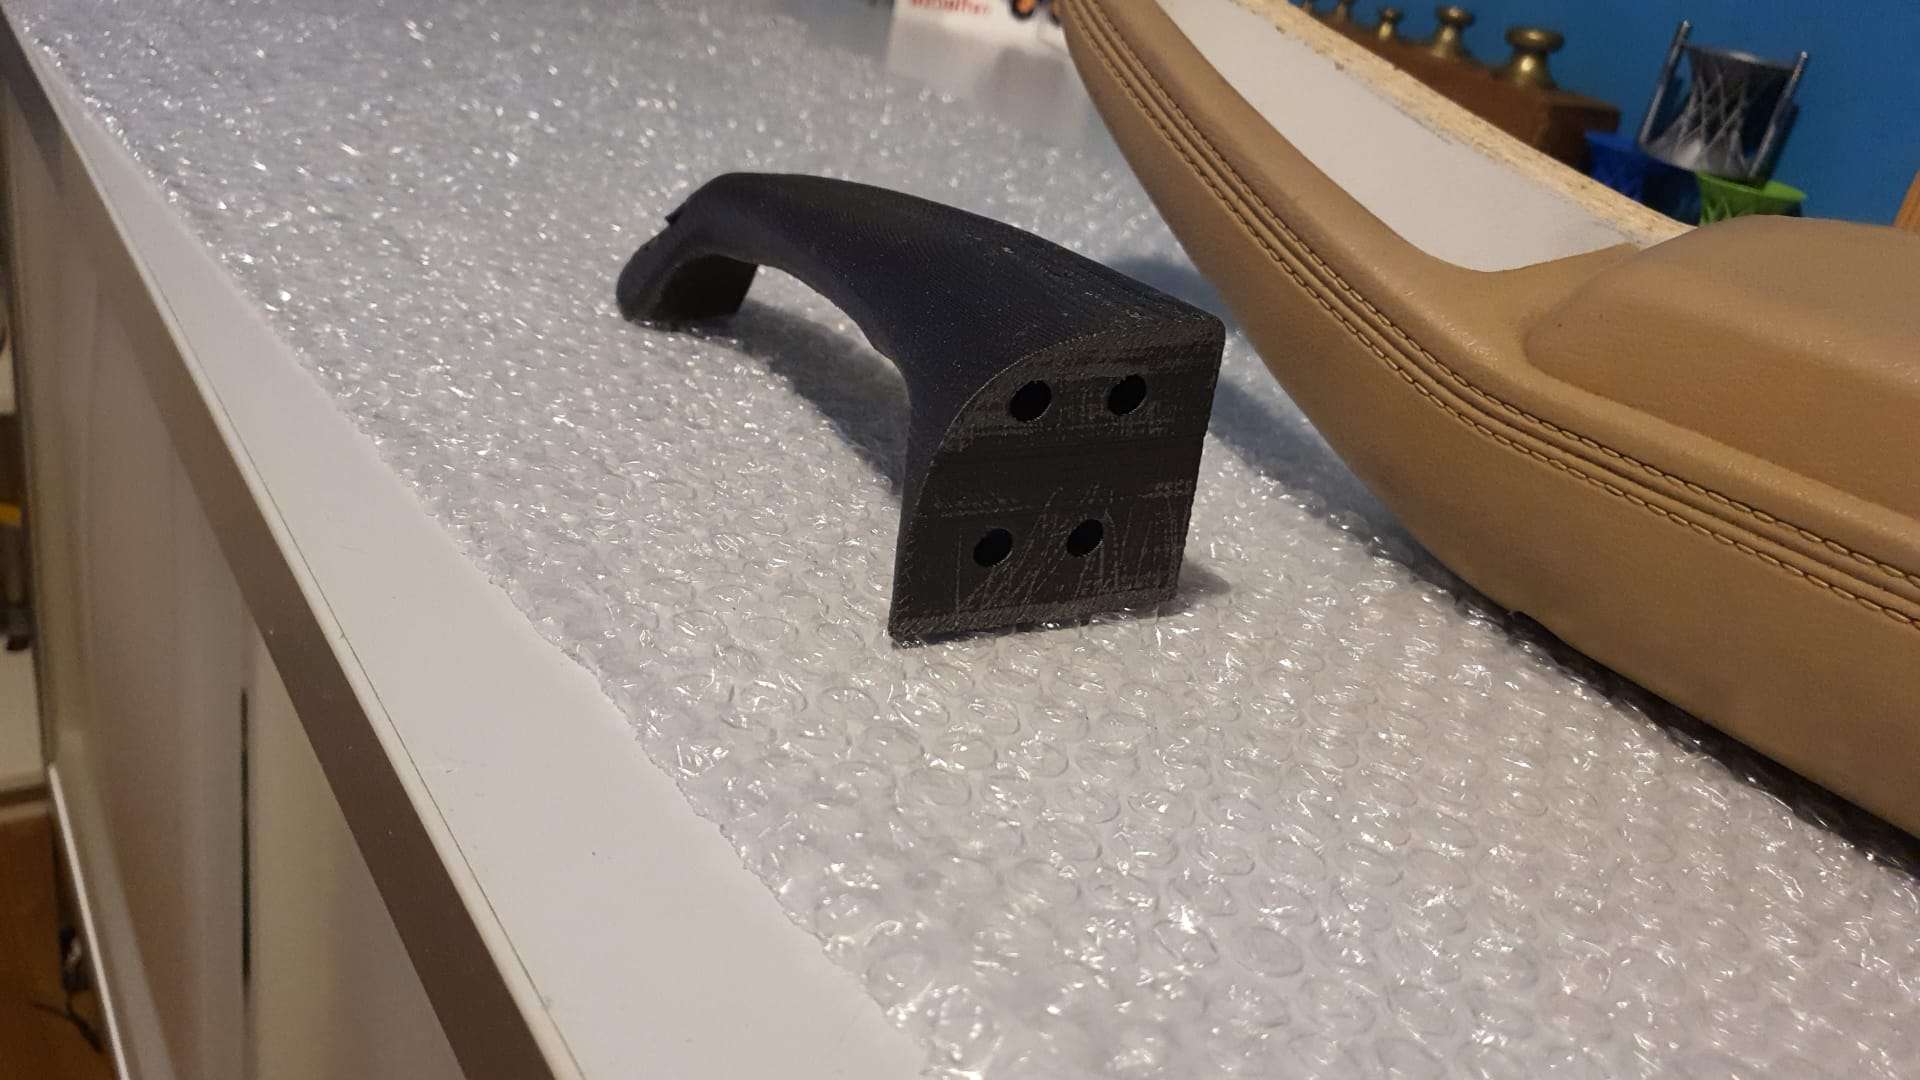
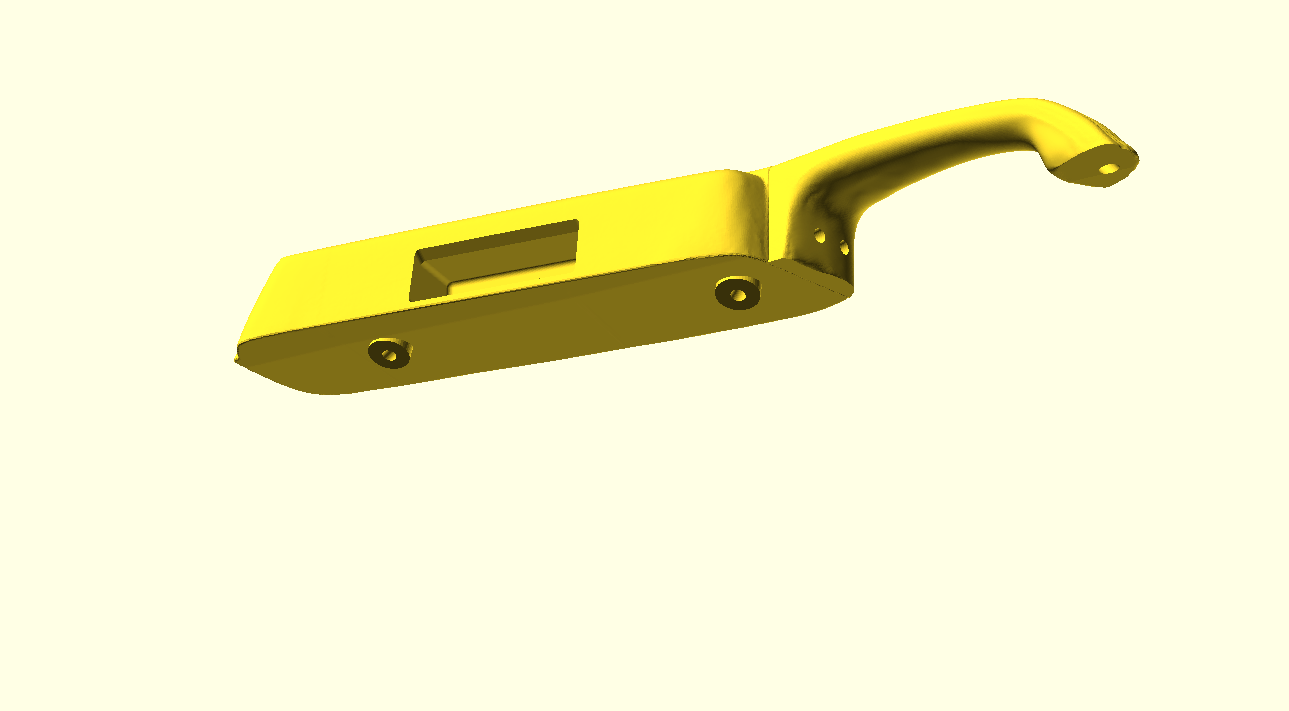
First compare of the 3d printed parts against the original.This is only the door handle, i.e. the front part that gets screwed onto the larger armrest part with 4 pieces 8mm screws
Above, the repaired mounting hole and its surroundings is shown. This was done with meshmixer.
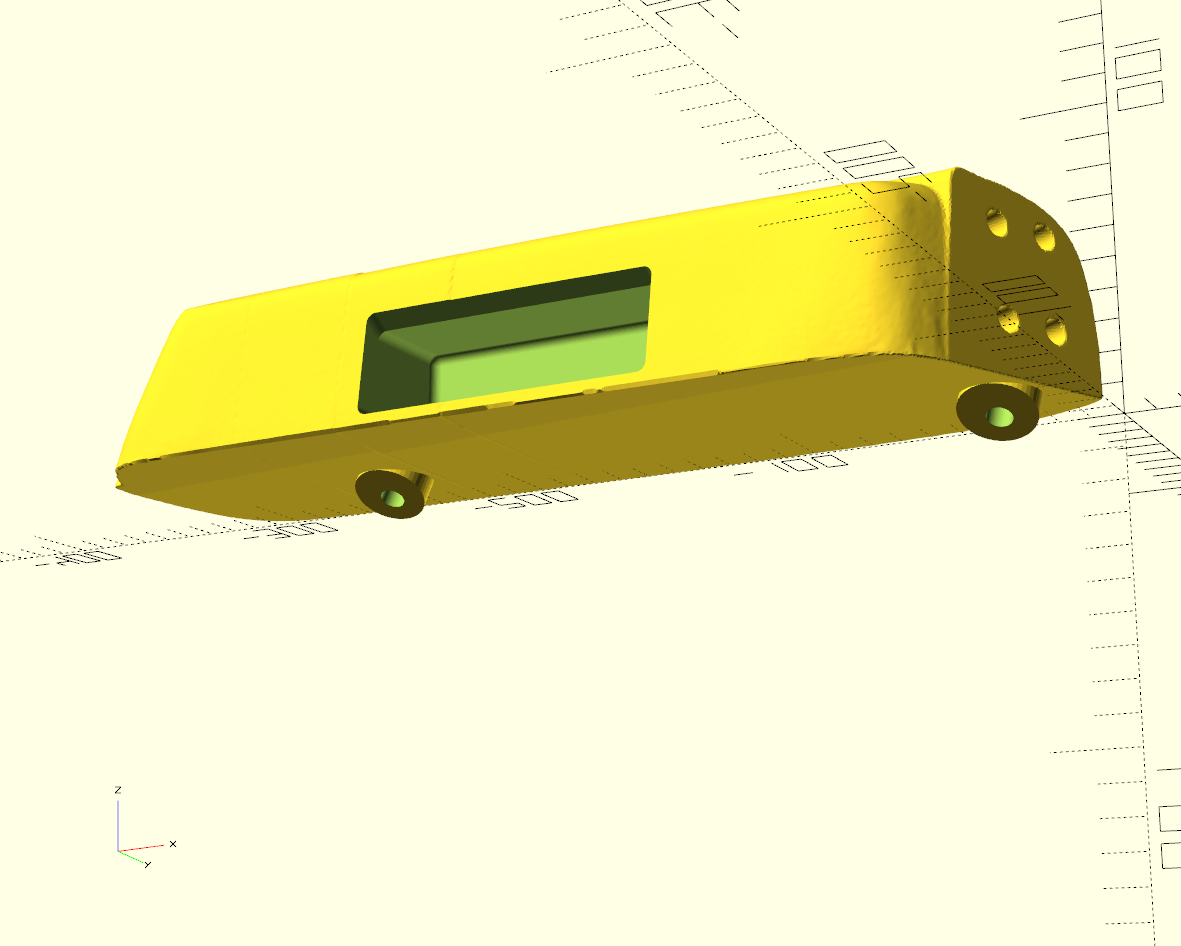
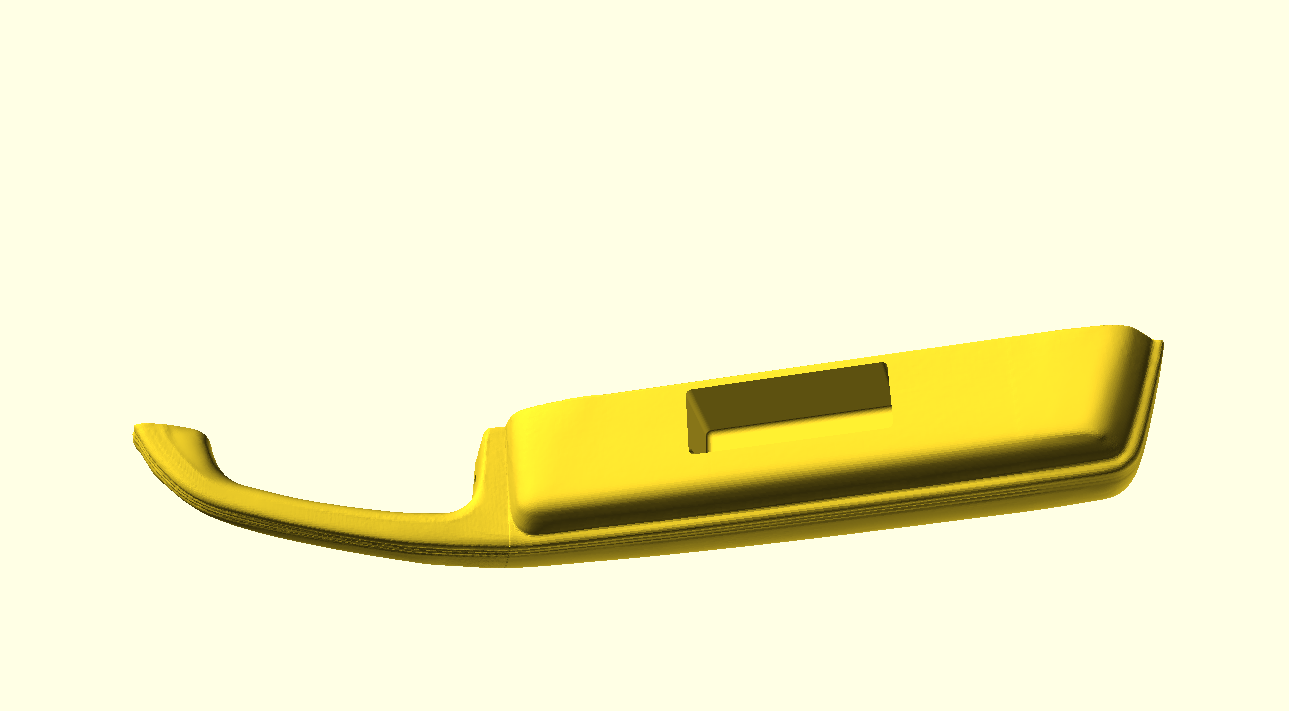
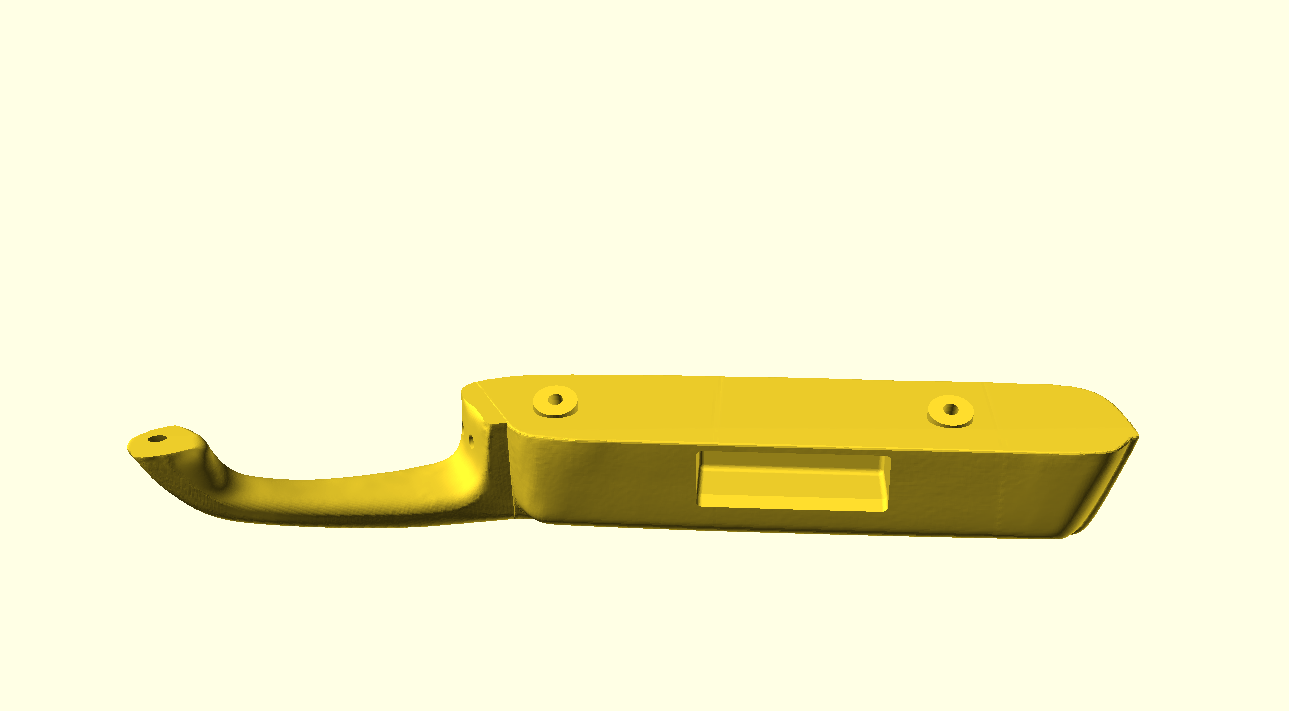
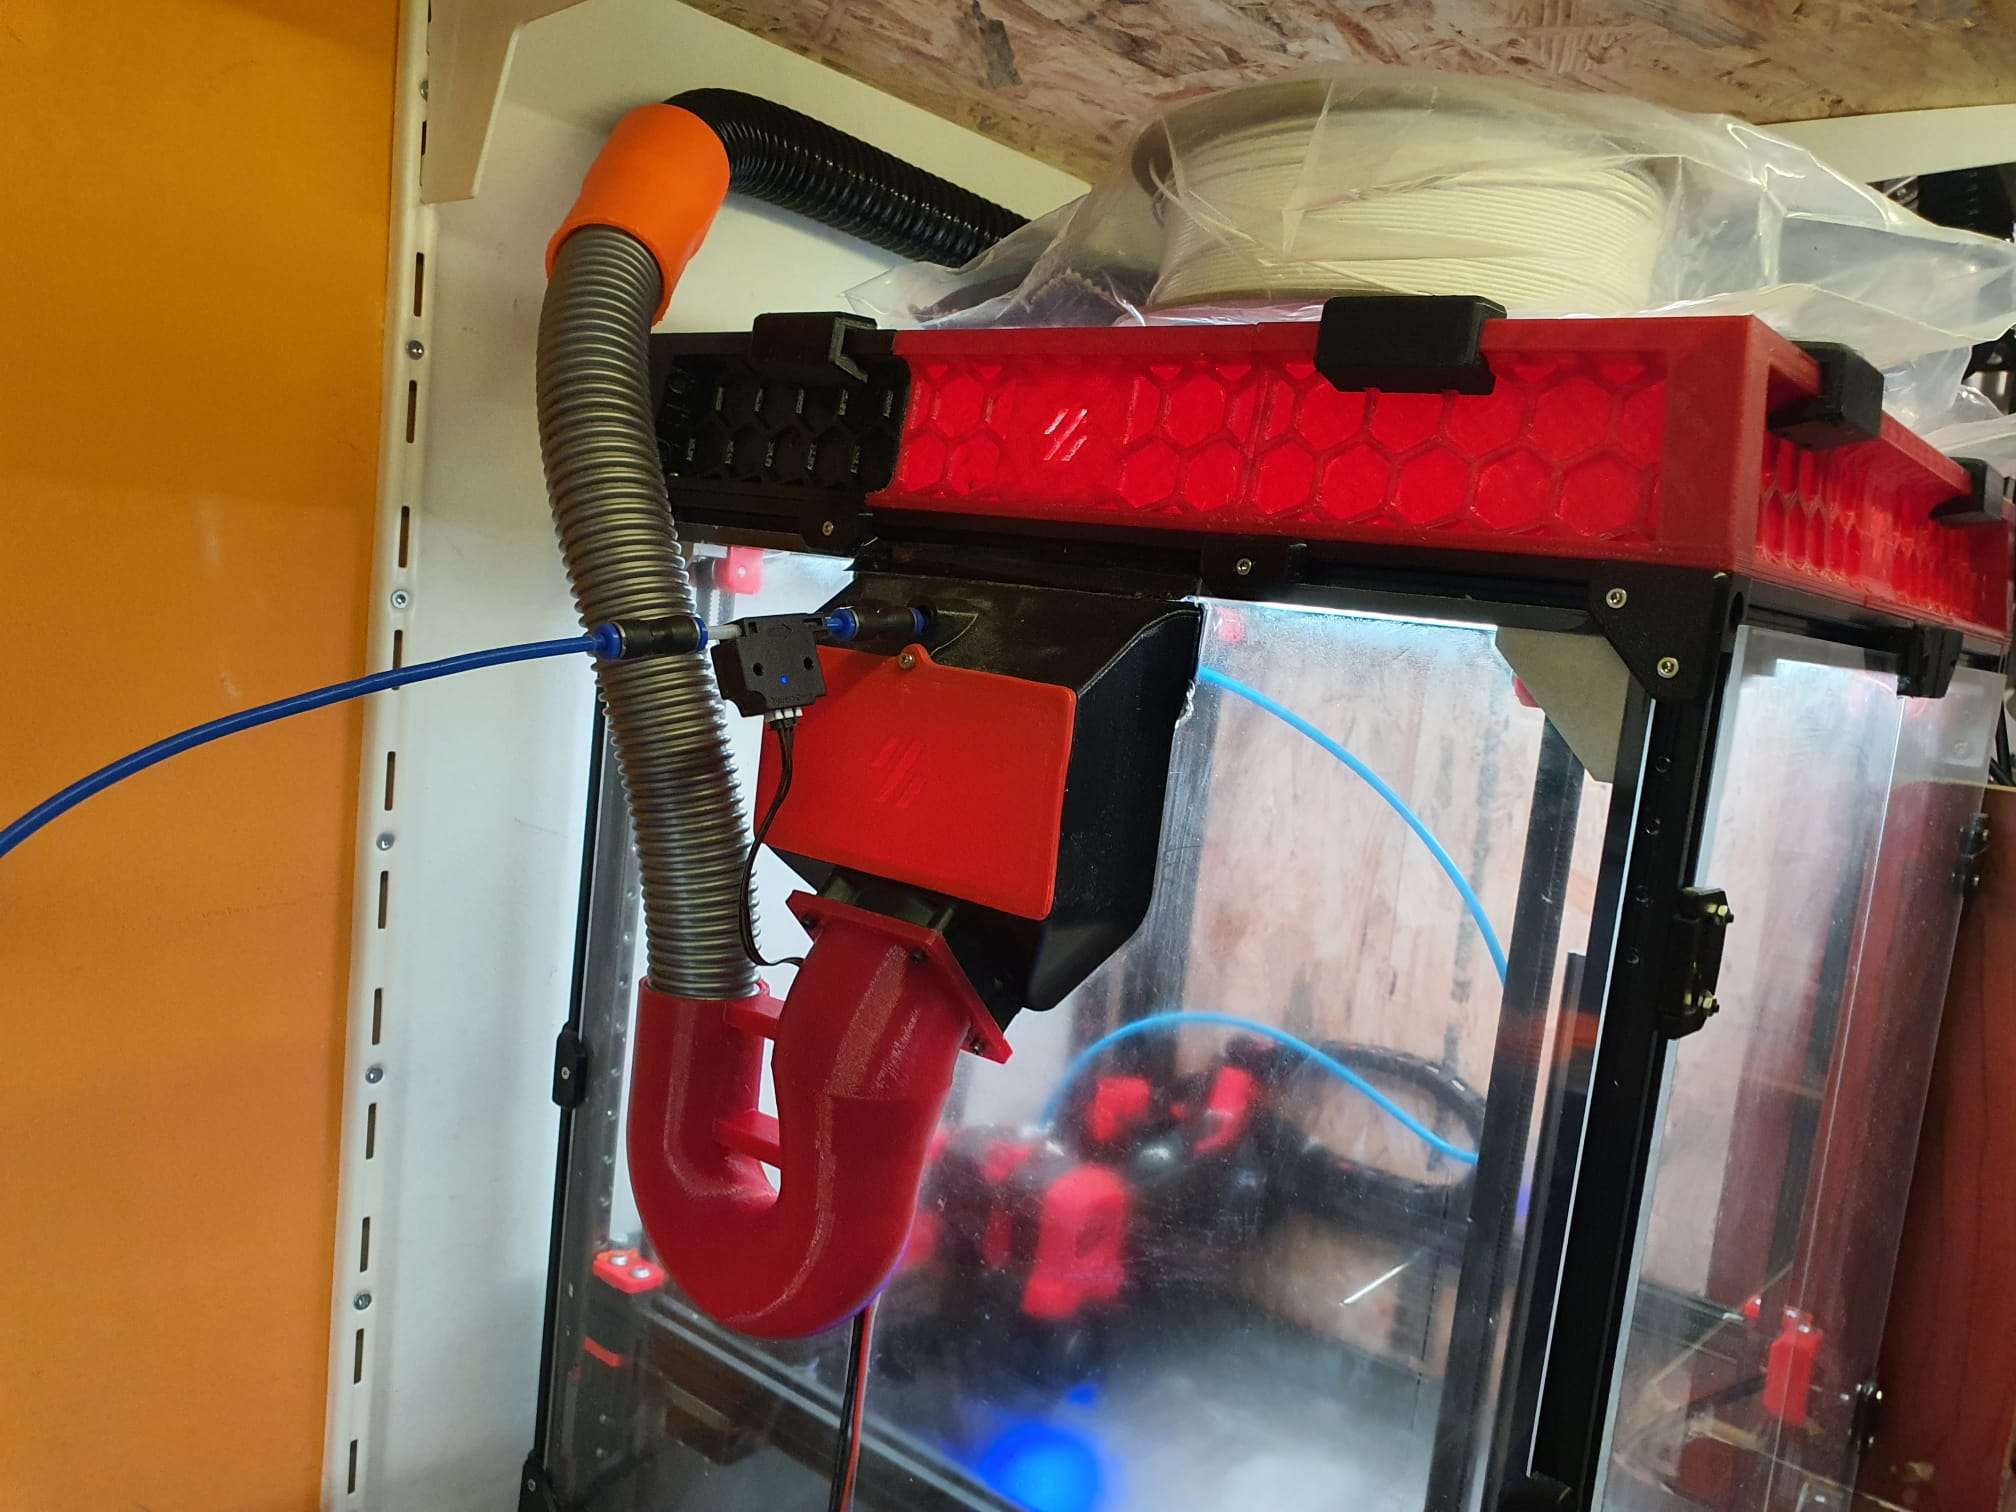
This design shows the added pocket that I made in the design of the armrest to close the door by using this grip without the need to use the front handleFinal version of the STL file that can be printed either as 1 part with a really large 3d printer or, as I did: print it in 2 parts and connect the parts with 4 pieces 8mm plugs
Ik bouw meestal mijn eigen 3d printers, voornamelijk op basis van bestaande ontwerpen.
De reden hiervoor is dat ik het gewoon leuker vind om zelf te bouwen dan kopen en gebruiken.
Ik had dus een reden om een printer te kopen die langere objecten kan printen dan 350 millimeter, waartoe ik nu beperkt ben.
Na wat onderzoek vond ik 4 echte alternatieven.
De eerste is de Creality CR-30:
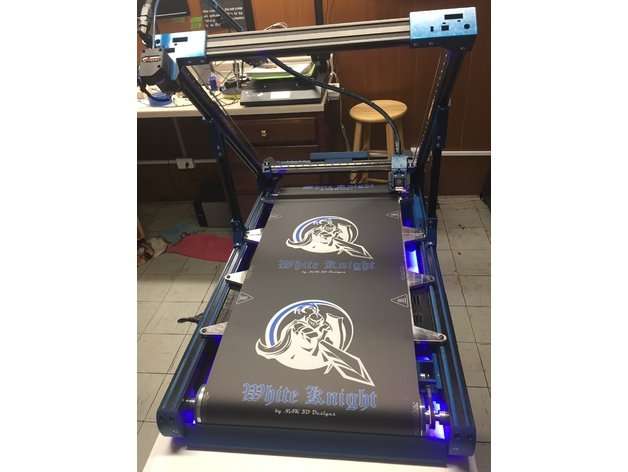
De tweede is een white knight (Zelfbouw/nabouw):
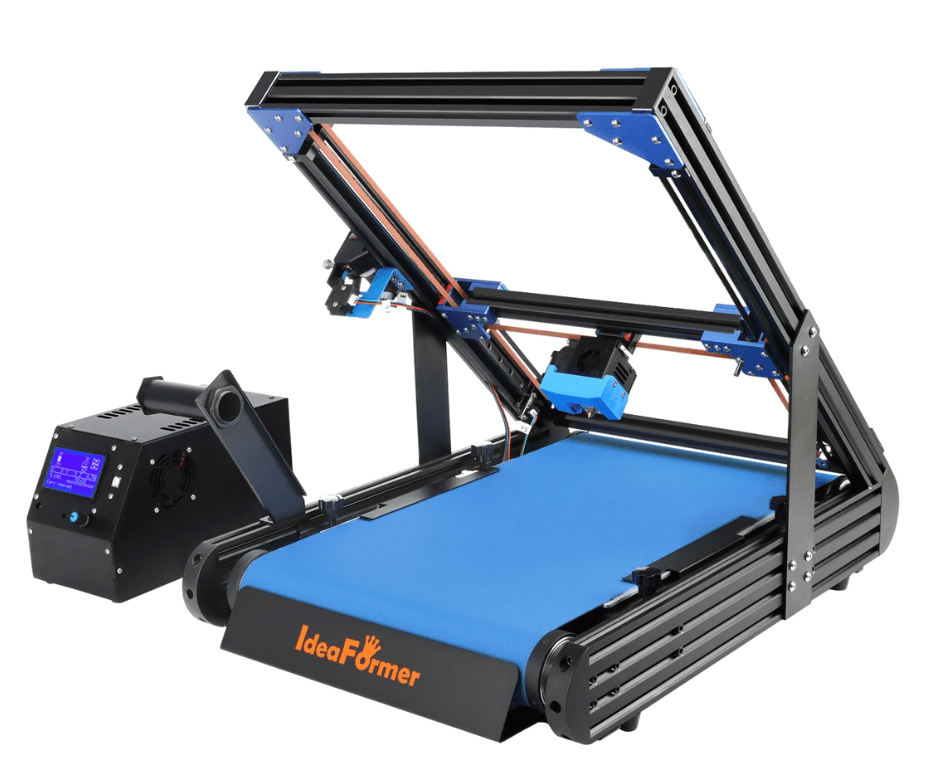
De derde is de Ideaformer IR3 V1:
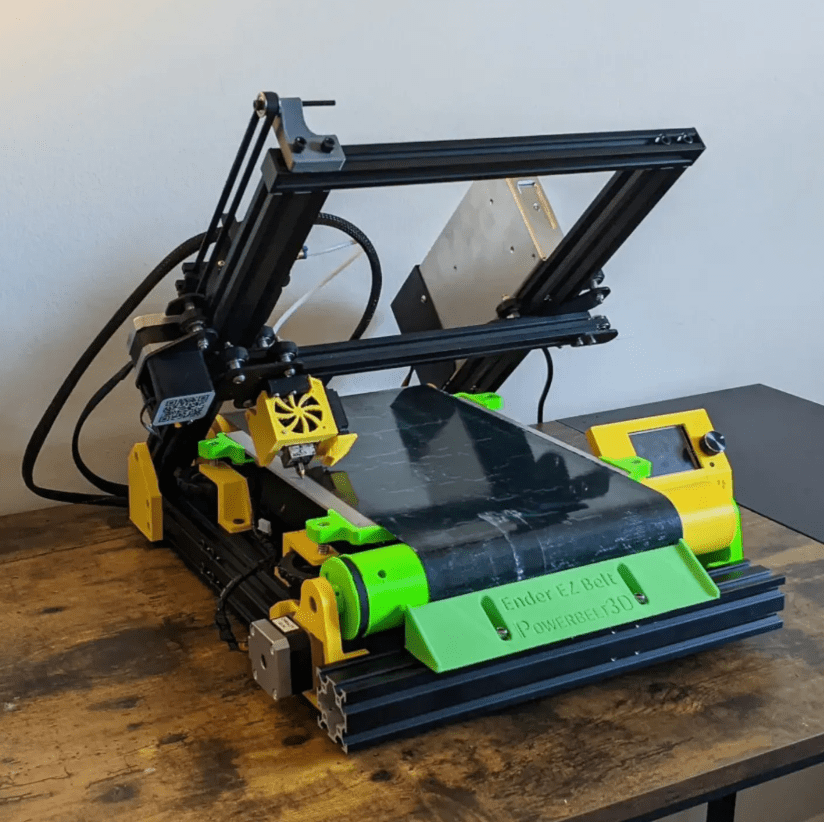
En de vierde is een ombouw van een bestaande eEnder-3, de EZ-belt ‘open source’ belt printer.
Mijn keuze is uiteindelijk op de Ideaformer gevallen vanwege de core XY structuur en de goede verkrijgbaarheid van het roterende bed, de ‘belt’.
Alle hardware zoals framedelen, X-as zijplaten, extruder, hotend, moederbord, steppers, tandwielen en -riemen, lagers, bouten en moeren heb ik voorradig..
Ik ga sowieso voor een Duet2wifi-board, omdat dit bij mij bekend is en ik de webinterface van de Duet erg prettig vind. Er zal een ESP32-camera worden toegevoegd en deze zal ook worden geïntegreerd in de webinterface van de Duet, net als bij mijn andere printers.
Aan te schaffen:
Ik zal een goede 24V PSU moeten aanschaffen, maar om te beginnen ga ik misschien voor een externe voeding van 24 Volt.
De riem en bijbehorende verwarming zijn ook al binnen via Ali, ik heb dus gekozen voor een Ideaformer riem, 320mm breed, 1,3 mm dik en een omtrek van 1180mm. Zoals ik heb gemeten is de lengte van het bed ca. 56 cm , afhankelijk van de dikte van de transportrollen. Bij de ideaformer zijn die rollen 3 inch dik, en van aluminium.
All of the hardware like frame parts, extruder, hotend, motherboard, steppers, teethed wheels and -belts, bearings, nuts and bolts are available.
I will go with a Duet2wifi board, since this is known to me and I like the Duet’s web interface a lot. An ESP32 camera will be added to the build and this will also be integrated into the Duet’s Web interface, as with all my other printers.
TO BE SOURCED:
I will need to source a good 24V PSU but I may go with an external one for this build, to start with.
The belt and corresponding heated bed have veen ordered from Ali, I chose an Ideaformer belt , 320mm wide, 1.3 mm thick and a perimeter of 1180mm.
Eerst de linker helft van de hobbykamer helemaal leeggehaald, daarna de F-rails aan de muur gemaakt. Vervolgens de vooraf op maat gezaagde ODF platen van 244×61 cm geplaatst. Daarna alles weer opnieuw ingedeeld.
Uiteindelijk heb ik alleen de 9 meest gebruikte 3d-printers geïnstalleerd, de rest heb ik voorlopig even opgeslagen. In de praktijk gebruik ik mijn delta printers nooit voor productiewerk en de KP3 printer is ook nooit meer voor productiewerk in gebruik sinds ik voor het serieuze productiewerk ook mijn 2 Prusa mini + printers heb.
Voor de CNC- en laser graveer machines heb ik nog geen vast plekje vrij kunnen krijgen. Maar eigenlijk wil ik dat soort equipment sowieso niet binnen gebruiken. Daarom staan de grote CO2-lasercutter en de 2 groteCNC machines al in de garage. Als er werk voor is kan ik altijd de kleine CNC machine en de kleine laser graveermachines tijdelijk in de garage plaatsen.
Ook het werkplekje in de hobbykamer voor het raam is opnieuw gemaakt, en de rechterkant van de kamer is helemaal gelijkvormig gemaakt met 3 stellingrekken naast elkaar en F-rails met dragers en 40cm diepe platen ODF daarboven.
Nu kan ik lekker overzichtelijk werken. De 3d printspullen staan allemaal links en aan de rechterkant heb ik nu alle computer-gerelateerde zaken staan.
Ik ben nog op zoek naar Eurobakken van L60xB40xH20 voor een redelijke prijs, zodat ik zowel de 60cm diepe als de 40cm diepe ODF platen helemaal kan benutten en alles netjes kan sorteren.


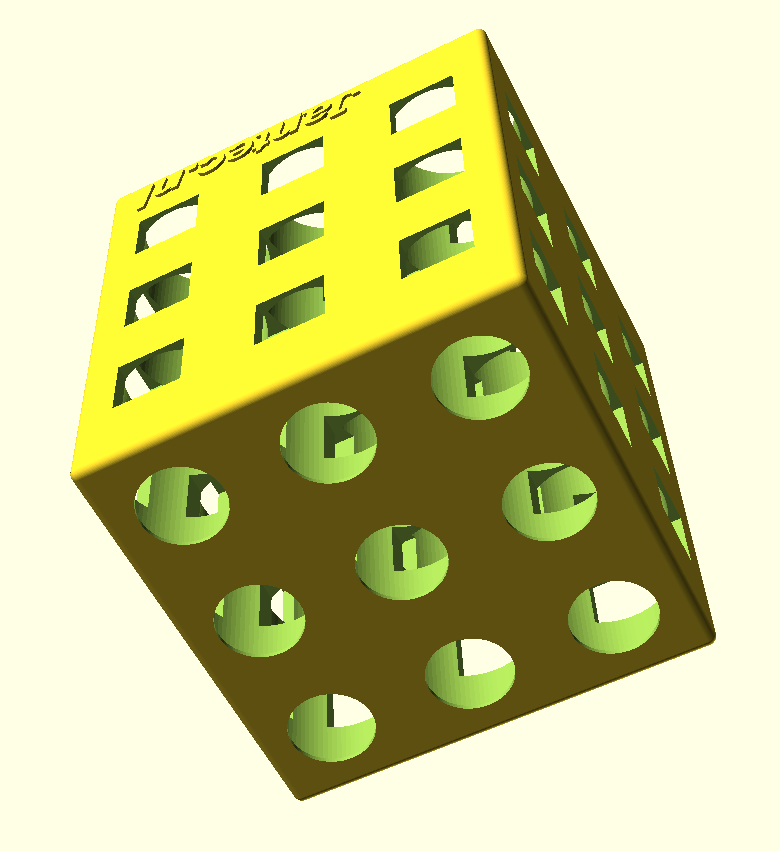
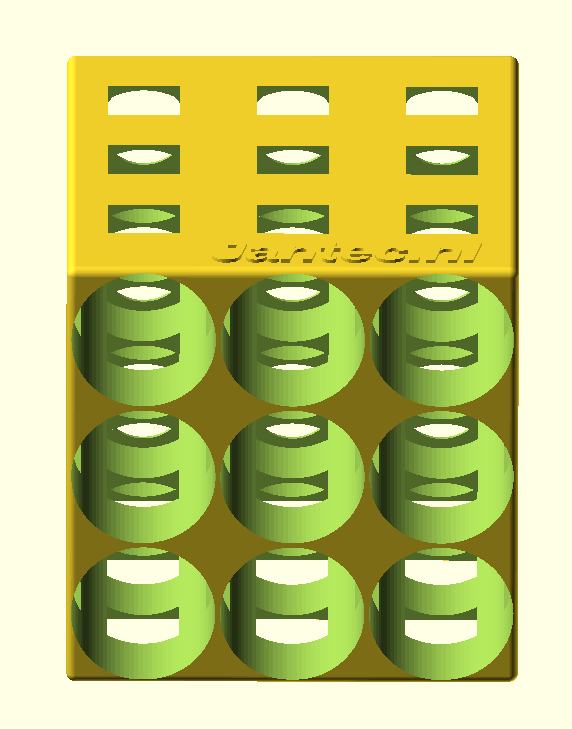
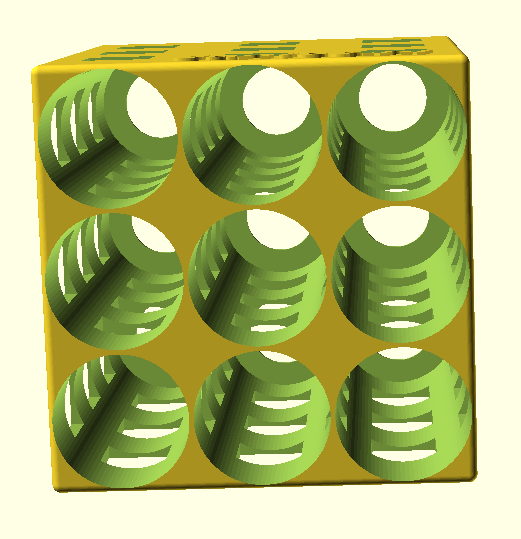
 beer bottles fridge rack with 45deg squared side holes 2023 04 20
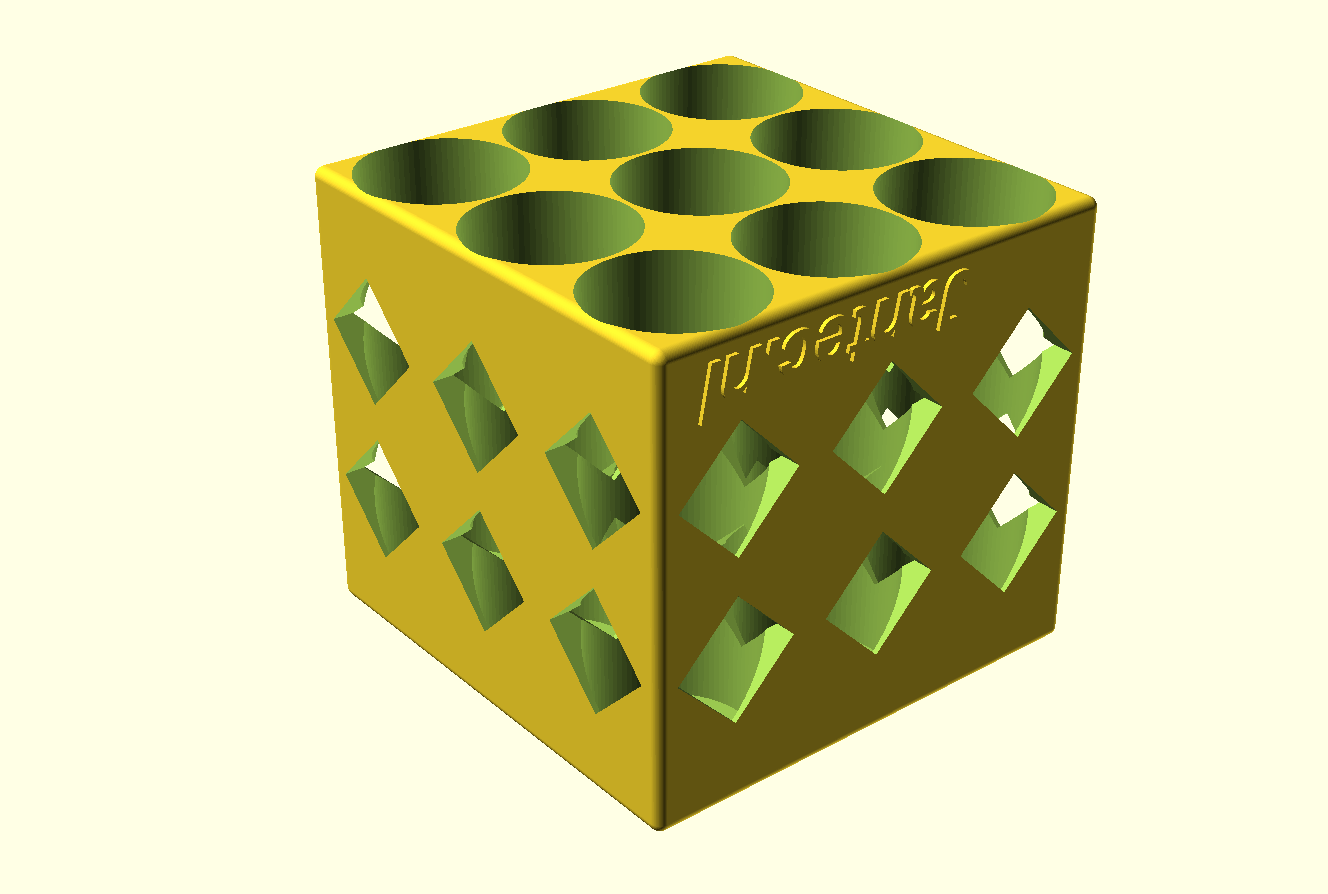 beer bottles SHORT fridge rack with 45deg squared side holes 2023 04 20