20110321_h_da_windenergie_weinberg (1)
![]()


Het gebruik van een octoWS2811 is de eenvoudigste manier om een LED display te maken zoals hierboven getoond.
Om dit goed te laten werken moet je eerst een Teensy module flashen met de juiste firmware.
Daarna sluit je de teensy aan op de OCTOWS2811 connectormodule.
In de RJ45 bussen van de OCTOWS2811 module steek je 2 LAN kabels en het andere uiteinde sluit je aan op de ingang van de WS2812 LED modules.
Het maximum aantal aansluitingen op de LED matrices of van de DIY strings van WS2812’s is 2×4=8 (Octo).
Download en start vervolgens JINX.
Sluit de Teensy met de USB poort aan op je PC/Laptop.
Sluit je LED matrixen aan op een krachtige 5V PSU.
Controleer je bedrading.
Definieer je WS2812 setup in JINX (grootte X*Y, type richting, zigzag of anders, etcetera) zodat de output al correct geformatteerd zal zijn voor je setup.
Start elke uitvoer en test het. Indien niet OK, pas dan de setup aan van de LED matrix/buizen.
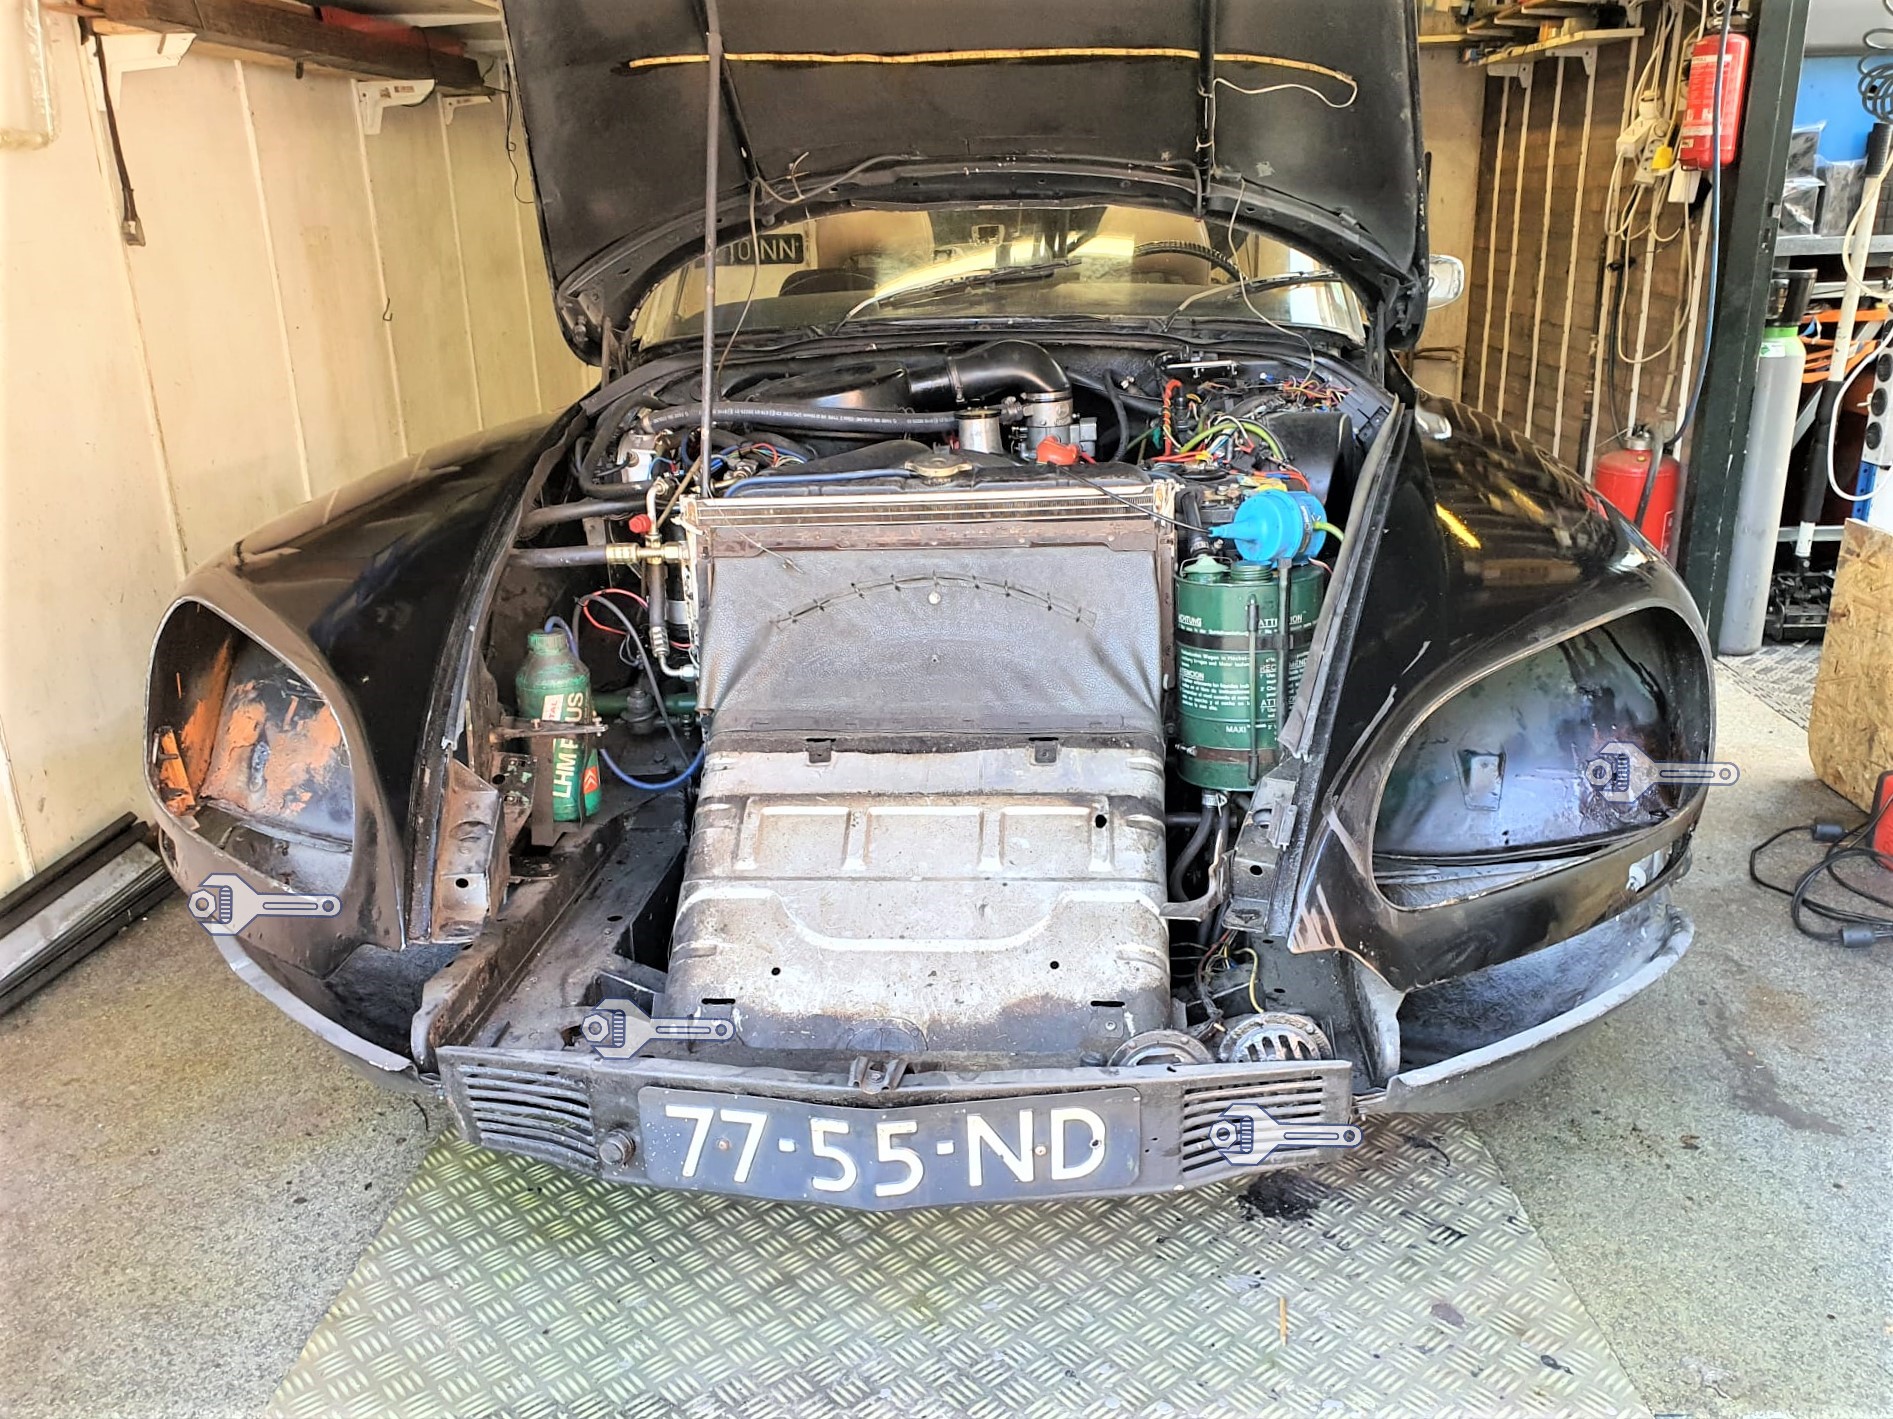
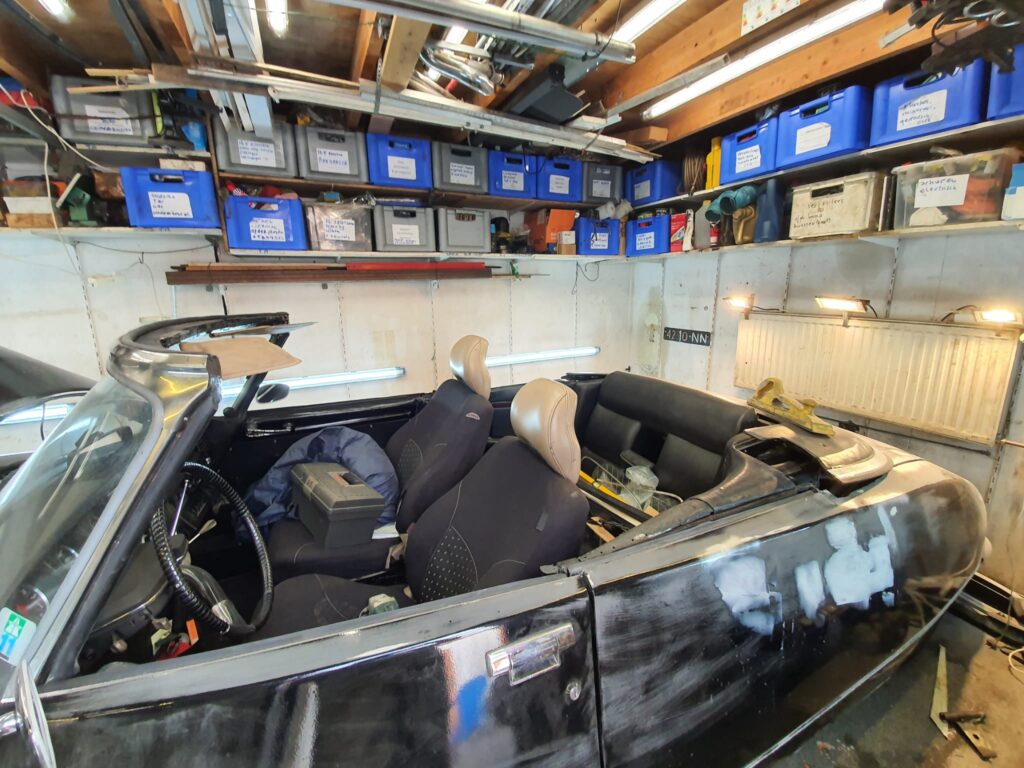
Started today September 1, 2021 the complete makeover of the Citroën ID20 originally converted to convertible by Oord in 2016.
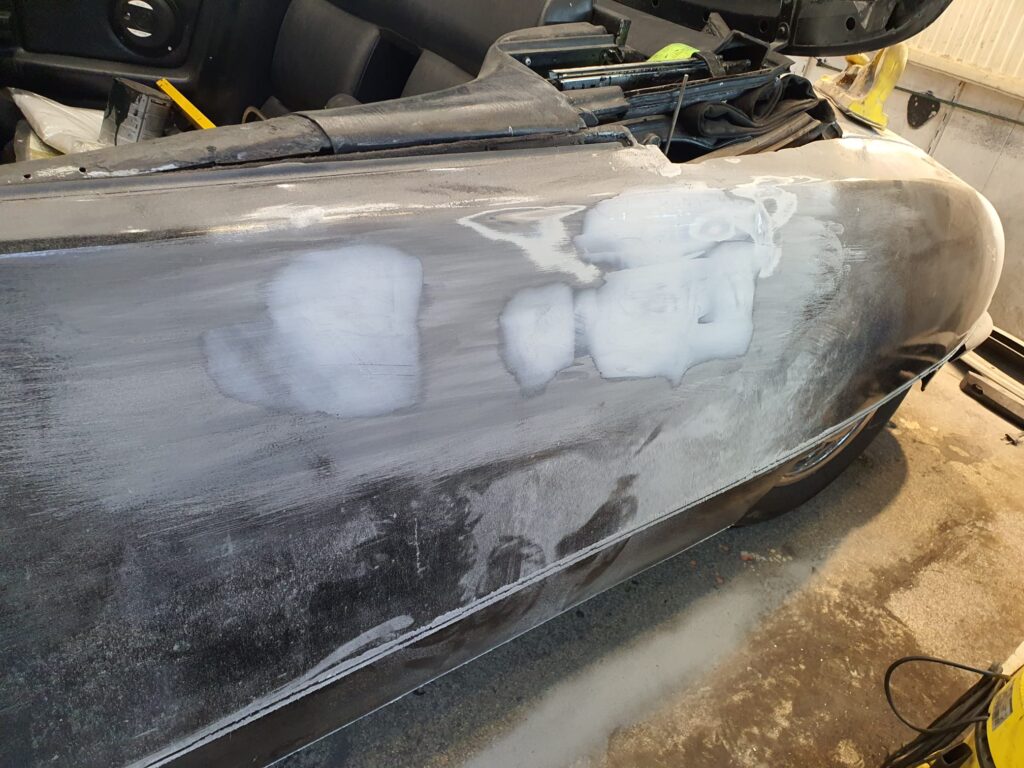
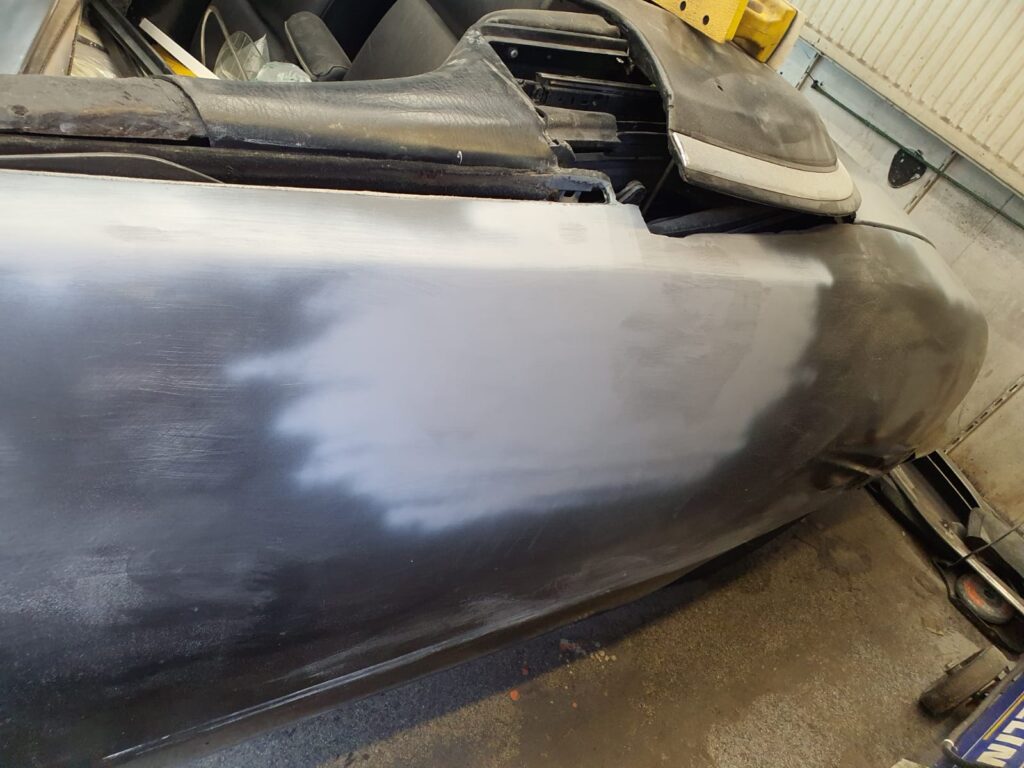
This was the car at the (pre-) last round of paint (primer) in 2018:
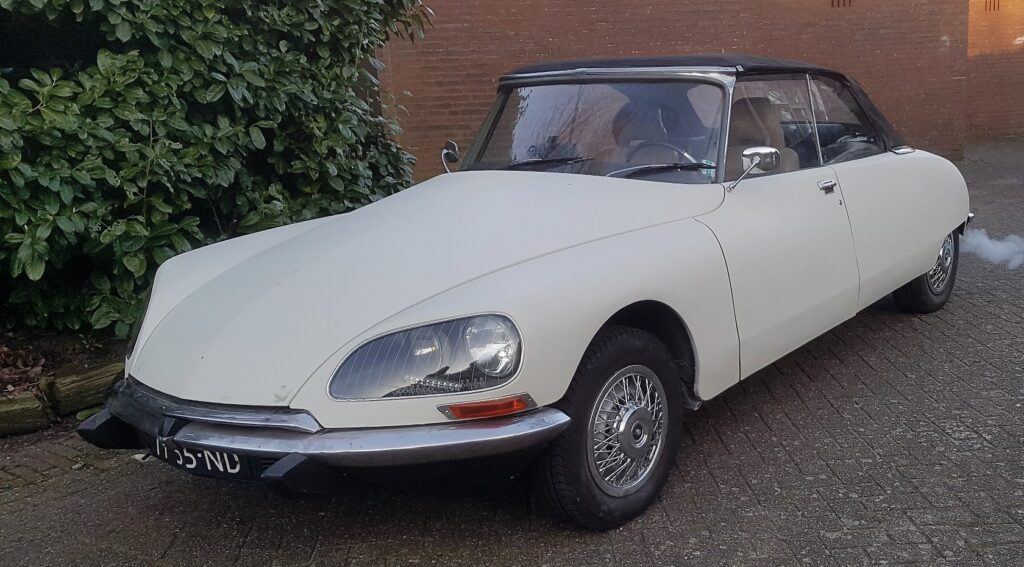
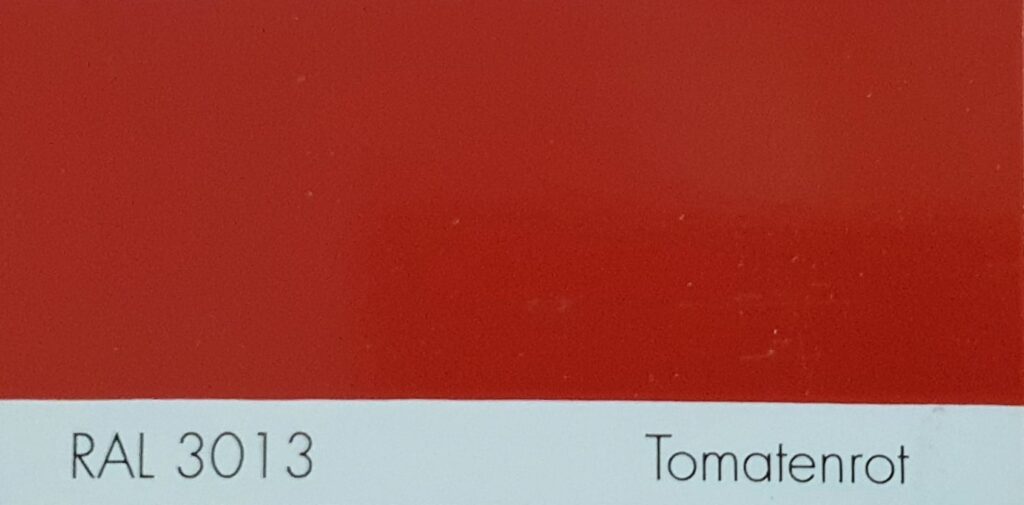
And- this time the color will be RED:
The exterior of the car will be completely dismantled, all sheet metal will be removed and where necessary, made tidy.
The original stainless steel Pallas wheel covers will be replaced, the plastic (2CV) spoke covers will be removed.
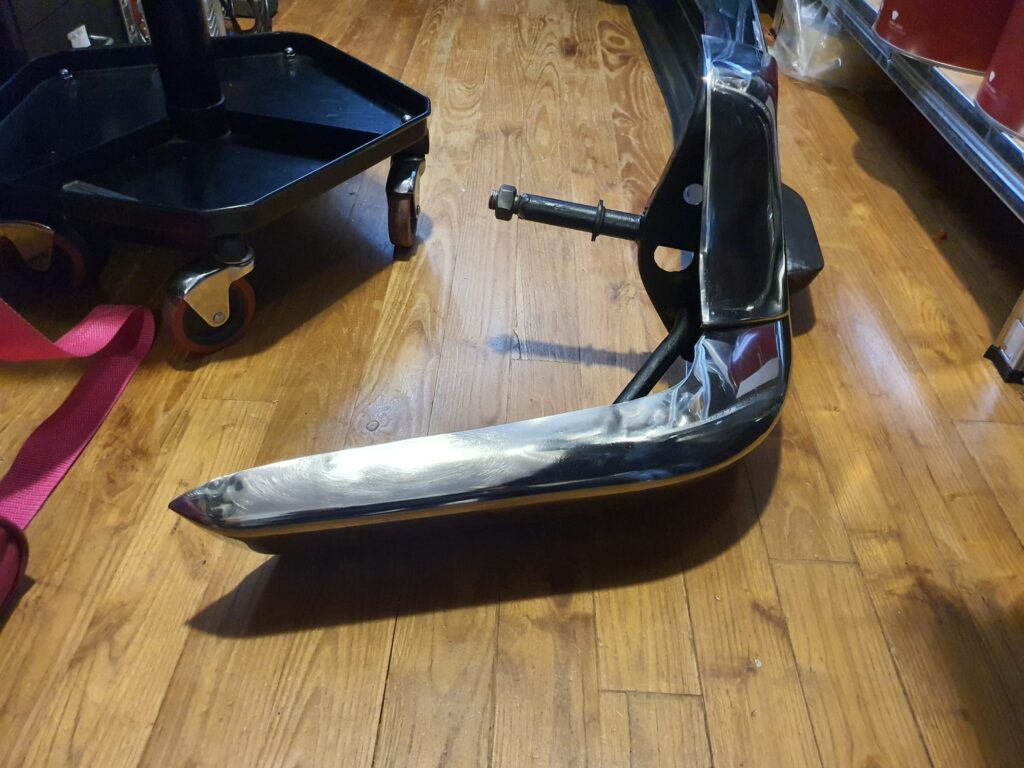
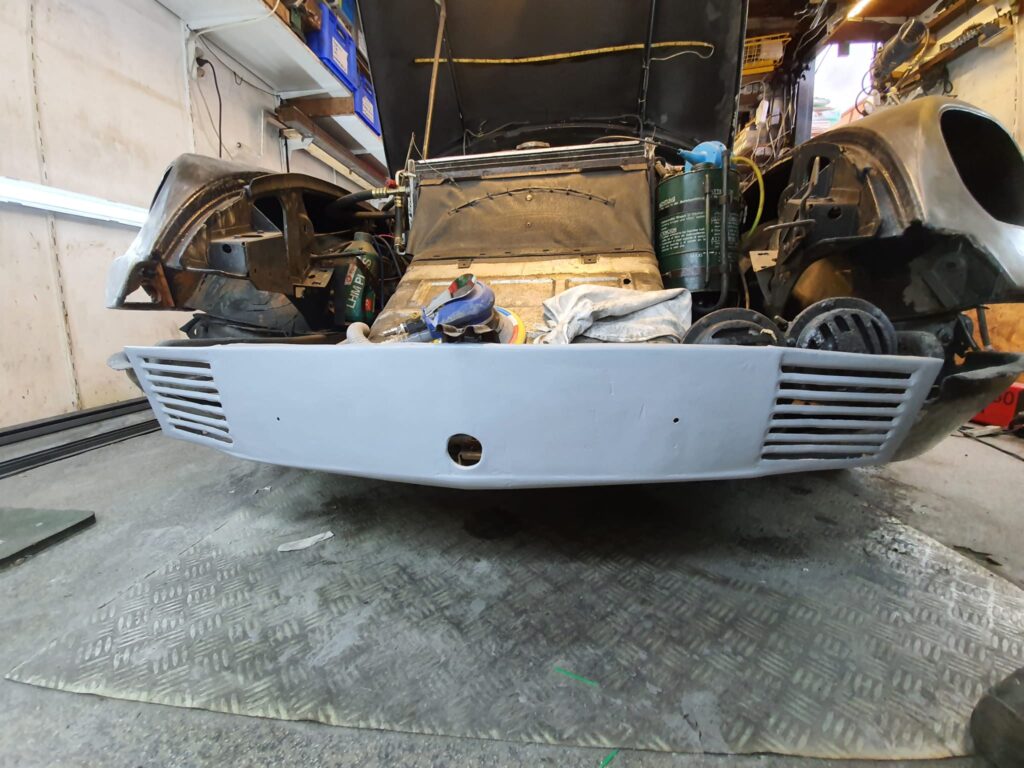
The front bumper has been disassembled and is being polished. The rear bumper will be replaced for a newly purchased extended convertible bumper, also already completely polished.
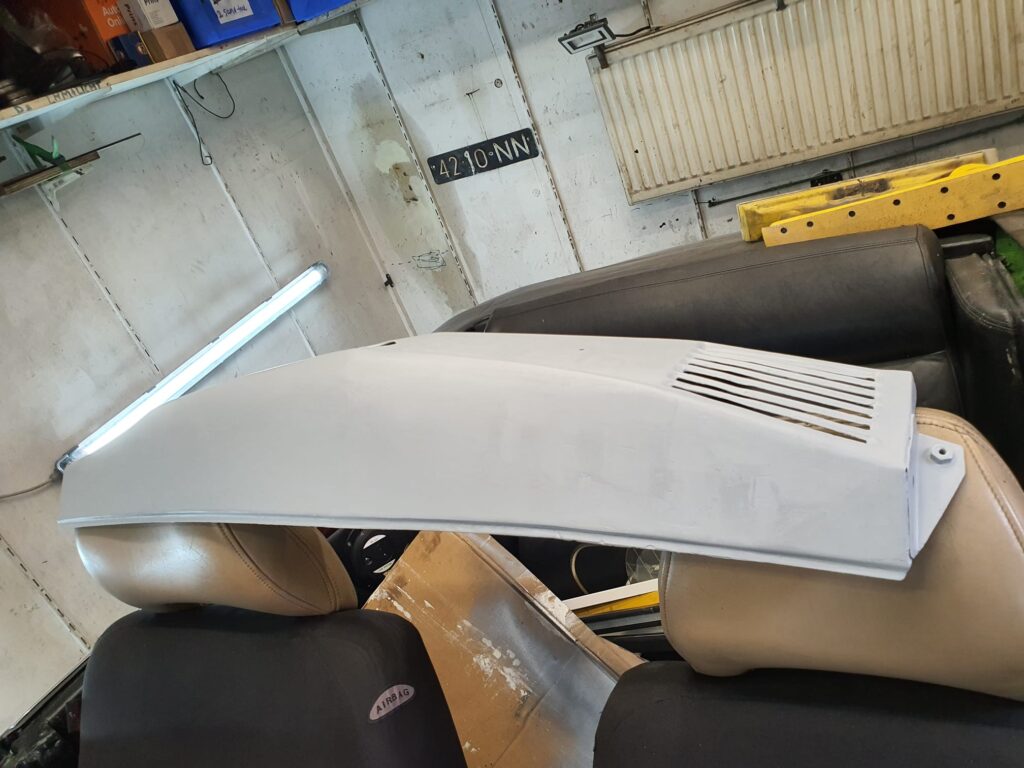
The roof will be completely recalibrated and the cover plate of the roof will be covered with Sonneland fabric. The black Sonneland cover is fitted with the typical push buttons.
The original 1966 Citroën ID tilt front seats go to the upholsterer and new black leather is fitted.
All loose parts are removed from the car, then the car is tightened. First coarse sanding, 2k primer, contrast spraying, medium sanding, fine sanding and then to the painter.
Oh yes, the air conditioning will be removed. That is very superfluous on a convertible and I can also remove the extra radiator of the airco that sits in front of the cooling water radiator. That saves on originality!
And that ugly antenna goes off at the same time! I have a reinforced antenna that goes on the inside of the windshield. On the right side. That is hardly visible and very easy to hide in terms of cabling, and close to the radio! And this antenna can be used for DAB+ at the same time.
The car will be tomato red RAL 2013. The professional (Basf) Glasurit 2K paint, hardener and thinner is already in stock! The inside, side, bottom and top of all sheet metal parts will also be painted red. The inside of the trunk, doors and doorposts will be red as well.
After painting, finally the by then re-upholstered seats can be put in and all new grey NOS carpet parts can be mounted.
The trunk lining can then be put in as well, and then all the external parts that were previously removed and either refurbished or replaced can be fitted.
Specifications: 4-cylinder in-line ID20 with 2.3 liter engine, two-stage carburetor and original electronic ignition. Air conditioning (manual). Manual sunroof. 4-person, 2-door version. LPG installation on the license plate. Last 2 years renewed: Water pump, alternator, hydraulic pump and fuel pump (All precautionary).
The intention is to put the car up for sale in the spring of 2022, to make room for a next project.
A P1800S with 1970-1973 build and overdrive would be a nice idea.
Or building a mehari yourself with one of those French replica mehari kits, or maybe stripping a 2CV and then using a fresh chassis and the old 2CV stuff to build the body of a Mehari.
Well, as long as petrol cars are still allowed to drive around, I can continue with the hobby for a while….
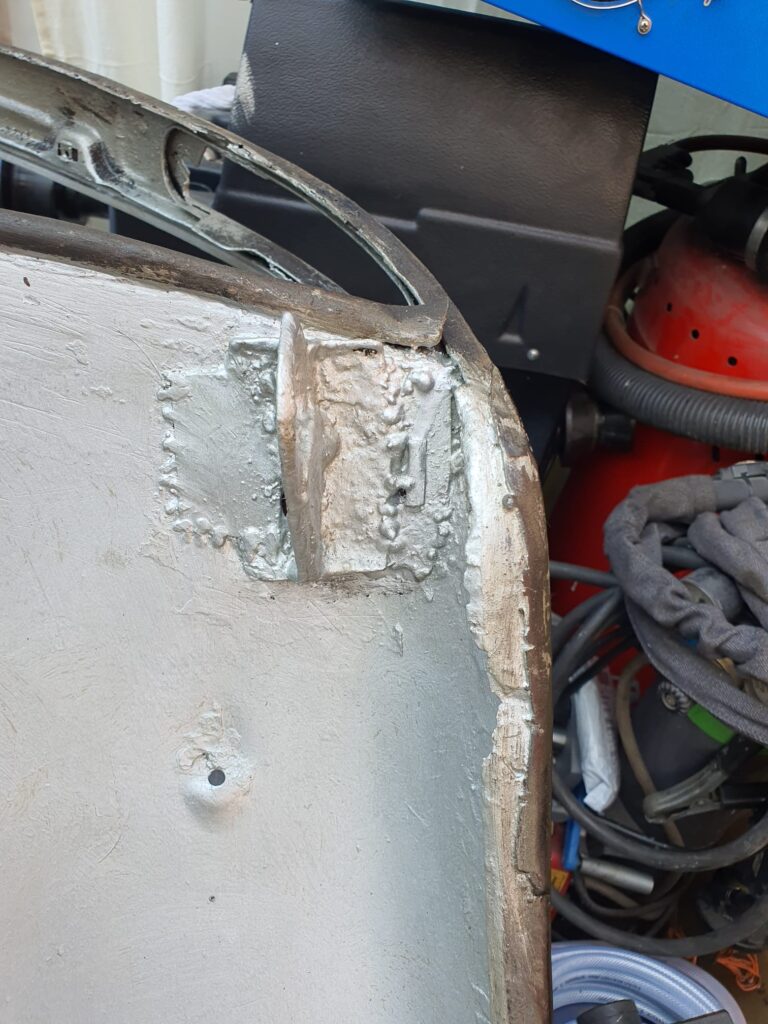
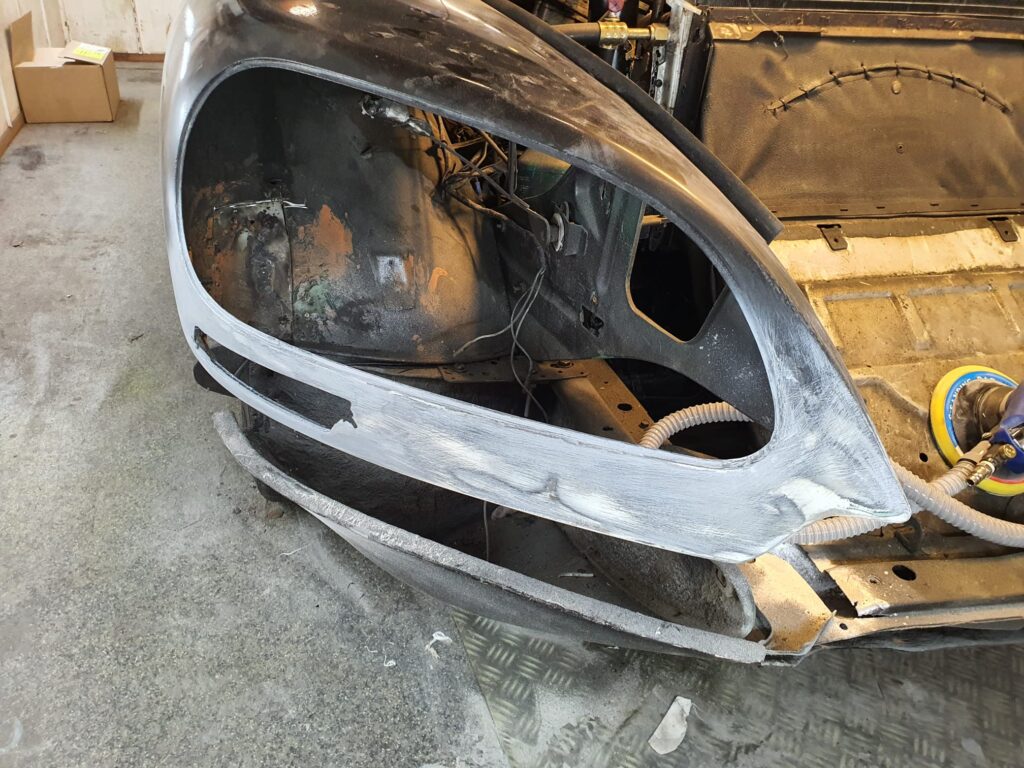
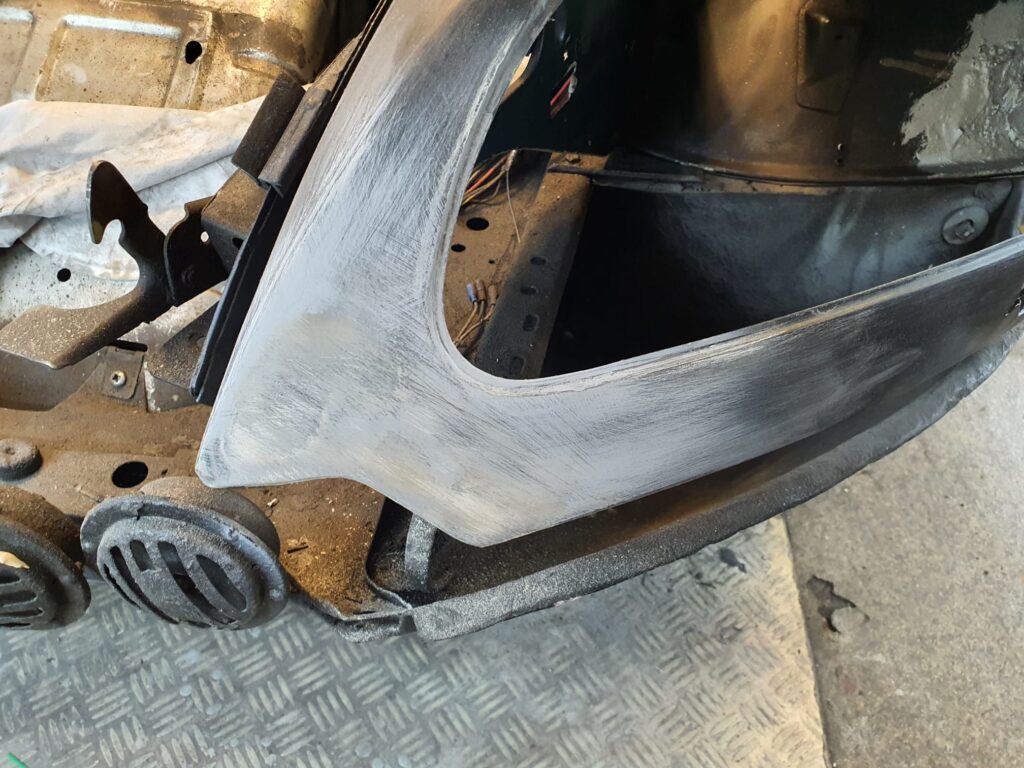
Update September 3, 2021: Completely emptied the front fenders, and removed all the tar and tectyl. Ordered a new replacement plate (left mounting eye was a bit baked on, will be made neat again with a new eye and replacement plate in the inner fender. . Fender edge will also be repaired).
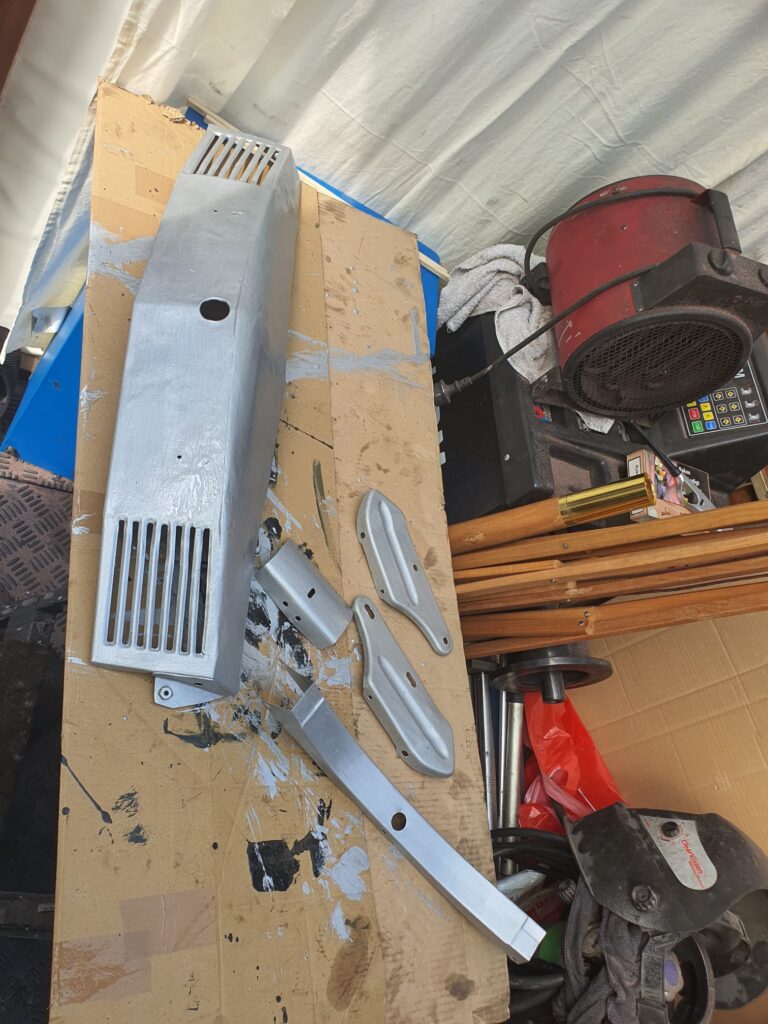
The headlight housings will be cream colored again, they are black now. There are already new headlight mirrors in them so that saves some time.
The front wings were completely cleaned on the inside and underneath and then put in grey hammerite.
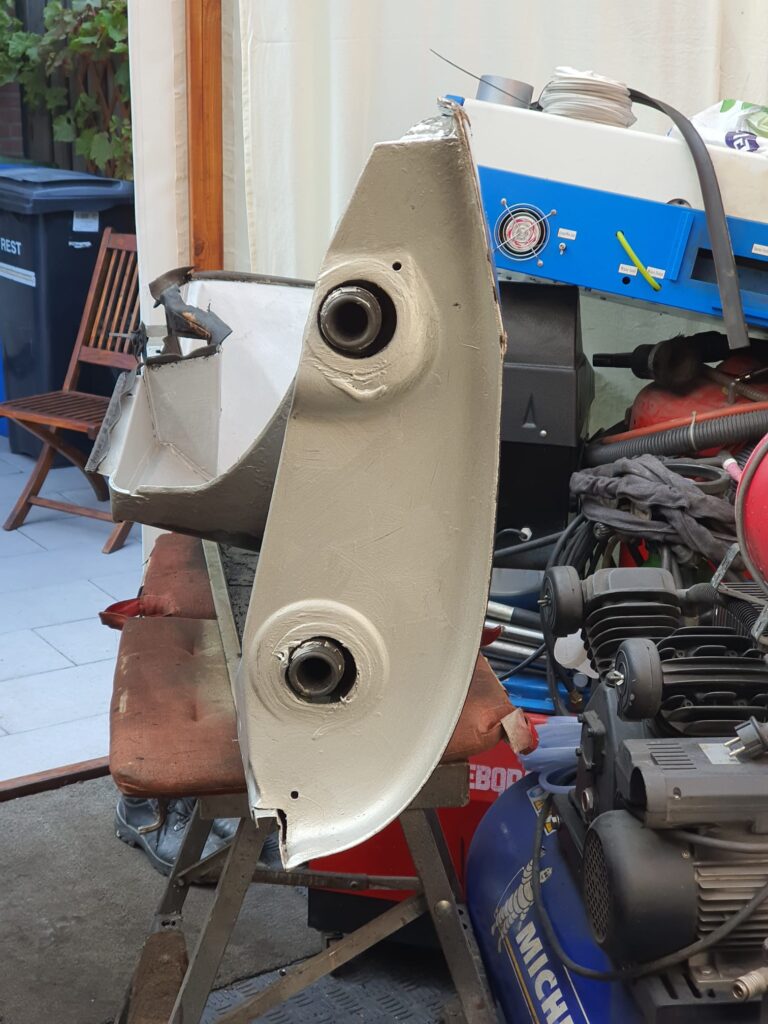
On the wheel arch side, there will be a black colored protective polyester coating. in my experience, that is the only way to protect the inside in our wet country with all kinds of gravel and other debris on the road.
In the rear, I previously installed aftermarket aluminum mud trays for protection in the inner fenders.
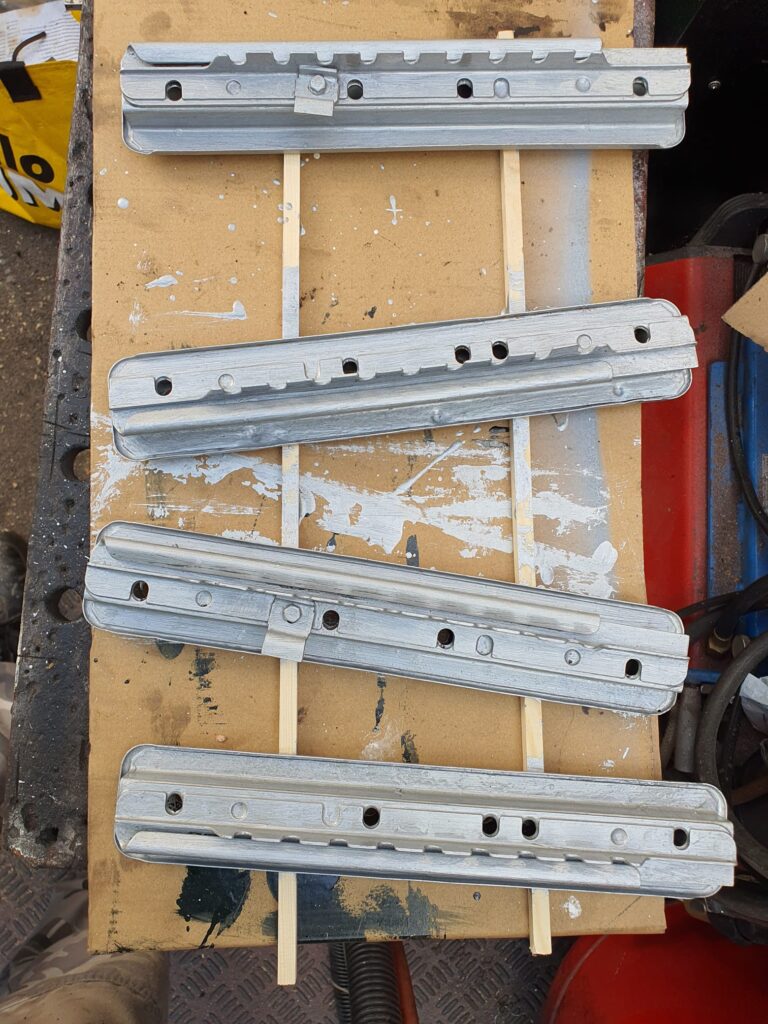
I completely disassembled the front bumper and replacement (very good NOS) sheet metal parts were arranged. The air horns were bad and the rest of the bumper connecting sheet metal was pretty bad too.
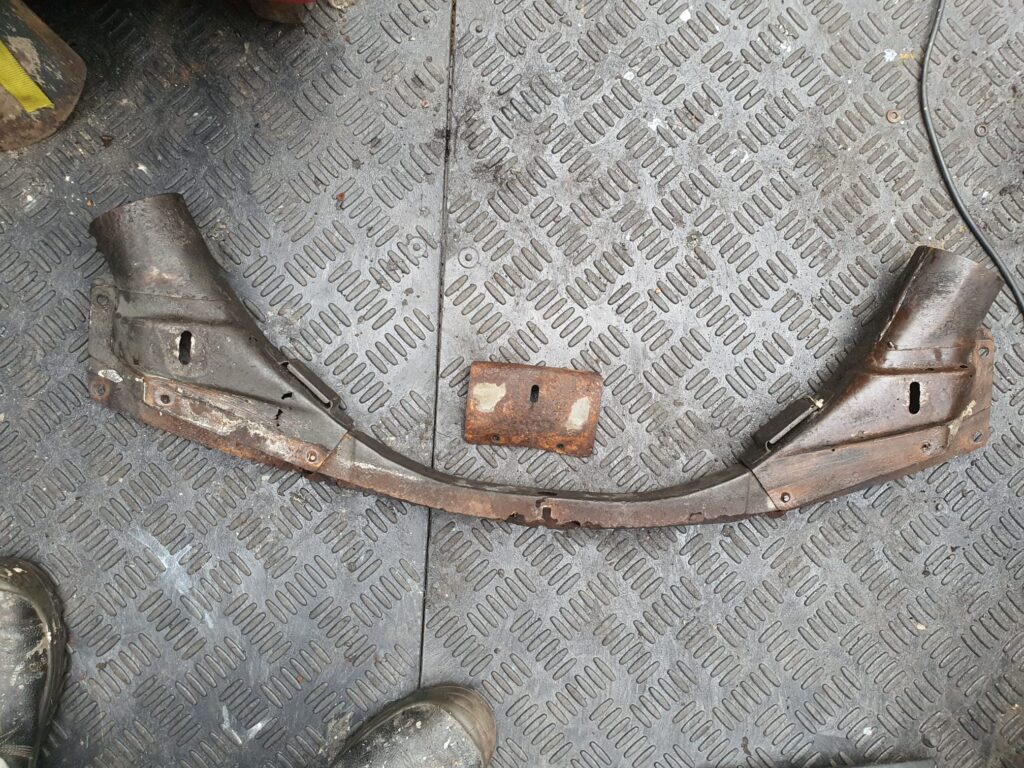
The license plate holder is also immediately replaced for a NOS one. The bottom of the licence plate holder has also become a bit too thin.
I had replaced the stone trap for a polyester type much earlier, so that will come off but it will also go back on after the underside has been cleaned, painted in the right color (same as the body) and the plating on the bottom has received a black anti-corrosion treatment.
The engine and gearbox, drive shafts, suspension and wheel bearings will be overhauled this winter, so these will also be taken out completely so that I can access the chassis properly.
I have to check if the threaded bushings in the chassis where the double front suspension is mounted are still in place. 14 years ago one bushing on the right side was welded again, but only on the outside because the engine was still there. Now that everything is going to be taken out anyway, I can do the inspection on this point at the same time.
After the front wings, it is time for the doors. I am going to saw off the bottom so that the normal size of an original convertible door in terms of height remains. Then I’m going to weld the doors shut and finish them off. The body near the doors will be widened to the outside of the door so that a wider sill becomes visible on the outside below the doors. In this way the bodywork under the doors continues from the front near the A-pillar to the rear. The yet to be purchased lower decorative strips then run from the A-pillar to the rear reflector in one go.
Lengthening the doors is not an issue, because the first Chapron models were also executed with the original size of the front doors. Nice excuse not to do that with my convertible either. In terms of boarding, there is not much improvement. With the new old handle seats, the backrests can easily be moved forward, if anyone would want to ride in the back. Besides, it is far too much work to have all the windows made anew, moving the B-pillar I see as possible but also a shame to open everything again now that everything fits nicely.
THE SPUITWORK
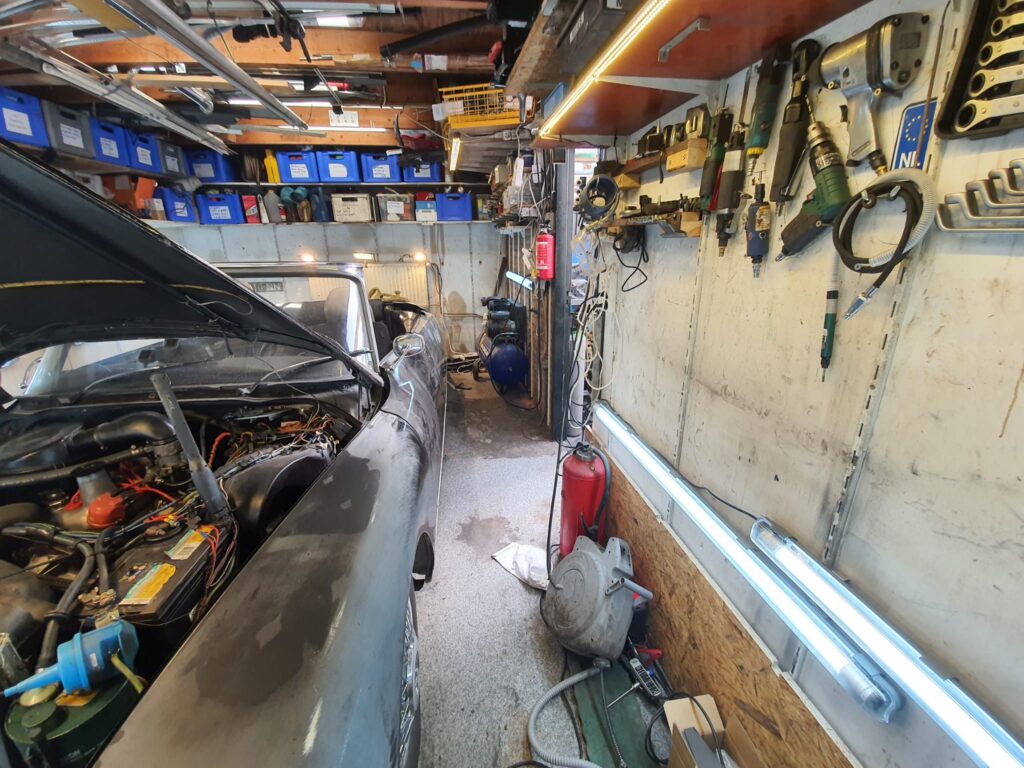
Because painting is a profession, I’ve been looking for a paint booth that can be rented near the garage and the workshop of the ID20 convertible. But it turns out to be difficult just to rent a space for half a day. Since I do all the prep work myself and already have the paint and such in stock, there is little to be gained for the rental company. I also take my own sprayers with me. And, if necessary, also the compressor and dehumidifier.
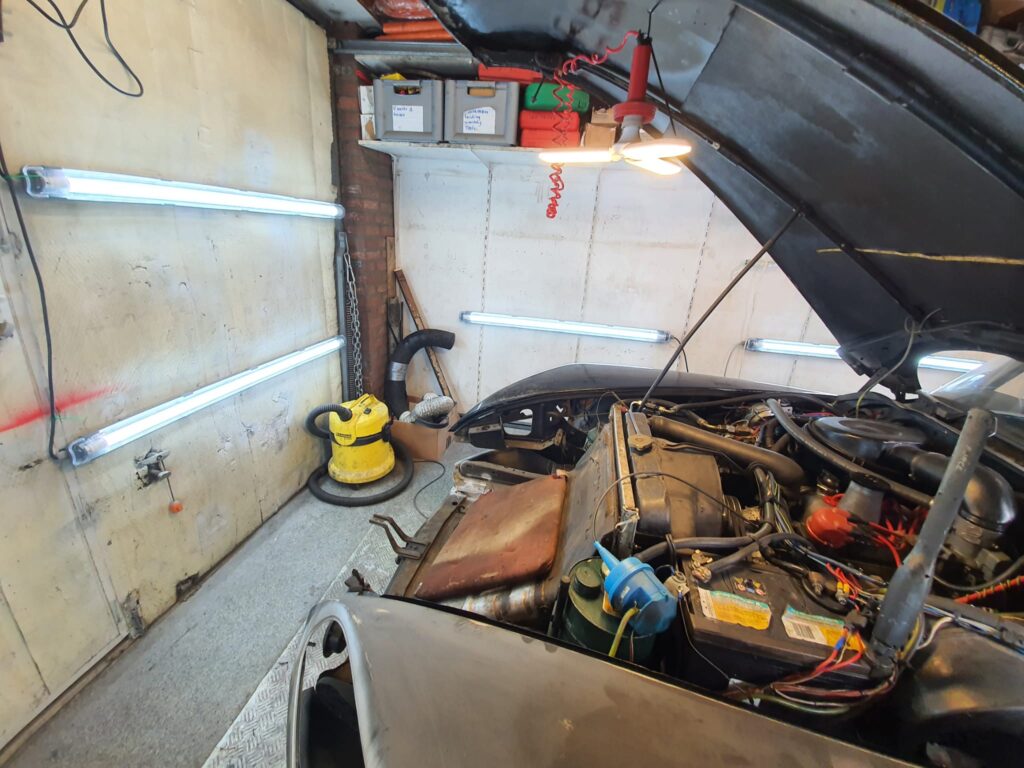
So it will probably come down to me spraying the car in my own garage. In preparation, I have already made the suction in the existing recesses in the outer wall, and the filter can easily be placed against that. Heating comes from 3 electric radiant heaters that can be attached to the ceiling, of the type outdoor heater.
The suction of the compressor comes from under the greenhouse, which is completely covered. In the pressure line there is a dehumidifier, in the spray room the dehumidifier is on continuously before spraying and I spray HVLP with about 2 Bar.
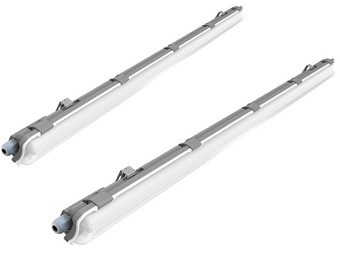
Lighting from the ceiling is arranged with 8 fixed LED fixtures, from the side also 8 LED x 120cm LED fixtures are placed, with cold white light 6800K.
Before spraying with the Glasurit 2K lacquer, I cover both the ceiling and walls and floor with plastic so that dust has no chance. The extraction and suction of air goes through filter boxes. I get my own air for inhalation from outside through a long 34 mm hose. During spraying, all doors are unlocked and there is always someone around. The compressor is outside the spray room so the overpressure must be able to get outside through the filter box and the fans in the wall. I don’t expect much spray with the low spray pressure and the electrostatic preload on the car. So also in terms of breathing I don’t think I’ll have any problems but as a precaution I prefer to get my own air clean from outside.
The garage is 3.5 by 5.5 meters and now that all the stuff from the garage is in the greenhouse, I can easily walk around the ID20. So the spraying should also be easy. I plan on when spraying it to do the inside of all things like doors, screens, tailgate etc first and then the outside. Since I disassemble all rubbers BEFORE spraying, I can just close the doors and lid after spraying the inside and continue spraying in one pass.
First layer with 5-10% thinner and the second layer after 15 minutes just pure. The third layer goes after 30 minutes with 5% thinner and the last layer after 45 minutes with 10% thinner.
This (already 12 years old) Glasurit paint does NOT need clear coat to get a good shine and because of the thickness of the paintjob I can always clean/polish the car for an even better finish!
Picked up from Daniel Q yesterday with many thanks again, also for the tea!
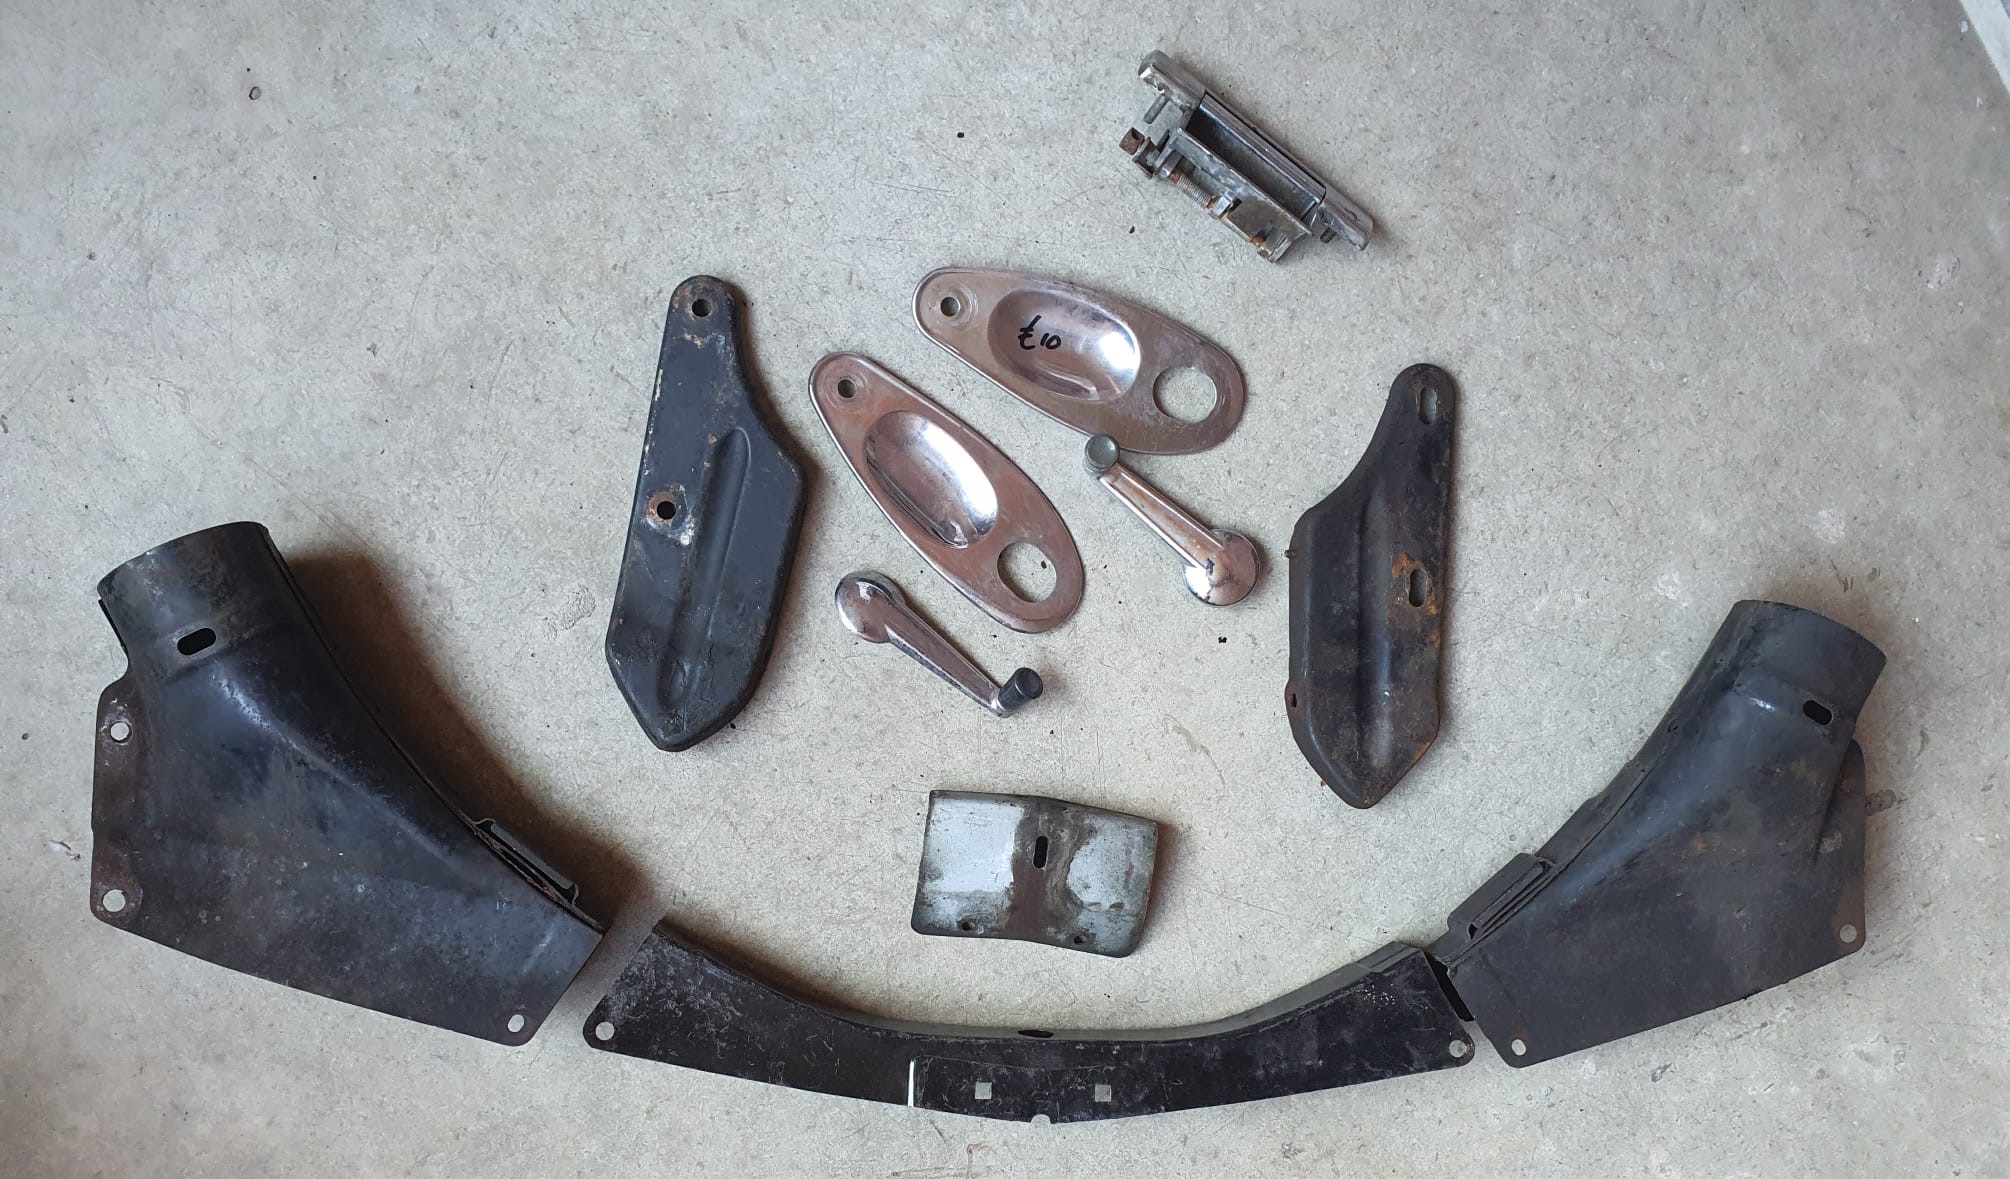
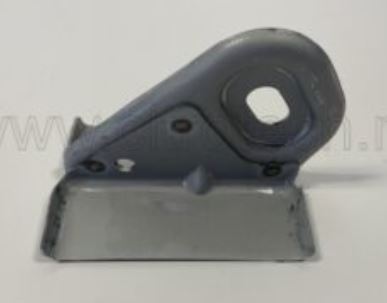
2 air hoods and spacer, connector and front bumper mounting brackets. Partly NOS, partly used and in good condition.
Replacement outside handle for the left door
2 window cranks
2 Mudflaps original rubbers for the front fenders
2 stainless steel inserts to be mounted behind the inside door handles
Various DS small parts
The license plate holder I already had as spare. The one I took off of the car is no longer usable.
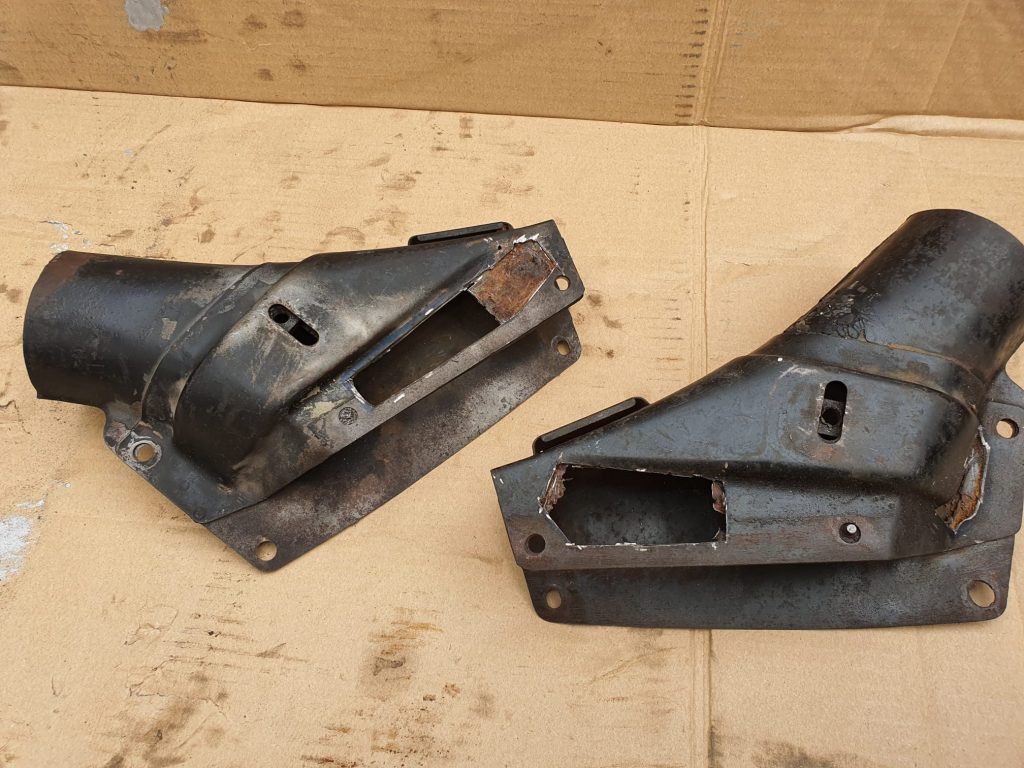
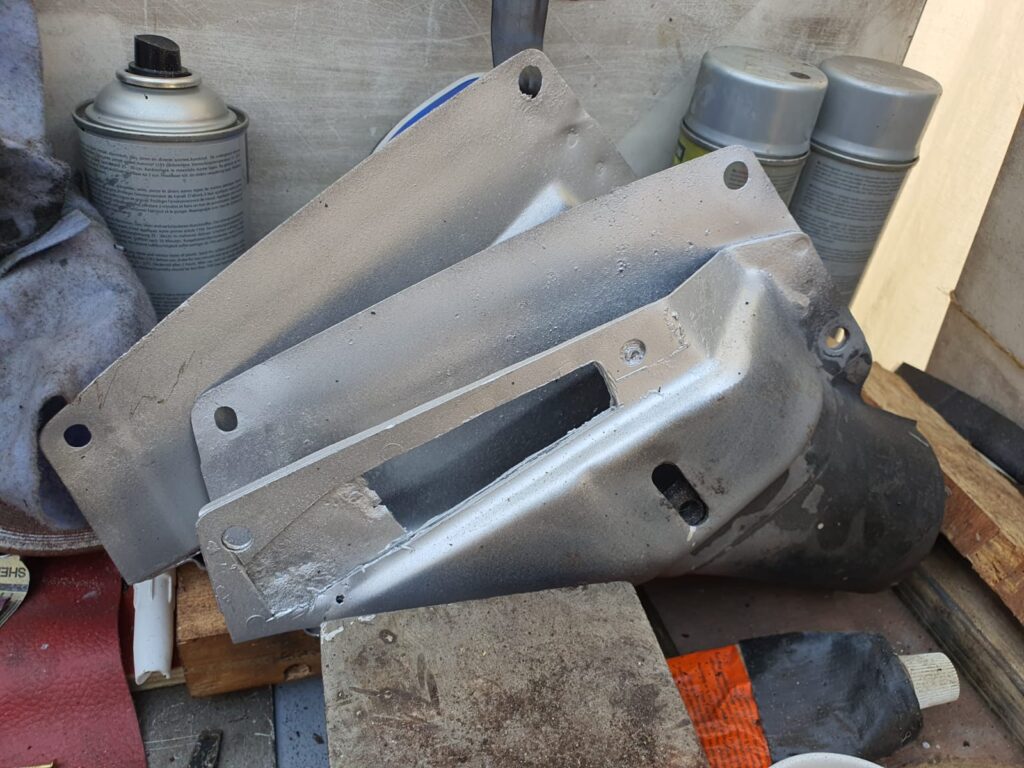
Took out bad parts of the 2nd hand air horns so new sheet metal could be welded in. The happers were blasted and then treated with zinc spray.
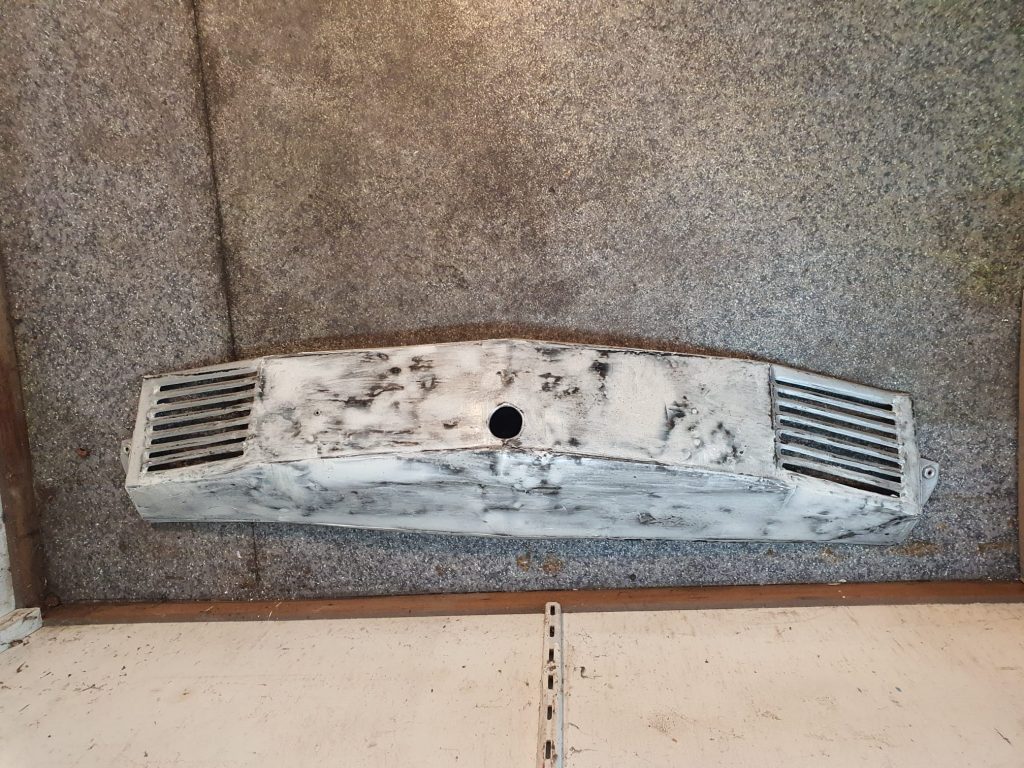
The spare license plate holder has been neatly flattened.
Ordered today 5-9-2021:
New suspension eye for L front screen
Citroën ID20 convertible 2021: The make-over part 1 – the plan
In this section all the info and photos about the installation, assembly, finishing will be presented:
This post is available in Dutch (switch to Dutch to read the article in Dutch)
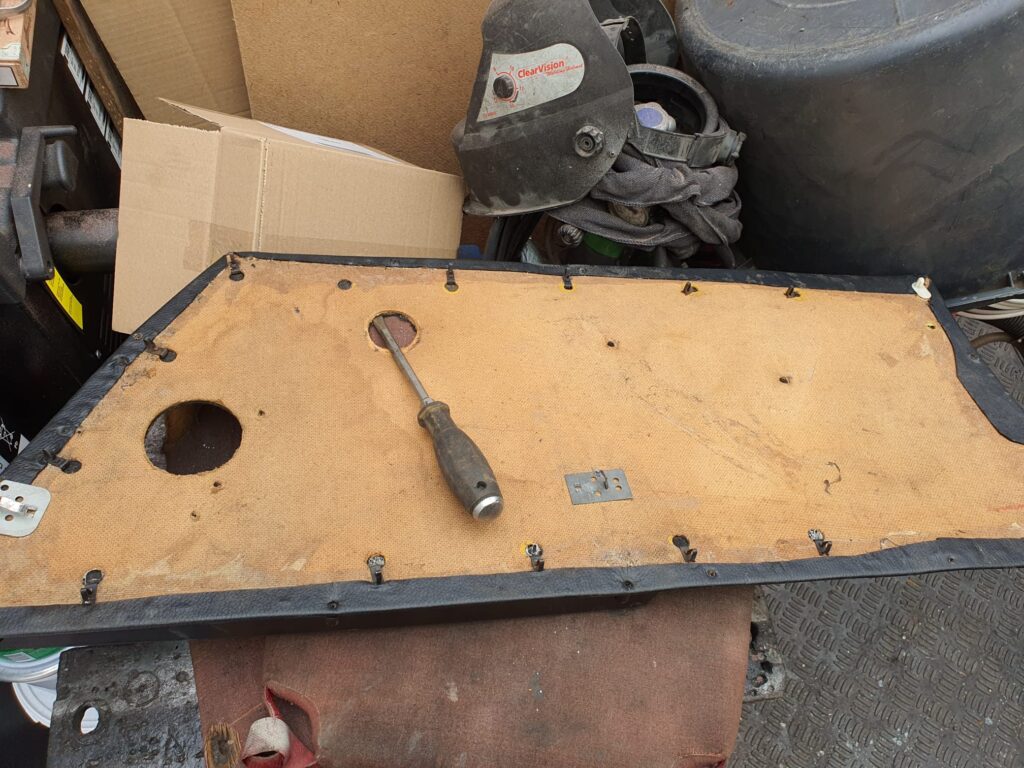
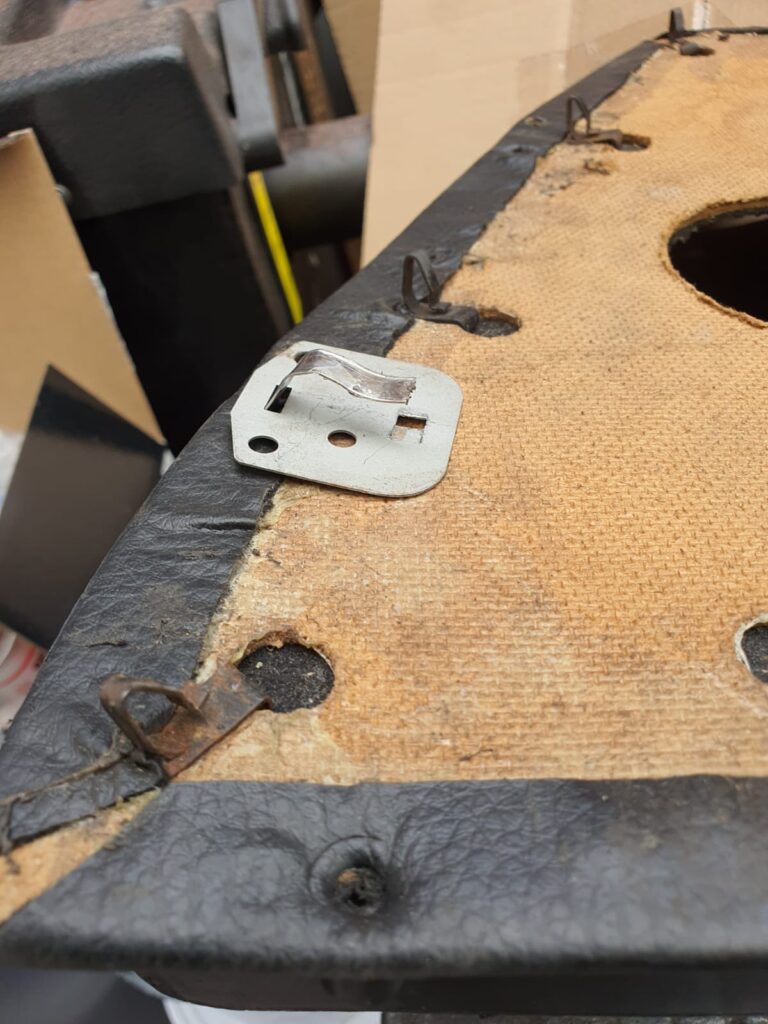
Interior paneling
Spraypaint jobs
Carpeting the chairs, sofa, door panels
Exterior strips
Bumpers
Lighting
Gear shift controls
Handbrake
Wheels, tires and wheel covers
License plate holders
License plates
Hood tie
Speakers, radio and antenna
roof lining
roof lock
roof cover lining
Etc.
The performance of my larger sites left a lot to be desired, and the costs are running up considerably. I had over 10 sites running, all with the same provider and the costs per site vary between 185 Euros per year and 65 Euros per year. For the large sites I have 5GB storage and the smallest is 200MB.
HOMESERVER: Previously I hosted a few websites from home, on a Zyxel NAS with a cheap domain provider. That all worked fine then. Based on my previous experience I have bought a Synology DS718+ web server, a few fast SSDs with mirroring in it and up to RAM. The cost is about 800 Euro. As a backup I have a DS218 play with a couple of big harddisks in it and extra RAM as a normal local NAS with an extra mirrored wordpress server for emergencies and maintenance on the main server.
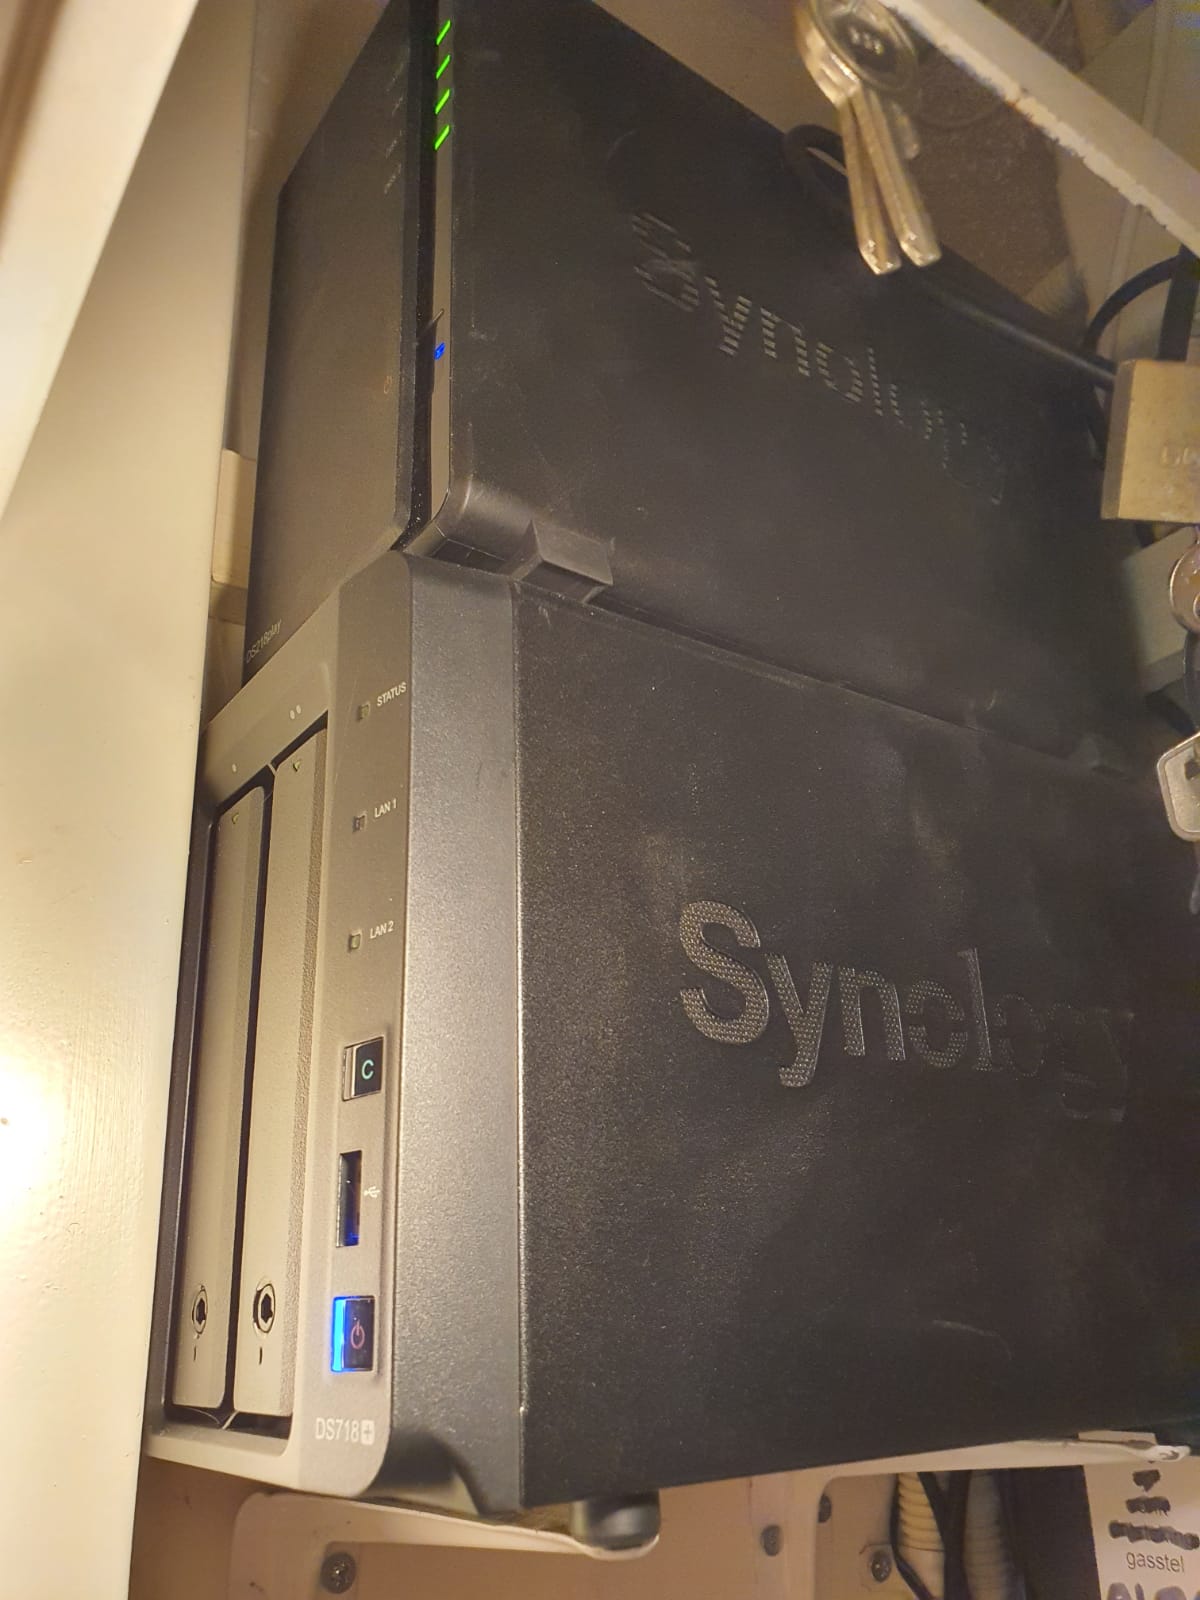
So now you see this post from my home server.
My experience is that it is always better to be the only one on your own web server than to rent shared hosting, regardless of the so-called SSD hosting et cetera. That’s what larger companies do as well: Just a fat server on a fast internet connection.
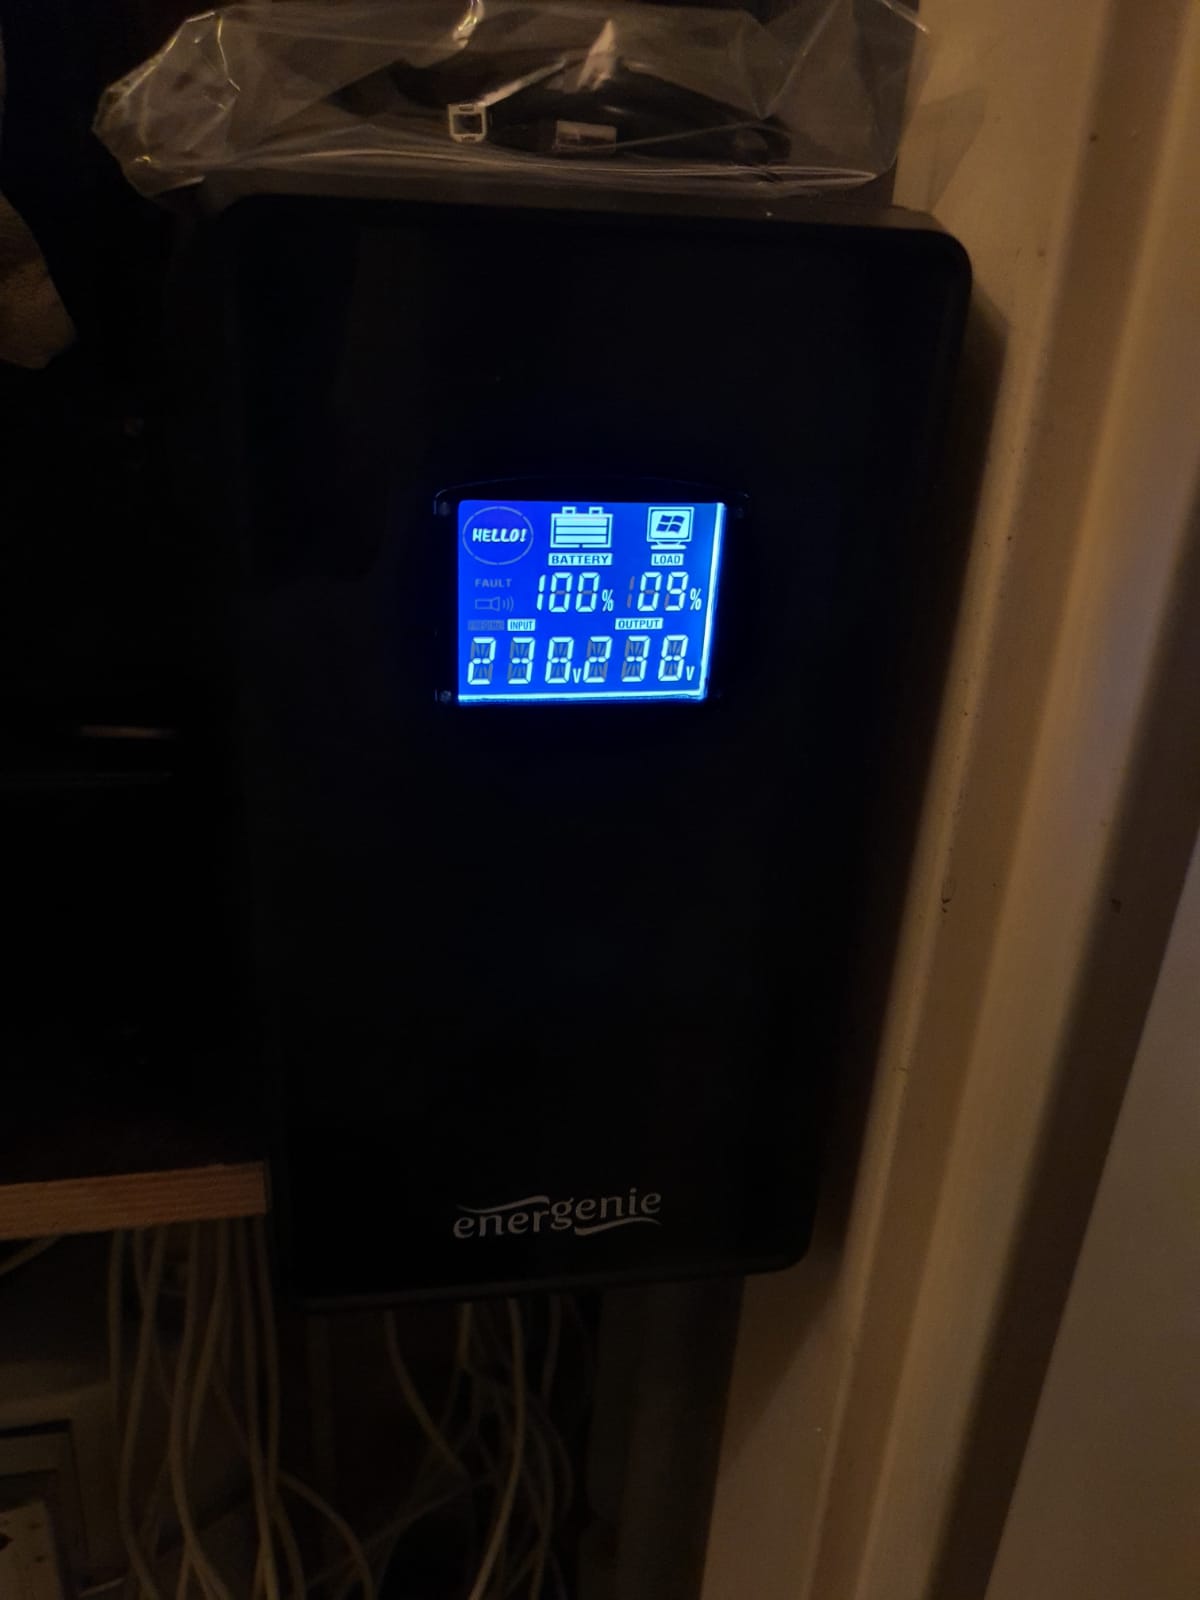
Just to be sure, I do have a backup (UPS) with battery for the 230 Volt power to the internet modem/router and web servers, and a data connection backup via a mobile connection, in case the internet connection goes down. The autonomy of the UPS is about 6 hours.
And… whether I like it? Actually, I’m mostly very happy with the merging of my various sites into 1 overall site because of its clarity. Because of my diversity of interests I had just too many sites running which resulted in insufficient attention on the sites. Now that I only have one for my hobbies and one for my business everything has become much simpler.
And how to proceed? I will cancel my webhosting and I have to see which domains I want to keep. That also depends a bit on the costs. If only the costs of the domains are not too high, I can keep 6 or so. Which I then redirect (fixed, 302) to my home server. Eventually only 1 domain will remain, but which one should that be…? And then I can make my URL unambiguous again!
That’s it!
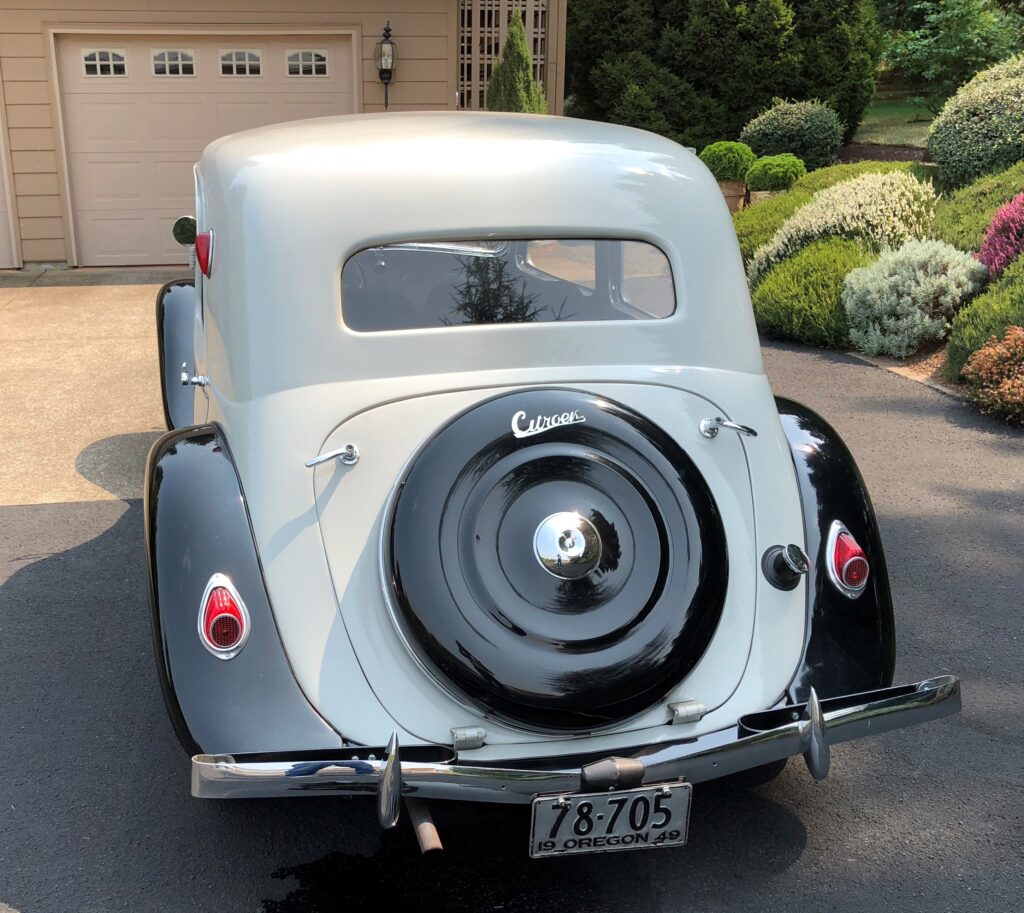
Recently (9-2021) I was able to buy me a tailgate and wheel cover from a wheeled TA version. This was the start of my project to convert my 1955 Citroën Traction Avant into a wheeled version.
It’s a matter of taste of course, and I just think a wheeled version is much nicer than such an imposed trunk.
Below you can see what my car would look like with a wheel instead of a trunk:
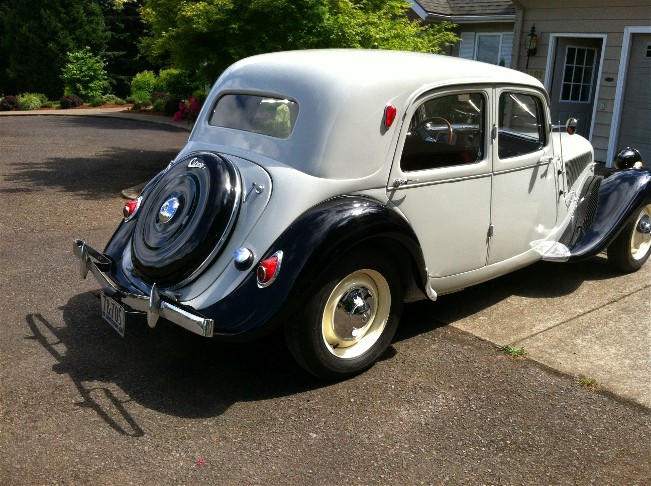


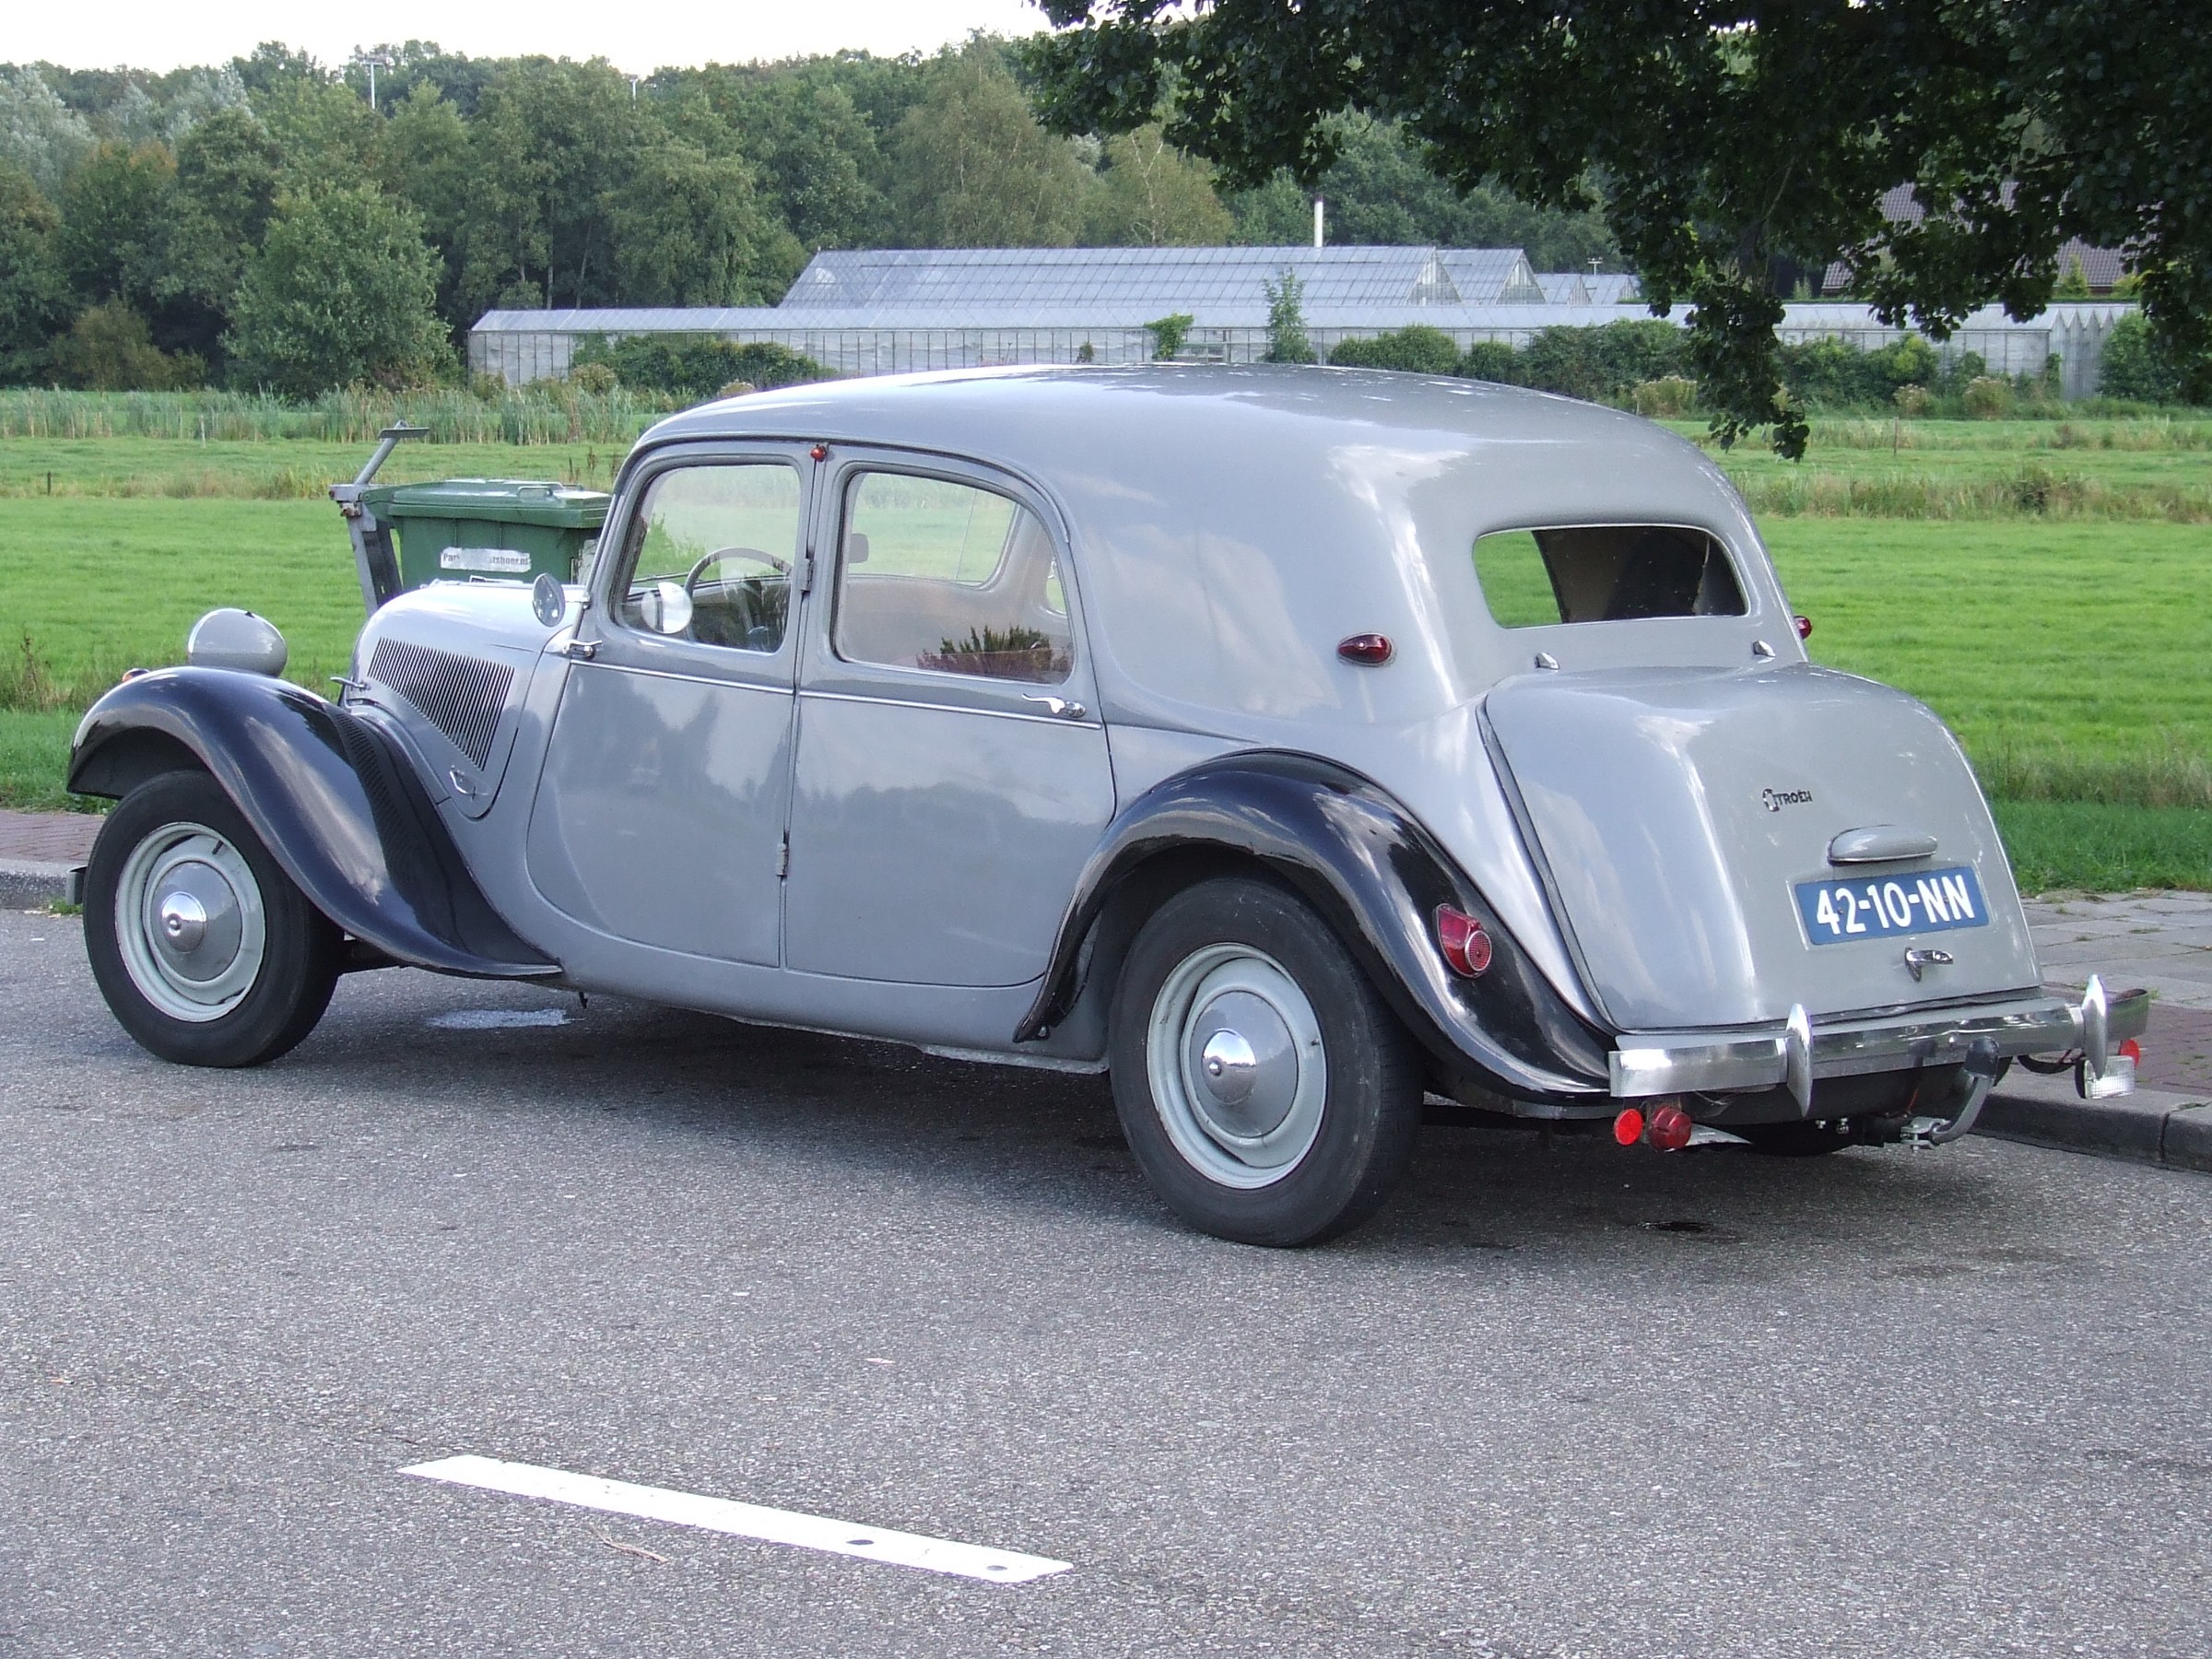
And, for comparison what my car looks like BEFORE the conversion to wheel:
 Picture dates from 2007
The trunk hangs from the part of the body directly under the rear window.
On a wheel version, there is still a section of sheet metal under the “kink” in the sheet metal that is under the window. That is completely missing from the trunk model.

And the underside in terms of sheet metal runs all the way through (gray) , including under the trunk lid (gray lid with black wheel cover). This should be constructed anyway, and connected to the existing trunk floor plate. Everything under and behind it has to be removed so also the spare wheel well and the existing extra extension of bumper brackets and the ‘standard’ extra bolted-on sheet metal.
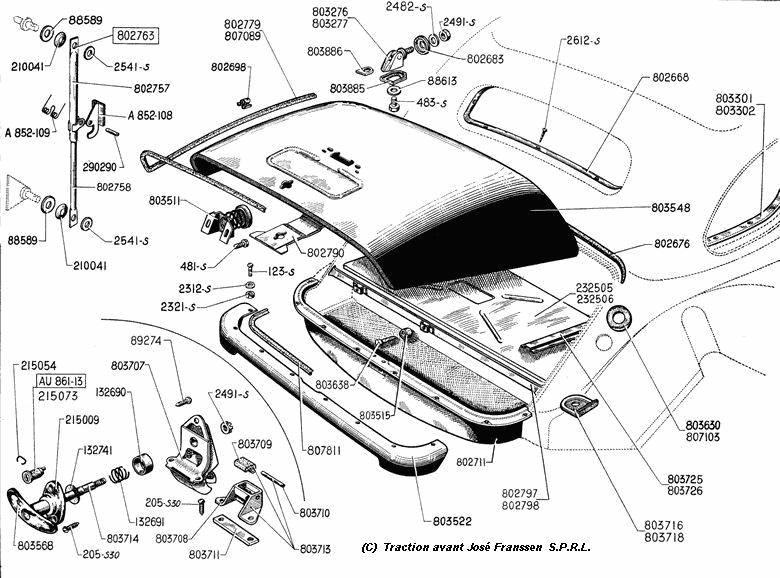
The fender points L and R are connected with a piece of sheet metal, under the fixed body (grey). This sheet metal part is still readily available as an aftermarket part.
THE APPROACH – is planned for mid 2022, after finishing the ID20 –
LPG tank out, gasoline tank out from under it.
OUTSIDE THE CAR:
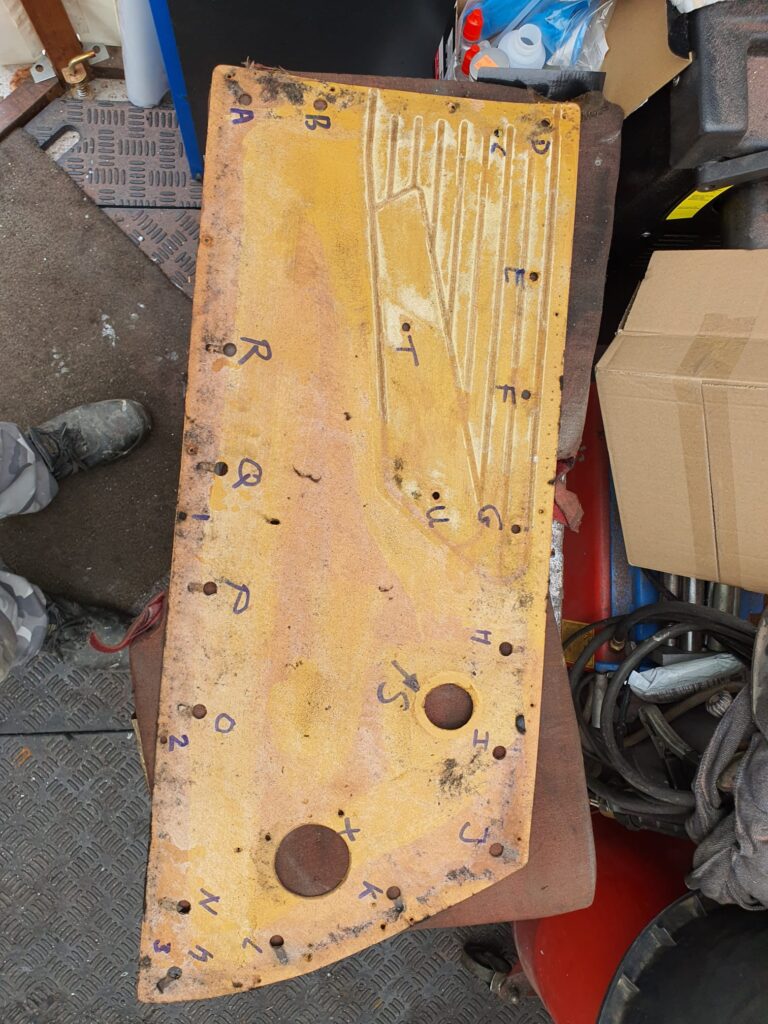
First, a fender edge is made that follows the exact shape of the trunk lid of the wheeled version. Then a sheet metal edge is made that fits in the hole created when removing the existing boot lid. After that, it’s going to be a lot of fitting and measuring. Temporarily the new sheet metal part with sheet metal edge for the lid is fixed with U-strips instead of the lid. This makes everything a lot easier to handle.
ON THE CAR:
Next, the new sheet metal part is fixed in place and secured with small MIG dots.
Then mark where the excess material needs to be removed.
Grinding off the new sheet metal, and
everything to size, strip the edges and reposition the new part
Welding the new part in place, measurements and dots.
Weld in the 2nd round of dots.
Then fit the valve.
Mount the valve and fix it (by MIG welding the dots to the edge of the plate).
Then weld the plate to the body with a few spots at a time, and keep cooling with air.
Weld in further and further until everything is welded in, and wait and cool with compressed air.
Then without heating grind flat with flapper wheel and
Then use fiber 2-K waterproof filler to seal the weld and immediate area.
Then bondo over the whole, and
flush with 60 grid.
Filler primer over it,
spray contrast on,
manually level with 200,
then spray again contracts
and flatten with 400 etc.
Remove pinholes and again after
Contrast spray and sand with 800.
Waterproof sanding with 1200 and
then to the painter.
CAUTION to use light gray filler, bondo etc. of the same hue/color, this will save possible misery afterwards when spraying.
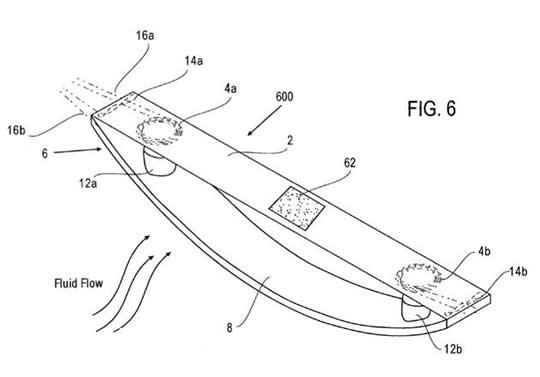
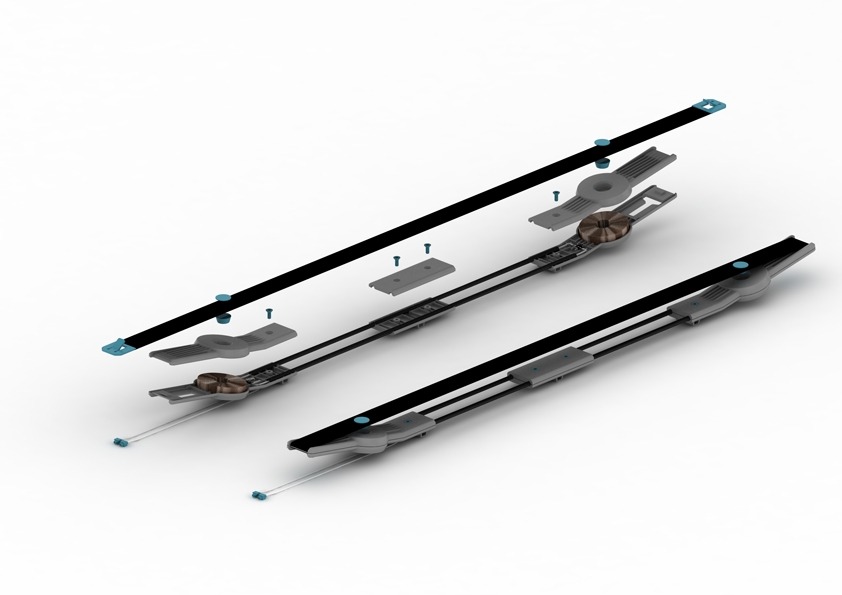
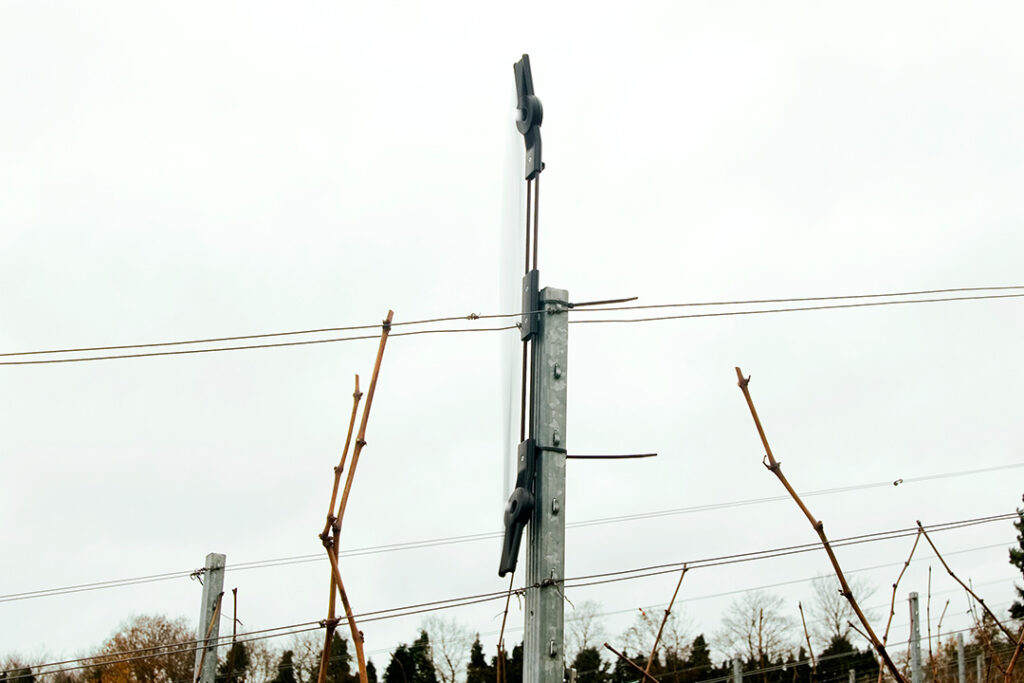
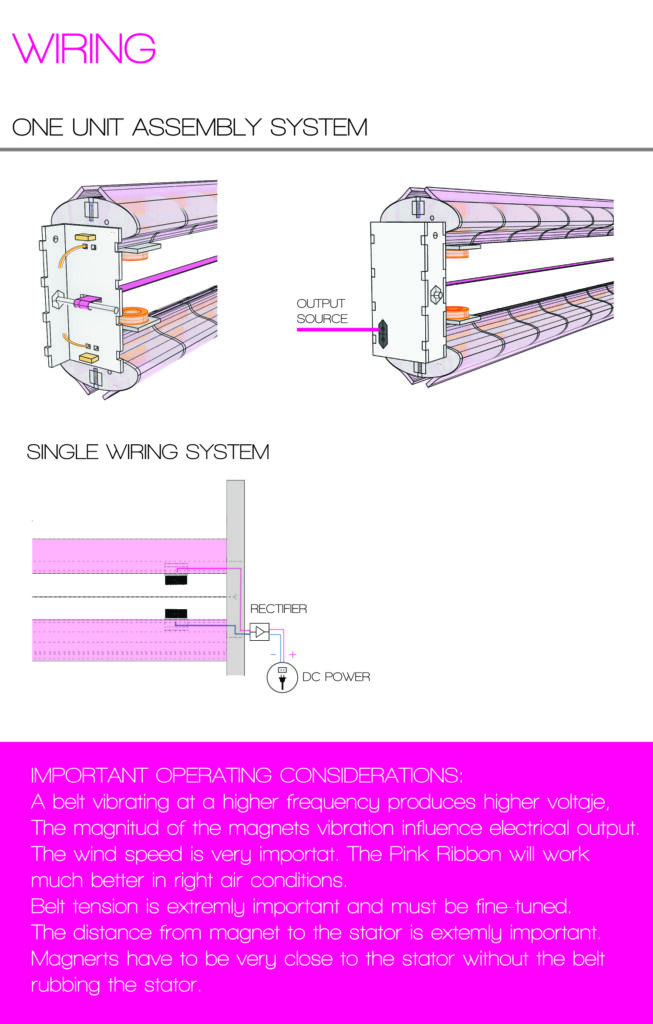
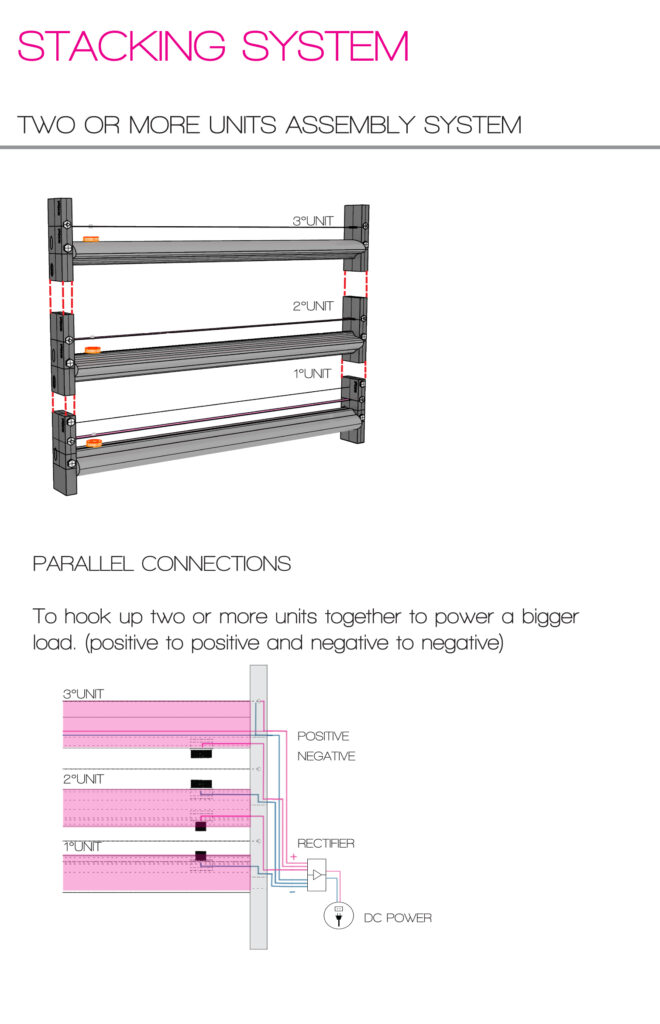
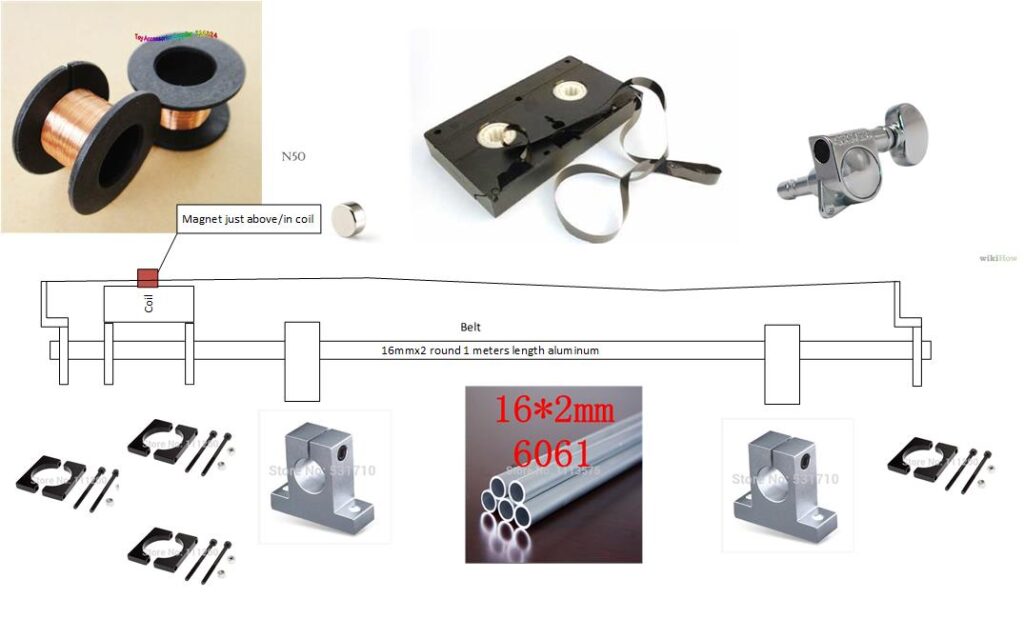
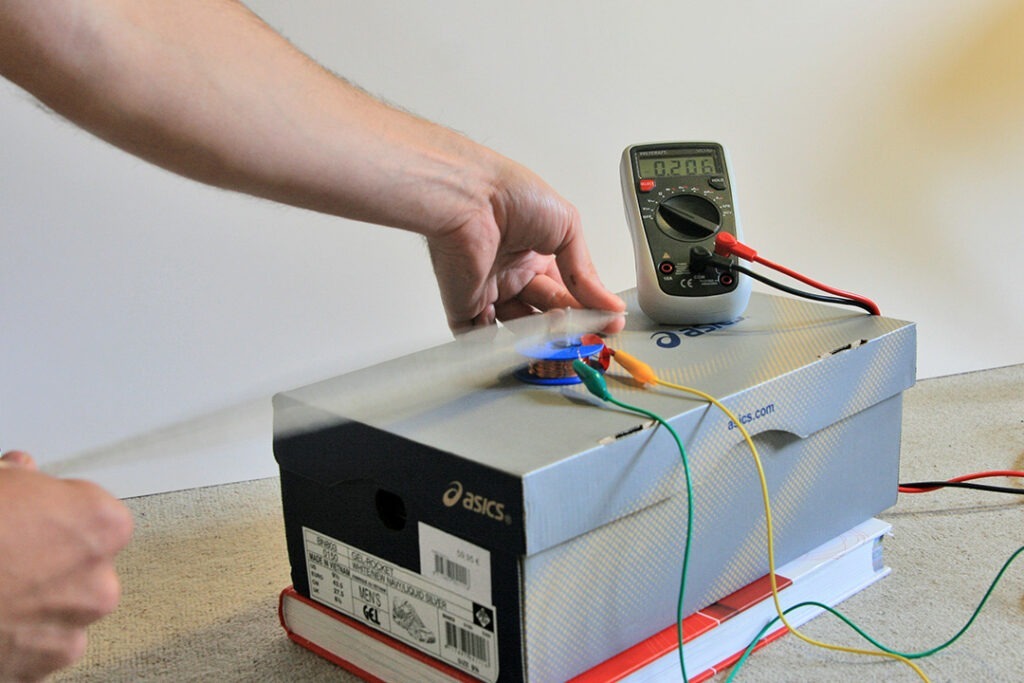
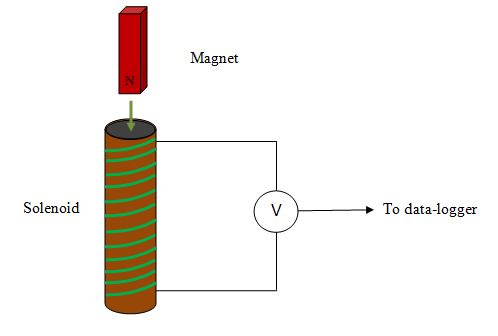
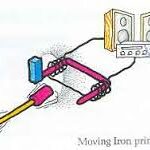
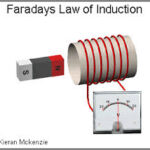
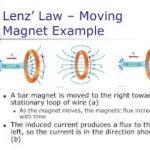
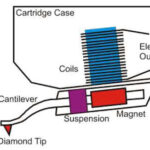
A magnet is set into vibration as the wind brings a tightly stretched string or tape into resonance. The magnet is attached to the tape and moves in a coil of copper wire. The coil is connected to a rectifier and provides energy as the magnet moves back and forth.
That’s the principle of the windbelt.
There have been some initiatives with windbelts around 2010, but you need quite a few of them to make a little energy. And, of course, it has to be blowing….
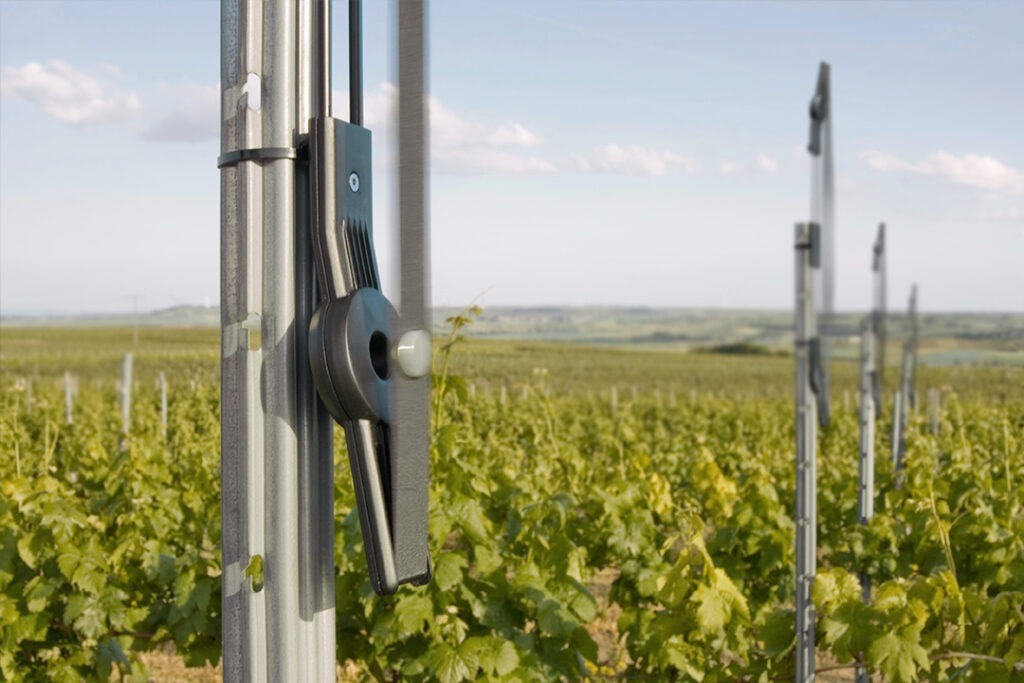
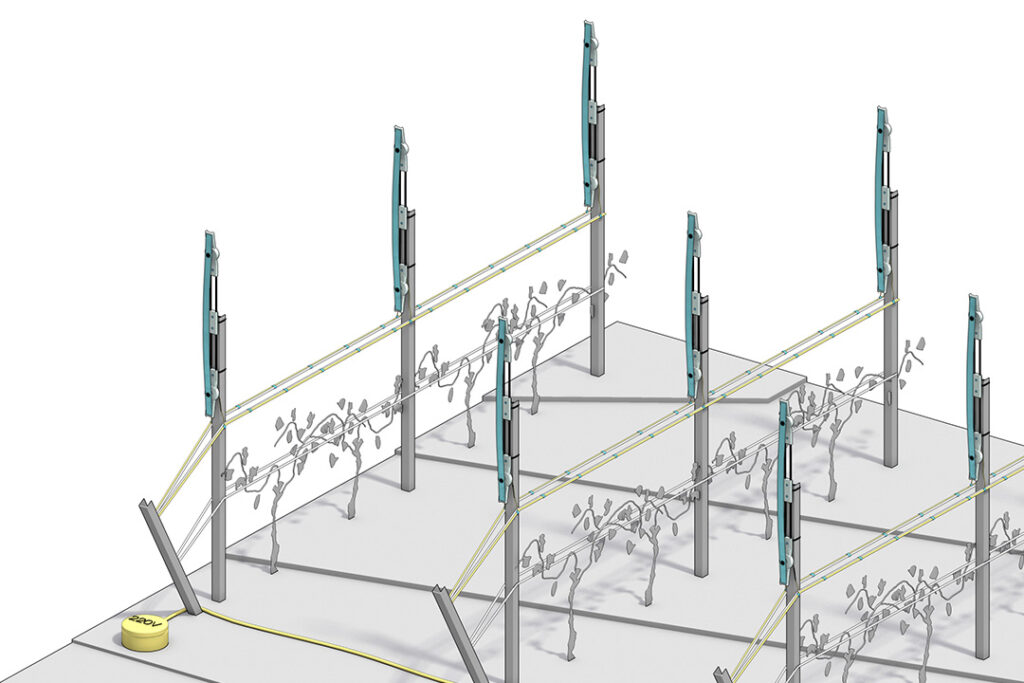
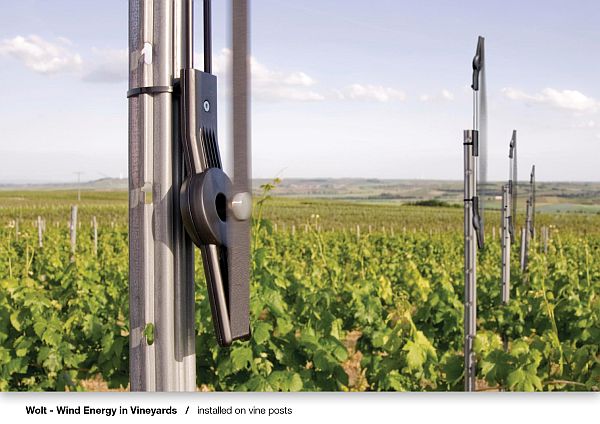
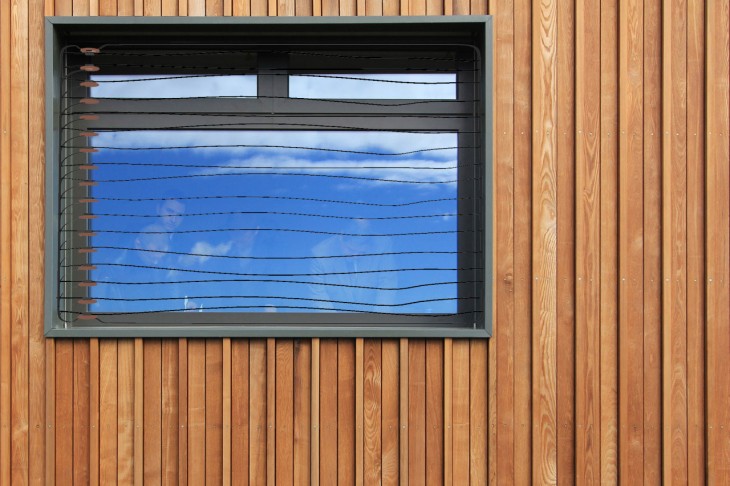
Solutions have been made with large numbers of windbelts mounted in windows, in vineyards between fields, and also in areas where there is no electricity at all but the wind does blow.
If you combine a number of windbelts with a solar panel you can make fairly off-grid calls…. -)
Example of a window setup with windbelts:
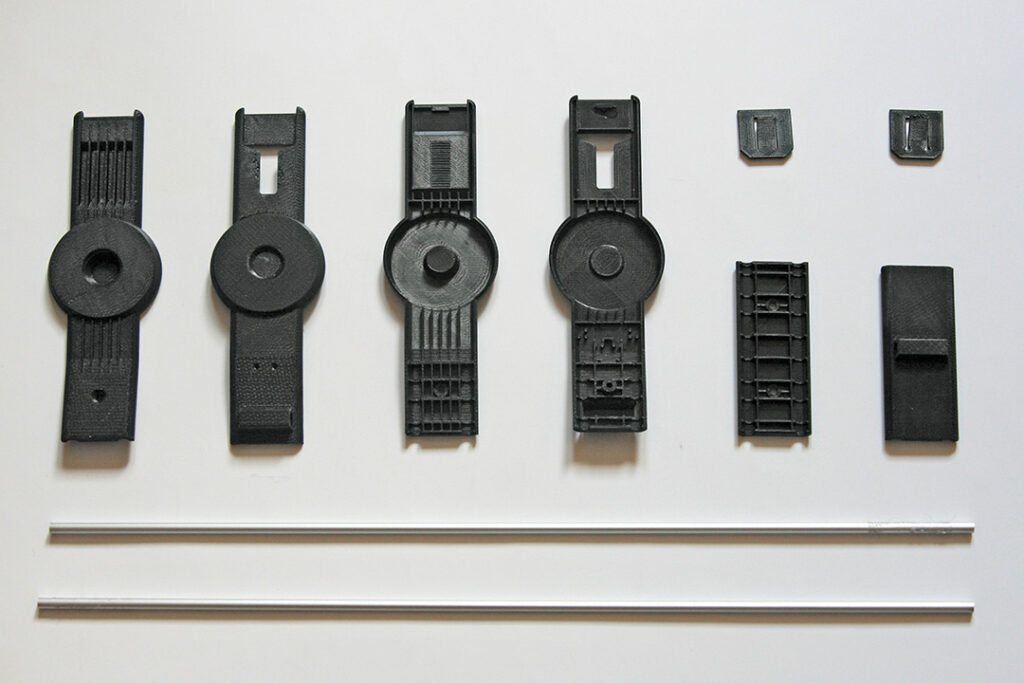
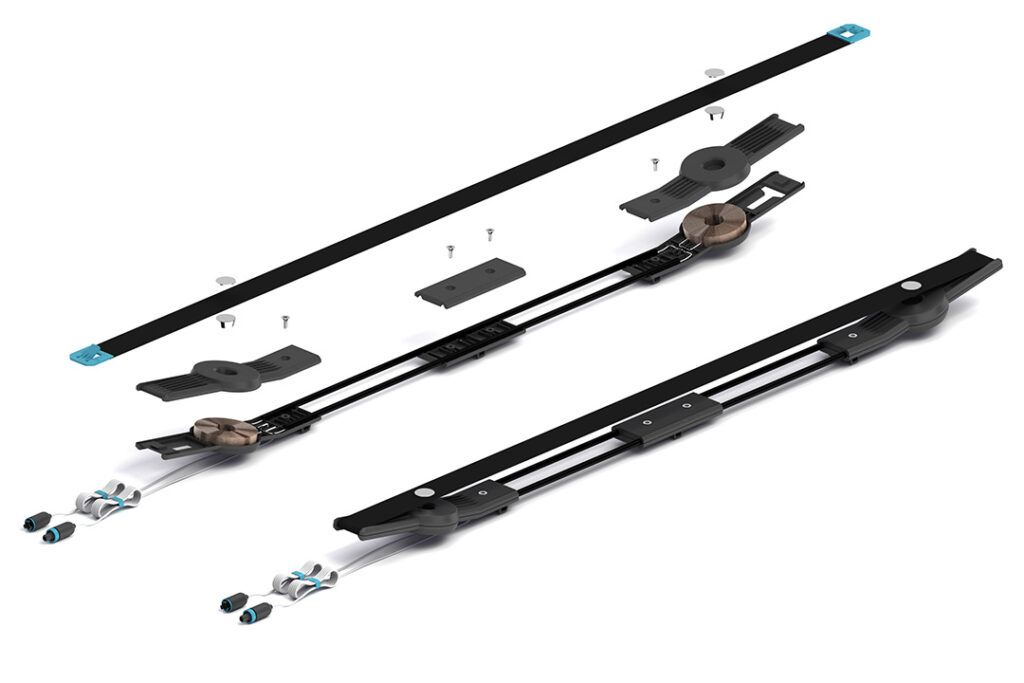
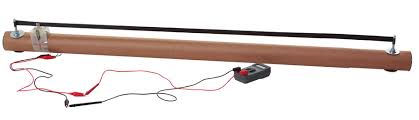
Example of another DIY kit:
(We can supply this kit on request, we always have 10+ kits on stock)
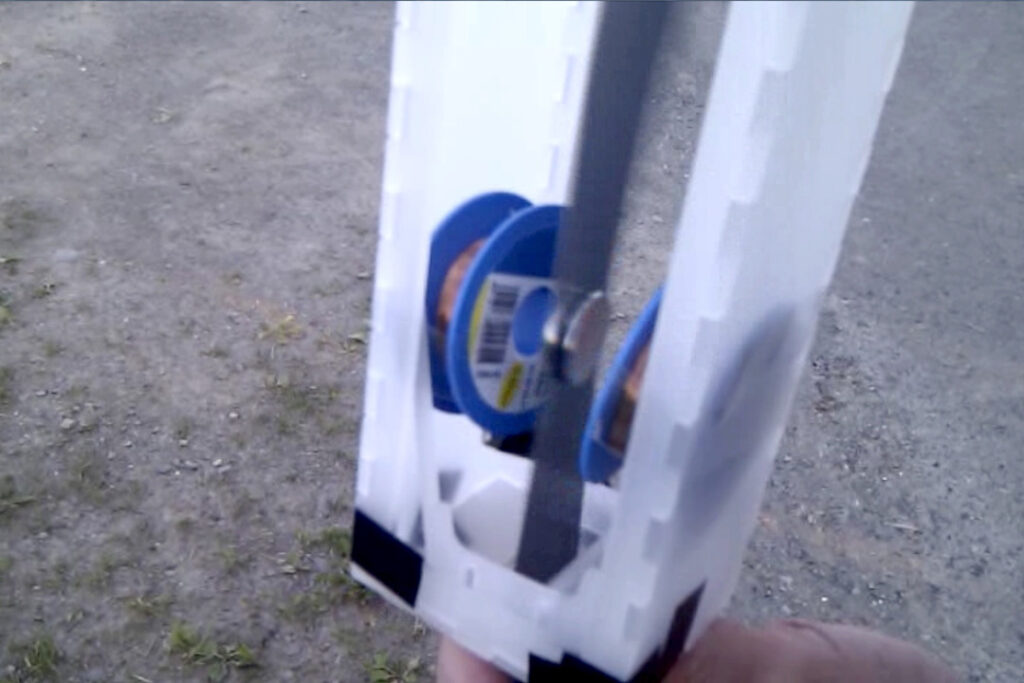
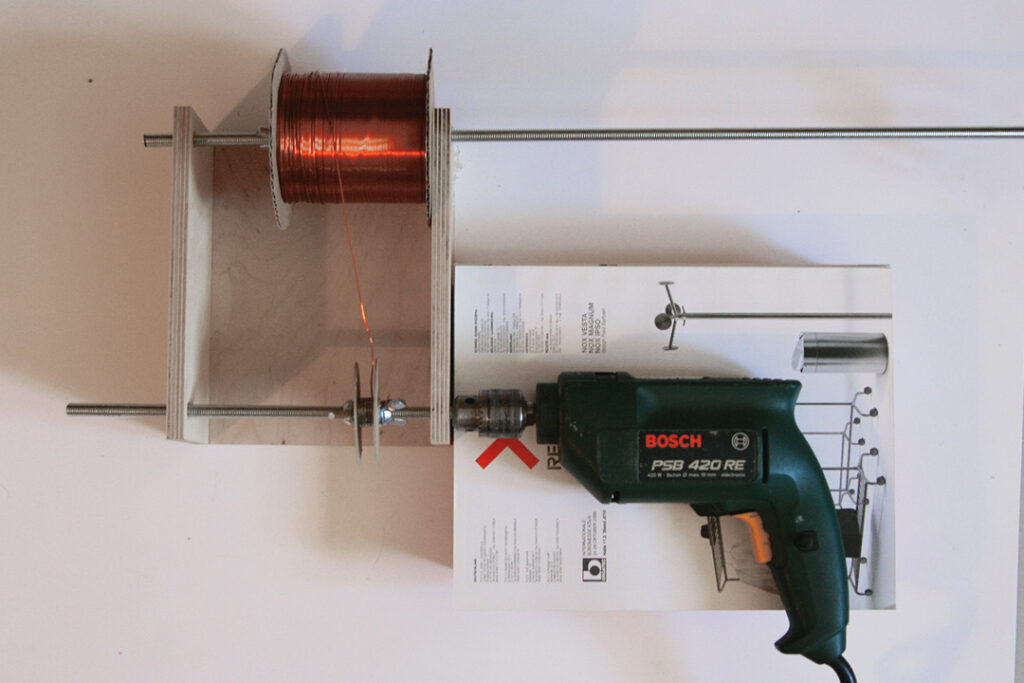
Other DIY examples:


The theory:
Resonance theory with the famous narrow bridge @ Tacoma narrows that collapsed in 1940 , November 7th, due to the wind :
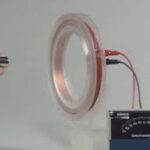
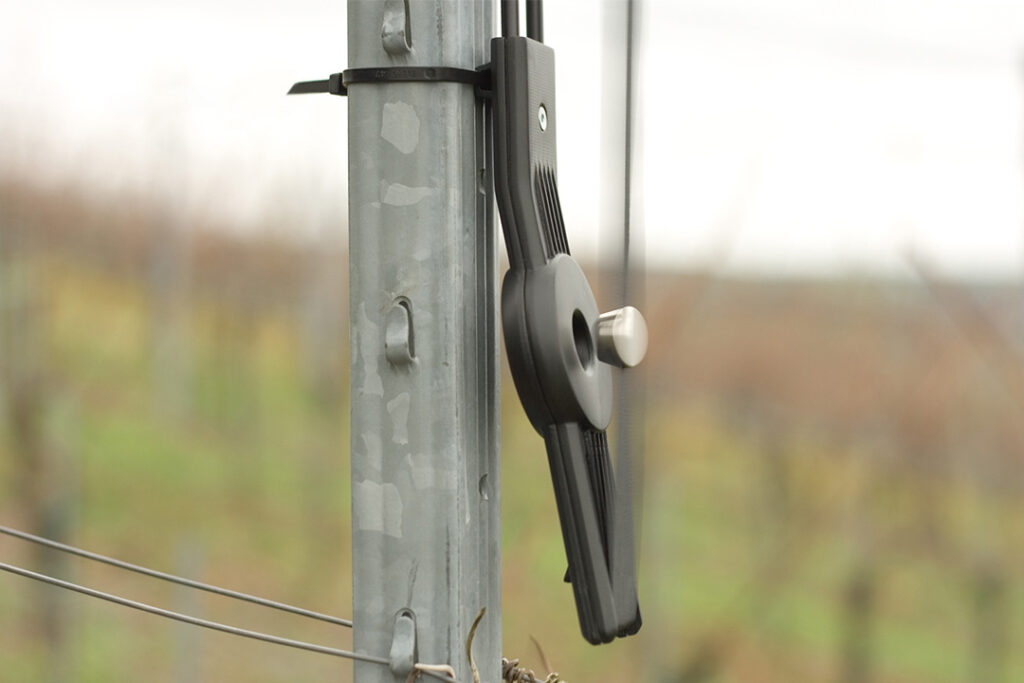
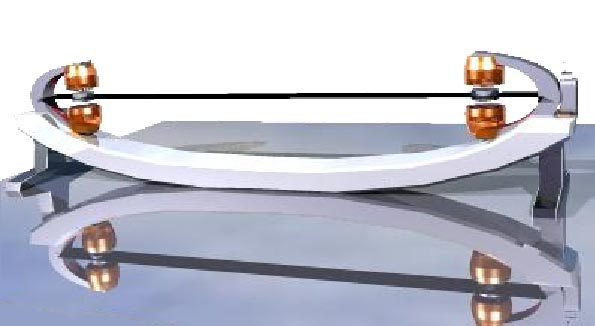
And another setup of a working windbelt: